flutter动画 Animation,Curve,AnimationController,Tween,Hero
1.Animation
Animation是一个抽象类,它本身和UI渲染没有任何关系,而它主要的功能是保存动画的插值和状态;其中一个比较常用的Animation类是Animation。Animation对象是一个在一段时间内依次生成一个区间(Tween)之间值的类。Animation对象在整个动画执行过程中输出的值可以是线性的、曲线的、一个步进函数或者任何其他曲线函数等等,这由Curve来决定。 根据Animation对象的控制方式,动画可以正向运行(从起始状态开始,到终止状态结束),也可以反向运行,甚至可以在中间切换方向。Animation还可以生成除double之外的其他类型值,如:Animation 或Animation。在动画的每一帧中,我们可以通过Animation对象的value属性获取动画的当前状态值。
2.动画通知
我们可以通过Animation来监听动画每一帧以及执行状态的变化,Animation有如下两个方法:
addListener();它可以用于给Animation添加帧监听器,在每一帧都会被调用。帧监听器中最常见的行为是改变状态后调用setState()来触发UI重建。
addStatusListener();它可以给Animation添加“动画状态改变”监听器;动画开始、结束、正向或反向(见AnimationStatus定义)时会调用状态改变的监听器
3.Curve
动画过程可以是匀速的、匀加速的或者先加速后减速等。Flutter中通过Curve(曲线)来描述动画过程,我们把匀速动画称为线性的(Curves.linear),而非匀速动画称为非线性的
final CurvedAnimation curve =
    new CurvedAnimation(parent: controller, curve: Curves.easeIn);
4.AnimationController
AnimationController用于控制动画,它包含动画的启动forward()、停止stop() 、反向播放 reverse()等方法。AnimationController会在动画的每一帧,就会生成一个新的值。默认情况下,AnimationController在给定的时间段内线性的生成从0.0到1.0(默认区间)的数字
final AnimationController controller = new AnimationController(
duration: const Duration(milliseconds: 2000), vsync: this);AnimationController生成数字的区间可以通过lowerBound和upperBound来指定
final AnimationController controller = new AnimationController(
 duration: const Duration(milliseconds: 2000),
 lowerBound: 10.0,
 upperBound: 20.0,
 vsync: this
);
5.Ticker
当创建一个AnimationController时,需要传递一个vsync参数,它接收一个TickerProvider类型的对象,它的主要职责是创建Ticker
通常我们会将SingleTickerProviderStateMixin添加到State的定义中,然后将State对象作为vsync的值
6.Tween
默认情况下,AnimationController对象值的范围是[0.0,1.0]。如果我们需要构建UI的动画值在不同的范围或不同的数据类型,则可以使用Tween来添加映射以生成不同的范围或数据类型的值
Tween构造函数需要begin和end两个参数。Tween的唯一职责就是定义从输入范围到输出范围的映射。输入范围通常为[0.0,1.0],但这不是必须的,我们可以自定义需要的范围
final Tween colorTween =
    new ColorTween(begin: Colors.transparent, end: Colors.black54);
7.Tween.animate
要使用Tween对象,需要调用其animate()方法,然后传入一个控制器对象
final AnimationController controller = new AnimationController(
    duration: const Duration(milliseconds: 500), vsync: this);
Animation alpha = new IntTween(begin: 0, end: 255).animate(controller);
final AnimationController controller = new AnimationController(
duration: const Duration(milliseconds: 500), vsync: this);
final Animation curve =
new CurvedAnimation(parent: controller, curve: Curves.easeOut);
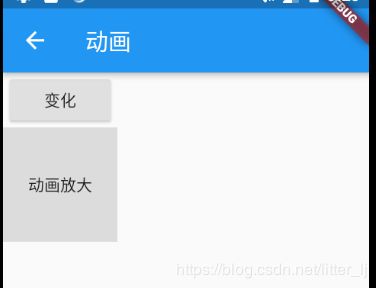
Animation alpha = new IntTween(begin: 0, end: 255).animate(curve); 8.示例1 原始的控制
劣势:需要加事件监听,还要setState去渲染
import 'package:flutter/material.dart';

class AnimateExp extends StatefulWidget {
  @override
  _AnimateExpState createState() => _AnimateExpState();
}

class _AnimateExpState extends State
    with SingleTickerProviderStateMixin {
  Animation _animation;

  AnimationController _ac;

  @override
  void initState() {
    super.initState();
    _ac = AnimationController(duration: Duration(seconds: 1), vsync: this);

    _animation = Tween(begin: 100.0, end: 300.0).animate(_ac)
      ..addListener(() {
        setState(() {});
      });
  }

  @override
  Widget build(BuildContext context) {
    return Scaffold(
      appBar: AppBar(
        title: Text("动画"),
      ),
      body: Column(
        children: [
          RaisedButton(
            child: Text("变化"),
            onPressed: () {
              _ac.reset();
              _ac.forward();
            },
          ),
          Container(
            alignment: Alignment.center,
            width: _animation.value,
            height: _animation.value,
            child: Text("动画放大"),
            color: Colors.black12,
          )

        ],
      ),

    );
  }
}
9.示例2 AnimatedWidget的使用
不需要写监听事件,也不用动态渲染
import 'package:flutter/material.dart';

class AnimateExp extends StatefulWidget {
  @override
  _AnimateExpState createState() => _AnimateExpState();
}

class _AnimateExpState extends State
    with SingleTickerProviderStateMixin {
  Animation _animation;

  AnimationController _ac;

  @override
  void initState() {
    super.initState();
    _ac = AnimationController(duration: Duration(seconds: 1), vsync: this);

    _animation = Tween(begin: 100.0, end: 300.0).animate(_ac);

  }

  @override
  Widget build(BuildContext context) {
    return Scaffold(
      appBar: AppBar(
        title: Text("动画"),
      ),
      body: Column(
        children: [
          RaisedButton(
            child: Text("变化"),
            onPressed: () {
              _ac.reset();
              _ac.forward();
            },
          ),
          Bigger(
            animation: _animation,
            child: Text("动画放大"),
          )
        ],
      ),

    );
  }
}

//AnimatedWidget的使用

class Bigger extends AnimatedWidget {
  Bigger({Key key, this.animation, this.child})
      : super(key: key, listenable: animation);

  final Animation animation;

  final Widget child;

  @override
  Widget build(BuildContext context) {
    final Animation ani = listenable;
    // TODO: implement build
    return Container(
      width: ani.value,
      height: ani.value,
      child: child,
      color: Colors.black12,
      alignment: Alignment.center,
    );
  }
}
10.示例3 AnimatedBuilder的用法
不需要写监听事件,也不用动态渲染
import 'package:flutter/material.dart';

class AnimateExp extends StatefulWidget {
  @override
  _AnimateExpState createState() => _AnimateExpState();
}

class _AnimateExpState extends State
    with SingleTickerProviderStateMixin {
  Animation _animation;

  AnimationController _ac;

  @override
  void initState() {
    super.initState();
    _ac = AnimationController(duration: Duration(seconds: 1), vsync: this);

    _animation = Tween(begin: 100.0, end: 300.0).animate(_ac);
  }

  @override
  Widget build(BuildContext context) {
    return Scaffold(
      appBar: AppBar(
        title: Text("动画"),
      ),
      body: Column(
        children: [
          RaisedButton(
            child: Text("变化"),
            onPressed: () {
              _ac.reset();
              _ac.forward();
            },
          ),
          BiggerBuilder(
            animation: _animation,
            child: Container(
              alignment: Alignment.center,
              child: Text("动画放大"),
              color: Colors.black12,
            ),
          )
        ],
      ),

    );
  }
}

//AnimatedBuilder的用法

class BiggerBuilder extends StatelessWidget {
  BiggerBuilder({this.animation, this.child});

  final Animation animation;

  final Widget child;

  @override
  Widget build(BuildContext context) {
    // TODO: implement build
    return AnimatedBuilder(
      animation: animation,
      child: child,
      builder: (context, child) {
        return Container(
          width: animation.value,
          height: animation.value,
          child: child,
        );
      },
    );
  }
}
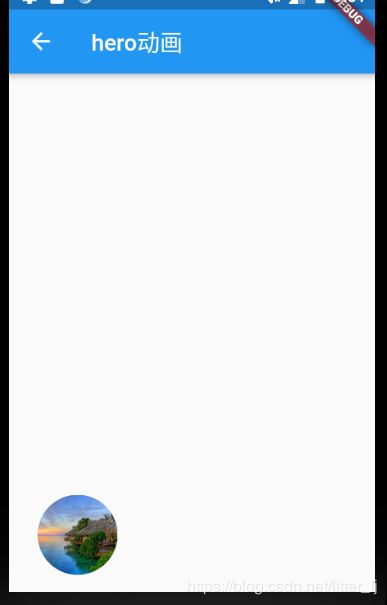
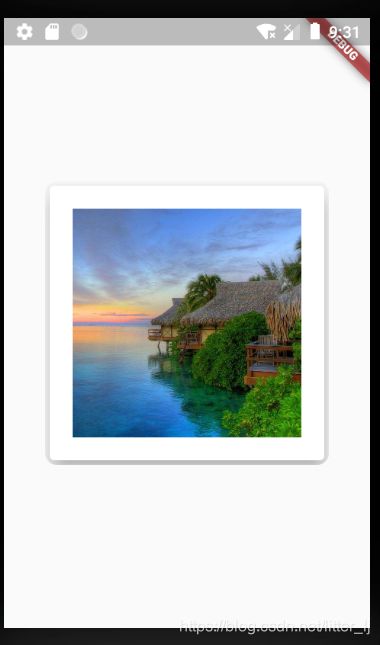
11.Hero动画 tag进行两个页面的连接
import 'package:flutter/material.dart';

class HeroExp extends StatelessWidget {
  @override
  Widget build(BuildContext context) {
    return Scaffold(
      appBar: AppBar(
        title: Text("hero动画"),
      ),
      body: Column(
        mainAxisAlignment: MainAxisAlignment.end,
        children: [
          Padding(
            padding: EdgeInsets.symmetric(horizontal: 25.0, vertical: 15.0),
            child: Row(
              children: [
                _getOvalImage(
                    "https://timgsa.baidu.com/timg?image&quality=80&size=b9999_10000&sec=1566279191655&di=780420c6c1ecd5e6965d87758a7af9c8&imgtype=0&src=http%3A%2F%2Fandroid-screenimgs.25pp.com%2F223%2F1561567_137633289902.jpg",
                    context)
              ],
            ),
          )
        ],
      ),
    );
  }

  _getOvalImage(String url, context) {
    return GestureDetector(
      onTap: () {
        //没有重新写页面,直接返回一个页面
        Navigator.of(context).push(MaterialPageRoute(builder: (context) {
          return Container(
            color: Theme.of(context).canvasColor,
            child: Center(
              child: ClipRRect(
                borderRadius: BorderRadius.circular(10.0),
                child: Card(
                  elevation: 15.0,
                  child: Padding(
                    padding: EdgeInsets.all(20.0),
                    child: Hero(
                      tag: url, //tag要对应
                      child: GestureDetector(
                        onTap: () {
                          Navigator.of(context).pop();
                        },
                        child: Image.network(
                          url,
                          fit: BoxFit.cover,
                          width: 200.0,
                          height: 200.0,
                        ),
                      ),
                    ),
                  ),
                ),
              ),
            ),
          );
        }));
      },
      child: Hero(
        tag: url, //tag要对应
        child: ClipOval(
          child: Image.network(
            url,
            width: 70.0,
            height: 70.0,
            fit: BoxFit.cover,
          ),
        ),
      ),
    );
  }
}


