使用glew、glfw配置OpenGL开发环境
最近发现了一个非常好的学习OpenGL基础的网站,点击打开链接。由于当中配置环境部分说得不是很详细,经过许多天的挣扎后,终于成功地配置出了开发环境,特此记录。
1. 下载glfw。网址为:点击打开链接。由于还得,所以使用的github下载的。
2. 下载cMake。网址为:点击打开链接。下载的版本为本网站作者使用的版本,即win32 Installer。
3. 下载glew。网址为:点击打开链接。下载的zip包,因为此处使用的方法是用本机编译。
1>工具准备完毕后,在某一目录建立一个文件夹用于放置源代码和库,本机建立了OpenGL文件夹,其下又建立有include和libs文件夹,分别用于放置源代码和库,截图如下。
2> 由于glew不用使用cMake,所以先编译glew以获得所需的库。
a. 解压glew的压缩包,进入build目录,用对应版本的VS打开对应的项目,本机用vs2012。
b. 用vs2012或者更高版本打开glew.sln,编译此项目。
c. 依次打开glew-1.13.0\lib\Debug\Win32,此文件夹下有glew32sd.lib,将其拷贝到OpenGL/libs文件夹下。
d. 将glew-1.13.0\include文件夹下的GL文件夹整体拷贝到OpenGL/include文件夹下。
3> 准备好了glew的库,下面使用cMake工具首先生成项目,然后编译,流程如下。
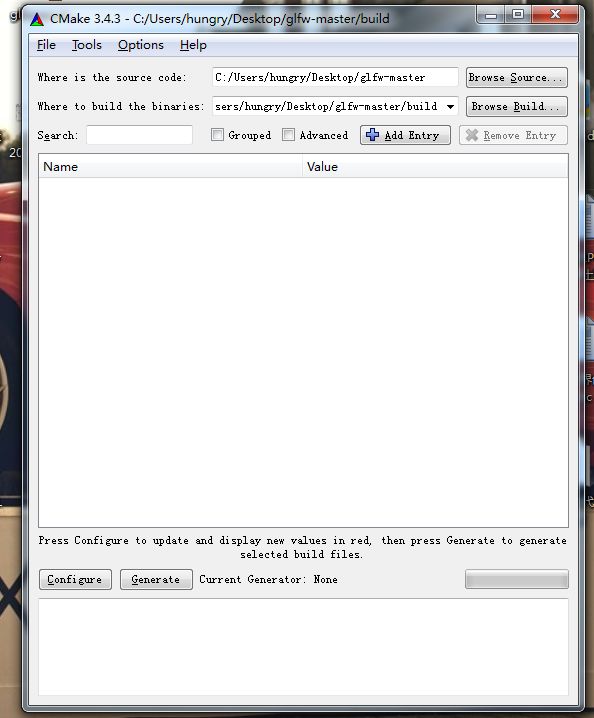
a. 安装好cMake以后,打开CMake (cmake-gui),点击Browse Source将目录设定到glfw目录。
b. 点击Browse Build,将目录设定到glfw/build文件夹。(此处的build文件夹需自己创建)如下。
c. 点击左下角Configure,选择目标平台,由于本机为vs2013,所以选择Visio Studio 12 2013,点击确定。
d. 然后再次点击Configure,在点击Generate生成项目,选择状态如下。
![]()
e. 关闭cMake,刚才建立的build目录下已经生成了glfw的项目,用vs2013打开后,编译,成功后生成glfw3.lib。
f. build\src\Debug目录下有刚才编译项目生成的glfw3.lib库,将此库拷贝到OpenGL/libs目录下。
g. 将glfw-master\include下的GLFW文件夹拷贝到OpenGL/include文件夹下。
h. 最后生成的OpenGL文件夹下的文件如下:
4> 到这一步基本环境就配置完成了,下一步就是在新建的空项目中将库和源代码链接,并手动导入一些库。具体流程如下。
a. 新建空项目。(c++项目)
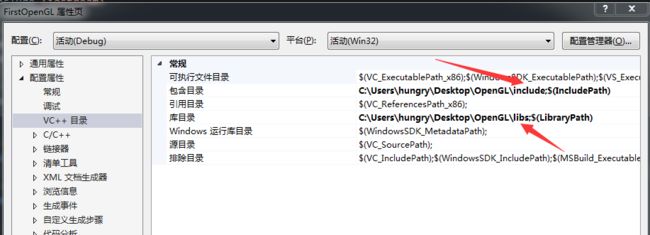
b. 右击项目->属性->配置属性->vc++目录->包含目录,添加路径到OpenGL/include。
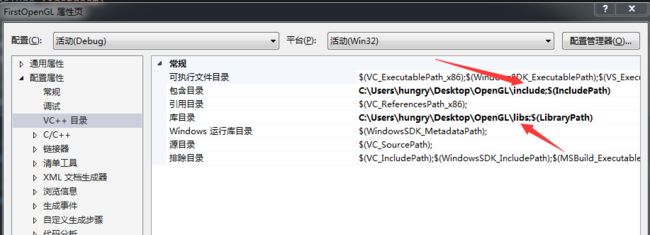
c. 右击项目->属性->配置属性->vc++目录->库目录,添加路径到OpenGL/libs,截图如下。
d. 右击项目->属性->配置属性->链接器->输入->附加依赖项,在其中添加openGL32.Lib,glfw3.lib,glew32sd.lib,截图如下。
e. 依次将配置保存后,即可在main类中输入代码,进行测试,如果未报错,即环境配置成功,测试代码可以从开头的网站上或者,或者复制下面的代码进行测试。
#include

// GLEW
#define GLEW_STATIC
#include

// GLFW
#include


// Function prototypes
void key_callback(GLFWwindow* window, int key, int scancode, int action, int mode);

// Window dimensions
const GLuint WIDTH = 800, HEIGHT = 600;

// The MAIN function, from here we start the application and run the game loop
int main()
{
	std::cout << "Starting GLFW context, OpenGL 3.3" << std::endl;
	// Init GLFW
	glfwInit();
	// Set all the required options for GLFW
	glfwWindowHint(GLFW_CONTEXT_VERSION_MAJOR, 3);
	glfwWindowHint(GLFW_CONTEXT_VERSION_MINOR, 3);
	glfwWindowHint(GLFW_OPENGL_PROFILE, GLFW_OPENGL_CORE_PROFILE);
	glfwWindowHint(GLFW_RESIZABLE, GL_FALSE);

	// Create a GLFWwindow object that we can use for GLFW's functions
	GLFWwindow* window = glfwCreateWindow(WIDTH, HEIGHT, "LearnOpenGL", nullptr, nullptr);
	if (window == nullptr)
	{
		std::cout << "Failed to create GLFW window" << std::endl;
		glfwTerminate();
		return -1;
	}
	glfwMakeContextCurrent(window);
	// Set the required callback functions
	glfwSetKeyCallback(window, key_callback);

	// Set this to true so GLEW knows to use a modern approach to retrieving function pointers and extensions
	glewExperimental = GL_TRUE;
	// Initialize GLEW to setup the OpenGL Function pointers
	if (glewInit() != GLEW_OK)
	{
		std::cout << "Failed to initialize GLEW" << std::endl;
		return -1;
	}

	// Define the viewport dimensions
	glViewport(0, 0, WIDTH, HEIGHT);

	// Game loop
	while (!glfwWindowShouldClose(window))
	{
		// Check if any events have been activiated (key pressed, mouse moved etc.) and call corresponding response functions
		glfwPollEvents();

		// Render
		// Clear the colorbuffer
		glClearColor(0.2f, 0.3f, 0.3f, 1.0f);
		glClear(GL_COLOR_BUFFER_BIT);

		// Swap the screen buffers
		glfwSwapBuffers(window);
	}

	// Terminate GLFW, clearing any resources allocated by GLFW.
	glfwTerminate();
	return 0;
}

// Is called whenever a key is pressed/released via GLFW
void key_callback(GLFWwindow* window, int key, int scancode, int action, int mode)
{
	std::cout << key << std::endl;
	if (key == GLFW_KEY_ESCAPE && action == GLFW_PRESS)
		glfwSetWindowShouldClose(window, GL_TRUE);
}
f. 编译运行后,出现如下窗口即代表环境配置成功。
到这一步,环境配置就结束了。


