HA HADOOP集群和HIVE部署
HDFS HA HADOOP集群部署
1.集群环境节点分布
JournalNode: bigdatasvr01 ,
bigdatasvr02
,bigdatasvr03
namenode: bigdatasvr02(active),bigdatasvr03(standby)
datanode: bigdatasvr01, bigdatasvr03
namenode: bigdatasvr02(active),bigdatasvr03(standby)
datanode: bigdatasvr01, bigdatasvr03
nodemanager: bigdatasvr01, bigdatasvr03
ResourceManager: bigdatasvr02
2.修改主机名
3.设置免密码登录
每台机器上都执行命令:
ssh-keygen -t rsa -P ''
将
bigdatasvr02
的公钥拷贝到
bigdatasvr01 ,
bigdatasvr03上
ssh-copy-id hadoop@bigdatasvr01
ssh-copy-id hadoop@bigdatasvr03
至少要保证bigdatasvr02免密码登录到bigdatasvr01 ,bigdatasvr03上
4.设置环境变量
1.设置JDK环境变量
2.设置hadoop环境变量,在/etc/profile.d下新建一个hadoop.sh:
export HADOOP_HOME=/home/hadoop/hadoop
export HADOOP_COMMON_LIB_NATIVE_DIR=$HADOOP_HOME/lib/native
export HADOOP_CONF_DIR=$HADOOP_HOME/etc/hadoop
export HADOOP_OPTS="-Djava.library.path=$HADOOP_HOME/lib"
export PATH=$HADOOP_HOME/bin:$HADOOP_HOME/sbin:$PATH
使其生效:
source hadoop.sh
5.搭建hadoop集群
用的hadoop是apache原生包hadoop-2.7.1.tar.gz
5.1 修改配置文件
把下面6个文件修改好,然后拷贝到所有节点。
hadoop-env.sh,core-stie.xml,hdfs-site.xml,yarn-site.xml,mapred-site.xml,slaves
5.1.1修改core-stie.xml
		fs.defaultFS
		hdfs://bigdatasvr02:9000


		io.file.buffer.size
		131072


		hadoop.tmp.dir
		file:/home/hadoop/hadoop/tmp
		Abasefor other temporary directories.
5.1.2修改hdfs-site.xml
		dfs.nameservices
		hadoopcluster


		dfs.ha.namenodes.hadoopcluster
		nn1,nn2


		dfs.namenode.rpc-address.hadoopcluster.nn1
		bigdatasvr02:9000


		dfs.namenode.rpc-address.hadoopcluster.nn2
		bigdatasvr03:9000


		dfs.namenode.http-address.hadoopcluster.nn1
		bigdatasvr02:50070


		dfs.namenode.http-address.hadoopcluster.nn2
		bigdatasvr03:50070


		dfs.namenode.name.dir
		file:/home/hadoop/hadoop/ha/hdfs/name
		allow multiple directory split by ,


		dfs.namenode.shared.edits.dir
		qjournal://bigdatasvr01:8485;bigdatasvr02:8485;bigdatasvr03:8485/hadoopcluster


		dfs.datanode.data.dir
		file:/home/hadoop/hadoop/ha/hdfs/data
		allow multiple directory split by ,


		dfs.ha.automatic-failover.enabled
		false
	Whether automatic failover is enabled. See the HDFS High
Availability documentation for details on automatic HA configuration.


		dfs.journalnode.edits.dir
		/home/hadoop/hadoop/ha/hdfs/journal


	  dfs.replication
	  2


		 dfs.webhdfs.enabled
	     true
5.1.3修改mapred-site.xml
   mapreduce.framework.name
   yarn


	mapreduce.jobhistory.address
	bigdatasvr03:10020


	mapreduce.jobhistory.webapp.address
	bigdatasvr03:19888
5.1.4修改yarn-site.xml
		The hostname of the RM.
		yarn.resourcemanager.hostname
		bigdatasvr02


		The address of the applications manager interface in the RM.
		yarn.resourcemanager.address
		${yarn.resourcemanager.hostname}:8032


		The http address of the RM web application.
		yarn.resourcemanager.webapp.address
		${yarn.resourcemanager.hostname}:8088


		The https adddress of the RM web application.
		yarn.resourcemanager.webapp.https.address
		${yarn.resourcemanager.hostname}:8090


		yarn.resourcemanager.resource-tracker.address
		${yarn.resourcemanager.hostname}:8031


	   yarn.resourcemanager.scheduler.address
	   ${yarn.resourcemanager.hostname}:8030


		The address of the RM admin interface.
		yarn.resourcemanager.admin.address
		${yarn.resourcemanager.hostname}:8033


		List of directories to store localized files in. An application's localized file directory will be found in:
${yarn.nodemanager.local-dirs}/usercache/${user}/appcache/application_${appid}.
Individual containers' work directories, called container_${contid}, will
be subdirectories of this.
		yarn.nodemanager.local-dirs
		/home/hadoop/hadoop/ha/yarn/local


		Whether to enable log aggregation
		yarn.log-aggregation-enable
		true


		Where to aggregate logs to.
		yarn.nodemanager.remote-app-log-dir
		/home/hadoop/logs


		Number of CPU cores that can be allocated for containers.
		yarn.nodemanager.resource.cpu-vcores
		4


		the valid service name should only contain a-zA-Z0-9_ and can not start with numbers
		yarn.nodemanager.aux-services
		mapreduce_shuffle
5.1.5修改slaves
bigdatasvr01
bigdatasvr035.2 启动journalnode(每个节点上都运行)
运行命令:
sbin/hadoop-daemon.sh start
journalnode

5.3 格式化namenode(nn1)

5.4 启动namenode (nn1)
只有当namenode格式化成功之后才能正常启动namenode
在
bigdatasvr02 上运行命令:
sbin/hadoop-daemon.sh start namenode

5.5格式化namenode(nn2)
在
bigdatasvr03 上运行命令:
bin/hdfs namenode -bootstrapStandby

5.6启动namenode (nn2)
在
bigdatasvr03 上运行命令:
sbin/hadoop-daemon.sh start namenode

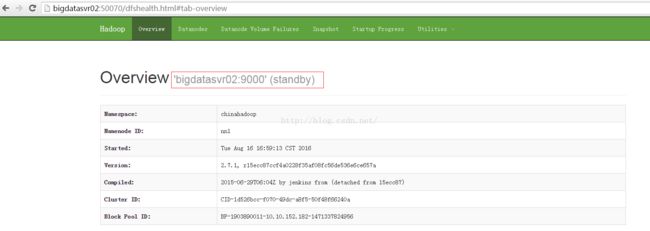
在浏览器上访问http://bigdatasvr02:50070/ 当前是 standby 状态
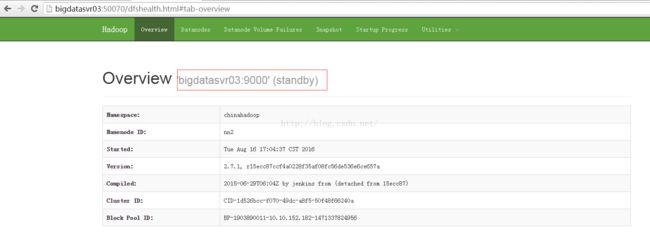
在浏览器上访问
http://bigdatasvr03:50070/
当前是
standby
状态
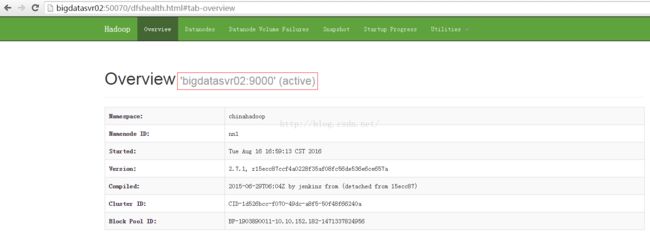
5.7激活namenode
在
bigdatasvr02 上运行命令:
bin/hdfs haadmin -transitionToActive nn1
在浏览器上访问http://bigdatasvr02:50070
5.8启动datanode
在
bigdatasvr02 上运行命令:
sbin/hadoop-daemons.sh start datanode
5.9启动yarn
在
bigdatasvr02 上运行命令:
sbin/start-yarn.sh
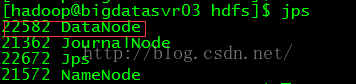
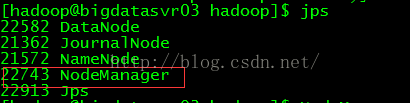
在
bigdatasvr02生成
ResourceManager进程

在datanode节点上生成
NodeManager进程
5.10执行一个MapReduce
hadoop jar share/hadoop/mapreduce/hadoop-mapreduce-examples-2.7.1.jar pi 2 10

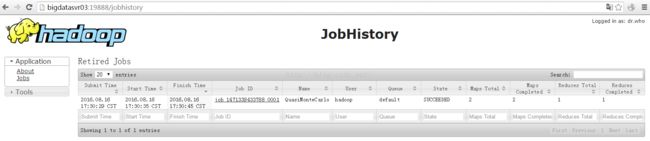
5.11启动日志记录服务
在
bigdatasvr03 上运行命令:
sbin/mr-jobhistory-daemon.sh start historyserver

在浏览器中输入:http://bigdatasvr03:19888/
6.停止hadoop集群
sbin/stop-all.sh
查看集群状态:
bin/hdfs dfsadmin -report
7.Hive部署安装
7.1安装mysql
7.2创建hive数据库和用户
1.登录mysql 以root用户身份登录
mysql -uroot -p123123
2.创建hive用户,数据库
insert into user(Host,User,Password,ssl_cipher,x509_issuer,x509_subject) values("localhost","hive",password("hive"),"","","");
create database hive;
grant all on hive.* to hive@'%' identified by 'hive';
grant all on hive.* to hive@'localhost' identified by 'hive';
flush privileges;
7.3验证hive用户

7.4安装Hive
使用安装包为:hive-1.2.1-bin.tar.gz
1.下载解压安装包
2.配置hive环境变量:vi /etc/profile.d/hadoop.sh

使其生效:source /etc/profile.d/hadoop.sh
3.修改hive-site.xml
4.启动hive的metastore
nohup hive --service metastore >> metaserver_logs/nohup.out 2>&1 &

5.启动hive的jdbc等服务程序,提供jdbc、beeline远端连接服务
hive --service hiveserver2 >> hiveserver_logs/nohup.out 2>&1 &

6.启动测试hive
执行hive命令:hive

7.创建hive表
create table
inter_table
(id int,
name string,
age int,
tele string)
ROW FORMAT DELIMITED
FIELDS TERMINATED BY '\t'
STORED AS TEXTFILE;
如果在创建表的时候卡很久一段时间并报错则需要设置mysql中hive数据库的编码为latin1.