Caffe基础(二)-使用命令行方式训练预测mnist、cifar10及自己的数据集
在win10 vs2015 显卡compute capability7.5 Python3.5.2环境下配置caffe及基本使用(一)介绍了如何编译生成caffe工程及python、matlab接口。下面介绍通过命令行方式使用caffe训练预测mnist数据集、训练预测cifar10数据集,训练预测自己的数据集。
(1) 训练mnist数据集
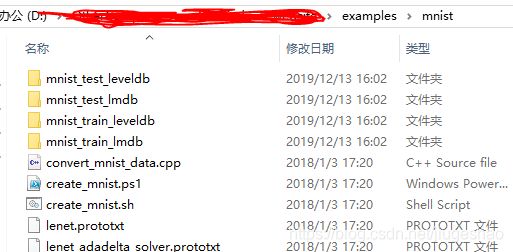
在主目录下的examples/minst文件夹下放入minist数据集
数据集见链接
可以用如下两个bat文件来做mnist数据集的转换
如下是转换为leveldb数据格式
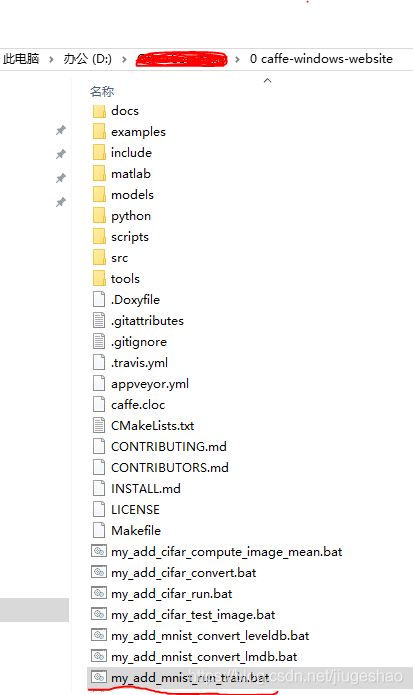
在主目录下新建一个bat文件my_add_mnist_run_train.bat(名字可以随意定义),输入如下内容:
打开lenet_solver.prototxt,可以看到
# The train/test net protocol buffer definition
net: "examples/mnist/lenet_train_test.prototxt"
# test_iter specifies how many forward passes the test should carry out.
# In the case of MNIST, we have test batch size 100 and 100 test iterations,
# covering the full 10,000 testing images.
test_iter: 100
# Carry out testing every 500 training iterations.
test_interval: 500
# The base learning rate, momentum and the weight decay of the network.
base_lr: 0.01
momentum: 0.9
weight_decay: 0.0005
# The learning rate policy
lr_policy: "inv"
gamma: 0.0001
power: 0.75
# Display every 100 iterations
display: 100
# The maximum number of iterations
max_iter: 10000
# snapshot intermediate results
snapshot: 5000
snapshot_prefix: "examples/mnist/lenet"
# solver mode: CPU or GPU
solver_mode: GPU
里面有学习率,迭代步数,gpu还是使用cpu跑等配置
再打开lenet_train_test.prototxt文件,可以看到
可以将prototxt文件放在以下的网址,查看网络的结构:http://ethereon.github.io/netscope/#/editor
name: "LeNet"
layer {
  name: "mnist"
  type: "Data"
  top: "data"
  top: "label"
  include {
    phase: TRAIN
  }
  transform_param {
    scale: 0.00390625
  }
  data_param {
    source: "examples/mnist/mnist_train_lmdb"
    batch_size: 64
    backend: LMDB
  }
}
layer {
  name: "mnist"
  type: "Data"
  top: "data"
  top: "label"
  include {
    phase: TEST
  }
  transform_param {
    scale: 0.00390625
  }
  data_param {
    source: "examples/mnist/mnist_test_lmdb"
    batch_size: 100
    backend: LMDB
  }
}
layer {
  name: "conv1"
  type: "Convolution"
  bottom: "data"
  top: "conv1"
  param {
    lr_mult: 1
  }
  param {
    lr_mult: 2
  }
  convolution_param {
    num_output: 20
    kernel_size: 5
    stride: 1
    weight_filler {
      type: "xavier"
    }
    bias_filler {
      type: "constant"
    }
  }
}
layer {
  name: "pool1"
  type: "Pooling"
  bottom: "conv1"
  top: "pool1"
  pooling_param {
    pool: MAX
    kernel_size: 2
    stride: 2
  }
}
layer {
  name: "conv2"
  type: "Convolution"
  bottom: "pool1"
  top: "conv2"
  param {
    lr_mult: 1
  }
  param {
    lr_mult: 2
  }
  convolution_param {
    num_output: 50
    kernel_size: 5
    stride: 1
    weight_filler {
      type: "xavier"
    }
    bias_filler {
      type: "constant"
    }
  }
}
layer {
  name: "pool2"
  type: "Pooling"
  bottom: "conv2"
  top: "pool2"
  pooling_param {
    pool: MAX
    kernel_size: 2
    stride: 2
  }
}
layer {
  name: "ip1"
  type: "InnerProduct"
  bottom: "pool2"
  top: "ip1"
  param {
    lr_mult: 1
  }
  param {
    lr_mult: 2
  }
  inner_product_param {
    num_output: 500
    weight_filler {
      type: "xavier"
    }
    bias_filler {
      type: "constant"
    }
  }
}
layer {
  name: "relu1"
  type: "ReLU"
  bottom: "ip1"
  top: "ip1"
}
layer {
  name: "ip2"
  type: "InnerProduct"
  bottom: "ip1"
  top: "ip2"
  param {
    lr_mult: 1
  }
  param {
    lr_mult: 2
  }
  inner_product_param {
    num_output: 10
    weight_filler {
      type: "xavier"
    }
    bias_filler {
      type: "constant"
    }
  }
}
layer {
  name: "accuracy"
  type: "Accuracy"
  bottom: "ip2"
  bottom: "label"
  top: "accuracy"
  include {
    phase: TEST
  }
}
layer {
  name: "loss"
  type: "SoftmaxWithLoss"
  bottom: "ip2"
  bottom: "label"
  top: "loss"
}
里面有网络结构、各层过滤器的大小,步长设置及数据集设置,有对应自己框架的数据结构
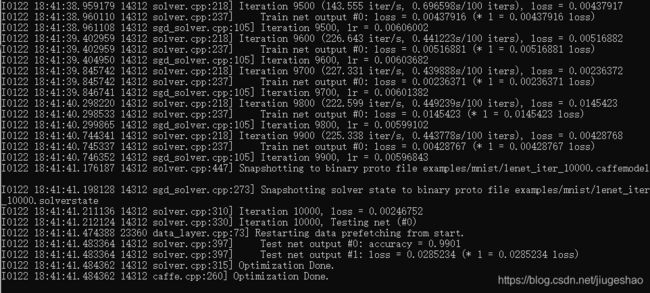
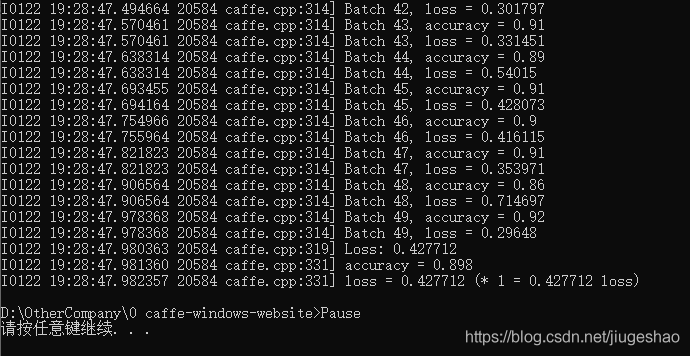
运行该训练的bat文件,训练完毕后结果如下:
(2)用训练出来的模型测试mnist
首先计算mean.binaryproto
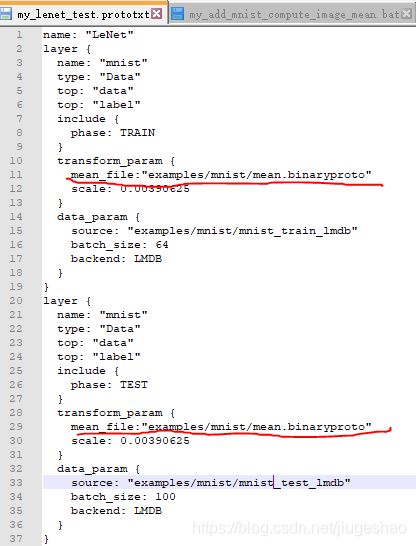
将lenet_train_test.prototxt复制一份出来,改名为my_lenet_test.prototxt,取名随意
对比lenet_train_test.prototxt,增加下面红色标记处语句:
在主目录下新建一个bat文件,文件里内容为:
运行该bat文件,结果如下:
创建一个bat文件,对单张mnist图片进行预测,文件里语句如下:
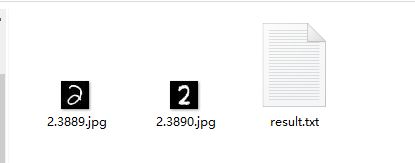
test image文件夹中里的内容如下:
result.txt中的内容如下(这里是caffe预测的结果为一个10维向量,这里预测的图片是2,会得到该向量中最大值所处的索引值,凭该索引去result中找对应的类别标签):
该bat文件的执行结果如下:
(3)训练cifar10
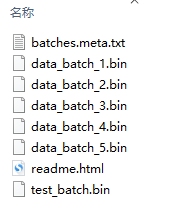
首先转化cifar10为caffe能够支持的数据集格式,这里转为lmdb,原来的数据集格式如下:
转化的bat文件中的语句如下:
创建bat文件计算cifar10的mean.binaryproto文件
![]()
创建bat文件训练网络
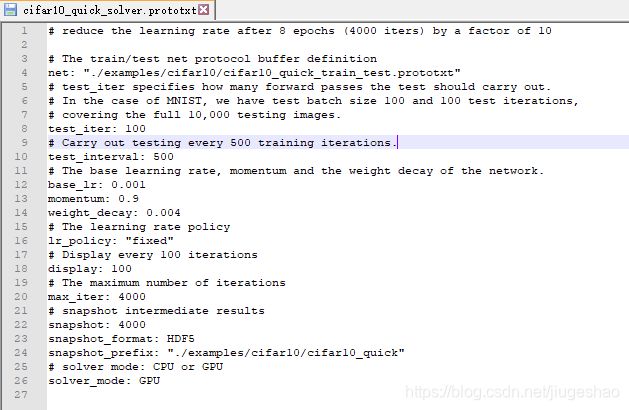
cifar10_quick_solver.prototxt文件如下:
cifar10_quick_train_test.prototxt文件如下:
name: "CIFAR10_quick"
layer {
  name: "cifar"
  type: "Data"
  top: "data"
  top: "label"
  include {
    phase: TRAIN
  }
  transform_param {
    mean_file: "./examples/cifar10/cifar_outputdata/mean.binaryproto"
  }
  data_param {
    source: "./examples/cifar10/cifar_outputdata/cifar10_train_lmdb"
    batch_size: 100
    backend: LMDB
  }
}
layer {
  name: "cifar"
  type: "Data"
  top: "data"
  top: "label"
  include {
    phase: TEST
  }
  transform_param {
    mean_file: "./examples/cifar10/cifar_outputdata/mean.binaryproto"
  }
  data_param {
    source: "./examples/cifar10/cifar_outputdata/cifar10_test_lmdb"
    batch_size: 100
    backend: LMDB
  }
}
layer {
  name: "conv1"
  type: "Convolution"
  bottom: "data"
  top: "conv1"
  param {
    lr_mult: 1
  }
  param {
    lr_mult: 2
  }
  convolution_param {
    num_output: 32
    pad: 2
    kernel_size: 5
    stride: 1
    weight_filler {
      type: "gaussian"
      std: 0.0001
    }
    bias_filler {
      type: "constant"
    }
  }
}
layer {
  name: "pool1"
  type: "Pooling"
  bottom: "conv1"
  top: "pool1"
  pooling_param {
    pool: MAX
    kernel_size: 3
    stride: 2
  }
}
layer {
  name: "relu1"
  type: "ReLU"
  bottom: "pool1"
  top: "pool1"
}
layer {
  name: "conv2"
  type: "Convolution"
  bottom: "pool1"
  top: "conv2"
  param {
    lr_mult: 1
  }
  param {
    lr_mult: 2
  }
  convolution_param {
    num_output: 32
    pad: 2
    kernel_size: 5
    stride: 1
    weight_filler {
      type: "gaussian"
      std: 0.01
    }
    bias_filler {
      type: "constant"
    }
  }
}
layer {
  name: "relu2"
  type: "ReLU"
  bottom: "conv2"
  top: "conv2"
}
layer {
  name: "pool2"
  type: "Pooling"
  bottom: "conv2"
  top: "pool2"
  pooling_param {
    pool: AVE
    kernel_size: 3
    stride: 2
  }
}
layer {
  name: "conv3"
  type: "Convolution"
  bottom: "pool2"
  top: "conv3"
  param {
    lr_mult: 1
  }
  param {
    lr_mult: 2
  }
  convolution_param {
    num_output: 64
    pad: 2
    kernel_size: 5
    stride: 1
    weight_filler {
      type: "gaussian"
      std: 0.01
    }
    bias_filler {
      type: "constant"
    }
  }
}
layer {
  name: "relu3"
  type: "ReLU"
  bottom: "conv3"
  top: "conv3"
}
layer {
  name: "pool3"
  type: "Pooling"
  bottom: "conv3"
  top: "pool3"
  pooling_param {
    pool: AVE
    kernel_size: 3
    stride: 2
  }
}
layer {
  name: "ip1"
  type: "InnerProduct"
  bottom: "pool3"
  top: "ip1"
  param {
    lr_mult: 1
  }
  param {
    lr_mult: 2
  }
  inner_product_param {
    num_output: 64
    weight_filler {
      type: "gaussian"
      std: 0.1
    }
    bias_filler {
      type: "constant"
    }
  }
}
layer {
  name: "ip2"
  type: "InnerProduct"
  bottom: "ip1"
  top: "ip2"
  param {
    lr_mult: 1
  }
  param {
    lr_mult: 2
  }
  inner_product_param {
    num_output: 10
    weight_filler {
      type: "gaussian"
      std: 0.1
    }
    bias_filler {
      type: "constant"
    }
  }
}
layer {
  name: "accuracy"
  type: "Accuracy"
  bottom: "ip2"
  bottom: "label"
  top: "accuracy"
  include {
    phase: TEST
  }
}
layer {
  name: "loss"
  type: "SoftmaxWithLoss"
  bottom: "ip2"
  bottom: "label"
  top: "loss"
}
(4)命令行方式使用caffe预测一张cifar10图片
如上mnist预测一样,预测图片如下:
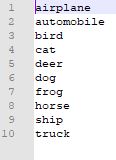
同样需要类别标签名文件synset_words.txt,供caffe的结果去索引,该文件内容如下:
预测bat文件如下:
运行结果如下:
(5)训练自己的数据集
在根目录下data文件夹下新建mydata文件夹,需要训练的数据集会存放在该文件夹内。
新建一个train和val文件夹,每个文件夹内如下:
cat文件夹内图片如下:
dog文件夹内图片如下:
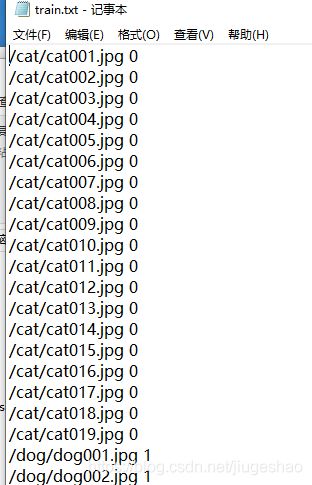
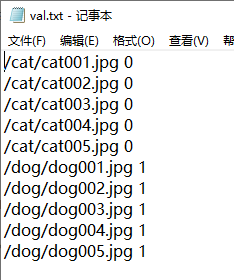
同时在mydata文件夹内新建train.txt和val.txt,以记录这些图片的路径
在主目录下创建bat文件,该文件将jpg图片转化为LMDB数据格式
新建bat文件,计算mean.binaryproto
这里选择利用cifar10中的cifar10_full_solver.prototxt、cifar10_full_train_test.prototxt,在其基础上进行修改,主要是修改了batch size,因为我这边的数据集很小,此外输出类别种类数由10改为了2
新建bat文件,训练网络
solve.prototxt中的内容如下:
# reduce learning rate after 120 epochs (60000 iters) by factor 0f 10
# then another factor of 10 after 10 more epochs (5000 iters)

# The train/test net protocol buffer definition
net: "./data/mydata/train_val.prototxt"
# test_iter specifies how many forward passes the test should carry out.
# In the case of CIFAR10, we have test batch size 100 and 100 test iterations,
# covering the full 10,000 testing images.
test_iter: 4
# Carry out testing every 1000 training iterations.
test_interval: 4
# The base learning rate, momentum and the weight decay of the network.
base_lr: 0.001
momentum: 0.9
weight_decay: 0.004
# The learning rate policy
lr_policy: "fixed"
# Display every 200 iterations
display: 4
# The maximum number of iterations
max_iter: 6000
# snapshot intermediate results
snapshot: 2000
snapshot_format: HDF5
snapshot_prefix: "./data/mydata/full"
# solver mode: CPU or GPU
solver_mode: GPU
train_val.prototxt中的内容如下:
name: "CIFAR10_full"
layer {
  name: "cifar"
  type: "Data"
  top: "data"
  top: "label"
  include {
    phase: TRAIN
  }
  transform_param {
    mean_file: "./data/mydata/mean.binaryproto"
  }
  data_param {
    source: "./data/mydata/mtrain"
    batch_size: 4
    backend: LMDB
  }
}
layer {
  name: "cifar"
  type: "Data"
  top: "data"
  top: "label"
  include {
    phase: TEST
  }
  transform_param {
    mean_file: "./data/mydata/mean.binaryproto"
  }
  data_param {
    source: "./data/mydata/mval"
    batch_size: 2
    backend: LMDB
  }
}
layer {
  name: "conv1"
  type: "Convolution"
  bottom: "data"
  top: "conv1"
  param {
    lr_mult: 1
  }
  param {
    lr_mult: 2
  }
  convolution_param {
    num_output: 32
    pad: 2
    kernel_size: 5
    stride: 1
    weight_filler {
      type: "gaussian"
      std: 0.0001
    }
    bias_filler {
      type: "constant"
    }
  }
}
layer {
  name: "pool1"
  type: "Pooling"
  bottom: "conv1"
  top: "pool1"
  pooling_param {
    pool: MAX
    kernel_size: 3
    stride: 2
  }
}
layer {
  name: "relu1"
  type: "ReLU"
  bottom: "pool1"
  top: "pool1"
}
layer {
  name: "norm1"
  type: "LRN"
  bottom: "pool1"
  top: "norm1"
  lrn_param {
    local_size: 3
    alpha: 5e-05
    beta: 0.75
    norm_region: WITHIN_CHANNEL
  }
}
layer {
  name: "conv2"
  type: "Convolution"
  bottom: "norm1"
  top: "conv2"
  param {
    lr_mult: 1
  }
  param {
    lr_mult: 2
  }
  convolution_param {
    num_output: 32
    pad: 2
    kernel_size: 5
    stride: 1
    weight_filler {
      type: "gaussian"
      std: 0.01
    }
    bias_filler {
      type: "constant"
    }
  }
}
layer {
  name: "relu2"
  type: "ReLU"
  bottom: "conv2"
  top: "conv2"
}
layer {
  name: "pool2"
  type: "Pooling"
  bottom: "conv2"
  top: "pool2"
  pooling_param {
    pool: AVE
    kernel_size: 3
    stride: 2
  }
}
layer {
  name: "norm2"
  type: "LRN"
  bottom: "pool2"
  top: "norm2"
  lrn_param {
    local_size: 3
    alpha: 5e-05
    beta: 0.75
    norm_region: WITHIN_CHANNEL
  }
}
layer {
  name: "conv3"
  type: "Convolution"
  bottom: "norm2"
  top: "conv3"
  convolution_param {
    num_output: 64
    pad: 2
    kernel_size: 5
    stride: 1
    weight_filler {
      type: "gaussian"
      std: 0.01
    }
    bias_filler {
      type: "constant"
    }
  }
}
layer {
  name: "relu3"
  type: "ReLU"
  bottom: "conv3"
  top: "conv3"
}
layer {
  name: "pool3"
  type: "Pooling"
  bottom: "conv3"
  top: "pool3"
  pooling_param {
    pool: AVE
    kernel_size: 3
    stride: 2
  }
}
layer {
  name: "ip1"
  type: "InnerProduct"
  bottom: "pool3"
  top: "ip1"
  param {
    lr_mult: 1
    decay_mult: 250
  }
  param {
    lr_mult: 2
    decay_mult: 0
  }
  inner_product_param {
    num_output: 2
    weight_filler {
      type: "gaussian"
      std: 0.01
    }
    bias_filler {
      type: "constant"
    }
  }
}
layer {
  name: "accuracy"
  type: "Accuracy"
  bottom: "ip1"
  bottom: "label"
  top: "accuracy"
  include {
    phase: TEST
  }
}
layer {
  name: "loss"
  type: "SoftmaxWithLoss"
  bottom: "ip1"
  bottom: "label"
  top: "loss"
}
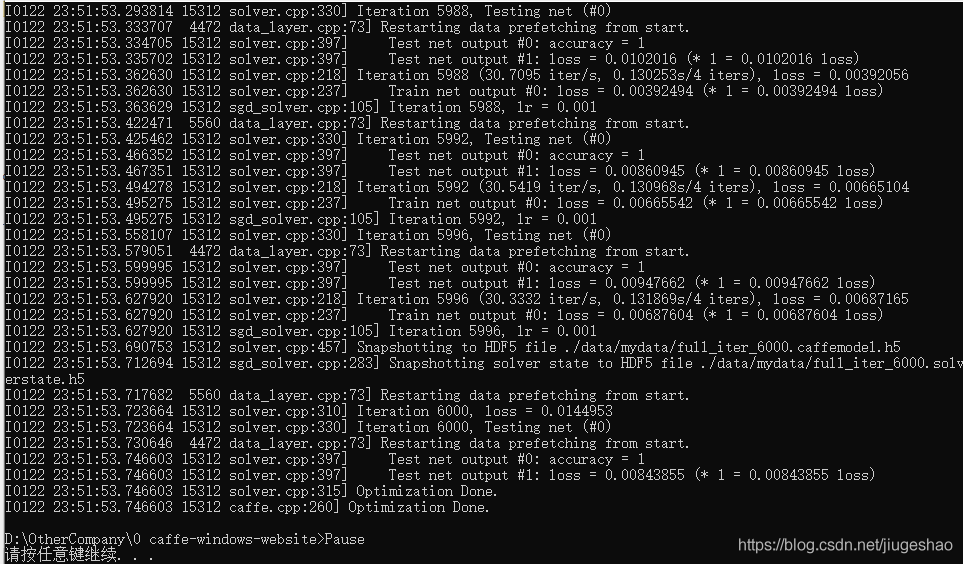
运行bat文件,生成caffe.model文件
新建deploy.prototxt文件,该文件是由上面的train_val.prototxt修改而成
deploy.prototxt文件和train_val.prototxt文件不同的地方在于:
(1)输入的数据不再是LMDB,也不分为测试集和训练集,输入的类型为Input,定义的维度,和训练集的数据维度保持一致,121*121,否则会报错;
(2)去掉weight_filler和bias_filler,这些参数已经存在于caffemodel中了,由caffemodel进行初始化。
(3)去掉最后的Accuracy层和loss层,换位Softmax层,表示分为某一类的概率。
deploy.prototxt文件如下:
name: "CIFAR10_full"
layer {
  name: "data"
  type: "Input"
  top: "data"
  input_param{shape: {dim:1 dim:3 dim:121 dim:121}}
}

layer {
  name: "conv1"
  type: "Convolution"
  bottom: "data"
  top: "conv1"
  param {
    lr_mult: 1
  }
  param {
    lr_mult: 2
  }
  convolution_param {
    num_output: 32
    pad: 2
    kernel_size: 5
    stride: 1
  }
}
layer {
  name: "pool1"
  type: "Pooling"
  bottom: "conv1"
  top: "pool1"
  pooling_param {
    pool: MAX
    kernel_size: 3
    stride: 2
  }
}
layer {
  name: "relu1"
  type: "ReLU"
  bottom: "pool1"
  top: "pool1"
}
layer {
  name: "norm1"
  type: "LRN"
  bottom: "pool1"
  top: "norm1"
  lrn_param {
    local_size: 3
    alpha: 5e-05
    beta: 0.75
    norm_region: WITHIN_CHANNEL
  }
}
layer {
  name: "conv2"
  type: "Convolution"
  bottom: "norm1"
  top: "conv2"
  param {
    lr_mult: 1
  }
  param {
    lr_mult: 2
  }
  convolution_param {
    num_output: 32
    pad: 2
    kernel_size: 5
    stride: 1
  }
}
layer {
  name: "relu2"
  type: "ReLU"
  bottom: "conv2"
  top: "conv2"
}
layer {
  name: "pool2"
  type: "Pooling"
  bottom: "conv2"
  top: "pool2"
  pooling_param {
    pool: AVE
    kernel_size: 3
    stride: 2
  }
}
layer {
  name: "norm2"
  type: "LRN"
  bottom: "pool2"
  top: "norm2"
  lrn_param {
    local_size: 3
    alpha: 5e-05
    beta: 0.75
    norm_region: WITHIN_CHANNEL
  }
}
layer {
  name: "conv3"
  type: "Convolution"
  bottom: "norm2"
  top: "conv3"
  convolution_param {
    num_output: 64
    pad: 2
    kernel_size: 5
    stride: 1
  }
}
layer {
  name: "relu3"
  type: "ReLU"
  bottom: "conv3"
  top: "conv3"
}
layer {
  name: "pool3"
  type: "Pooling"
  bottom: "conv3"
  top: "pool3"
  pooling_param {
    pool: AVE
    kernel_size: 3
    stride: 2
  }
}
layer {
  name: "ip1"
  type: "InnerProduct"
  bottom: "pool3"
  top: "ip1"
  param {
    lr_mult: 1
    decay_mult: 250
  }
  param {
    lr_mult: 2
    decay_mult: 0
  }
  inner_product_param {
    num_output: 2
    weight_filler {
      type: "gaussian"
      std: 0.01
    }
    bias_filler {
      type: "constant"
    }
  }
}

layer {
  name: "prob"
  type: "Softmax"
  bottom: "ip1"
  top: "prob"
}
运行结果如下:
测试图片为
可知预测结果正确
这里附上以上相关文件链接
主目录下的examples\mnist文件夹内文件链接:https://pan.baidu.com/s/1H2tlBFEun-EPXSDn5uH8xg
提取码:15xl
主目录下的examples\cifar10文件夹内文件python、matlab调用)链接:https://pan.baidu.com/s/17Sy5mKtaFMEyB4_CEyAyrA
提取码:5c1j
主目录下的\data\mydata文件夹内的文件 链接:https://pan.baidu.com/s/1deI-ka1CoIvJdgx9cyEhSQ
提取码:xgct
command line 文件 链接:https://pan.baidu.com/s/1kJONutsQlkN5KJ-n-lPmyg
提取码:5snd
后续会有博客介绍如何使用matlab、python、c++接口训练网络和预测图片
