前言:
ASP.NET中的Web项目可以通过APIController控制器来为其他项目提供接口。 而我们在调试这些接口时,可以选择单元测试,网页测试(Get接口),自己写测试代码或者第三方测试工具等等(如:PostMan可以发送GET/POST请求)。
但这里为大家介绍一种新的调试工具:微软提供的一种关于APIController控制器说明帮助页+测试(借助第三方)的方法来帮助开发。
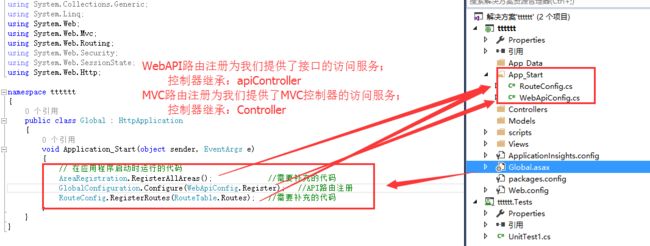
备注:在实际使用过程中,发现了一个问题,我创建的是WebApi项目,在NuGet管理包中添加了API的帮助页helppage核心组件后,访问帮助页首页Index时(http://localhost:27609/Help)居然报404,经过和能成功访问帮助页的项目进行对比发现,少了MVC路由器,因为通过WebAPI项目只添加了API核心组件的项目,并没有为我们自动添加MVC的核心组件(路由服务),而控制器的帮助页就是借助MVC路由核心组件来实现的,因此我们需要手动把路由服务补上:
1-在App_Start文件夹下添加类:RouteConfig.cs
using System;
using System.Collections.Generic;
using System.Linq;
using System.Web;
using System.Web.Mvc;
using System.Web.Routing;

namespace Lambda_Learn
{
    public class RouteConfig
    {
        public static void RegisterRoutes(RouteCollection routes)
        {
            routes.IgnoreRoute("{resource}.axd/{*pathInfo}");

            routes.MapRoute(
                name: "Default",
                url: "{controller}/{action}/{id}",
                defaults: new { controller = "Home", action = "Index", id = UrlParameter.Optional }
            );
        }
    }
}
2-在项目启动文件:Global.asax中注册注册并配置路由服务:
using System;
using System.Collections.Generic;
using System.Linq;
using System.Web;
using System.Web.Mvc;
using System.Web.Routing;
using System.Web.Security;
using System.Web.SessionState;
using System.Web.Http;

namespace tttttt
{
    public class Global : HttpApplication
    {
        void Application_Start(object sender, EventArgs e)
        {
            // 在应用程序启动时运行的代码
            AreaRegistration.RegisterAllAreas();             //需要补充的代码
            GlobalConfiguration.Configure(WebApiConfig.Register);
            RouteConfig.RegisterRoutes(RouteTable.Routes);   //需要补充的代码
        }
    }
}
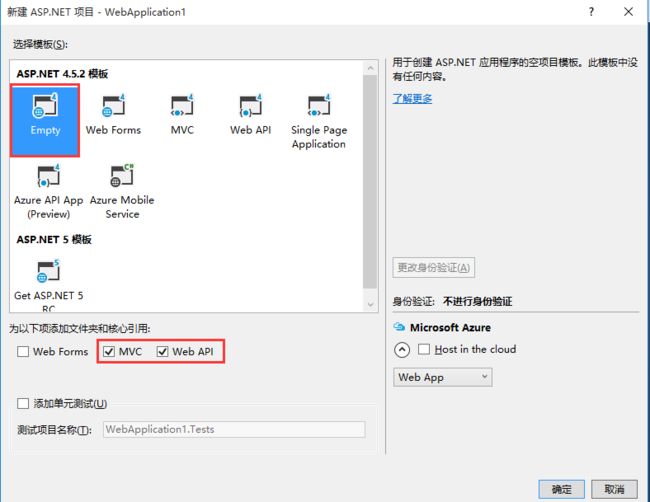
那么怎么放在这样的核心组件缺少的情况呢? 在VS2015中,我们如果新建WebAPI项目时,需要将MVC和API核心组件同时勾上,项目就会自动为我们注册MVC相关路由和API相关路由。如下图:
废话不多说,请看原文:
以下文章转载自:http://www.cnblogs.com/pmars/p/3673654.html
如何给你的ASP.NET页面添加HelpPage
最近写了一些webAPI,所以需要搞一套API的帮助文档,google了一下,发现这是可以自动生成的,以下就是如何自动生成HelpPage的说明。
参考:http://www.asp.net/web-api/overview/creating-web-apis/creating-api-help-pages
其实我也是按照上面的说法一步步走的,只是上面是英文,我进行一个简单的翻译,并且,在其中有些地方做了更改,也在这边记录一下!
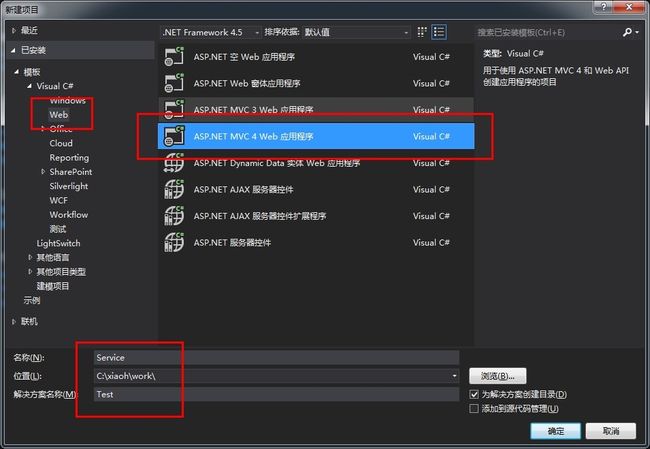
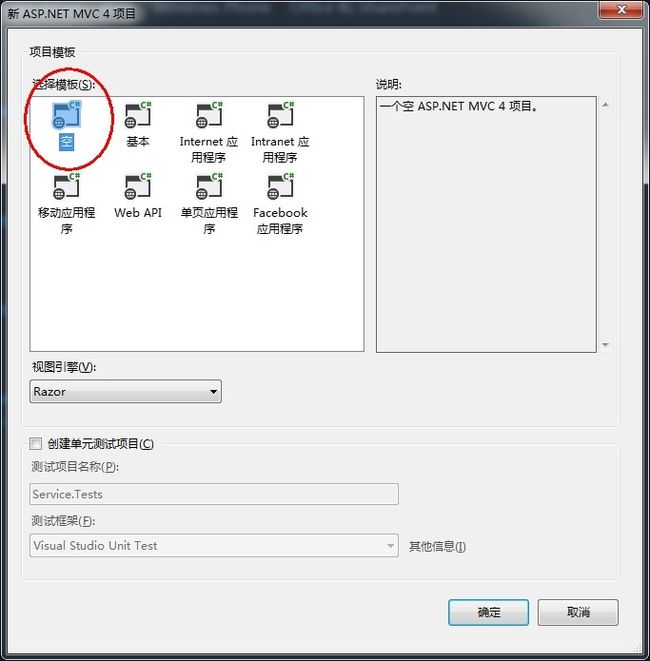
1,新建一个项目:(这里创建的是MVC web项目,已经为我们添加了mvc核心组件)
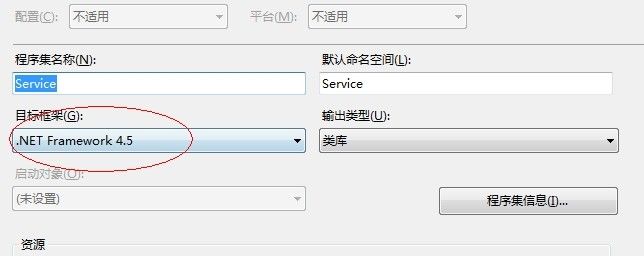
确认新建项目,右键项目属性,确保我们当前的项目是Framework4.5的(4.0及其以下的下面的安装包是安装不成功的,记住,这是血的教训)
2,添加引用包
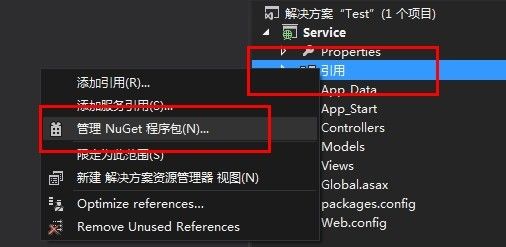
右键引用,选择管理NuGet程序包(你得先配置好这个,具体如何配置百度一下就OK了)
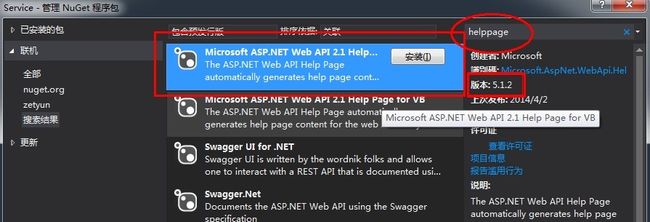
之后搜索helppage即可,找到的第一个既是我们需要添加的asp.net的helppage程序包
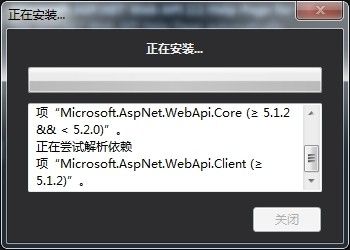
点击安装即可,这安装的速度得取决于你的网速,反正我这边特慢,有的时候还得安装好多次才可以。
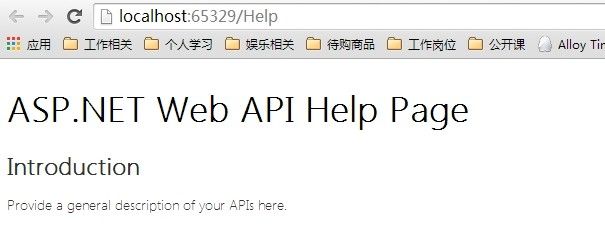
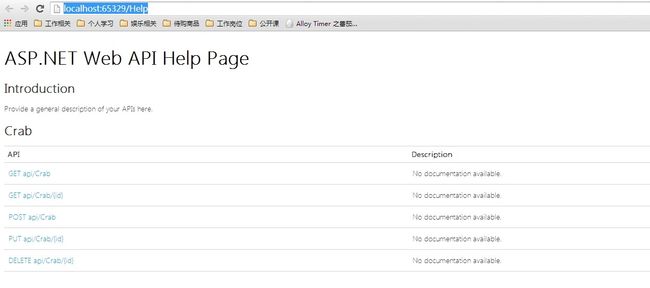
现在Help page就已经生成了,右键项目-》调试-》启动新实例,之后再页面URL后面写上 /Help 看看(注:我们的端口应该不会一样,无妨)
这时候你会发现,页面什么都没有,不急,往下走。
3,修改配置文件生成位置
首先需要说明的是,这个程序包会依托于项目生成的XML配置文件来产生所有的文档,所以你得先让你的项目生成这个XML文件
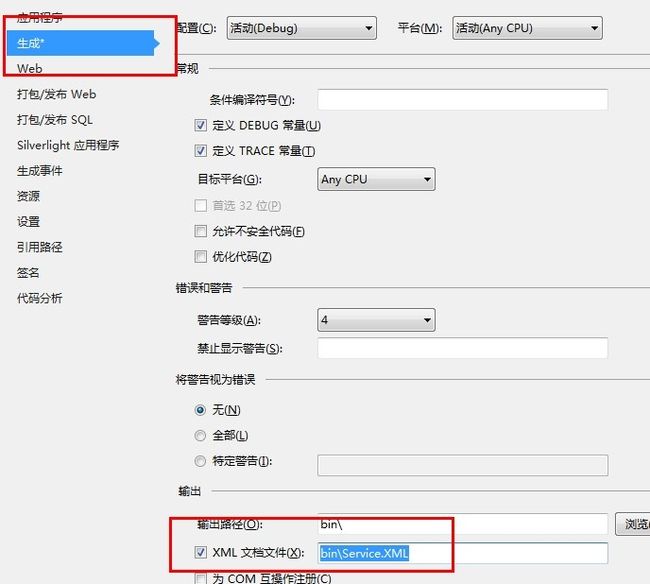
右键项目选择属性,之后再生成一栏里面选择输出到XML文档文件,那个路径和名称随你怎么写,只要一会和下面的配置对应上就OK,我这边直接用的是默认的。
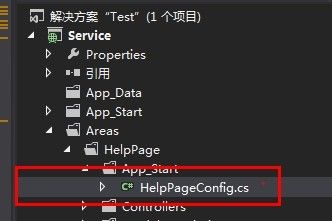
之后我们需要做的就是给这个xml的路径写到程序里面,配置好就可以了,打开Areas/HelpPage/App_Start/HelpPageConfig.cs 页面,将Register函数里面的几段注释去掉,之后修改成刚才的路径就ok了。
 1      public static void Register(HttpConfiguration config)
 2         {
 3             // Uncomment the following to use the documentation from XML documentation file.
 4             config.SetDocumentationProvider(new XmlDocumentationProvider(HttpContext.Current.Server.MapPath("~/bin/Service.xml")));  // 注:这里的路径就是刚才说的地址,你修改成一样的就OK了
 5
 6             // Uncomment the following to use "sample string" as the sample for all actions that have string as the body parameter or return type.
 7             // Also, the string arrays will be used for IEnumerable. The sample objects will be serialized into different media type
 8             // formats by the available formatters.
 9             config.SetSampleObjects(new Dictionary    // 这段需要解放出来主要就是做sample的
10             {
11                 {typeof(string), "sample string"},
12                 {typeof(IEnumerable), new string[]{"sample 1", "sample 2"}}
13             });
4,添加Controller
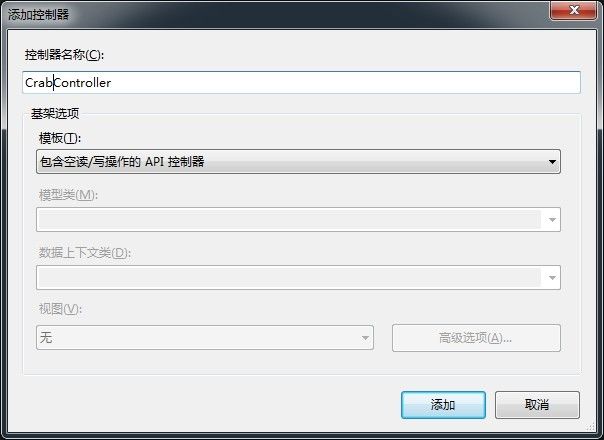
OK,现在基本条件已经备齐,只剩下需要显示的东西了,我们创建一个controller,之后添加一个接口
添加Controller之后,里面会有一些自动生成的API,现在你可以去刷新一下那个Help页面,看看是否有货了...
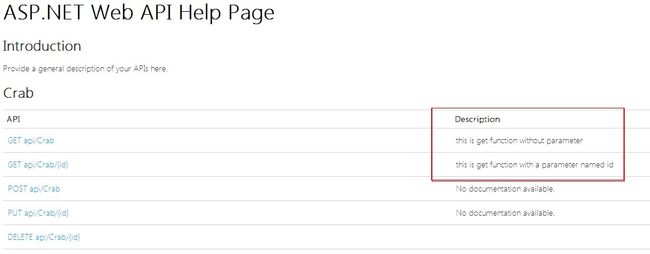
是不是发现,API已经显示出来了,但是并没有有用的描述在页面上,我们加上就可以了
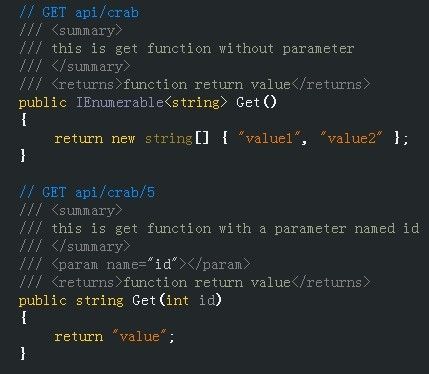
我只修改了两个函数来看看效果:
1 // GET api/crab 2 ///3 /// this is get function without parameter 4 /// 5 ///function return value 6 public IEnumerableGet() 7 { 8 return new string[] { "value1", "value2" }; 9 } 10 11 // GET api/crab/5 12 /// 13 /// this is get function with a parameter named id 14 /// 15 /// 16 ///function return value 17 public string Get(int id) 18 { 19 return "value"; 20 }
OK,现在的页面已经变了,你可以根据你的需求来编写Help page了。
5,其他风格的API
可以发现,默认生成的都是一些RestAPI,我对这个一点都不感冒,所以,我打算换一种写法:
 1    public class CrabController : ApiController
 2     {
 3         ///
 4         /// 测试方法
 5         ///
 6         /// 串1
 7         /// 串2
 8         /// 两个字符串的连接串
 9         [System.Web.Http.AcceptVerbs("GET")]
10         [System.Web.Http.ActionName("TestMethod")]
11         public string TestMethod(string msg1,string msg2)
12         {
13             return msg1 + msg2;
14         }
15     }
这个时候,我们还需要修改一下配置文件,否则你会发现,他的API名称变成了controller的名字
找到路径 App_Start/WebApiConfig.cs,修改Register函数如下:
1      public static void Register(HttpConfiguration config)
2         {
3             config.Routes.MapHttpRoute(
4                 name: "DefaultApi",
5                 routeTemplate: "{controller}/{action}",    // 此处进行了修改
6                 defaults: new { id = RouteParameter.Optional }
7             );
8         }
现在我们刷新一下页面:
OK,这才是我想要的。
6,修改标题显示的内容
为了个性化,我需要修改一下标题和介绍部分的内容,找到文件:Area/Views/Help/Index.cshtml,修改部分代码为:
 1 @{
 2     ViewBag.Title = "这里是需要修改的Title";
 3
 4     // Group APIs by controller
 5     ILookup apiGroups = Model.ToLookup(api => api.ActionDescriptor.ControllerDescriptor);
 6 }
 7
 8
 9
10
11
12             @ViewBag.Title
13
14
15
16
17
18
19             介绍
20
21                 我修改了这里
22
23
24
25
26         @foreach (var group in apiGroups)
27         {
28             @Html.DisplayFor(m => group, "ApiGroup")
29         }
30
31
现在的页面:
7,这里面的坑
我在用的时候发现里面有个坑,找到文件:Areas/HelpPage/ModelDescriptions/ModelNameHelper.cs
里面有一段代码:genericTypeName = genericTypeName.Substring(0, genericTypeName.IndexOf('`'));
这段代码,如果当genericTypeName字符串中没有'`'的时候,是会出问题的,所以我修改了一下这段代码:
1           var index = genericTypeName.IndexOf('`');
2                 genericTypeName = genericTypeName.Substring(0, index != -1 ? index : genericTypeName.Length);
8,不在页面显示API
其实很多的函数是不需要对外公布的,那我们可以通过以下代码来设置:
1 [ApiExplorerSettings(IgnoreApi=true)]
2 public HttpResponseMessage Get(int id) {  }
OK,这个问题基本上就是这些,现在HelpPage已经可以使用了,下一篇文章我打算写写Test Client,就是说,在help page内放入一个测试工具,连接在此:http://www.cnblogs.com/pmars/p/3673811.html,这样我们在开发的时候就很方便了。
