彩色图像直方图均衡化 --- 基于OpenCV中EqualizeHist_Demo实现
本文给出基于彩色图像直方图均衡化的OpenCV代码与结果示例!
具体内容包含:
1. 灰度图像直方图均衡化
2. 对RGB三通道各自均衡化后,再组合输出结果
3. RGB图像转化为HSI,YUV,YCbCr颜色空间后,对亮度通道进行均衡化运算后再转回RGB空间
/**
 * @function EqualizeHist_Demo.cpp
 * @brief Demo code for equalizeHist function
 * @author OpenCV team
 */

#include "opencv2/imgcodecs.hpp"
#include "opencv2/highgui/highgui.hpp"
#include "opencv2/imgproc/imgproc.hpp"
#include
#include

using namespace cv;
using namespace std;

// add by frank, 2014-09-25
Mat equalizeChannelHist(const Mat & inputImage)
{
	if( inputImage.channels() >= 3 )
	{
		vector channels;
		split(inputImage, channels);

		Mat B,G,R;

		equalizeHist( channels[0], B );
		equalizeHist( channels[1], G );
		equalizeHist( channels[2], R );

		vector combined;
		combined.push_back(B);
		combined.push_back(G);
		combined.push_back(R);

		Mat result;
		merge(combined, result);

		return result;
	}

	return Mat();
}

Mat equalizeIntensityHist(const Mat & inputImage)
{
	if(inputImage.channels() >= 3)
	{
		Mat ycrcb;

		cvtColor(inputImage, ycrcb, COLOR_BGR2YCrCb);

		vector channels;
		split(ycrcb, channels);

		equalizeHist(channels[0], channels[0]);

		Mat result;
		merge(channels,ycrcb);

		cvtColor(ycrcb, result, COLOR_YCrCb2BGR);

		return result;
	}

	return Mat();
}

void getGrayImageHistImage(const Mat & src, Mat & histImage)
{
	Mat hist;
	int histSize = 256;

	calcHist(&src, 1, 0, Mat(), hist, 1, &histSize, 0);
	normalize(hist, hist, 0, histImage.rows, NORM_MINMAX, CV_32F);

	histImage = Scalar::all(255);
	int binW = cvRound((double)histImage.cols/histSize);

	for( int i = 0; i < histSize; i++ )
		rectangle( histImage, Point(i*binW, histImage.rows),
		Point((i+1)*binW, histImage.rows - cvRound(hist.at(i))),
		Scalar::all(0), -1, 8, 0 );
}


int main( int, char** argv )
{
	Mat src, dst;
	Mat intensity_color_dst;
	Mat channel_color_dst;

	const char* source_gray_window = "Source Gray Image";
	const char* equalized_gray_window = "Equalized Gray Image";
	const char* source_color_window = "Source Color Image";
	const char* equalized_intensity_color_window = "Equalized Intensity Color Image";
	const char* equalized_channels_color_window = "Equalized Channels Color Image";

	/// Load image
	src = imread( argv[1], 1 );

	if( src.empty() )
	{
		cout<<"Usage: ./Histogram_Demo "<
执行结果,如下图所示:


原灰度图像 直方图均衡化增强后图像
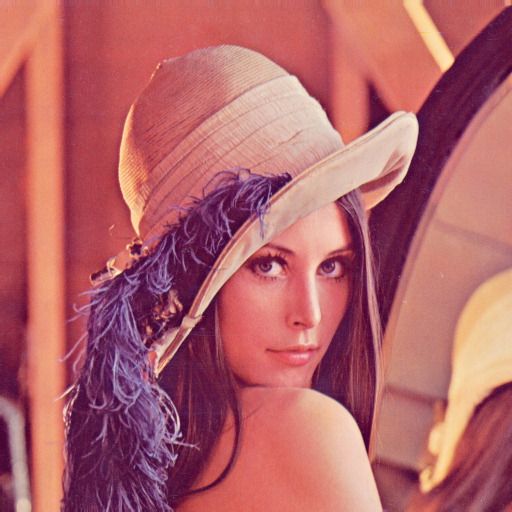
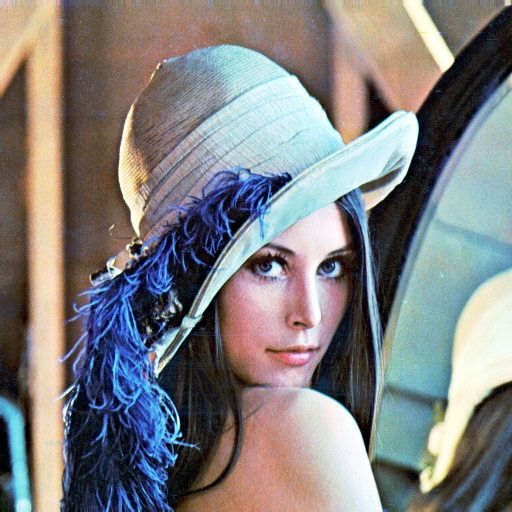

原彩色图像 RGB各通道直方图均衡化后图像 YCbCr 亮度通道Y直方图均衡化后图像
分RGB通道均衡化后图像颜色有失真情况,而亮度通道均衡化结果不会,主要原因:
Histogram equalization is a non-linear process. Channel splitting and equalizing each channel separately is not the proper way for equalization of contrast. Equalization involves Intensity values of the image not the color components. So for a simple RGB color image, HE should not be applied individually on each channel. Rather, it should be applied such that intensity values are equalized without disturbing the color balance of the image. So, the first step is to convert the color space of the image from RGB into one of the color space which separates intensity values from color components. Some of these are:
HSV/HLS
YUV
YCbCr
Convert the image from RGB to one of the above mentioned color spaces. YCbCr is preferred as it is designed for digital images.Perform HE of the intensity plane Y. Convert the image back to RGB.
参考:
基本理论 http://www.cnblogs.com/cfantaisie/archive/2011/06/05/2073406.html
参考比较 http://blog.csdn.net/morewindows/article/details/8364690 灰度直方图均衡化
http://blog.csdn.net/morewindows/article/details/8364722 彩色直方图均衡化