iOS 自定义TabBar(仿新浪微博TabBar)
UITabBar 是一个比较常用的工具
有的时候系统的样式不能满足需求,我们可以考虑自定义
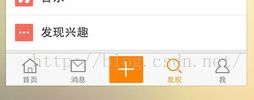
中间的+ 就属于自定义样式
我们可以通过自定义TabBar来实现
首先新建一个项目
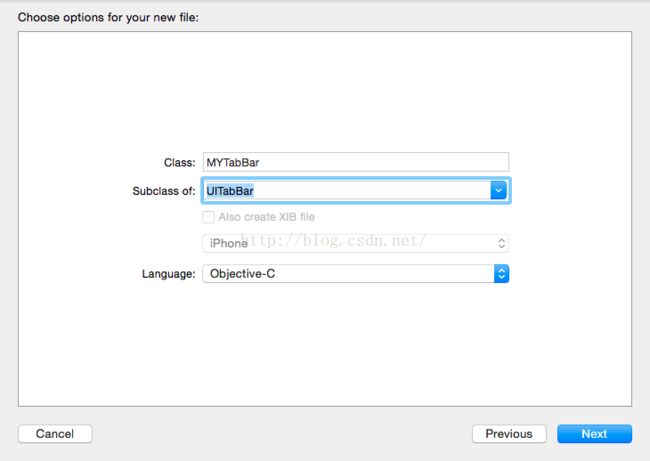
创建一个类继承字UITabBar
创建一个协议和按钮
#import

@class MYTabBar;

@protocol MYTabBarDelegate

@optional

- (void)tabBarDidClickPlusButton:(MYTabBar *)tabBar;

@end


@interface MYTabBar : UITabBar

@property (strong,nonatomic) UIButton *plusBtn;
@property (nonatomic, weak) id tabBarDelegate;

@end
在MyTabBar 的实现中首先添加按钮 设置按钮的图片 点击等
- (id)initWithFrame:(CGRect)frame
{
    self = [super initWithFrame:frame];
    if (self) {
        // 添加一个按钮到tabbar中
        UIButton *plusBtn = [[UIButton alloc] init];
        [plusBtn setImage:[UIImage imageNamed:@"tabbar_mainbtn1.png"] forState:UIControlStateNormal];
        CGRect temp = plusBtn.frame;
        temp.size=plusBtn.currentImage.size;
        plusBtn.frame=temp;
        [plusBtn addTarget:self action:@selector(plusClick) forControlEvents:UIControlEventTouchUpInside];
        [self addSubview:plusBtn];
        self.plusBtn = plusBtn;
    }
    return self;
}
将按钮点击的方法设置到他的代理中
#pragma mark 加号按钮点击事件处理器
- (void)plusClick
{
    // 通知代理
    if ([self.tabBarDelegate respondsToSelector:@selector(tabBarDidClickPlusButton:)]) {
        [self.tabBarDelegate tabBarDidClickPlusButton:self];
    }
}
- (void)layoutSubviews
{
    [super layoutSubviews];

    // 1.设置加号按钮的位置
    CGPoint temp = self.plusBtn.center;
    temp.x=self.frame.size.width/2;
    temp.y=self.frame.size.height/2;
    self.plusBtn.center=temp;

    // 2.设置其它UITabBarButton的位置和尺寸
    CGFloat tabbarButtonW = self.frame.size.width / 5;
    CGFloat tabbarButtonIndex = 0;
    for (UIView *child in self.subviews) {
        Class class = NSClassFromString(@"UITabBarButton");
        if ([child isKindOfClass:class]) {
            // 设置宽度
            CGRect temp1=child.frame;
            temp1.size.width=tabbarButtonW;
            temp1.origin.x=tabbarButtonIndex * tabbarButtonW;
            child.frame=temp1;
            // 增加索引
            tabbarButtonIndex++;
            if (tabbarButtonIndex == 2) {
                tabbarButtonIndex++;
            }
        }
    }
}
好了 自定义TabBar 好了
我们在创建一个类MainViewController 继承自UITabBarController
使用KVC方法设置TabBar
- (void)viewDidLoad {
    [super viewDidLoad];
    // Do any additional setup after loading the view.
    MYTabBar *tabBar = [[MYTabBar alloc] init];
    tabBar.tabBarDelegate = self;

    [self setValue:tabBar forKeyPath:@"tabBar"];

}
同时实现代理方法
#pragma mark - MYTabBarDelegate代理方法
- (void)tabBarDidClickPlusButton:(MYTabBar *)tabBar
{
    AddViewController *addVC= [[AddViewController alloc] init];

    [self presentViewController:addVC animated:YES completion:nil];
}
好了 剩下的就是设置UITabBarControl
我们在项目默认生成的AppDelegate 中设置rootViewController为我们的MainViewControler
- (BOOL)application:(UIApplication *)application didFinishLaunchingWithOptions:(NSDictionary *)launchOptions {
    // Override point for customization after application launch.

    //创建几个ViewController
    FirstViewController *firstVC = [[FirstViewController alloc]init];
    SecondViewController *secondVC = [[SecondViewController alloc]init];
    ThirdViewController *thirdVC = [[ThirdViewController alloc]init];
    ForthViewController *forthVC = [[ForthViewController alloc]init];


    //创建MainViewController并将创建好的ViewController添加到TabBar上
    MainViewController *tabBarC=[[MainViewController alloc]init];
    tabBarC.viewControllers=@[firstVC,secondVC,thirdVC,forthVC];

    for (UIViewController *controller in tabBarC.viewControllers) {
        UIViewController *view= controller.view;
    }

    self.window.rootViewController=tabBarC;
    return YES;
}
完成之后看下效果
TabBar的样式已经出来了 如果需要,可以自己换成微博的图片就可以了
源代码 我上传到QQ群 大家有兴趣去看下
demo:【60331MYTabBar.zip】
苹果开发群 :414319235 欢迎加入,共同学习


