创建一个简单的SpringBoot项目
1. 使用IDEA新建一个Maven项目
2. 在pom.xml添加SpringBoot的相关依赖
xml version="1.0" encoding="UTF-8"?>
<project xmlns="http://maven.apache.org/POM/4.0.0"
         xmlns:xsi="http://www.w3.org/2001/XMLSchema-instance"
         xsi:schemaLocation="http://maven.apache.org/POM/4.0.0 http://maven.apache.org/xsd/maven-4.0.0.xsd">
    <modelVersion>4.0.0modelVersion>

    <groupId>com.testgroupId>
    <artifactId>test-springboot-helloworldartifactId>
    <version>1.0-SNAPSHOTversion>

    <parent>
        <groupId>org.springframework.bootgroupId>
        <artifactId>spring-boot-starter-parentartifactId>
        <version>2.1.8.RELEASEversion>
    parent>

    <dependencies>


        <dependency>
            <groupId>org.springframework.bootgroupId>
            <artifactId>spring-boot-starter-webartifactId>
        dependency>
    dependencies>


    <build>
        <plugins>
            <plugin>
                <groupId>org.springframework.bootgroupId>
                <artifactId>spring-boot-maven-pluginartifactId>
            plugin>
        plugins>
    build>
project>
3. 新建Application.java
package com.test;

import org.springframework.boot.SpringApplication;
import org.springframework.boot.autoconfigure.SpringBootApplication;


/**
 * @SpringBootApplication 用来标注一个主程序,说明这是一个Spring Boot应用
 */
@SpringBootApplication
public class Application {

    public static void main(String[] args) {

        // Spring应用启动
        SpringApplication.run(Application.class, args);
    }
}
4. 新建HelloController.java
package com.test;

import org.springframework.stereotype.Controller;
import org.springframework.web.bind.annotation.RequestMapping;
import org.springframework.web.bind.annotation.ResponseBody;

@Controller
public class HelloController {

    @RequestMapping("/hello")
    @ResponseBody
    public String hello(){
        return "Hello World!";
    }

}
项目框架:
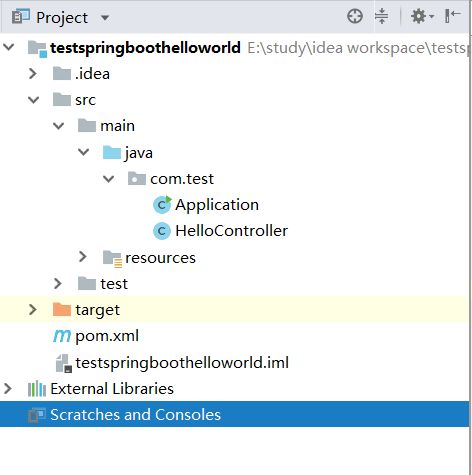
至此,一个简单的SpringBoot项目构建完成。
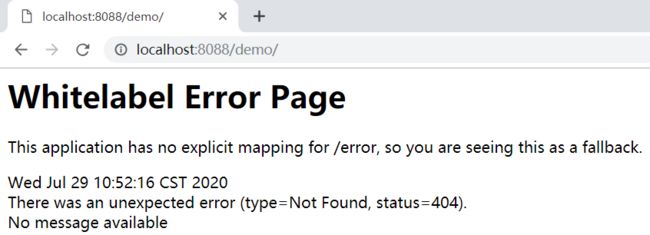
然后启动Application.java来启动SpringBoot项目,启动后报错,错误信息如下:
Description:
The Tomcat connector configured to listen on port 8080 failed to start. The port may already be in use or the connector may be misconfigured.
Action:
Verify the connector's configuration, identify and stop any process that's listening on port 8080, or configure this application to listen on another port.
原因是因为8080端口被占用,Tomcat启动失败。这个端口被另一个重要的进程占着,那就修改Tomcat的默认端口。
修改项目访问端口
使用properties文件方式:
在src/main/resources目录下创建:application.properties,添加如下配置即可修改端口号:
server.port=8088
使用yml文件方式:
在src/main/resources目录下创建:application.yml,添加如下配置即可修改端口号:
server:
  port:8088
修改项目访问路径
使用properties文件方式:
在application.properties,添加如下配置即可修改项目访问路径
#这是旧版的设置访问路径的方法,现在已经不起作用
#server.context-path=/demo

#这是新版设置访问路径的方法
server.servlet.context-path=/demo
使用yml文件方式:
在application.yml,追加如下配置即可修改项目访问路径:
server:
  port:8088
 server.context-path:/demo
使用Properties文件修改端口和路径:
#设置访问端口
server.port=8088

#这是旧版的设置访问路径的方法,现在已经不起作用
#server.context-path=/demo

#这是新版设置访问路径的方法
server.servlet.context-path=/demo
修改端口和路径之后的结果:

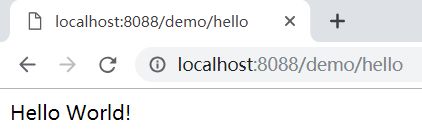
打开http://localhost:8088/demo/,可以看到默认路径已经从localhost:8088变为localhost:8088/demo/
打开http://localhost:8088/demo/hello