Android Bitmap加载内存占用彻底分析
转载:http://blog.csdn.net/axlchen/article/details/78230920
背景
在某个版本应用上线后,偶然测得首页占用的内存非常的大而且一直不能回收掉,经过一轮的排查后最终确定是3张图片引起的!当时每张图片占用了将近20m内存。当时紧急处理好后还一直惦记着此事,后来对Android加载Bitmap的内存占用作了彻底的分析,跟踪了相关的源码,在这里总结一下。
图片加载测试
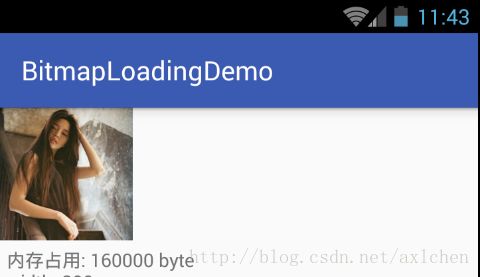
先抛开结论,现在先直观的看一下加载如下一张图片需要多少内存

其中图片的宽高都为300像素
计算内存的方法采用 android.graphics.Bitmap#getByteCount
public final int getByteCount() {
    // int result permits bitmaps up to 46,340 x 46,340
    return getRowBytes() * getHeight();
}- 1
- 2
- 3
- 4
预期占用的内存大小为
图片宽*图片高*表示每个像素点的字节数,即 - 1
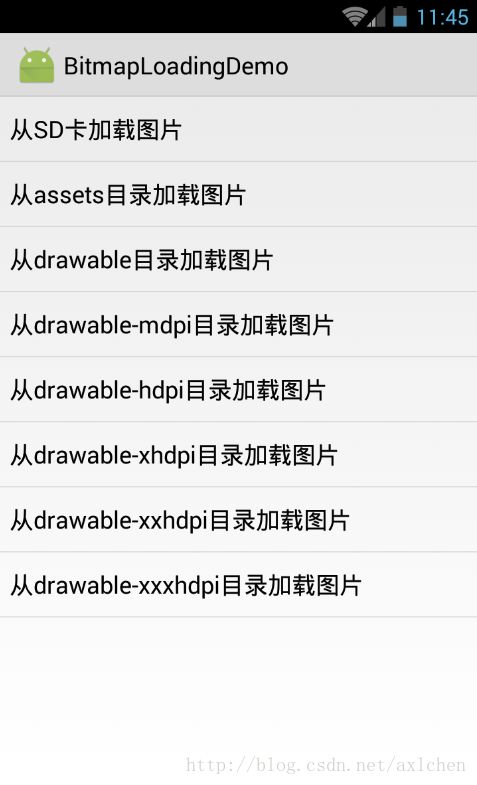
加载SD卡的图片
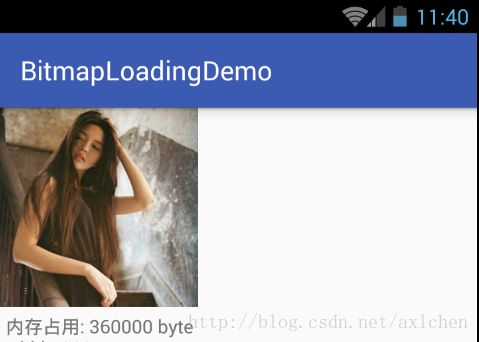
加载SD中的图片结果为
assets的图片
加载asset目录中的图片结果为
加载Resources的图片
-
drawable目录
-
drawable-mdpi目录
-
drawable-hdpi目录
-
drawable-xhdpi目录
-
drawable-xhhdpi目录
-
drawable-xhhhdpi目录

内存占用分析
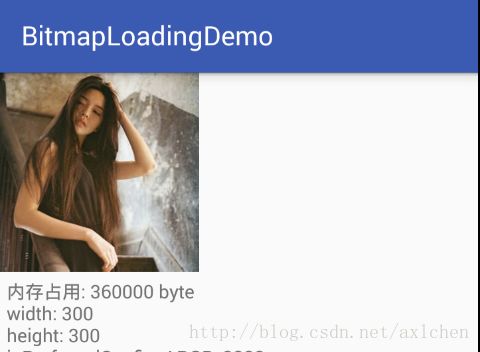
理论上,300 * 300像素的图片,默认以4byte表示1个像素的情况下,占用的内存为
300 * 300 * 4 = 360000 byte
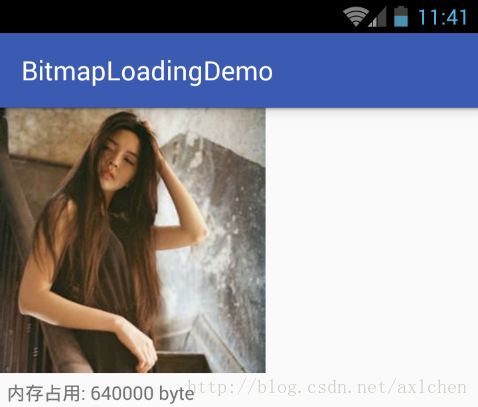
但是,实际上,只有从SD卡、assets目录、drawable-xhdpi目录下加载图片才等于理论数值,其他数值都不等!
等等!,从图片的大小看,不等于理论值的图片好像被放大或者缩小了?我们可以验证一下,把图片在内存中的实际宽高打印出来
SD卡的
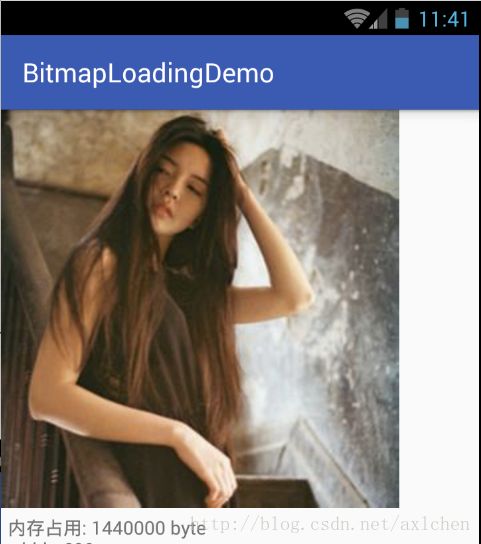
drawable-mdpi的
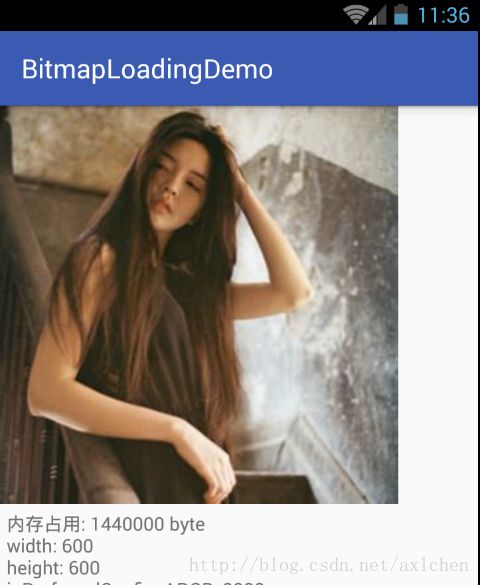
发现没有?在drawable-mdpi目录中的图片在加载内存中时的宽高都放大了两倍!!
其实,加载在SD卡和assets目录的图片时,图片的尺寸不会被改变,但是drawable-xxxdpi目录的照片的尺寸会被改变,这里篇幅所限,就不一一截图了,想验证的可以下载demo(文末给出链接)试验一下。至于尺寸改变的原因,下文会讨论,这里卖个关子。
查看源码
正所谓源码面前,了无秘密,欲知原理,还须从源码下手,首先查看BitmapFactory.java文件
BitmapFactory.decodeFile
BitmapFactory.decodeResourceStream- 1
- 2
这两个方法的重载函数最终都会调用到
private static native Bitmap nativeDecodeStream(InputStream is, byte[] storage,
Rect padding, Options opts);- 1
- 2
这是一个本地方法,其相关实现在
frameworks/base/core/jni/android/graphics/BitmapFactory.cpp
打开文件,找到如下的方法,就是本地方法的实现
static jobject nativeDecodeStream(JNIEnv* env, jobject clazz, jobject is, jbyteArray storage,
        jobject padding, jobject options) {

    jobject bitmap = NULL;
    SkAutoTUnref stream(CreateJavaInputStreamAdaptor(env, is, storage));

    if (stream.get()) {
        SkAutoTUnref bufferedStream(
                SkFrontBufferedStream::Create(stream, BYTES_TO_BUFFER));
        SkASSERT(bufferedStream.get() != NULL);
        bitmap = doDecode(env, bufferedStream, padding, options);
    }
    return bitmap;
} - 1
- 2
- 3
- 4
- 5
- 6
- 7
- 8
- 9
- 10
- 11
- 12
- 13
- 14
抓住我们要看的部分,这里还调用了doDecode方法,调到doDecode会发现,bitmap解码的逻辑基本框架都在里面了,分析清楚它的逻辑,我们就能找到答案,方法非常长,有200多行,我把枝干提取出来,并加上注释如下
static jobject doDecode(JNIEnv* env, SkStreamRewindable* stream, jobject padding, jobject options) {

    int sampleSize = 1;

    SkImageDecoder::Mode decodeMode = SkImageDecoder::kDecodePixels_Mode;
    SkColorType prefColorType = kN32_SkColorType;

    bool doDither = true;
    bool isMutable = false;
    float scale = 1.0f;
    bool preferQualityOverSpeed = false;
    bool requireUnpremultiplied = false;

    jobject javaBitmap = NULL;

    if (options != NULL) {
         //options是BitmapFactory.Options的java对象,这里获取该对象的成员变量值并赋值给本地代码的变量,下面类似格式的方法调用作用相同
        sampleSize = env->GetIntField(options, gOptions_sampleSizeFieldID);
        if (optionsJustBounds(env, options)) {
            decodeMode = SkImageDecoder::kDecodeBounds_Mode;
        }

        // initialize these, in case we fail later on
        env->SetIntField(options, gOptions_widthFieldID, -1);
        env->SetIntField(options, gOptions_heightFieldID, -1);
        env->SetObjectField(options, gOptions_mimeFieldID, 0);

        jobject jconfig = env->GetObjectField(options, gOptions_configFieldID);
        prefColorType = GraphicsJNI::getNativeBitmapColorType(env, jconfig);
        isMutable = env->GetBooleanField(options, gOptions_mutableFieldID);
        doDither = env->GetBooleanField(options, gOptions_ditherFieldID);
        preferQualityOverSpeed = env->GetBooleanField(options,
                gOptions_preferQualityOverSpeedFieldID);
        requireUnpremultiplied = !env->GetBooleanField(options, gOptions_premultipliedFieldID);
        javaBitmap = env->GetObjectField(options, gOptions_bitmapFieldID);

          //java里,inScaled默认true,所以这里总是执行,除非手动设置为false
        if (env->GetBooleanField(options, gOptions_scaledFieldID)) {
            const int density = env->GetIntField(options, gOptions_densityFieldID);
            const int targetDensity = env->GetIntField(options, gOptions_targetDensityFieldID);
            const int screenDensity = env->GetIntField(options, gOptions_screenDensityFieldID);
            //重点就是这里了,density、targetDensity、screenDensity的值决定了是否缩放、以及缩放的倍数
            if (density != 0 && targetDensity != 0 && density != screenDensity) {
                scale = (float) targetDensity / density;
            }
        }
    }

    const bool willScale = scale != 1.0f;

    ...省略若干行

     //真正的decode操作,decodingBitmap是解码的的结果,但如果要缩放,则返回缩放后的bitmap,看后面的代码
     SkBitmap decodingBitmap;
    if (decoder->decode(stream, &decodingBitmap, prefColorType, decodeMode)
                != SkImageDecoder::kSuccess) {
        return nullObjectReturn("decoder->decode returned false");
    }

    int scaledWidth = decodingBitmap.width();
    int scaledHeight = decodingBitmap.height();

    if (willScale && decodeMode != SkImageDecoder::kDecodeBounds_Mode) {
        scaledWidth = int(scaledWidth * scale + 0.5f);
        scaledHeight = int(scaledHeight * scale + 0.5f);
    }

    // update options (if any)
    if (options != NULL) {
        jstring mimeType = getMimeTypeString(env, decoder->getFormat());
        if (env->ExceptionCheck()) {
            return nullObjectReturn("OOM in getMimeTypeString()");
        }
        env->SetIntField(options, gOptions_widthFieldID, scaledWidth);
        env->SetIntField(options, gOptions_heightFieldID, scaledHeight);
        env->SetObjectField(options, gOptions_mimeFieldID, mimeType);
    }

    // if we're in justBounds mode, return now (skip the java bitmap)
    if (decodeMode == SkImageDecoder::kDecodeBounds_Mode) {
        return NULL;
    }

    ...省略若干行

     //scale != 1.0f就缩放bitmap,缩放的步骤概扩起来就是申请缩放后的内存,然后把所有的bitmap信息记录复制到outputBitmap变量上;否则直接复制decodingBitmap的内容
    if (willScale) {
        // This is weird so let me explain: we could use the scale parameter
        // directly, but for historical reasons this is how the corresponding
        // Dalvik code has always behaved. We simply recreate the behavior here.
        // The result is slightly different from simply using scale because of
        // the 0.5f rounding bias applied when computing the target image size
        const float sx = scaledWidth / float(decodingBitmap.width());
        const float sy = scaledHeight / float(decodingBitmap.height());

        // TODO: avoid copying when scaled size equals decodingBitmap size
        SkColorType colorType = colorTypeForScaledOutput(decodingBitmap.colorType());
        // FIXME: If the alphaType is kUnpremul and the image has alpha, the
        // colors may not be correct, since Skia does not yet support drawing
        // to/from unpremultiplied bitmaps.
        outputBitmap->setInfo(SkImageInfo::Make(scaledWidth, scaledHeight,
                colorType, decodingBitmap.alphaType()));
        if (!outputBitmap->allocPixels(outputAllocator, NULL)) {
            return nullObjectReturn("allocation failed for scaled bitmap");
        }

        // If outputBitmap's pixels are newly allocated by Java, there is no need
        // to erase to 0, since the pixels were initialized to 0.
        if (outputAllocator != &javaAllocator) {
            outputBitmap->eraseColor(0);
        }

        SkPaint paint;
        paint.setFilterLevel(SkPaint::kLow_FilterLevel);

        SkCanvas canvas(*outputBitmap);
        canvas.scale(sx, sy);
        canvas.drawBitmap(decodingBitmap, 0.0f, 0.0f, &paint);
    } else {
        outputBitmap->swap(decodingBitmap);
    }

    ...省略若干行

     //后面的部分就是返回bitmap对象给java代码了

    if (javaBitmap != NULL) {
        bool isPremultiplied = !requireUnpremultiplied;
        GraphicsJNI::reinitBitmap(env, javaBitmap, outputBitmap, isPremultiplied);
        outputBitmap->notifyPixelsChanged();
        // If a java bitmap was passed in for reuse, pass it back
        return javaBitmap;
    }

    int bitmapCreateFlags = 0x0;
    if (isMutable) bitmapCreateFlags |= GraphicsJNI::kBitmapCreateFlag_Mutable;
    if (!requireUnpremultiplied) bitmapCreateFlags |= GraphicsJNI::kBitmapCreateFlag_Premultiplied;

    // now create the java bitmap
    return GraphicsJNI::createBitmap(env, outputBitmap, javaAllocator.getStorageObj(),
            bitmapCreateFlags, ninePatchChunk, ninePatchInsets, -1);
}- 1
- 2
- 3
- 4
- 5
- 6
- 7
- 8
- 9
- 10
- 11
- 12
- 13
- 14
- 15
- 16
- 17
- 18
- 19
- 20
- 21
- 22
- 23
- 24
- 25
- 26
- 27
- 28
- 29
- 30
- 31
- 32
- 33
- 34
- 35
- 36
- 37
- 38
- 39
- 40
- 41
- 42
- 43
- 44
- 45
- 46
- 47
- 48
- 49
- 50
- 51
- 52
- 53
- 54
- 55
- 56
- 57
- 58
- 59
- 60
- 61
- 62
- 63
- 64
- 65
- 66
- 67
- 68
- 69
- 70
- 71
- 72
- 73
- 74
- 75
- 76
- 77
- 78
- 79
- 80
- 81
- 82
- 83
- 84
- 85
- 86
- 87
- 88
- 89
- 90
- 91
- 92
- 93
- 94
- 95
- 96
- 97
- 98
- 99
- 100
- 101
- 102
- 103
- 104
- 105
- 106
- 107
- 108
- 109
- 110
- 111
- 112
- 113
- 114
- 115
- 116
- 117
- 118
- 119
- 120
- 121
- 122
- 123
- 124
- 125
- 126
- 127
- 128
- 129
- 130
- 131
- 132
- 133
- 134
- 135
- 136
- 137
- 138
- 139
- 140
- 141
- 142
上面的解析能勾画出大概的逻辑了,其中秘密就在这一小段
//java里,inScaled默认true,所以这里总是执行,除非手动设置为false
if (env->GetBooleanField(options, gOptions_scaledFieldID)) {
    const int density = env->GetIntField(options, gOptions_densityFieldID);
    const int targetDensity = env->GetIntField(options, gOptions_targetDensityFieldID);
    const int screenDensity = env->GetIntField(options, gOptions_screenDensityFieldID);
    //重点就是这里了,density、targetDensity、screenDensity的值决定了是否缩放、以及缩放的倍数
    if (density != 0 && targetDensity != 0 && density != screenDensity) {
        scale = (float) targetDensity / density;
    }
}- 1
- 2
- 3
- 4
- 5
- 6
- 7
- 8
- 9
- 10
可以看到,BitmapFactory.Options对象的inScaled、inDensity、inTargetDensity、screenDensity四个值共同决定了bitmap是否被缩放以及缩放的倍数。
下面回到java部分的代码继续分析
为什么在drawable文件夹的图片会被缩放而SD卡、assets的图片不会
现在要解决这个问题就是要看BitmapFactory.Options对象的inScaled、inDensity、inTargetDensity、screenDensity四个值是怎样被赋值了
之前提到过,inScaled默认值为true
public Options() {
    inDither = false;
    inScaled = true;
    inPremultiplied = true;
}- 1
- 2
- 3
- 4
- 5
decodeFile方法在调用本地方法前调用会decodeStream和decodeStreamInternal
public static Bitmap decodeStream(InputStream is, Rect outPadding, Options opts) {
    // we don't throw in this case, thus allowing the caller to only check
    // the cache, and not force the image to be decoded.
    if (is == null) {
        return null;
    }

    Bitmap bm = null;

    Trace.traceBegin(Trace.TRACE_TAG_GRAPHICS, "decodeBitmap");
    try {
        if (is instanceof AssetManager.AssetInputStream) {
            final long asset = ((AssetManager.AssetInputStream) is).getNativeAsset();
            bm = nativeDecodeAsset(asset, outPadding, opts);
        } else {
            bm = decodeStreamInternal(is, outPadding, opts);
        }

        if (bm == null && opts != null && opts.inBitmap != null) {
            throw new IllegalArgumentException("Problem decoding into existing bitmap");
        }

        setDensityFromOptions(bm, opts);
    } finally {
        Trace.traceEnd(Trace.TRACE_TAG_GRAPHICS);
    }

    return bm;
}

private static Bitmap decodeStreamInternal(InputStream is, Rect outPadding, Options opts) {
    // ASSERT(is != null);
    byte [] tempStorage = null;
    if (opts != null) tempStorage = opts.inTempStorage;
    if (tempStorage == null) tempStorage = new byte[DECODE_BUFFER_SIZE];
    return nativeDecodeStream(is, tempStorage, outPadding, opts);
}- 1
- 2
- 3
- 4
- 5
- 6
- 7
- 8
- 9
- 10
- 11
- 12
- 13
- 14
- 15
- 16
- 17
- 18
- 19
- 20
- 21
- 22
- 23
- 24
- 25
- 26
- 27
- 28
- 29
- 30
- 31
- 32
- 33
- 34
- 35
- 36
- 37
可以看到,如果opts直到调用本地方法之前也没有并没有改变,故加载SD卡的图片和assets的图片并不会被缩放(加载assets的图片对应的本地方法为nativeDecodeAsset,最后都会调用doDecode)
decodeResource方法的调用栈为 decodeResource->decodeResourceStream->decodeStream,后面就跟之前的一样了,其中decodeResourceStream方法如下
/**
 * Decode a new Bitmap from an InputStream. This InputStream was obtained from
 * resources, which we pass to be able to scale the bitmap accordingly.
 */
public static Bitmap decodeResourceStream(Resources res, TypedValue value,
        InputStream is, Rect pad, Options opts) {

    if (opts == null) {
        opts = new Options();
    }

    if (opts.inDensity == 0 && value != null) {
        final int density = value.density;
        if (density == TypedValue.DENSITY_DEFAULT) {
            opts.inDensity = DisplayMetrics.DENSITY_DEFAULT;
        } else if (density != TypedValue.DENSITY_NONE) {
            opts.inDensity = density;
        }
    }

    if (opts.inTargetDensity == 0 && res != null) {
        opts.inTargetDensity = res.getDisplayMetrics().densityDpi;
    }

    return decodeStream(is, pad, opts);
}- 1
- 2
- 3
- 4
- 5
- 6
- 7
- 8
- 9
- 10
- 11
- 12
- 13
- 14
- 15
- 16
- 17
- 18
- 19
- 20
- 21
- 22
- 23
- 24
- 25
- 26
方法的注释已经提示此方法会缩放bitmap了,哈哈
在这里,opts对象的内容被改变了inDensity和inTargetDensity被赋值了,具体来说inDensity被赋值成资源对应的屏幕dpi值,而inTargetDensity则被赋值为当前设备的屏幕的dpi。
我们知道,android系统去获取资源的时候,会根据屏幕的密度去选取最适合的资源,也就是对应屏幕密度的资源,所以才有了drawable-mdpi、drawable-hdpi、drawable-xhdpi等目录,放在对应目录的资源,加载的时候都会记录其对应的密度等信息,存放在TypedValue的对象里,在decodeResource方法里有如下代码
final TypedValue value = new TypedValue();
is = res.openRawResource(id, value);
bm = decodeResourceStream(res, value, is, null, opts);- 1
- 2
- 3