Spring Boot项目技术入门级使用教程
前言
由于本人并没有经常使用Spring Boot项目,没有去阅读源码,此篇博客仅仅是入门级别的使用教程,为了在想简单使用Spring Boot项目时可以用上。
创建springboot项目
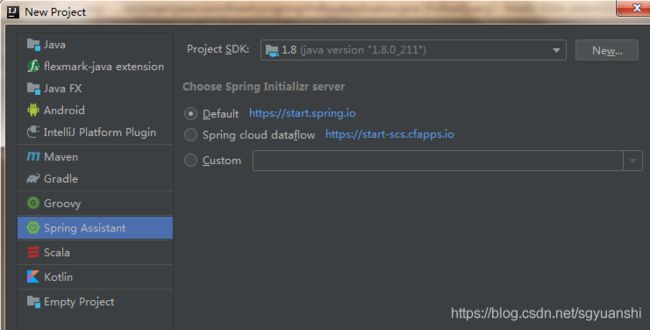
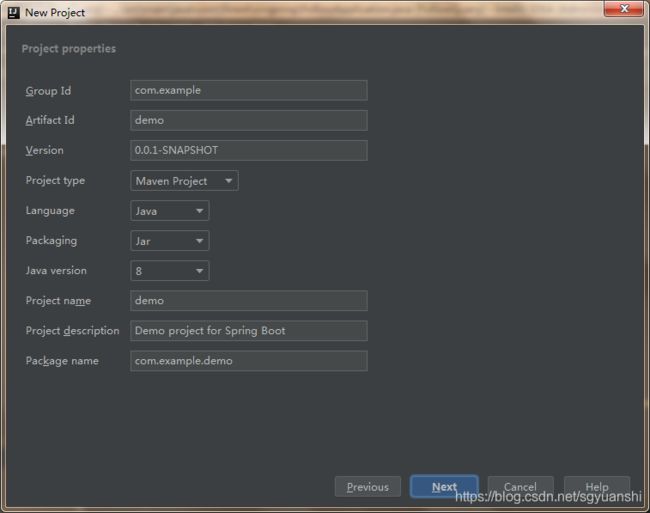
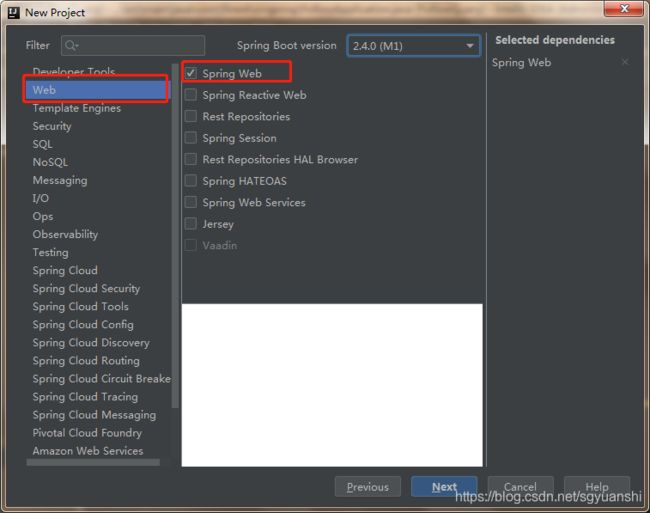
在IDEA安装插件:Spring Assistant。然后按平时的操作新建项目New Project…


项目创建之后会自动生成一个启动类,用于springboot项目的启动。
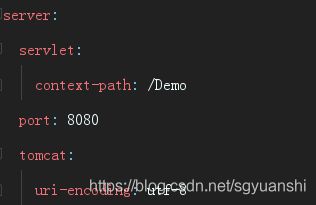
接着,我们在resources目录下,新建一个application.yml文件,用于springboot相关配置或其他参数配置。
这里我们定义端口号为8080,项目的访问路径为Demo,可以不加。
定义接口
一般我们的接口类都会放在controller包。
首先,我们需要在类的前面注入
@RestController @RequestMapping("/test")
接着,定义一个接口方法,并且注入@RequestMapping(value = "/hello", produces = "application/json;charset=UTF-8")。
其中"test"表示类的路径,"hello"表示接口的名称。
如下代码,在这个DemoController中我们新建了一个test的接口,传入的参数为name和id,其中name是必须要传的,用@RequestParam(required = true)来修饰。
注意:这里决定接口名称的是注解中的value,不是方法名
import org.springframework.web.bind.annotation.RequestMapping;
import org.springframework.web.bind.annotation.RequestParam;
import org.springframework.web.bind.annotation.RestController;


@RestController
@RequestMapping("/test")
public class DemoController {

    @RequestMapping(value = "/hello", produces = "application/json;charset=UTF-8")
    public String hello(@RequestParam(required = true) String name, String id){
        return "hello -->" + name + ": " + id;
    }

}
这样,项目启动之后我们就可以刚才定义的接口了。
接口的路径格式:IP+端口号+项目的路径+类的路径+接口名称+参数
(IP当然就是你项目部署的机器ip了,项目的路径在上面提到的配置文件中application.yml)
预加载
类预加载@Component
有时候,我们想将一些操作在项目启动的时候完成,这个时候就可以用到这个注解:@Component,它是一种通用组件模式注解,被标注的类会交由spring管理,在项目启动时,类会一起被初始化,那么类中的静态属性赋值和静态方法块也会执行。
package com.example.demo.business;

import org.springframework.beans.factory.annotation.Value;
import org.springframework.stereotype.Component;


@Component
public class Worker {

    static{
        String str = "啊啊啊啊啊啊啊啊啊啊啊啊啊啊啊啊啊啊啊啊啊啊啊";
        System.out.println(str);
    }

}
方法预加载@PostConstruct
类通过@Component注解交由spring管理预加载之后,只有类的静态方法块能够在项目启动的时候执行,那么类中的其他方法呢?
答案就是给方法注入@PostConstruct注解。
@PostConstruct
private void test(){
    System.out.println("=========PostConstruct Test");
}
读取yml配置文件参数
例如,我们在application.yml中增加worker.name
@Value
第一种方法,我们可以通过@Value注解。
在Controller注解注入的类中,只能把参数赋值给成员变量,不能是静态变量。
@Value("${worker.name:#{null}}")
private String workerName;
如果是在Component注解注入的类,那么情况就相反了,只能是静态变量,不能是成员变量了。
并且必须要有set方法,@Value是注入set方法,不是注入变量。
static String name;

@Value("${worker.name:#{null}}")
public void setName(String name) { // 不能是静态方法,即static修饰
    Worker.name = name; // Worker是当前的类名
}
@ConfigurationProperties+@Autowired
第二种方法,是通过@ConfigurationProperties+@Autowired与javabean结合使用。
首先,在application.yml中增加student类的相关配置
接着,在工程中新建一个Student类
import org.springframework.boot.context.properties.ConfigurationProperties;
import org.springframework.context.annotation.Primary;
import org.springframework.stereotype.Component;


@Component
@Primary
@ConfigurationProperties(prefix = "student")
public class Student {

    private String name;
    private String sex;
    private String age;

    public String getName() {
        return name;
    }

    public void setName(String name) {
        this.name = name;
    }

    public String getSex() {
        return sex;
    }

    public void setSex(String sex) {
        this.sex = sex;
    }

    public String getAge() {
        return age;
    }

    public void setAge(String age) {
        this.age = age;
    }
}
这样,我们就可以在相关的类中使用了。
@Autowired
	private Student student;

@RequestMapping(value = "/hello", produces = "application/json;charset=UTF-8")
public String test(@RequestParam(required = true) String name, String id){
    System.out.println("=========>>>>>name: " + this.student.getName());
    return "hello -->" + name + ": " + id;
}
不过,通过这种方法注入的javabean只能在Controller类中持久化,在其他spring管理的类中,不能持久化,只在启动的时候生效。
举个例子吧:
import org.springframework.beans.factory.annotation.Autowired;
import org.springframework.beans.factory.annotation.Value;
import org.springframework.stereotype.Component;

import javax.annotation.PostConstruct;


@Component
public class Worker {

    @Autowired
        public Student student;

    @PostConstruct
    private void test(){
        System.out.println("=========PostConstruct Test: " + student.getName());
    }
}
我们在一个加入@Component注解的类Worker中,也用这种方法注入student配置项的javabean。通过@PostConstruct注解,在spring项目启动的同时,调用student的name属性。这样是可以正常运行的,不会出现异常的。
@RequestMapping(value = "/hello", produces = "application/json;charset=UTF-8")
public String test(@RequestParam(required = true) String name, String id){
    Worker worker = new Worker();
    System.out.println("=========>>>>>name: " + worker.student.getName());
    return "hello -->" + name + ": " + id;
}
但如果,我们在项目启动之后,再去调用Worker中student对象的name属性,这个时候程序就会抛出空指针的异常,因为student对象为null,其实就是student对象在项目启动时注入了之后没有持久化。
预加载并持久化
如果,我们想要在非Controller类中注入配置文件的javabean并进行持久化,其实我们可以通过上述提到的方法,活学活用,结合一下(投机取巧2333)
@Component
public class Worker {

    @Autowired
        private Student temp;

    public Student student;

    @PostConstruct
    private void test(){
        student = temp;
    }
}


