Springboot:配置jdk、maven、idea,使用向导快速创建SpringBoot项目
第一个springboot程序
环境约束
①jdk1.8:Spring Boot 推荐jdk1.7及以上;java version “1.8.0_112”
②maven3.x:maven 3.3以上版本;Apache Maven 3.3.9

Maven-settings.xml配置
>
>jdk-1.8 >
>
>true >
>1.8 >
>
>
>1.8 >
>1.8 >
>1.8 >
>
>
③IntelliJIDEA2017:IntelliJ IDEA 2017.2.2 x64、STS(后期需要升级更高级别,负责不支持springboot)
④SpringBoot 1.5.9.RELEASE:1.5.9;
1.修改maven配置
C:\DevTools\maven\apache-maven-3.2.2\apache-maven-3.2.2\conf

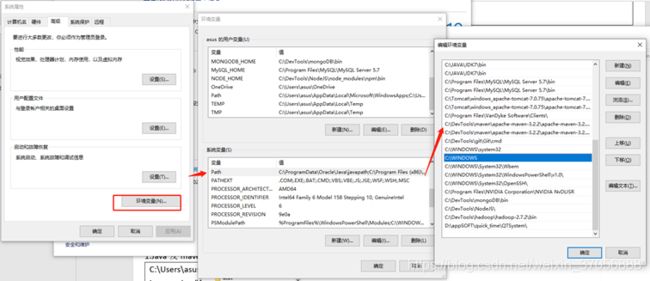
修改settings.xml
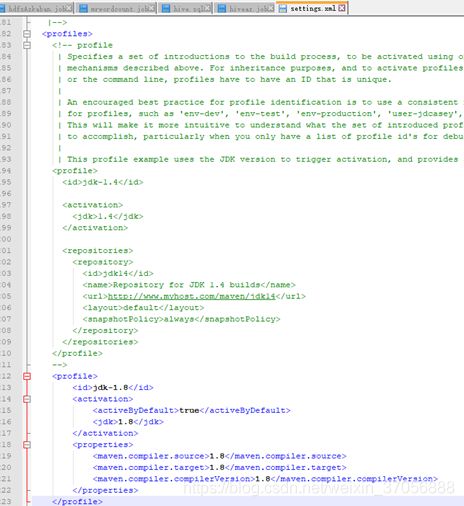
修改java环境变量

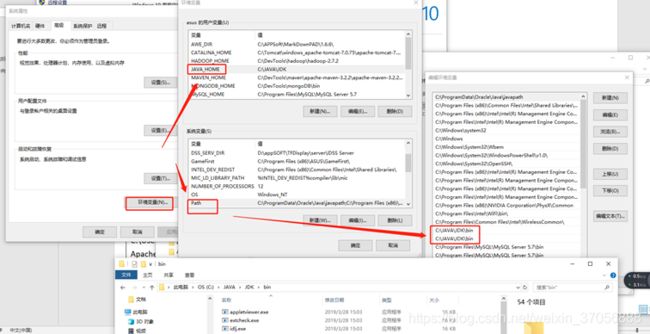
2.Java及maven配置
C:\Users\asus>java -version
java version "1.8.0_45"
Java(TM) SE Runtime Environment (build 1.8.0_45-b15)
Java HotSpot(TM) 64-Bit Server VM (build 25.45-b02, mixed mode)

C:\Users\asus>mvn -version
Apache Maven 3.2.2 (45f7c06d68e745d05611f7fd14efb6594181933e; 2014-06-17T21:51:42+08:00)
Maven home: C:\DevTools\maven\apache-maven-3.2.2\apache-maven-3.2.2\bin\..
Java version: 1.8.0_45, vendor: Oracle Corporation
Java home: C:\JAVA\JDK\jre
Default locale: zh_CN, platform encoding: GBK
OS name: "windows 8.1", version: "6.3", arch: "amd64", family: "dos"
3.Idea配置
4.导入springboot相关依赖
"1.0" encoding="UTF-8"?>
"http://maven.apache.org/POM/4.0.0"
         xmlns:xsi="http://www.w3.org/2001/XMLSchema-instance"
         xsi:schemaLocation="http://maven.apache.org/POM/4.0.0 http://maven.apache.org/xsd/maven-4.0.0.xsd">
    4.0.0</modelVersion>

    com.cevent</groupId>
    spring-boot-01-hellocevent</artifactId>
    1.0-SNAPSHOT</version>

    <!--格式化代码:ctrl+shift+F / ctrl+alt+L-->

        org.springframework.boot</groupId>
        spring-boot-starter-parent</artifactId>
        1.5.9.RELEASE</version>
    </parent>


            org.springframework.boot</groupId>
            spring-boot-starter-web</artifactId>
        </dependency>
    </dependencies>

</project>
5.helloword需求:浏览器发送hello请求,服务器接受请求并处理,响应Hello Cevent World字符串;
创建一个maven工程;(jar)
编写主程序:启动spring boot应用
编写主程序:启动spring boot应用
package com.cevent.springboot;/**
 * Created by Cevent on 2020/7/5.
 */

import org.springframework.boot.SpringApplication;
import org.springframework.boot.autoconfigure.SpringBootApplication;

/** 第一个SpringBoot Application
 * @author cevent
 * @description
 * @date 2020/7/5 21:12
 * @SpringBootApplication 声明本类为spring boot 应用主配置类
 */
@SpringBootApplication
public class HelloCeventMainAPP {
    public static void main(String[] args) {
        //1.启动Spring应用,,传入的类一定是@SpringBootApplication标注的类
        SpringApplication.run(HelloCeventMainAPP.class,args);
    }
}
6.编写相关的Controller、Service
package com.cevent.springboot.controller;/**
 * Created by Cevent on 2020/7/5.
 */

import org.springframework.stereotype.Controller;
import org.springframework.web.bind.annotation.RequestMapping;
import org.springframework.web.bind.annotation.ResponseBody;

/**
 * @author cevent
 * @description
 * @date 2020/7/5 21:17
 * @Controller 声明本类为controller类
 */
@Controller
public class HelloCeventMainAPPController {
    //@RequestMapping绑定来自浏览器的hello请求
    //@ResponseBody,将string方法的内容返回写入到浏览器
    @ResponseBody
    @RequestMapping("/hello")
    public String helloCevent(){
        return "Hello Cevent!";
    }
}
7.测试main APP启动
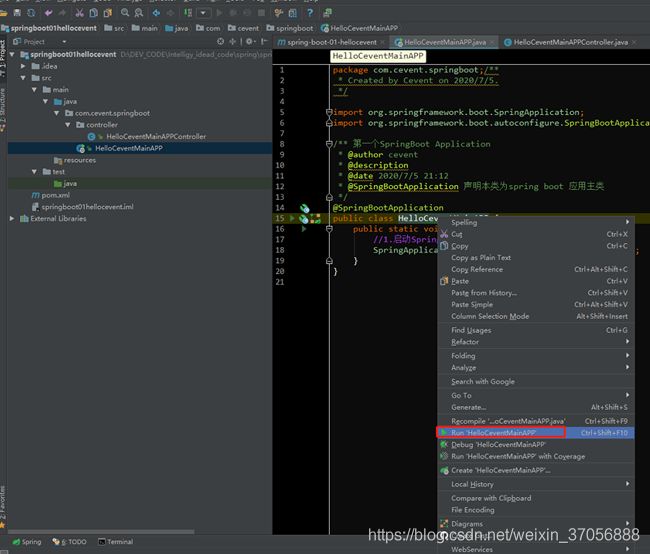

访问链接:http://localhost:8080/
没有配置tomcat,默认报错可忽略

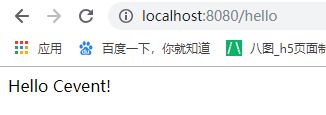
访问:http://localhost:8080/hello

8.简化部署(将工程APP打包,创建可执行的jar包)配置pom
<?xml version="1.0" encoding="UTF-8"?>
<project xmlns="http://maven.apache.org/POM/4.0.0"
         xmlns:xsi="http://www.w3.org/2001/XMLSchema-instance"
         xsi:schemaLocation="http://maven.apache.org/POM/4.0.0 http://maven.apache.org/xsd/maven-4.0.0.xsd">
    <modelVersion>4.0.0</modelVersion>

    <groupId>com.cevent</groupId>
    <artifactId>spring-boot-01-hellocevent</artifactId>
    <version>1.0-SNAPSHOT</version>

    <!--格式化代码:ctrl+shift+F / ctrl+alt+L
    父项目,导入依赖的后端jar
    -->
    <parent>
        <groupId>org.springframework.boot</groupId>
        <artifactId>spring-boot-starter-parent</artifactId>
        <version>1.5.9.RELEASE</version>
    </parent>
    <dependencies>
        <!--spring-boot-starter场景启动器,导入web模块正常运行所需要的组件,前端kjar-->
        <dependency>
            <groupId>org.springframework.boot</groupId>
            <artifactId>spring-boot-starter-web</artifactId>
        </dependency>
    </dependencies>

    <!--boot-maven插件:将应用打包为jar包-->
    <build>
        <plugins>
            <plugin>
                <groupId>org.springframework.boot</groupId>
                <artifactId>spring-boot-maven-plugin</artifactId>
            </plugin>
        </plugins>
    </build>

</project>


复制路径:D:\DEV_CODE\Intelligy_idead_code\spring\springboot\springboot01hellocevent\target
说明:windows10下,直接找到jar包文件夹所在目录,清空目录,回车进行当前目录cmd
D:\DEV_CODE\Intelligy_idead_code\spring\springboot\springboot01hellocevent\target>java -jar spring-boot-01-hellocevent-1.0-SNAPSHOT.jar

访问:http://localhost:8080/hello
9.使用向导快速创建SpringBoot
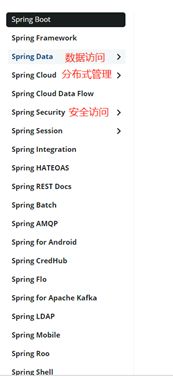
9.11-1使用Spring Initializer向导快速创建SpringBoot
IDE支持Spring的项目创建向导快速实现SpringBoot项目


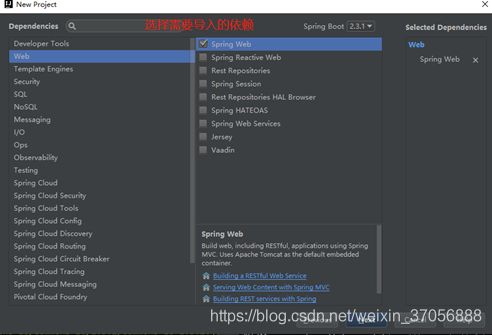
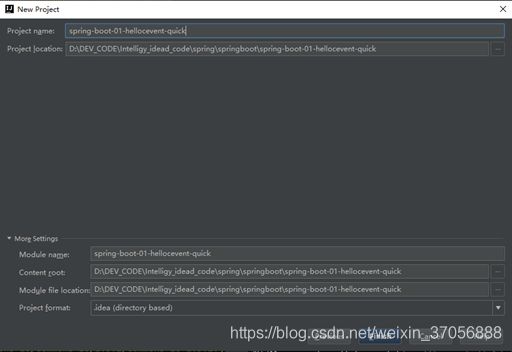
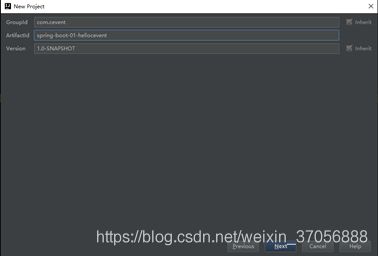
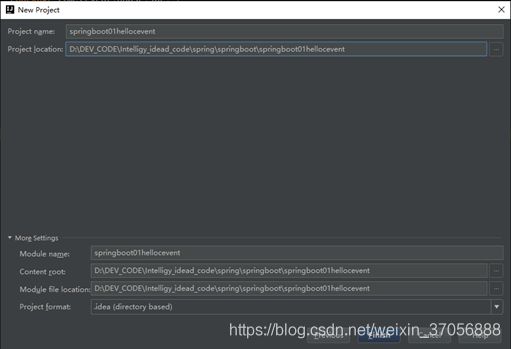
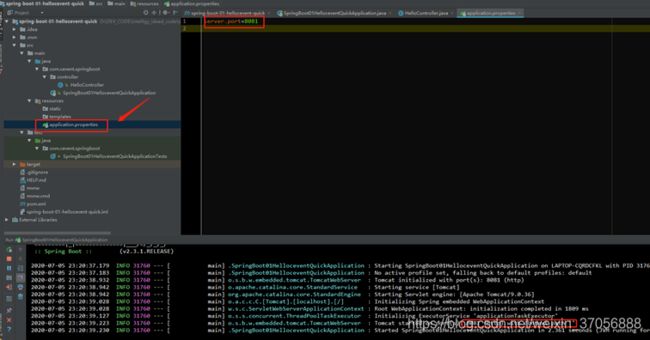
自动向导完成创建springboot项目

9.2pom配置
"1.0" encoding="UTF-8"?>
"http://maven.apache.org/POM/4.0.0" xmlns:xsi="http://www.w3.org/2001/XMLSchema-instance"
   xsi:schemaLocation="http://maven.apache.org/POM/4.0.0 https://maven.apache.org/xsd/maven-4.0.0.xsd">
   4.0.0</modelVersion>

      org.springframework.boot</groupId>
      spring-boot-starter-parent</artifactId>
      2.3.1.RELEASE</version>
      /> <!-- lookup parent from repository -->
   </parent>
   com.cevent</groupId>
   spring-boot-01-hellocevent-quick</artifactId>
   0.0.1-SNAPSHOT</version>
   spring-boot-01-hellocevent-quick</name>
   Demo project for Spring Boot</description>


      .version>1.8</java.version>
   </properties>


         org.springframework.boot</groupId>
         spring-boot-starter-web</artifactId>
      </dependency>


         org.springframework.boot</groupId>
         spring-boot-starter-test</artifactId>
         test</scope>


               org.junit.vintage</groupId>
               junit-vintage-engine</artifactId>
            </exclusion>
         </exclusions>
      </dependency>
   </dependencies>


            org.springframework.boot</groupId>
            spring-boot-maven-plugin</artifactId>
         </plugin>
      </plugins>
   </build>

</project>
9.3自动生成的mainClassAPP
自动生成的mainClassAPP
package com.cevent.springboot;

import org.springframework.boot.SpringApplication;
import org.springframework.boot.autoconfigure.SpringBootApplication;

@SpringBootApplication
public class SpringBoot01HelloceventQuickApplication {

   public static void main(String[] args) {
      SpringApplication.run(SpringBoot01HelloceventQuickApplication.class, args);
   }

}
9.4自定义Controller
自定义Controller
package com.cevent.springboot.controller;/**
 * Created by Cevent on 2020/7/5.
 */

import org.springframework.stereotype.Controller;
import org.springframework.web.bind.annotation.RequestMapping;
import org.springframework.web.bind.annotation.ResponseBody;
import org.springframework.web.bind.annotation.RestController;

/**
 * @author cevent
 * @description
 * @date 2020/7/5 23:11
 * @ResponseBody 加在类头,表示本类所有方法返回的数据都转接给浏览器(如果是对象,还可以转为json对象)
 *
 * 类头可以将@ResponseBody 和 @Controller 省略结合,变为@RestController,是spring4.2新加入的功能
 */
/*@ResponseBody
@Controller*/
@RestController
public class HelloController {

    @RequestMapping("/hello")
    public String hello(){
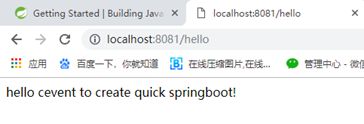
        return "hello cevent to create quick springboot!";
    }
}


