python dlib学习(十):换脸
前言
这次再用dlib来做一个很酷的应用:换脸。在百度可以搜出一大堆转载的,里面虽然讲的不是很详细(数学部分),个人感觉大多数人对于奇异值分解、仿射变换矩阵 怎么实现根本不敢兴趣,只想上代码实现功能,所以后面就省去了数学的那部分。
一篇文章的链接:教你用200行Python代码“换脸”
代码的github链接:https://github.com/matthewearl/faceswap/blob/master/faceswap.py
我很大程度上都是参考其中的代码,但是有些部分会不太一样。完整工程下载链接在文章的最后。
功能实现
第一步,我们要把零散的功能全部实现,后面验证都正确后,再把这些“零件”拼在一起。
导入包和定义路径
#coding=utf-8
import cv2
import dlib
import os
import numpy as np
import glob

current_path = os.getcwd()  # 获取当前路径
predictor_68_points_path = current_path + '/model/shape_predictor_68_face_landmarks.dat'
predictor_5_points_path = current_path + '/model/shape_predictor_5_face_landmarks.dat'
predictor_path = predictor_68_points_path# 选取人脸68个特征点检测器
face_path = current_path + '/faces/'导入包,然后获取当前路径。指定要用到的模型文件和测试图片的路径。这里的模型文件有两个,一个是人脸的68个特征点的检测器(shape_predictor_68_face_landmarks.dat),一个是5个特征点的检测器(shape_predictor_5_face_landmarks.dat)。自行选择即可。
获取特征点
程序实现
detector = dlib.get_frontal_face_detector()
predictor = dlib.shape_predictor(predictor_path)

class TooManyFaces(Exception):
    pass

class NoFace(Exception):
    pass

def get_landmark(image):
    face_rect = detector(image, 1)

    if len(face_rect) > 1:
        print('Too many faces.We only need no more than one face.')
        raise TooManyFaces
    elif len(face_rect) == 0:
        print('No face.We need at least one face.')
        raise NoFace
    else:
        print('left {0}; top {1}; right {2}; bottom {3}'.format(face_rect[0].left(), face_rect[0].top(), face_rect[0].right(), face_rect[0].bottom()))
        # box = face_rect[0]
        # shape = predictor(image, box)
        # return np.matrix([[p.x, p.y] for p in shape.parts()])
return np.matrix([[p.x, p.y] for p in predictor(image, face_rect[0]).parts()])- 获取人脸的特征点的这些套路不愿意再重复介绍了,前面的博客都有讲。偷个懒,直接上链接:python dlib学习(二):人脸特征点标定。
- 有两个异常类:NoFace和TooManyFaces,分别对应没有检测到人脸和检测到超过一个人的脸。我们只是实现简单的换脸,只需要图片中有一张脸就足够了,如果不符合情况就抛出异常。
- 还有一点,由于后面涉及矩阵计算,为了加快计算,把得到的这些特征点转换成numpy矩阵。
编写测试函数
接下来测试一下这段程序,编写一段测试程序。比较简单,直接贴代码了:
def test_get_landmark():
    for img_path in glob.glob(os.path.join(face_path, "*.jpg")):
        print("Processing file: {}".format(img_path))
        img = cv2.imread(img_path, cv2.IMREAD_COLOR)
        img = cv2.cvtColor(img, cv2.COLOR_BGR2RGB)
        landmarks = get_landmark(img)
        print landmarks
运行程序,然后会读取前面指定的faces文件夹中的所有图片:
如果图片只有一张图片,那么会正常打印出如下信息(人脸位置、所有检测到的特征点等等):
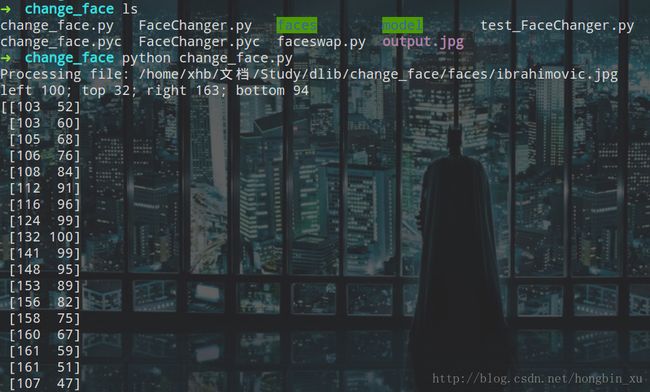
我故意放了一张有多个人脸的图片,那么程序会抛出异常直接终止:

测试通过后,再往下写程序。
使用普氏分析(Procrustes analysis)调整脸部
程序实现
因为图片中的人脸可能会有一定的倾斜,而且不同图片中人脸的位置也不一样。所以,我们需要把人脸的位置进行调整。
def transformation_from_points(points1, points2):
    points1 = points1.astype(np.float64)
    points2 = points2.astype(np.float64)

    c1 = np.mean(points1, axis=0)
    c2 = np.mean(points2, axis=0)
    points1 -= c1
    points2 -= c2

    s1 = np.std(points1)
    s2 = np.std(points2)
    points1 /= s1
    points2 /= s2

    U, S, Vt = np.linalg.svd(points1.T * points2)
    R = (U * Vt).T

    return np.vstack([np.hstack(((s2 / s1) * R, c2.T - (s2 / s1) * R * c1.T)), np.matrix([0., 0., 1.])])
这部分会比较难懂,下面是我直接从前面那篇文章摘出的相关描述。
代码分别实现了下面几步:
- 将输入矩阵转换为浮点数。这是之后步骤的必要条件。
- 每一个点集减去它的矩心。一旦为这两个新的点集找到了一个最佳的缩放和旋转方法,这两个矩心c1和c2就可以用来找到完整的解决方案。
- 同样,每一个点集除以它的标准偏差。这消除了问题的组件缩放偏差。
- 使用Singular Value Decomposition计算旋转部分。可以在维基百科上看到关于解决正交普氏问题的细节(https://en.wikipedia.org/wiki/Orthogonal_Procrustes_problem)。
- 利用仿射变换矩阵(https://en.wikipedia.org/wiki/Transformation_matrix#Affine_transformations)返回完整的转化。
实质上最后就是得到了一个转换矩阵,第一幅图片中的人脸可以通过这个转换矩阵映射到第二幅图片中,与第二幅图片中的人脸对应。(吐槽:奇异值分解直接上numpy解出来,真是省了不少事啊)
得到了转换矩阵后,就可以使用它进行映射了吧:
def wrap_image(image, M, dshape):
    output_image = np.zeros(dshape, dtype=image.dtype)
    cv2.warpAffine(image, M[:2], (dshape[1], dshape[0]), dst=output_image, flags=cv2.WARP_INVERSE_MAP, borderMode=cv2.BORDER_TRANSPARENT)
    return output_image
这里也是使用了opencv的warpAffine函数,自己从底层实现会比较复杂。python代码也得以精简。
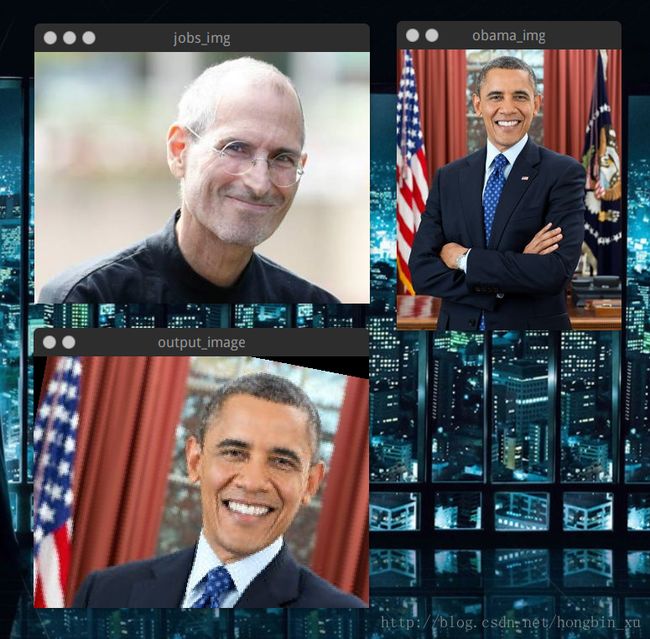
测试函数
def test_warp_image():
    jobs_image_path = os.path.join(face_path, "jobs2.jpg")
    obama_image_path = os.path.join(face_path, "obama.jpg")

    jobs_img = cv2.imread(jobs_image_path, cv2.IMREAD_COLOR)
    cv2.imshow("jobs_img", jobs_img)
    obama_img = cv2.imread(obama_image_path, cv2.IMREAD_COLOR)
    cv2.imshow("obama_img", obama_img)

    jobs_landmark = get_landmark(jobs_img)
    obama_landmark = get_landmark(obama_img)

    transformation_matrix = transformation_from_points(jobs_landmark, obama_landmark)

    print('warpping images...')

    output_image = warp_image(obama_img, transformation_matrix, dshape=jobs_img.shape)

    print('showing the results!')
    print('Please press any button to continue.')

    cv2.namedWindow("output_image", cv2.WINDOW_AUTOSIZE)
    cv2.imshow("output_image", output_image)
    cv2.waitKey(0)

cv2.destroyAllWindows()获取人脸掩模
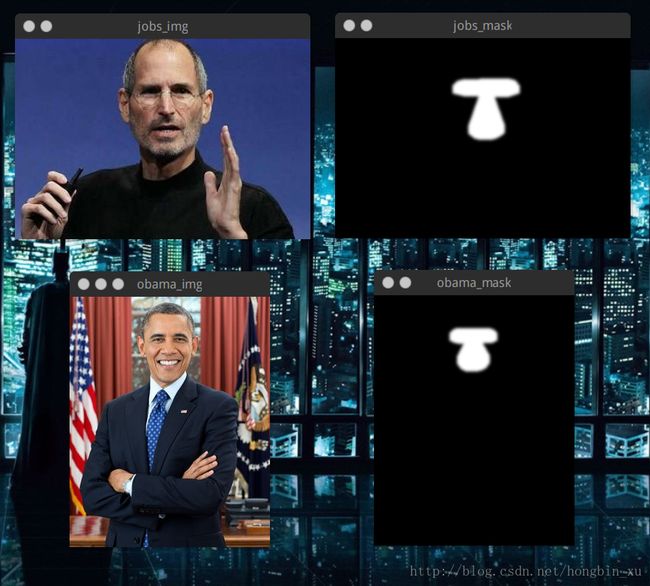
我们已经得到了对齐后的人脸图片,那么接下来的目标就是得到人脸的位置。我们可以使用一个掩模(mask)来表示,属于人脸的区域像素值为1,不属于人脸的区域像素值为0。在提取时我们直接将原图片乘以掩模,就可以得到人脸,而其余区域像素值为0;如果将原图片乘以 1−mask ,即人脸区域会是0,其余区域会保留下来。上面这两个结果相加,既可以实现初步的换脸。
程序实现
# 人脸特征点对应的器官
LEFT_EYE_POINTS = list(range(42, 48))
RIGHT_EYE_POINTS = list(range(36, 42))
LEFT_BROW_POINTS = list(range(22, 27))
RIGHT_BROW_POINTS = list(range(17, 22))
NOSE_POINTS = list(range(27, 35))
MOUTH_POINTS = list(range(48, 61))
OVERLAY_POINTS = [
    LEFT_EYE_POINTS + RIGHT_EYE_POINTS + LEFT_BROW_POINTS + RIGHT_BROW_POINTS,
    NOSE_POINTS + MOUTH_POINTS,
]
FEATHER_AMOUNT = 11

# 绘制凸包
def draw_convex_hull(img, points, color):
    points = cv2.convexHull(points)
    cv2.fillConvexPoly(img, points, color)

# 获取人脸掩模
def get_face_mask(img, landmarks):
    img = np.zeros(img.shape[:2], dtype=np.float64)
    for group in OVERLAY_POINTS:
        draw_convex_hull(img, landmarks[group], color=1)

    img = np.array([img, img, img]).transpose((1, 2, 0))

    img = (cv2.GaussianBlur(img, (FEATHER_AMOUNT, FEATHER_AMOUNT), 0) > 0) * 1.0
    img = cv2.GaussianBlur(img, (FEATHER_AMOUNT, FEATHER_AMOUNT), 0)

    return img
测试函数
def test_face_mask():
    jobs_image_path = os.path.join(face_path, "jobs.jpg")
    obama_image_path = os.path.join(face_path, "obama.jpg")

    jobs_img = cv2.imread(jobs_image_path, cv2.IMREAD_COLOR)
    obama_img = cv2.imread(obama_image_path, cv2.IMREAD_COLOR)

    jobs_landmark = get_landmark(jobs_img)
    obama_landmark = get_landmark(obama_img)

    jobs_mask = get_face_mask(jobs_img, jobs_landmark)
    obama_mask = get_face_mask(obama_img, obama_landmark)

    cv2.imshow("jobs_img", jobs_img)
    cv2.imshow("obama_img", obama_img)
    cv2.imshow("jobs_mask", jobs_mask)
    cv2.imshow("obama_mask", obama_mask)
    cv2.waitKey(0)
cv2.destroyAllWindows()颜色校正
有了前面的函数,其实我们已经实现了换脸的大部分功能了。人脸已经对齐了,我们有人脸的特征点,可以进行凸包检测来得到人脸的区域,然后把第二幅图凸包中的位置抠出来放到第一幅图片中,就可以了。但是,这样得到的结果是十分难看的,因为背景光照或者肤色等等因素的影响,看起来会十分不自然。

程序实现
COLOUR_CORRECT_BLUR_FRAC = 0.6
LEFT_EYE_POINTS = list(range(42, 48))
RIGHT_EYE_POINTS = list(range(36, 42))

def correct_colours(im1, im2, landmarks1):
    blur_amount = COLOUR_CORRECT_BLUR_FRAC * np.linalg.norm(
                              np.mean(landmarks1[LEFT_EYE_POINTS], axis=0) -
                              np.mean(landmarks1[RIGHT_EYE_POINTS], axis=0))
    blur_amount = int(blur_amount)
    if blur_amount % 2 == 0:
        blur_amount += 1
    im1_blur = cv2.GaussianBlur(im1, (blur_amount, blur_amount), 0)
    im2_blur = cv2.GaussianBlur(im2, (blur_amount, blur_amount), 0)

    # Avoid divide-by-zero errors.
    im2_blur += (128 * (im2_blur <= 1.0)).astype(im2_blur.dtype)

    return (im2.astype(np.float64) * im1_blur.astype(np.float64) /
                                                im2_blur.astype(np.float64))
实现思路就是利用高斯模糊来帮助我们校正颜色,使用im2除以im2的高斯模糊,乘以im1来校正颜色。总体来说,这个方法比较粗糙和暴力,很多因素都忽略了。结果也只能从一定程度上获得提高,有时反而会被修正的更“差”。因为有很多的影响因素,选取到一个合适的高斯核的大小,才可能取得比较理想的结果。如果太小,第一个图像的面部特征将显示在第二个图像中。过大,内核之外区域像素被覆盖,并发生变色。这里的内核用了一个0.6 *的瞳孔距离。
测试函数
这里的测试函数会用到前面所有的程序,并把过程中生成的图片全部打印出来。
注:在进行一系列的操作后,我们程序中的图像的灰度不是初始的0-255或是0-1了,我们要显示这些图片必须要先进行归一化。我在程序中调用了opencv中的cv2.normalize()函数实现。
def test_all():
    jobs_image_path = os.path.join(face_path, "jobs.jpg")
    obama_image_path = os.path.join(face_path, "obama.jpg")

    jobs_img = cv2.imread(jobs_image_path, cv2.IMREAD_COLOR)
    jobs_img = cv2.resize(jobs_img, (jobs_img.shape[1] * SCALE_FACTOR,
                                    jobs_img.shape[0] * SCALE_FACTOR))
    cv2.imshow("1", jobs_img)
    cv2.waitKey(0)
    # img1 = cv2.cvtColor(jobs_img, cv2.COLOR_BGR2RGB)
    img1 = jobs_img
    obama_img = cv2.imread(obama_image_path, cv2.IMREAD_COLOR)
    obama_img = cv2.resize(obama_img, (obama_img.shape[1] * SCALE_FACTOR,
                                    obama_img.shape[0] * SCALE_FACTOR))
    cv2.imshow("2", obama_img)
    cv2.waitKey(0)
    # img2 = cv2.cvtColor(obama_img, cv2.COLOR_BGR2RGB)
    img2 = obama_img

    landmark1 = get_landmark(img1)
    landmark2 = get_landmark(img2)

    transformation_matrix = transformation_from_points(landmark1[ALIGN_POINTS], landmark2[ALIGN_POINTS])

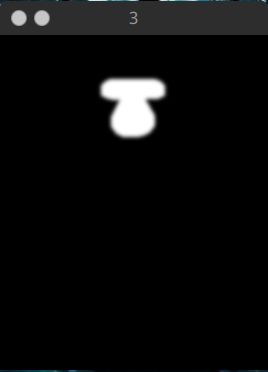
    mask = get_face_mask(img2, landmark2)
    cv2.imshow("3", mask)
    cv2.waitKey(0)
    warped_mask = warp_image(mask, transformation_matrix, img1.shape)
    cv2.imshow("4", warped_mask)
    cv2.waitKey(0)
    combined_mask = np.max([get_face_mask(img1, landmark1), warped_mask], axis=0)
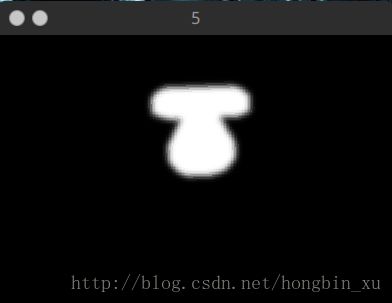
    cv2.imshow("5", combined_mask)
    cv2.waitKey(0)

    warped_img2 = warp_image(img2, transformation_matrix, img1.shape)
    cv2.imshow("6", warped_img2)
    cv2.waitKey(0)
    # warped_corrected_img2 = correct_colours(img1, warped_img2, landmark1)
    warped_corrected_img2 = correct_colours(img1, warped_img2, landmark1)
    warped_corrected_img2_temp = np.zeros(warped_corrected_img2.shape, dtype=warped_corrected_img2.dtype)
    cv2.normalize(warped_corrected_img2, warped_corrected_img2_temp, 0, 1, cv2.NORM_MINMAX)
    cv2.imshow("7", warped_corrected_img2_temp)
    cv2.waitKey(0)

    output = img1 * (1.0 - combined_mask) + warped_corrected_img2 * combined_mask
    cv2.normalize(output, output, 0, 1, cv2.NORM_MINMAX)

    cv2.imshow("8", output.astype(output.dtype))
    cv2.waitKey(0)
    cv2.destroyAllWindows()
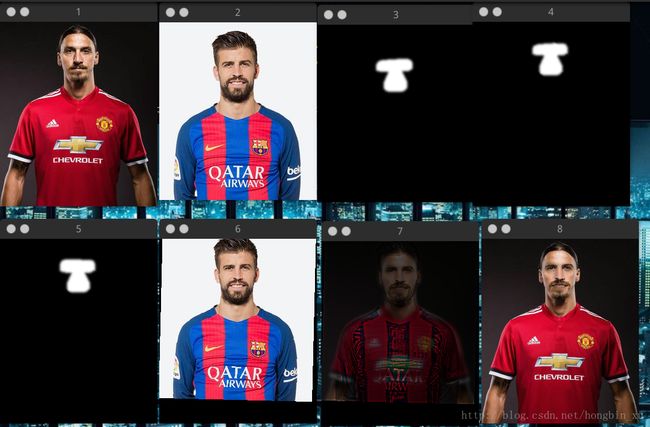
运行程序后,每次按任意键就会显示下一步的结果,下面是截图。
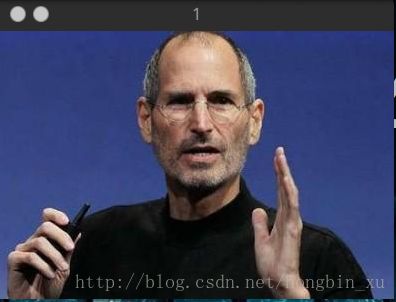
原图片1:
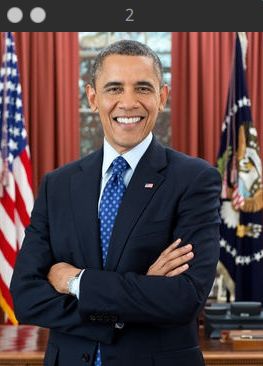
原图片2:
提取图片2掩模:
将图片2掩模映射到图片1:
将映射后的掩模与图片1的原始掩模融合:
将图片2映射到图片1:
颜色校正:
使用前面的掩模合成图片:
封装
功能实现了,但是都是函数形式,也不利于调用,可扩展性也比较差。我把前面的程序整合了一下封装成了类,可以更容易地使用。
文件名:FaceChanger.py
#coding=utf-8
import cv2
import dlib
import os
import numpy as np
import glob

class TooManyFaces(Exception):
    pass

class NoFace(Exception):
    pass

class FaceChanger(object):

    def __init__(self, which_predictor='68'):
        print('Starting your FaceChanger...')

        self.current_path = os.getcwd()
        print('Current path:{0}'.format(self.current_path))

        predictor_68_points_path = self.current_path + '/model/shape_predictor_68_face_landmarks.dat'
        predictor_5_points_path = self.current_path + '/model/shape_predictor_5_face_landmarks.dat'
        if which_predictor == '68':
            predictor_name = 'shape_predictor_68_face_landmarks.dat'
            self.predictor_path = predictor_68_points_path
        elif which_predictor == '5':
            predictor_name = 'shape_predictor_5_face_landmarks.dat'
            self.predictor_path = predictor_5_points_path
        else:
            predictor_name = 'shape_predictor_68_face_landmarks.dat'
            self.predictor_path = predictor_68_points_path
        print('Your predictor is:{0}'.format(predictor_name))

        print('Searching for faces...')
        self.face_path = self.current_path + '/faces/'
        self.face_list = glob.glob(os.path.join(self.face_path, '*.jpg'))
        print('{0} faces have been found.'.format(len(self.face_list)))
        print('Here are the names of those pictures:')
        name = self.face_list[0].strip().split('/')[-1]
        for face_file in self.face_list[1:]:
            name += ' ' + face_file.strip().split('/')[-1]
        print('%s'%(name))

        print('You can choose two of theses pictures, and change the face between them.')

        # some parameters
        self.SCALE_FACTOR = 1
        self.FEATHER_AMOUNT = 11

        self.FACE_POINTS = list(range(17, 68))
        self.MOUTH_POINTS = list(range(48, 61))
        self.RIGHT_BROW_POINTS = list(range(17, 22))
        self.LEFT_BROW_POINTS = list(range(22, 27))
        self.RIGHT_EYE_POINTS = list(range(36, 42))
        self.LEFT_EYE_POINTS = list(range(42, 48))
        self.NOSE_POINTS = list(range(27, 35))
        self.JAW_POINTS = list(range(0, 17))

        # Points used to line up the images.
        self.ALIGN_POINTS = (self.LEFT_BROW_POINTS + self.RIGHT_EYE_POINTS + self.LEFT_EYE_POINTS +
                                       self.RIGHT_BROW_POINTS + self.NOSE_POINTS + self.MOUTH_POINTS)

        # Points from the second image to overlay on the first. The convex hull of each
        # element will be overlaid.
        self.OVERLAY_POINTS = [
            self.LEFT_EYE_POINTS + self.RIGHT_EYE_POINTS + self.LEFT_BROW_POINTS + self.RIGHT_BROW_POINTS,
            self.NOSE_POINTS + self.MOUTH_POINTS,
        ]

        self.COLOUR_CORRECT_BLUR_FRAC = 0.6

        # load in models
        self.detector = dlib.get_frontal_face_detector()
        self.predictor = dlib.shape_predictor(self.predictor_path)

        self.image1 = None
        self.image2 = None
        self.landmarks1 = None
        self.landmarks2 = None

    def load_images(self, image1_name, image2_name):
        assert image1_name.strip().split('.')[-1] == 'jpg'
        assert image2_name.strip().split('.')[-1] == 'jpg'

        image1_path = os.path.join(self.face_path, image1_name)
        image2_path = os.path.join(self.face_path, image2_name)

        self.image1 = cv2.imread(image1_path, cv2.IMREAD_COLOR)
        self.image2 = cv2.imread(image2_path, cv2.IMREAD_COLOR)

        self.landmarks1 = self.get_landmark(self.image1)
        self.landmarks2 = self.get_landmark(self.image2)

    def run(self, showProcedure=False, saveResult=True):
        if self.image1 is None or self.image2 is None:
            print('You need to load two images first.')
            return

        if showProcedure == True:
            print('Showing the procedure.Press any key to continue your process.')
            cv2.imshow("1", self.image1)
            cv2.waitKey(0)
            cv2.imshow("2", self.image2)
            cv2.waitKey(0)

        M = self.transformation_from_points(\
        self.landmarks1[self.ALIGN_POINTS], self.landmarks2[self.ALIGN_POINTS])

        mask = self.get_face_mask(self.image2, self.landmarks2)
        if showProcedure == True:
            cv2.imshow("3", mask)
            cv2.waitKey(0)

        warped_mask = self.warp_image(mask, M, self.image1.shape)
        if showProcedure == True:
            cv2.imshow("4", warped_mask)
            cv2.waitKey(0)

        combined_mask = np.max([self.get_face_mask(self.image1, self.landmarks1), \
         warped_mask], axis=0)
        if showProcedure == True:
            cv2.imshow("5", combined_mask)
            cv2.waitKey(0)

        warped_img2 = self.warp_image(self.image2, M, self.image1.shape)
        if showProcedure == True:
            cv2.imshow("6", warped_img2)
            cv2.waitKey(0)

        warped_corrected_img2 = self.correct_colours(self.image1, warped_img2, self.landmarks1)
        warped_corrected_img2_temp = np.zeros(warped_corrected_img2.shape, dtype=warped_corrected_img2.dtype)
        cv2.normalize(warped_corrected_img2, warped_corrected_img2_temp, 0, 1, cv2.NORM_MINMAX)
        if showProcedure == True:
            cv2.imshow("7", warped_corrected_img2_temp)
            cv2.waitKey(0)

        output = self.image1 * (1.0 - combined_mask) + warped_corrected_img2 * combined_mask
        output_show = np.zeros(output.shape, dtype=output.dtype)
        cv2.normalize(output, output_show, 0, 1, cv2.NORM_MINMAX)
        cv2.normalize(output, output, 0, 255, cv2.NORM_MINMAX)

        if showProcedure == True:
            cv2.imshow("8", output_show.astype(output_show.dtype))
            cv2.waitKey(0)
            cv2.destroyAllWindows()

        if saveResult is True:
            cv2.imwrite("output.jpg", output)

    def get_landmark(self, image):
        face_rect = self.detector(image, 1)

        if len(face_rect) > 1:
            print('Too many faces.We only need no more than one face.')
            raise TooManyFaces
        elif len(face_rect) == 0:
            print('No face.We need at least one face.')
            raise NoFace
        else:
            print('left {0}; top {1}; right {2}; bottom {3}'.format(face_rect[0].left(), face_rect[0].top(), face_rect[0].right(), face_rect[0].bottom()))
            # box = face_rect[0]
            # shape = predictor(image, box)
            # return np.matrix([[p.x, p.y] for p in shape.parts()])
            return np.matrix([[p.x, p.y] for p in self.predictor(image, face_rect[0]).parts()])

    def transformation_from_points(self, points1, points2):
        points1 = points1.astype(np.float64)
        points2 = points2.astype(np.float64)

        c1 = np.mean(points1, axis=0)
        c2 = np.mean(points2, axis=0)
        points1 -= c1
        points2 -= c2

        s1 = np.std(points1)
        s2 = np.std(points2)
        points1 /= s1
        points2 /= s2

        U, S, Vt = np.linalg.svd(points1.T * points2)
        R = (U * Vt).T

        return np.vstack([np.hstack(((s2 / s1) * R, c2.T - (s2 / s1) * R * c1.T)), np.matrix([0., 0., 1.])])

    def warp_image(self, image, M, dshape):
        output_image = np.zeros(dshape, dtype=image.dtype)
        cv2.warpAffine(image, M[:2], (dshape[1], dshape[0]), dst=output_image, flags=cv2.WARP_INVERSE_MAP, borderMode=cv2.BORDER_TRANSPARENT)
        return output_image

    def correct_colours(self, im1, im2, landmarks1):
        blur_amount = self.COLOUR_CORRECT_BLUR_FRAC * np.linalg.norm(
                                  np.mean(landmarks1[self.LEFT_EYE_POINTS], axis=0) -
                                  np.mean(landmarks1[self.RIGHT_EYE_POINTS], axis=0))
        blur_amount = int(blur_amount)
        if blur_amount % 2 == 0:
            blur_amount += 1
        im1_blur = cv2.GaussianBlur(im1, (blur_amount, blur_amount), 0)
        im2_blur = cv2.GaussianBlur(im2, (blur_amount, blur_amount), 0)

        # Avoid divide-by-zero errors.
        im2_blur += (128 * (im2_blur <= 1.0)).astype(im2_blur.dtype)

        return (im2.astype(np.float64) * im1_blur.astype(np.float64) /
                                                    im2_blur.astype(np.float64))

    def draw_convex_hull(self, img, points, color):
        points = cv2.convexHull(points)
        cv2.fillConvexPoly(img, points, color)

    def get_face_mask(self, img, landmarks):
        img = np.zeros(img.shape[:2], dtype=np.float64)
        for group in self.OVERLAY_POINTS:
            self.draw_convex_hull(img, landmarks[group], color=1)

        img = np.array([img, img, img]).transpose((1, 2, 0))

        img = (cv2.GaussianBlur(img, (self.FEATHER_AMOUNT, self.FEATHER_AMOUNT), 0) > 0) * 1.0
        img = cv2.GaussianBlur(img, (self.FEATHER_AMOUNT, self.FEATHER_AMOUNT), 0)

        return img
这段代码就可以直接使用了。
调用方法示例如下:
from FaceChanger import *
fc = FaceChanger()
fc.load_images('ibrahimovic.jpg', 'pique.jpg')
fc.run(showProcedure=True)- 创建类的实例;
- 导入两张图片;
- 运行即可(可以选择是否显示过程中的图片);
如果选择显示图片,会显示如下结果。图片8是合成的图片。最后还会在当前文件夹保存生成的图片。
完整工程下载链接:http://download.csdn.net/download/hongbin_xu/10170440。
