(3.8)一个按键所能涉及的:内核按键标准驱动gpio-keys
/* AUTHOR: Pinus
* Creat on : 2018-10-30
* KERNEL : linux-4.4.145
* BOARD : JZ2440(arm9 s3c2440)
* REFS : 内核 gpio-keys.c
Linux驱动子系统之输入子系统(6)-gpio-keys
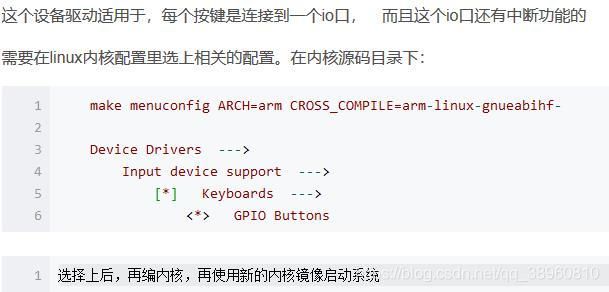
47 使用linux内核源码里的按键驱动
解析gpio-keys(kernel-4.7)
*/
分析
从入口函数开始
static int __init gpio_keys_init(void)
{
    return platform_driver_register(&gpio_keys_device_driver); // 注册平台设备
}
显然其采用了platform bus的方法设计驱动,由此也可以猜想出,我们若想要实现该驱动,理想情况下不用更改gpio-keys.c中的任何一个字,只需要编写其需要的平台设备资源。但是我们要提供哪些资源呢?显然这就需要通过阅读驱动代码确定。
static struct platform_driver gpio_keys_device_driver = {
    .probe = gpio_keys_probe, // 驱动和设备匹配后调用该函数
    .remove = gpio_keys_remove,
    .driver = {
        .name = "gpio-keys", /*platform driver和platform device通过name来匹配 */
        .pm = &gpio_keys_pm_ops, // 写了但并未具体赋值,无意义
        .of_match_table = of_match_ptr(gpio_keys_of_match), // 匹配列表
    }
};
platform_driver 是用于平台驱动注册的结构体,其中各项含义皆有注释。前文中也有分析。
当驱动和设备的.name匹配,必然会去调用gpio_keys_probe,为方便阅读只保留重要部分,完整代码可再内核源码中获取。
// probe主要完成初始化引脚,注册输入设备input_dev,在sys目录下产生相应的文件
static int gpio_keys_probe(struct platform_device *pdev)
{
    struct device *dev = &pdev->dev;
    const struct gpio_keys_platform_data *pdata = dev_get_platdata(dev); //获取具体的设备platform_data资源;可得知我们写的平台设备的platform_data成员应当提供gpio_keys_platform_data类型数据
    struct gpio_keys_drvdata *ddata; //定义一个结构体,用来整合关联各类信息
    struct input_dev *input; // 声明输入子系统结构
    ...
    input = devm_input_allocate_device(dev); // 实例化结构体
    ...
    ddata->pdata = pdata; // 将平台资源整合在,ddate中
    ddata->input = input; // 将输入子系统设备整合在,ddate中
    mutex_init(&ddata->disable_lock); // 初始化ddate中的互斥锁

    platform_set_drvdata(pdev, ddata); // 把ddate保存在平台设备pdev中 pdev->dev->driver_data = ddata
    input_set_drvdata(input, ddata);   // 同理, input->dev->driver_data = ddata

    /*设置input相关属性*/
    input->name = pdata->name ? : pdev->name; // 优先使用在设备资源里定义的name
    input->phys = "gpio-keys/input0";
    input->dev.parent = &pdev->dev;
    input->open = gpio_keys_open; // input打开操作
    input->close = gpio_keys_close; // input关闭操作

    input->id.bustype = BUS_HOST;
    input->id.vendor = 0x0001;
    input->id.product = 0x0001;
    input->id.version = 0x0100;

    /* Enable auto repeat feature of Linux input subsystem 使能输入子系统 自动重复上报的特点*/
    if (pdata->rep)
        __set_bit(EV_REP, input->evbit);

    for (i = 0; i < pdata->nbuttons; i++) { // 根据按键数目循环设置所有按键
        const struct gpio_keys_button *button = &pdata->buttons[i];
        struct gpio_button_data *bdata = &ddata->data[i];

        error = gpio_keys_setup_key(pdev, input, bdata, button); // 初始化按键,将按键信息也保存在ddate中
        ...
    }

    error = sysfs_create_group(&pdev->dev.kobj, &gpio_keys_attr_group);
    ...
    error = input_register_device(input); // 注册input设备
    ...
    device_init_wakeup(&pdev->dev, wakeup);
    ...
}
代码一开始就定义了两个很重要的结构体,弄清楚这两个结构体的组成,对理解代码有河大帮助。
其一:
const struct gpio_keys_platform_data *pdata = dev_get_platdata(dev); //获取具体的设备platform_data资源;可得知我们写的平台设备的platform_data成员应当提供
由注释也可以看出这个的作用了,他就是我们在平台设备侧应该给出的数据
/**
 * struct gpio_keys_platform_data - platform data for gpio_keys driver
 * @buttons: pointer to array of &gpio_keys_button structures
 * describing buttons attached to the device
 * @nbuttons: number of elements in @buttons array
 * @poll_interval: polling interval in msecs - for polling driver only
 * @rep: enable input subsystem auto repeat
 * @enable: platform hook for enabling the device
 * @disable: platform hook for disabling the device
 * @name: input device name
 */
struct gpio_keys_platform_data {
    struct gpio_keys_button *buttons; // 按键设置信息
    int nbuttons; // 按键数目
    unsigned int poll_interval;
    unsigned int rep:1;
    int (*enable)(struct device *dev);
    void (*disable)(struct device *dev);
    const char *name;
};这其中又有一个结构体gpio_keys_button
/**
 * struct gpio_keys_button - configuration parameters
 * @code: input event code (KEY_*, SW_*)
 * @gpio: %-1 if this key does not support gpio
 * @active_low: %true indicates that button is considered // 1 低电平有效,低电平表示按下
 * depressed when gpio is low
 * @desc: label that will be attached to button's gpio // 按键的描述 名字
 * @type: input event type 输入事件类型(%EV_KEY, %EV_SW, %EV_ABS)
 * @wakeup: configure the button as a wake-up source 配置一个按键为唤醒源
 * @debounce_interval: debounce ticks interval in msecs
 * @can_disable: %true indicates that userspace is allowed to
 * disable button via sysfs 1 表示可以在用户空间内disable
 * @value: axis value for %EV_ABS 坐标值,EV_ABS专用
 * @irq: Irq number in case of interrupt keys 中断号
 * @gpiod: GPIO descriptor
 */

struct gpio_keys_button {
    unsigned int code; //此按键对应的键码
    int gpio;     //此按键对应的一个io口
    int active_low;     // 1 低电平有效,低电平表示按下
    const char *desc;     //就是申请io口,申请中断时使用的名字
    unsigned int type;     //输入设备的事件类型,按键用EV_KEY
    int wakeup;     //表示按键按下时是否唤醒系统, 这个需要io口硬件上有这功能
    int debounce_interval; // 去抖动间隔 防抖动用,间隔多久时间
    bool can_disable;
    int value;
    unsigned int irq;
    struct gpio_desc *gpiod;
};
看其各项含义,不由让我联想到我们在学习用input子系统实现按键时所进行的设置,显然这些都应该是设备资源的一部分。
其二:struct gpio_keys_drvdata *ddata; //定义一个结构体,用来整合关联各类信息
struct gpio_keys_drvdata {
    const struct gpio_keys_platform_data *pdata; // 平台设备资源
    struct input_dev *input; // 指向定义的输入子系统设备
    struct mutex disable_lock; // 定义一个互斥锁
    struct gpio_button_data data[0]; // 按键设置信息
};它就是驱动定义的结构体,用来关联各设备相关项,其内也有一个结构体gpio_button_data
struct gpio_button_data {
    const struct gpio_keys_button *button; // 按键的设置
    struct input_dev *input;

    struct timer_list release_timer; // 防抖动定时器
    unsigned int release_delay; /* in msecs, for IRQ-only buttons ms, 按下的延迟,超过表示一直按 */
    struct delayed_work work;
    unsigned int software_debounce; /* 去抖动 in msecs, for GPIO-driven buttons */

    unsigned int irq;
    spinlock_t lock;
    bool disabled;
    bool key_pressed;
};
其中有关于定时的设置,显然是用来防抖动的。
大致介绍这两个结构体,继续向下看,
error = gpio_keys_setup_key(pdev, input, bdata, button); // 初始化按键,将按键信息也保存在ddate中
static int gpio_keys_setup_key(struct platform_device *pdev, struct input_dev *input, struct gpio_button_data *bdata, const struct gpio_keys_button *button)
{
    const char *desc = button->desc ? button->desc : "gpio_keys";
    struct device *dev = &pdev->dev;
    irq_handler_t isr;
    unsigned long irqflags;
    int irq;
    int error;

    bdata->input = input; // 关联进ddate
    bdata->button = button;
    spin_lock_init(&bdata->lock);

    if (gpio_is_valid(button->gpio)) { // 如果设置的io口有效根据io脚设置,否则根据IRQ设置,都没有返回错误
    error = devm_gpio_request_one(&pdev->dev, button->gpio, GPIOF_IN, desc); // 申请io引脚
    ...
    if (button->debounce_interval) {
        error = gpio_set_debounce(button->gpio, button->debounce_interval * 1000);
        /* use timer if gpiolib doesn't provide debounce */
        if (error < 0)
            bdata->software_debounce = button->debounce_interval;
    }

    if (button->irq) {
        bdata->irq = button->irq; // 如果设置了中断号就用没有就自动申请
    } else {
        irq = gpio_to_irq(button->gpio);
        ...
        bdata->irq = irq;
    }

    INIT_DELAYED_WORK(&bdata->work, gpio_keys_gpio_work_func);// 定时器的超时处理函数,用于按键后信息上报
    isr = gpio_keys_gpio_isr; // 按键中断handler
    irqflags = IRQF_TRIGGER_RISING | IRQF_TRIGGER_FALLING;
    ...
    input_set_capability(input, button->type ?: EV_KEY, button->code); // 设置按键产生哪一类事件下的哪一些事件 L,S,ENTER,LEFTSHIFT
    ...

    error = devm_request_any_context_irq(&pdev->dev, bdata->irq, isr, irqflags, desc, bdata); // 注册按键中断
    /* 内部调用 rc = request_any_context_irq(irq, handler, irqflags, devname, bdata);
        isr = gpio_keys_gpio_isr; // 按键中断handler
        irqflags = IRQF_TRIGGER_RISING | IRQF_TRIGGER_FALLING;
        const char *desc = button->desc ? button->desc : "gpio_keys"
        struct gpio_button_data *bdata
    ==> request_any_context_irq(bdata->irq, gpio_keys_gpio_isr, IRQF_TRIGGER_RISING | IRQF_TRIGGER_FALLING, button->desc, gpio_button_data);
    * 以前我们这么做 request_irq(IRQ_EINT0, button_irq_handle, IRQF_TRIGGER_FALLING, "S2", &pins_desc[0]);
    */
    ...
}
实现
/* realize gpio-keys @pinus 2018-10-30 */
static struct gpio_keys_button jz2440_buttons[] = {
    [0] = {
        .code = KEY_L,
        .gpio = S3C2410_GPF(0),
        .desc = "S2",
        .active_low = 1,
    },
    [1] = {
        .code = KEY_S,
        .gpio = S3C2410_GPF(2),
        .desc = "S3",
        .active_low = 1,
    },
    [2] = {
        .code = KEY_ENTER,
        .gpio = S3C2410_GPG(3),
        .desc = "S4",
        .active_low = 1,
    },
    [3] = {
        .code = KEY_LEFTSHIFT,
        .gpio = S3C2410_GPG(11),
        .desc = "S5",
        .active_low = 1,
    },
};

static struct gpio_keys_platform_data jz2440_keys_pdata = {
    .buttons = jz2440_buttons,
    .nbuttons = ARRAY_SIZE(jz2440_buttons),
};

static struct platform_device jz2440_buttons_device = {
    .name = "gpio-keys",
    .id = -1,
    .dev = {
        .platform_data = &jz2440_keys_pdata,
    },
};

static struct platform_device *smdk2440_devices[] __initdata = {
    ...
    /* modify by pinus 2018-10-30 */
    &jz2440_buttons_device,
};
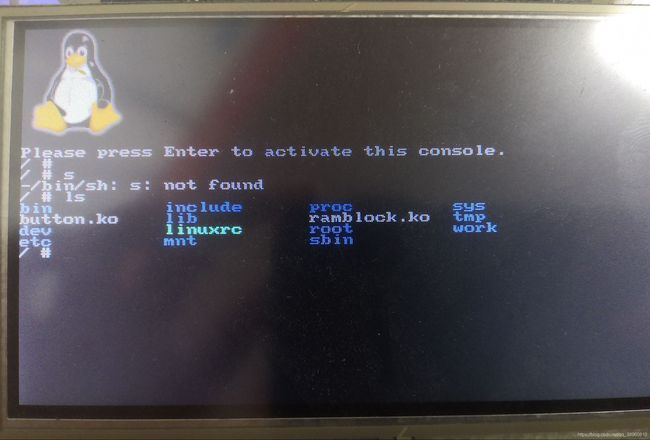
演示
以前没试过,正好实现演示一下