Linux中的火墙策略优化(iptables+firewalld)
实验环境设置
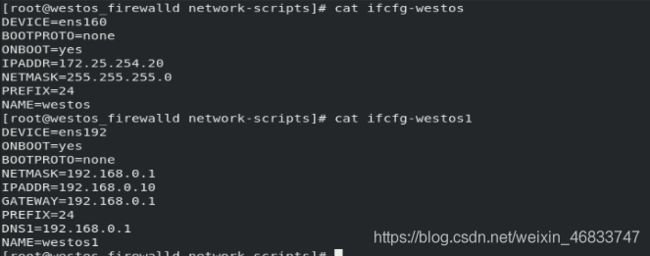
单网卡主机(内网) 172.25.254.10
双网卡主机(外网) 172.25.254.20
火墙切换方式
在rhel8中默认的火墙是firewalld
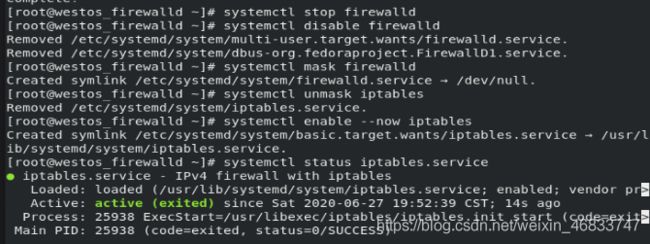
firewalld -----> iptables
dnf install iptables-services -y
systemctl stop firewalld
systemctl disable firewalld
systemctl mask firewalld
systemctl unmask iptables 第一次安装时不需使用此命令。若之前使用mask命令锁定过iptables,需用此命令解锁。
systemctl enable --now iptables
iptables ------> firewalld
dnf install firewalld -y 安装firewalld(rhel8中默认已安装)
systemctl stop iptables.service
systemctl disable iptables
systemctl mask iptables
systemctl unmask firewalld
systemctl enable --now firewalld
iptables的使用
1.火墙策略的永久保存
iptables-save > /etc/sysconfig/iptables
service iptables save
2.iptables中的常用命令
iptables
-t 指定表名称(默认表格为filter)
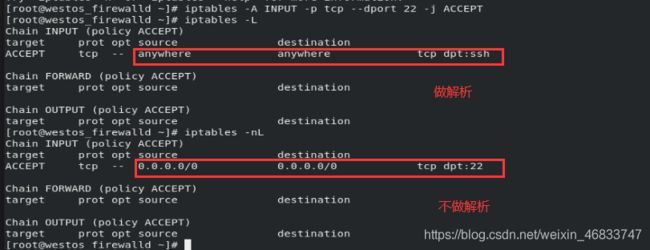
-n 不做解析
-L 查看
-A 添加策略
-p 协议
--dport 目的地端口
-s 来源
-j 动作
ACCEPT 允许
DROP 丢弃
REJECT 拒绝
SNAT 源地址转换
DNAT 目的地地址转换
-N 新建链
-E 更改链名称(奖上一步中的HHH更名为GGG)
-X 删除链(将上一步中的GGG删除)
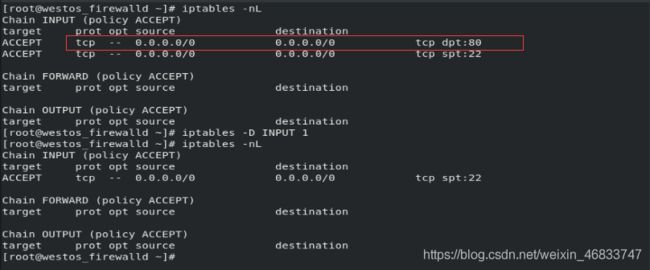
-D 删除规则(将第一行的规则删除)
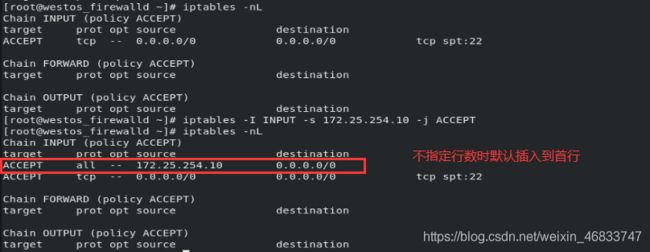
-I 插入规则
-R 更改规则
-P 更改默认规则(默认规则只能为ACCEPT或DROP,修改为其它规则会失败)
3.iptables策略优化
三种数据状态:
ESTABLISHED 正在建立连接的
RELATED 之前连接过的
NEW 从未连接的
火墙优化部署:
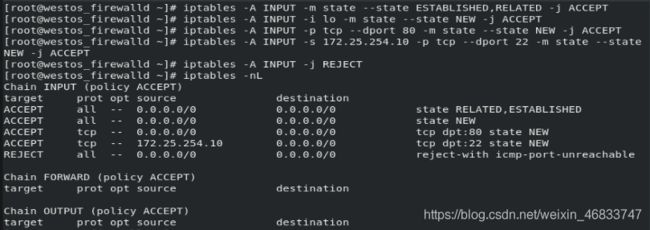
允许ESTABLISHED与RELATED状态的数据连接:
iptables -A INPUT -m state --state ESTABLISHED,RELATED -j ACCEPT
允许回环接口中NEW状态的数据连接:
iptables -A INPUT -i lo -m state --state NEW -j ACCEPT
允许状态为NEW的数据访问80端口:
iptables -A INPUT -p tcp --dport 80 -m state --state NEW -j ACCEPT
允许172.25.254.10中状态为NEW的数据访问22端口:
iptables -A INPUT -s 172.25.254.10 -p tcp --dport 22 -m state --state NEW -j ACCEPT
其余访问一概拒绝:
iptables -A INPUT -j REJECT
4.SNAT的使用
在10中:
vim ifcfg-westos 添加192.168.0.20为网关
route -n 查看网关
在20中:
iptables -t nat -F 清除nat中的设置
iptables -t nat -A POSTROUTING -o ens192 -j SNAT --to-source 192.168.0.20 将通过20的地址伪装成20
iptables -t nat -nL
在10中:
ping 192.168.0.1
ssh [email protected] 此时可ping通192.168.0.1,并可通过192.168.0.20访问192.168.0.30
在30中:
w -i 查看连接这台主机的用户
5.DNAT的使用
在20中:
iptables -t nat -A PREROUTING -i ens224 -j DNAT --to-dest 172.25.254.10 将通过20的地址访问目的地设置为10
![]()
在30中:
在10中:
w -i 查看连接这台主机的用户
Firewalld的使用
1.关于firewalld的域
trusted 接受所有的网络连接
home 用于家庭网络,允许接受ssh mdns ipp-client samba-client dhcp-client
work 工作网络 ssh ipp-client dhcp-client
public 公共网络 ssh dhcp-client
dmz 军用级网络 ssh
block 拒绝所有
drop 丢弃 所有数据全部丢弃无任何回复
internal 内部网络 ssh mdns ipp-client samba-client dhcp-client
external ipv4网络地址伪装转发 sshd
firewall-cmd --set-default-zone=trusted 将域修改为trusted
2.firewalld的设定原理和数据存储
/etc/firewalld/ 火墙配置目录
cd zones/
vim public.xml 火墙中允许的服务都在此文件中,可通过编辑此文件添加服务
firewall-cmd --permanent --add-service=http
vim trusted.xml 此文件为添加新服务后自动生成的文件
/lib/firewalld/ 火墙模块目录
2.firewalld的管理命令
firewall-cmd --state 查看火墙状态
firewall-cmd --get-active-zones 查看当前火墙中生效的域
firewall-cmd --get-default-zone-zones 查看默认域
firewall-cmd --list-all 查看默认域中的火墙策略
firewall-cmd --list-all --zone=work 查看指定域中的火墙策略
firewall-cmd --set-default-zone=trusted 将域修改为trusted
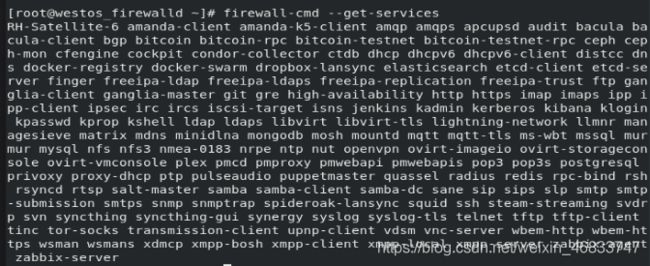
firewall-cmd --get-services 查看所有可以设定的服务
firewall-cmd --permanent --remove-service=cockpit 永久移除服务
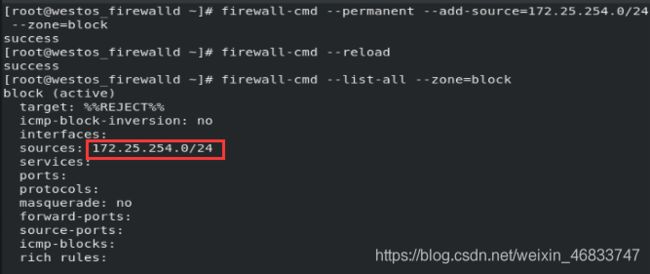
firewall-cmd --permanent --add-source=172.25.254.0/24 --zone=block 指定数据来源访问指定域(此处将来源放入block域中,使得172网段无法访问本机)
firewall-cmd --permanent --remove-source=172.25.254.0/24 --zone=block 删除指定域中的数据来源
firewall-cmd --remove-interface=ens160 --zone=public 删除指定域的网络接口
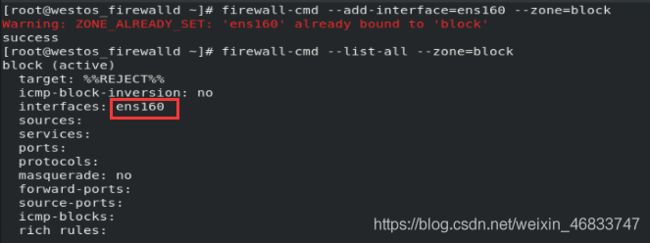
firewall-cmd --add-interface=ens160 --zone=block 添加指定域的网络接口
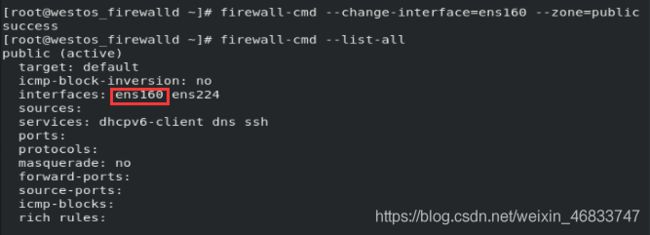
firewall-cmd --change-interface=ens160 --zone=public 更改网络接口到指定域
3.firewalld的高级规则
firewall-cmd --direct --get-all-rules 查看高级规则
firewall-cmd --direct --add-rule ipv4 filter INPUT 1 -p tcp --dport 22 -s 172.25.254.10 -j REJECT 添加高级规则,使得10无法访问本机
firewall-cmd --direct --remove-rule ipv4 filter INPUT 1 -p tcp --dport 22 -s 172.25.254.10 -j REJECT 删除此高级规则
4.firewalld中的NAT
SNAT
firewall-cmd --permanent --add-masquerade
firewall-cmd --reload
DNAT
firewall-cmd --permanent --add-forward-port=port=22:proto=tcp:toaddr=172.25.254.10
firewall-cmd --reload

