http://blog.csdn.net/qq_23547831/article/details/51285804
1.在ActivityThread中通过handleMessage来运行activity。
2.准备activity需要的配置信息(Context,主题,Instrumentation,ActivityThread),并且通过反射的机制创建
3.创建的同时会调用activity的onCreate,onStart方法。(Instrumentaion)
4.在onReume中通过调用windowManager的makeVisable方法让视图显示,wm--WindowManagerImp---updataViewLayout---viewRootImp.setLayoutParams()---scheduleTraversals-- doTraversal();
一、在ActivityThread中触法整个生命周期的流程
1.在ActivityThread有main方法。android中所有的消息都是通过handler的Binder机制来处理的。包括activity的运行,service的执行等等。
2.在ActivityThread的scheduleLaunchActivity方法中通过sendMessage方法给handler发消息,
    // we use token to identify this activity without having to send the
        // activity itself back to the activity manager. (matters more with ipc)
        @Override
        public final void scheduleLaunchActivity(Intent intent, IBinder token, int ident,
                ActivityInfo info, Configuration curConfig, Configuration overrideConfig ) {
            //刷新进程的信息
            updateProcessState(procState, false);
            ActivityClientRecord r = new ActivityClientRecord();
            r.token = token;
            r.ident = ident;
            .....
            updatePendingConfiguration(curConfig);
           //这里是handler方法的封装
            sendMessage(H.LAUNCH_ACTIVITY, r);
        }
3.在handleMessage里执行activity的构建任务
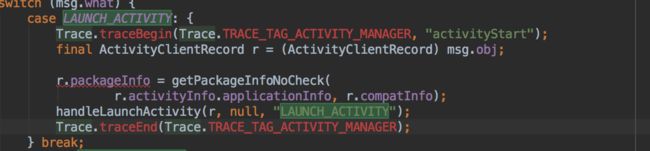
4.handlLauncherActivity
 private void handleLaunchActivity(ActivityClientRecord r, Intent customIntent, String reason) {
       //如果我们在后台准备gc了,跳过这次gc,这里也是通过handler来
 //控制的
        unscheduleGcIdler();
        mSomeActivitiesChanged = true;
        if (r.profilerInfo != null) {
            mProfiler.setProfiler(r.profilerInfo);
            mProfiler.startProfiling();
        }

        //在创建activity之前,确保创建它的信息是最新的
        handleConfigurationChanged(null, null);
        // 创建一个windowmanager的实例WindowManagerGlobal
        WindowManagerGlobal.initialize();
       //这里是创建activity的地方,onCreate,onStart 以及activity的window创建调用的地方,下面有讲解
        Activity a = performLaunchActivity(r, customIntent);
        if (a != null) {
         .......
           //紧接着调用resume方法 看下面的源码。
            handleResumeActivity(r.token, false, r.isForward,
                    !r.activity.mFinished && !r.startsNotResumed, r.lastProcessedSeq, reason);
            if (!r.activity.mFinished && r.startsNotResumed) {
              //当activity不在前台但是仍然希望自身可见的时候执行onPause。activity期望在window呈现之前调用onResume方法。在这里并不需要执行全部pause周期,因为activity manager 假定当前activity能够维持现在的状态(在后台不被回收)
                performPauseActivityIfNeeded(r, reason);
                // We need to keep around the original state, in case we need to be created again.
                // But we only do this for pre-Honeycomb apps, which always save their state when
                // pausing, so we can not have them save their state when restarting from a paused
                // state. For HC and later, we want to (and can) let the state be saved as the
                // normal part of stopping the activity.
                if (r.isPreHoneycomb()) {
                    r.state = oldState;
                }
            }
        } else {
            // If there was an error, for any reason, tell the activity manager to stop us.
            try {
                ActivityManagerNative.getDefault()
                    .finishActivity(r.token, Activity.RESULT_CANCELED, null,
                            Activity.DONT_FINISH_TASK_WITH_ACTIVITY);
            } catch (RemoteException ex) {
                throw ex.rethrowFromSystemServer();
            }
        }
    }
performLaunchActivity这里根据所有配置信息Instrumentation对象创建一个activity,Instrumentation相当于管理activity的一个对象,负责实际执行activity的方法,ActivityClientRecord对象会保存启动过的activity的信息,并通过一个arraymap维护起来,这里执行两个生命周期的方法oncreate-onstart
private Activity performLaunchActivity(ActivityClientRecord r, Intent customIntent) {
        .....
       .....
        Activity activity = null;
        try {
            //通过Instrumentation创建一个activity
            java.lang.ClassLoader cl = r.packageInfo.getClassLoader();
            activity = mInstrumentation.newActivity(
                    cl, component.getClassName(), r.intent);
       ......
        try {
           //为每一个activity创建一个application对象,以及其他的信息,
//通过activity的attch方法给activity的信息进行赋值
            Application app = r.packageInfo.makeApplication(false, mInstrumentation);
          ....
            if (activity != null) {
               //创建这个activity的上下文环境
                Context appContext = createBaseContextForActivity(r, activity);
                CharSequence title = r.activityInfo.loadLabel(appContext.getPackageManager());
                Configuration config = new Configuration(mCompatConfiguration);
                if (r.overrideConfig != null) {
                    config.updateFrom(r.overrideConfig);
                }
               //创建一个window对象
                Window window = null;
                if (r.mPendingRemoveWindow != null && r.mPreserveWindow) {
                    window = r.mPendingRemoveWindow;......
                }
                 //把所有activity需要的信息都交给它,同时创建activity需要的window,windowManager
                activity.attach(appContext, this, getInstrumentation(), r.token,  r.ident, app, r.intent, r.activityInfo, title, r.parent, r.embeddedID, r.lastNonConfigurationInstances, config,
                        r.referrer, r.voiceInteractor, window);
                if (customIntent != null) {
                    activity.mIntent = customIntent;
                }
                r.lastNonConfigurationInstances = null;
                activity.mStartedActivity = false;
              //设置主题
                int theme = r.activityInfo.getThemeResource();
                if (theme != 0) {
                    activity.setTheme(theme);
                }
                activity.mCalled = false;
                if (r.isPersistable()) {
                     //调用activity的onCreate方法
                    mInstrumentation.callActivityOnCreate(activity, r.state, r.persistentState);
                } else {
                    //调用activity的onCreate方法 这里会触发onCreate方法
                    mInstrumentation.callActivityOnCreate(activity, r.state);
                }
               ......
                if (!r.activity.mFinished) {
                    activity.performStart();
                    r.stopped = false;
                }
                if (!r.activity.mFinished) {
                    if (r.isPersistable()) {
                        if (r.state != null || r.persistentState != null) {
                            mInstrumentation.callActivityOnRestoreInstanceState(activity, r.state,
                                    r.persistentState);
                        }
                    } else if (r.state != null) {                        mInstrumentation.callActivityOnRestoreInstanceState(activity, r.state);
                    }
                }
               ........
            }
            r.paused = true;
            mActivities.put(r.token, r);
        }
.......
        }
        return activity;
    }
attach配置activity需要的内容
配置了context,application,window,以及通过window为当前activity创建了windowManager对象
final void attach(Context context, ActivityThread aThread,
Instrumentation instr, IBinder token, int ident,
Application application, Intent intent, ActivityInfo info.....) {
attachBaseContext(context);
mFragments.attachHost(null /*parent*/);
mWindow = new PhoneWindow(this);
....
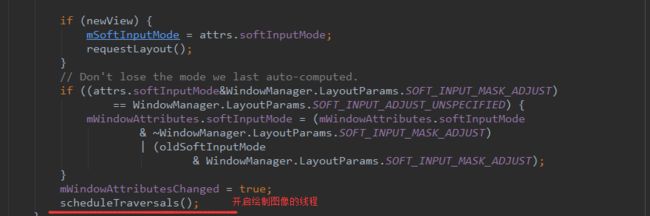
if (info.softInputMode != WindowManager.LayoutParams.SOFT_INPUT_STATE_UNSPECIFIED) {
mWindow.setSoftInputMode(info.softInputMode);
}
if (info.uiOptions != 0) {
mWindow.setUiOptions(info.uiOptions);
}
mUiThread = Thread.currentThread();
mMainThread = aThread;
mInstrumentation = instr;
mApplication = application;
mIntent = intent;
Parent = parent
....
mWindow.setWindowManager(
(WindowManager)context.getSystemService(Context.WINDOW_SERVICE),
mToken, mComponent.flattenToString(),
(info.flags & ActivityInfo.FLAG_HARDWARE_ACCELERATED) != 0);
if (mParent != null) {
mWindow.setContainer(mParent.getWindow());
}
mWindowManager = mWindow.getWindowManager();
mCurrentConfig = config;
}
windowManager实际上是由WindowManagerImpl对象来创建一个windowManagerImp对象,它集成windowmanager对象,负责真正的管理view的工作
    public void setWindowManager(WindowManager wm, IBinder appToken, String appName,
            boolean hardwareAccelerated) {
         ......
        mWindowManager = ((WindowManagerImpl)wm).createLocalWindowManager(this);
    }
handleResumeActivity调用activity的onResume以及之前的准备,如果这个activity的window还没有交给一个windowManager管理,而且没有启动新的activity,添加一个window给它。添加成功后,让这个window可见
 final void handleResumeActivity(IBinder token,
            boolean clearHide, boolean isForward, boolean reallyResume, int seq, String reason) {
        //获取当前activity的信息
        ActivityClientRecord r = mActivities.get(token);
        if (!checkAndUpdateLifecycleSeq(seq, r, "resumeActivity")) {
            return;
        }
        // 核心的地方 创建window的参数,以及onResume方法的调用
        r = performResumeActivity(token, clearHide, reason);
        if (r != null) {
            final Activity a = r.activity;
            .....
            //如果没有添加windowmanager和decoreview 创建一个
            boolean willBeVisible = !a.mStartedActivity;
          .....
            if (r.window == null && !a.mFinished && willBeVisible) {
                r.window = r.activity.getWindow();
                View decor = r.window.getDecorView();
                decor.setVisibility(View.INVISIBLE);
                ViewManager wm = a.getWindowManager();
                WindowManager.LayoutParams l = r.window.getAttributes();
                a.mDecor = decor;
                l.type = WindowManager.LayoutParams.TYPE_BASE_APPLICATION;
                l.softInputMode |= forwardBit;
                if (r.mPreserveWindow) {
                    a.mWindowAdded = true;
                    r.mPreserveWindow = false;
                    // 通过ViewRootImp的setView方法我们已经和activity建立的回调,必须通知decoreView,因为布局已经发生了改变
                    ViewRootImpl impl = decor.getViewRootImpl();
                    if (impl != null) {
                        impl.notifyChildRebuilt();
                    }
                }
                if (a.mVisibleFromClient && !a.mWindowAdded) {
                    a.mWindowAdded = true;
                   //这里就是建立联系的地方
                    wm.addView(decor, l);
                }
             //如果已经设置好了windowmanager,并且没有启动新的activity,让window显示,通过ac的makeVisiable。
            } else if (!willBeVisible) {
            // The window is now visible if it has been added, we are not
            // simply finishing, and we are not starting another activity.
            if (!r.activity.mFinished && willBeVisible
                    && r.activity.mDecor != null && !r.hideForNow) {
                if (r.newConfig != null) {
            ........
                WindowManager.LayoutParams l = r.window.getAttributes();
              ......
                    if (r.activity.mVisibleFromClient) {
                        ViewManager wm = a.getWindowManager();
                        View decor = r.window.getDecorView();
                        //这里是开始渲染视图的地方,wm--WindowManagerImp---updataViewLayout---viewRootImp.setLayoutParams()---scheduleTraversals-- doTraversal();
                        wm.updateViewLayout(decor, l);
                    }
                }
.....
                if (r.activity.mVisibleFromClient) {
                    //让activity中的window的decorView显示
                    r.activity.makeVisible();
                }
            }
   //activity的makeVisiable
    void makeVisible() {
        if (!mWindowAdded) {
            ViewManager wm = getWindowManager();
            wm.addView(mDecor, getWindow().getAttributes());
            ....
        }
        mDecor.setVisibility(View.VISIBLE);
    }
makeVisiable让显示布局
performResumeActivity
最重要的就是deliverNewIntents,这里会调用activity的onNewIntent方法:如果设置启动方式设置为SingleTop,那么onNewIntent方法被触发,拿到上一次调用记录保存的intent引用。接着执行
onRestart--onStart--OnResume。如果没有执行OnResume。
 public final ActivityClientRecord performResumeActivity(IBinder token,
            boolean clearHide) {
        ActivityClientRecord r = mActivities.get(token);
        if (r != null && !r.activity.mFinished) {
            try {
                if (r.pendingIntents != null) {
                   //这里会调用activity的onNewIntent
                    deliverNewIntents(r, r.pendingIntents);
                    r.pendingIntents = null;
                }
                if (r.pendingResults != null) {
                    deliverResults(r, r.pendingResults);
                    r.pendingResults = null;
                }
                r.activity.performResume();
               ..
            }
        return r;
    }
View开始渲染的流程
WindowManagerImp的updateLayoutParmas
 @Override
    public void updateViewLayout(View view, ViewGroup.LayoutParams params) {
        mGlobal.updateViewLayout(view, params);
    }
//WindowManagerGlobal的setLayoutParams

//setLayoutParams部分方法
//scheduleTraversals最后开开启一个线程调用doTraversal方法,doTraversal方法执行的是所有的绘制任务

setContentView
实际上调用的window的setContentView,这里的window是phonewindow。
  public void setContentView(@LayoutRes int layoutResID) {
        getWindow().setContentView(layoutResID);
        initWindowDecorActionBar();
    }
phoneWindow的inflate方法最终会调用addView/setLayoutParams,这两个方法都会调用requestLayout方法,requestLayout方法最终会调用scheduleTraversals方法
   //phonewindow的setContentView方法
    public void setContentView(int layoutResID) {
        if (mContentParent == null) {
            installDecor();
        } else {
            mContentParent.removeAllViews();
        }
        mLayoutInflater.inflate(layoutResID, mContentParent);
        final Callback cb = getCallback();
        if (cb != null) {
            cb.onContentChanged();
        }
    }