接上一节,这一节,介绍一下Angularjs的安装
这里前端,我们用bower来安装,先安装
npm install -g bower
在工程项目下创建一个.bowerrc文件
{
    "directory": "public/lib"
}
这里以后所有通过bower命令安装的库都会放在public/lib目录下
好了,我们安装Angular吧
bower install angular
bower install angular-route
这里面安装了两个包,一个是angular的主包,一个是angular的路由,因为我们需要跳转,所以这里需要装一个angular-route的包
接下来,我们把bootstrap下的css文件拷贝到public的css文件夹下,什么?public下没有css文件夹?呵呵,因为express-generator创建的工程,public下只创建了stylesheets、javascripts、images三个文件夹,我们为了方便,把stylesheets改成css,javascripts改成js,再创建一个fonts的文件夹,是放bootstrap的fonts的,这里我们就把前端依赖库安装好了,
好,接下来,我们在public/js下创建一个app.js,这是我们angular的主文件
angular.module('pollsApp', ['ngRoute', 'controllers', 'pollServices'])
.config(['$routeProvider', function($routeProvider){
    $routeProvider
        .when('/polls', {
            templateUrl: 'js/views/partials/list.html',
            controller: 'PollListCtrl'
        })
        .when('/poll/:pollId', {
            templateUrl: 'js/views/partials/item.html',
            controller: 'PollItemCtrl'
        })
        .when('/new', {
            templateUrl: 'js/views/partials/new.html',
            controller: 'PollNewCtrl'
        })
        .otherwise({
            redirectTo: '/polls'
        });
}]);
这里代码不多,主要是用了angular的路由功能,对不同的url请求返回不同的页面和控制器。
接下来要写服务
在public/js/services下创建一个services.js
'use strict'

angular.module('pollServices', [])
.factory('Poll', function($http, $q){
    return {
        all: function(){
            var delay = $q.defer();
            $http.get('/polls').success(function(response){
                delay.resolve(response);
            }).error(function(){
                delay.reject("Can't get polls data.");
            })
            return delay.promise;
        },
        get: function(pollId){
            var delay = $q.defer();
            $http.get('/poll/' + pollId).success(function(response){
                delay.resolve(response);
            }).error(function(){
                delay.reject("Can't get pollId " + pollId + " data.");
            })
            return delay.promise;
        },
        save: function(poll){
            var delay = $q.defer();
            $http.post('/pollAdd', poll).success(function(){
                delay.resolve();
            }).error(function(){
                delay.reject("Can't save the data.");
            })
            return delay.promise;
        }
    }
});
这里通过angular的工厂生成一个Poll的服务器,这里主要定义了三个方法,一个是获取全部投票信息的请求,一个是获取单一投票信息的请求,最后一个就是创建投票信息的请求,这三个请求对应的是后台创建的三个处理。
这里用了$q来进行promise的处理,当然你也可以不用$q来处理。
接下来在public/js/controllers下创建controllers.js
'use strict'

angular.module('controllers', [])
//投票列表
.controller('PollListCtrl', function($scope, Poll){
    Poll.all().then(function(data){
        $scope.polls = data;
    });
})
//投票详情
.controller('PollItemCtrl', function($scope, $routeParams, socket, Poll){
    Poll.get($routeParams.pollId).then(function(data){
        $scope.poll = data;
    })

    //投票
    $scope.vote = function(){

    };
})
//创建新的投票
.controller('PollNewCtrl', function($scope, $location, Poll){
    $scope.poll = {
        question: '',
        choices: [
        { text: '' },
        { text: '' },
        { text: '' }
        ]
    };
    //增加选项
    $scope.addChoice = function(){
        $scope.poll.choices.push({ text: '' });
    };
    //创建投票
    $scope.createPoll = function(){
        var poll = $scope.poll;
        if(poll.question.length > 0){
            var choiceCount = 0;
            poll.choices.forEach(function(choice, index) {
                if(choice.text.length > 0){
                    choiceCount++;
                }
            });
            if(choiceCount > 1){
                var newPoll = $scope.poll;
                Poll.save(newPoll).then(function(){
                    $location.path('polls');
                })
            }else{
                alert('请填写一个以上选项');
            }
        }else{
            alert('请填写详细信息');
        }
    };
});
好了,差不多了,接下来我们在public/js/partials/views下创建三个html页面
list.html
投票列表
-
没有投票信息, 是否要
创建?
item.html
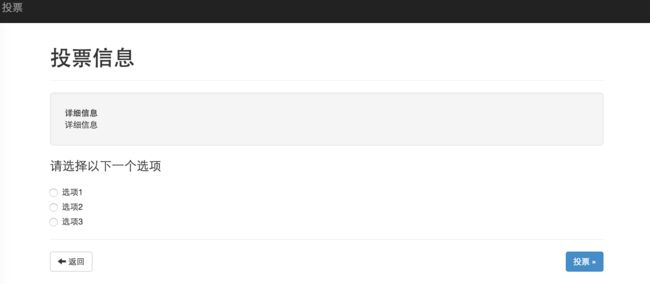
投票信息
详细信息
{{poll.question}}
请选择以下一个选项
new.html
创建新投票
views/index.jade
html
  head
    meta(charset='utf-8')
    meta(name='viewport', content='width=device-width, initial-scale=1, user-scalable=no')
    title= title
    link(rel='stylesheet', href='/css/bootstrap.min.css')
    link(rel='stylesheet', href='/css/style.css')
    script(src='lib/angular/angular.min.js')
    script(src='lib/angular-route/angular-route.min.js')
    script(src='/socket.io/socket.io.js')
    script(src='js/app.js')
    script(src='js/controllers/controllers.js')
    script(src='js/services/services.js')
  body(ng-app='pollsApp')
    nav.navbar.navbar-inverse.navbar-fixed-top(role='navigation')
      div.navbar-header
        a.navbar-brand(href='#/polls')= title
    div.container
      div(ng-view)
创建完成后,我们现在运行一下
npm start
访问http://localhost:3000
如果没有报错的话,应该显示如下:


好了,第二节结束了,第三节,我们为投票系统加入socket.io来进行实时操作。