IDEA 2020 配置 Maven 创建 Spring Boot 项目
文章目录
- Maven
- 安装配置 Maven
- 配置 Maven 仓库(仓库路径、阿里云下载)
- IDEA 配置 Maven
- IDEA 创建 springboot 项目
在新电脑上配环境总是要不停的百度,简单记录一下。。。
Maven
安装配置 Maven
前提:已经安装好 Java 运行环境,否则配置不能成功;
cmd 输入 java -version 可以看到 java 版本号再做下面的;
这里下载各个版本的Maven:http://archive.apache.org/dist/maven/maven-3/
根据 SpringBoot 官网文档,Mave 版本需要 3.3 及以上;

下载后,解压,将 bin 目录配置到环境变量中:
配置 Maven 仓库(仓库路径、阿里云下载)
所谓的仓库就是用于存放项目需要的 jar 包的,只要配好一个仓库,以后的项目都可以去使用这个仓库里的 jar 包。
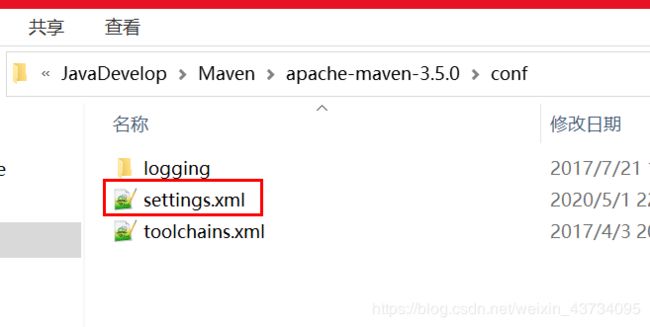
配置仓库位置:打开 Maven 根目录下的 conf/setting.xml;

Ctrl + F 搜索

配置阿里云下载:还是在 Maven 根目录下的 conf/setting.xml;
Ctrl + F 搜索
<mirror>
	<id>alimavenid>
	<mirrorOf>centralmirrorOf>
	<name>aliyun mavenname>
	<url>http://maven.aliyun.com/nexus/content/repositories/central/url>
mirror>
IDEA 配置 Maven
打开 IDEA,点击开始右下角的 Configure -> Settings 进入设置;
设置界面:Build, Execute, Deployment->Build Tools->Maven;
修改 Maven home directory: D:\JavaDevelop\Maven\apache-maven-3.5.0
修改 User settings file: D:\JavaDevelop\Maven\apache-maven-3.5.0\conf\settings.xml
只要 settings.xml 中配置的正确,Local repository 会被自动识别到;

至此,IDEA 配置 Maven 已经完全结束了,可以开始创建项目了。
IDEA 创建 springboot 项目
打开 IDEA,Create New Project,选择 Maven 项目,勾选 Create from archetype,选中 maven-archetype-webapp;

GruopId 其实就是默认的包名;

确认 Maven home directory 是我们自己的 Maven 位置,包括下面的 User settings file 和 Local repository 都是我们自己的文件目录;勾上 Override;

点击 Finsh,开始创建项目;
如果右下角跳出选项,选择 Auto Enable;
首先 pom.xml 中引入项目依赖:
这些是随时会更新的,建议去看 springboot官方文档;
<parent>
  <groupId>org.springframework.bootgroupId>
  <artifactId>spring-boot-starter-parentartifactId>
  <version>2.2.5.RELEASEversion>
parent>
<dependency>
  <groupId>org.springframework.bootgroupId>
  <artifactId>spring-boot-starter-webartifactId>
dependency>
<dependency>
  <groupId>junitgroupId>
  <artifactId>junitartifactId>
  <version>4.11version>
  <scope>testscope>
dependency>
将 springboot 配置成标准目录结构:

Application.java:
package com.yusael;

import org.springframework.boot.SpringApplication;
import org.springframework.boot.autoconfigure.EnableAutoConfiguration;
import org.springframework.context.annotation.ComponentScan;

@EnableAutoConfiguration // 作用: 开启自动配置 初始化spring环境 springmvc环境
@ComponentScan // 作用: 用来扫描相关注解 扫描范围 当前入口类所在的包及子包(com.yusal及其子包)
public class Application {
    public static void main(String[] args) {
        // springApplication: spring应用类    作用: 用来启动springboot应用
        // 参数1: 传入入口类 类对象   参数2: main函数的参数
        SpringApplication.run(Application.class, args);
    }
}
helloController.java:
package com.yusael.controller;

import org.springframework.web.bind.annotation.GetMapping;
import org.springframework.web.bind.annotation.RequestMapping;
import org.springframework.web.bind.annotation.RestController;

@RestController
@RequestMapping("/hello")
public class helloController {
    @GetMapping("/hello")
    public String hello() {
        System.out.println("hello springboot!!!");
        return "hello springboot";
    }
}
点击运行:成功跑起 spring boot 。


