Android 相册回传 相机 (更换头像效果)
我们在开发中,经常会有用户点击头像选择相册或相机更换头像功能。
思路是首先点击头像 弹框选择 相机或者相册 选择图片 裁剪 上传。
所使用的框架MVP+Retrofit+Rxjava
废话少说 直接上代码
//绑定视图
View contentView = LayoutInflater.from(UserMessage.this).inflate(popuwindow_item, null);
View inflate = contentView.inflate(UserMessage.this, R.layout.change_user_head_pic,null);
popWnd = new PopupWindow(inflate);
            popWnd.setContentView(inflate);
            //设置宽高
            popWnd.setWidth(ViewGroup.LayoutParams.MATCH_PARENT);
            popWnd.setHeight(ViewGroup.LayoutParams.WRAP_CONTENT);

            popWnd.setFocusable(true);
            popWnd.setOutsideTouchable(true);
            popWnd.update();
            popWnd.setBackgroundDrawable(new BitmapDrawable());
            //获取资源id
            Button xiangce=inflate.findViewById(R.id.xiangce);
            Button xiangji=inflate.findViewById(R.id.xiangji);
            Button quxiao = inflate.findViewById(R.id.quxiao);

            //设置popuwindow位置
            popWnd.showAtLocation(inflate, Gravity.BOTTOM, 0, 0);
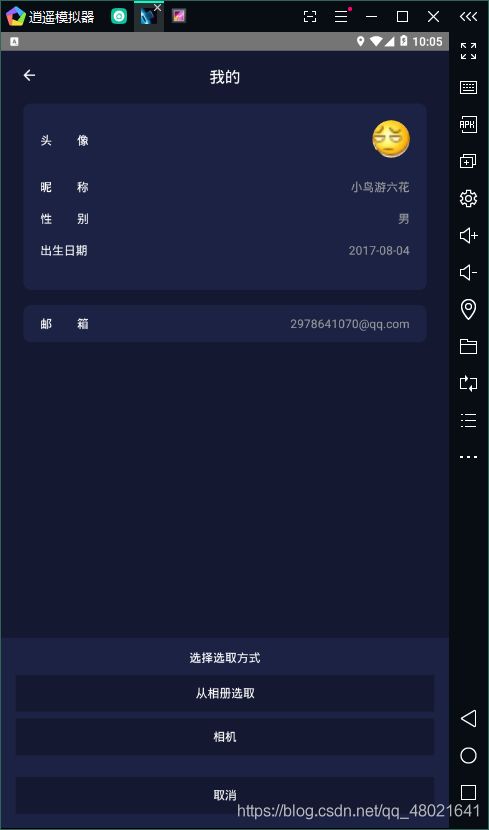
点击头像弹框popularWindow,选择相册 或者相机 亦或者取消,贴出效果图,布局就不放了。
//相册点击事件
xiangce.setOnClickListener(new View.OnClickListener() {
@Override
public void onClick(View v) {
popWnd.dismiss();
//跳转相册
Intent intent1 = new Intent(Intent.ACTION_PICK, null);
intent1.setDataAndType(MediaStore.Images.Media.EXTERNAL_CONTENT_URI, “image/*”);
                    Log.e("===",MediaStore.Images.Media.EXTERNAL_CONTENT_URI+"");
                    List resolveInfos = getPackageManager().queryIntentActivities(intent1
                            , PackageManager.MATCH_DEFAULT_ONLY);
                    //判断用户设备是否有相册
                    if (resolveInfos.size()!=0){
                        startActivityForResult(intent1, 1);
                    }else{
                        Toast.makeText(UserMessage.this,"没有相册",Toast.LENGTH_SHORT).show();
                    }

                }

            });
            //相机点击事件b
            xiangji.setOnClickListener(new View.OnClickListener() {
                @Override
                public void onClick(View v) {
                    popWnd.dismiss();
                    //跳转向机
               //     Intent intent2 = new Intent(MediaStore.ACTION_IMAGE_CAPTURE);
                    Intent intent2 = new Intent(MediaStore.ACTION_IMAGE_CAPTURE);
                    intent2.putExtra(MediaStore.EXTRA_OUTPUT, Uri.fromFile(new File(Environment.getExternalStorageDirectory(),
                            "head.jpg")));
                    intent2.addCategory("android.intent.category.DEFAULT");
                    List resolveInfos = getPackageManager().queryIntentActivities(intent2
                            , PackageManager.MATCH_DEFAULT_ONLY);
                    //判断用户设备是否有相机
                    if (resolveInfos.size()!=0){
                        startActivityForResult(intent2, 2);//采用ForResult打开
                    }else{
                        ToastUtils.setToastTextview(UserMessage.this,"没有相机");
                        ToastUtils.show();
// Toast.makeText(UserMessage.this,“没有相机”,Toast.LENGTH_SHORT).show();
}
                }
            });
隐式跳转跳转相机相册,此吐司为自定义吐司。
/**
* 判断是裁剪 还是 裁剪完毕
* @param requestCode
* @param resultCode
* @param data
*/
@Override
protected void onActivityResult(int requestCode, int resultCode, @Nullable Intent data) {
switch (requestCode) {
//裁剪相册选取的图片
case 1:
if (resultCode == RESULT_OK) {
Uri data1 = data.getData();
Log.e("===",String.valueOf(data1));
cropPhoto(data.getData());//裁剪图片
}
break;
//裁剪拍照获取的图片
case 2:
if (resultCode == RESULT_OK) {
File temp = new File(Environment.getExternalStorageDirectory()
+ “/head.jpg”);
cropPhoto(Uri.fromFile(temp));//裁剪图片
}
break;
//处理图片 调用P层请求接口
case 3:
if (data != null){
Bundle extras = data.getExtras();
                head = extras.getParcelable("data");

                if (head != null){
                    headSimple.setImageBitmap(head);

                    //BitMap转File
                    File file = new File(Environment.getExternalStorageDirectory()+"/head.jpg");
                    Log.e("===",Environment.getExternalStorageDirectory()+"/head.jpg");

                    //将要保存图片的路径

                    try {
                        BufferedOutputStream bos = new BufferedOutputStream(new FileOutputStream(file));
                        head.compress(Bitmap.CompressFormat.JPEG, 100, bos);
                        bos.flush();
                        bos.close();
                    } catch (IOException e) {
                        e.printStackTrace();
                    } catch (Exception e) {
                        e.printStackTrace();
                    }

                    getPresenter().UploadUserHeadPicPresenter(file);

                }

            }
            break;

        default:
            break;

    }

    super.onActivityResult(requestCode, resultCode, data);
}
/**
* 调用系统的裁剪
* @param uri
/
public void cropPhoto(Uri uri) {
Intent intent = new Intent(“com.android.camera.action.CROP”);
intent.setDataAndType(uri, "image/");
intent.putExtra(“crop”, “true”);
// aspectX aspectY 是宽高的比例
intent.putExtra(“aspectX”, 1);
intent.putExtra(“aspectY”, 1);
// outputX outputY 是裁剪图片宽高
intent.putExtra(“outputX”, 150);
intent.putExtra(“outputY”, 150);
intent.putExtra(“return-data”, true);
startActivityForResult(intent, 3);
}
对图片进行裁剪
网络请求

API
@Override
public void UploadUserHeadPicModel(File file, UploadUserHeadPicCallBackData uploadUserHeadPicCallBackData) {
    RequestBody requestBody = RequestBody.create(MediaType.parse("multipart/form-data"), file);

    MultipartBody.Part image = MultipartBody.Part.createFormData("image", file.getName(), requestBody);

    httpUtils.create()
            .getUploadUserHeadPic(image)
            .subscribeOn(Schedulers.io())
            .observeOn(AndroidSchedulers.mainThread())
            .subscribe(new Observer() {
                @Override
                public void onSubscribe(Disposable d) {

                }

                @Override
                public void onNext(UploadUserHeadPicBean uploadUserHeadPicBean) {
                    uploadUserHeadPicCallBackData.success(uploadUserHeadPicBean);
                }

                @Override
                public void onError(Throwable e) {

                }

                @Override
                public void onComplete() {

                }
            });

}
RequestBody requestBody = RequestBody.create(MediaType.parse(“multipart/form-data”), file);
MultipartBody.Part image = MultipartBody.Part.createFormData("image", file.getName(), requestBody);
将File文件转化为MultipartBody.Part 入参
因为本人模拟器没有相机app 所以相机效果不做展示,有兴趣者可自行实现。