Android进阶图片处理之三级缓存方案
图片的三级缓存
一、概述
一开始在学习Android的时候,处理图片的时候,每次获取图片都是直接从网络上面加载图片,
但是在开发项目的过程中,每次点击进入app里面,图片都要慢慢的再一次从网络上面加载。
给用户的体验非常不好,第一个等待的时间非常令人dan 疼
第二个给用户的流量造成了不必要的浪费
因此提出图片的三级缓存策略,
所谓的三级缓存:就是在手机加载图片的时候,
1、首先从内存中加载,
2、如果内存中没有的话,从sd卡上获取,读取到之后将图片写入到内存中
3、如果sd卡上没有的话,从网络上获取,从网络上获取之后,写入到sd卡上,还有内存中
总体效果图如下:(比较模糊了点将就看吧)
想要写一个网络加载的框架,首先来写一个内存缓存的类:
package com.jishihuitong.bitmaputil;

import android.graphics.Bitmap;
import android.util.LruCache;

/**
 * Created by hss on 2016/8/4.
 * 图片内存缓存工具类
 */
public class MemoryCache {

    /**
     * 内存缓存对象
     */
    private LruCache mLruCache;
    private static final String TAG = "MemoryCache";

    /**
     * 构造方法,初始化LruCache
     */
    public MemoryCache() {
        int maxMemory = (int) Runtime.getRuntime().maxMemory();
        int cacheMemory = maxMemory/8;
        mLruCache = new LruCache(cacheMemory){
            @Override
            protected int sizeOf(String key, Bitmap value) {
                LogUtil.d(TAG,"创建了lruCache实例");
                return value.getByteCount();
            }
        };

    }

    /**
     * 从内存中获取Bitmap对象
     * @param url key
     * @return bitmap对象
     */
    public Bitmap getBitmap(String url){
        LogUtil.d(TAG,"从内存中获取图片"+url);
        return mLruCache.get(url);
    }

    /**
     * 将图片对象按照键值对保存在内存中
     * @param url key
     * @param bitmap value
      */
    public void putBitmap(String url,Bitmap bitmap){
        LogUtil.d(TAG,"将图片保存到内存中"+url);
        mLruCache.put(url,bitmap);
    }
}
然后来写 本地缓存 实例,本地一般是保存在了sd卡上面,
但是有时候需要判断一下手机有没有sd卡,要是没有的话我们就把他存在缓存目录里面,
将文件写入到本地的话,为了安全操作,我们需要对文件名进行一次MD5加密,
这里是MD5的代码
package com.jishihuitong.bitmaputil;

import java.security.MessageDigest;

/**
 * Created by hss on 2016/8/4.
 */
public class MD5Encoder {
    public static String encode(String string) throws Exception {
        byte[] hash = MessageDigest.getInstance("MD5").digest(string.getBytes("UTF-8"));
        StringBuilder hex = new StringBuilder(hash.length * 2);
        for (byte b : hash) {
            if ((b & 0xFF) < 0x10) {
                hex.append("0");
            }
            hex.append(Integer.toHexString(b & 0xFF));
        }
        return hex.toString();
    }
}
将图片保存到本地的代码
package com.jishihuitong.bitmaputil;

import android.content.Context;
import android.graphics.Bitmap;
import android.graphics.BitmapFactory;
import android.os.Environment;

import java.io.File;
import java.io.FileInputStream;
import java.io.FileNotFoundException;
import java.io.FileOutputStream;

/**
 * Created by hss on 2016/8/4.
 */
public class SDCardCache {
    private static final String TAG = "SDCardCache";
    private static String sdcardCache;

    /**
     * 从sd卡缓存中获取图片对象
     *
     * @param url 图片URL
     * @return bitmap
     */
    public Bitmap getSDCardBitmap(Context context,String url) {
        Bitmap bitmap;
        String filename = null;
        try {
            filename = MD5Encoder.encode(url);
            LogUtil.d(TAG,"获取到文件的filename = "+filename);
            bitmap = BitmapFactory.decodeStream(new FileInputStream(new File(getSDCache(context), filename)));
            if (bitmap != null) {
                LogUtil.d(TAG,"从SD卡中获取到图片"+url);
                return bitmap;
            }
        } catch (Exception e) {
            e.printStackTrace();
            return null;
        }
        return null;
    }

    /**
     * 将图片缓存到本sd卡
     * @param context 上下文对象
     * @param url 图片URL
     * @param bitmap 图片对象
     */
    public  void saveBitmapToSDCard(Context context,String url, Bitmap bitmap) {
        String filename = null;
        try {
            filename = MD5Encoder.encode(url);
            LogUtil.d(TAG,"保存的图片的filename = "+filename);
        } catch (Exception e) {
            e.printStackTrace();
        }
        File file = new File(getSDCache(context), filename);
        File parentFile = file.getParentFile();
        if(!parentFile.exists()){
            LogUtil.d(TAG,"父目录不存在,创建");
            parentFile.mkdirs();
        }
        //将图片保存到本地
        try {
            LogUtil.d(TAG,"文件保存在了本地");
            //将图片保存到本地的方法,第一个参数 图片的格式,第二个参数图片的质量100表示最高质量
            //第三个参数 图片的流
            bitmap.compress(Bitmap.CompressFormat.PNG, 100,new FileOutputStream(file));
        } catch (FileNotFoundException e) {
            e.printStackTrace();
        }
    }

    /**
     * 获取到图片在本地缓存的目录
     * @param context 上下文对象
     * @return 缓存目录的字符串
     */
    public  String getSDCache(Context context){
        String state = Environment.getExternalStorageState();
        if(state==Environment.MEDIA_MOUNTED){
            LogUtil.d(TAG,"SD卡挂载,获取到sd卡目录");
            sdcardCache = Environment.getExternalStorageDirectory() + "cache/";
        }else{
            LogUtil.d(TAG,"SD卡不在,获取到cache目录");
            sdcardCache = context.getCacheDir().getAbsolutePath();
            LogUtil.d(TAG,"sdcardCache = "+sdcardCache);
        }
        return sdcardCache;
    }
}
然后说从网络上获取图片的操作,这个操作涉及到访问网络,这个例子里面使用的是asyncTask
在asyncTask里面,需要有在UI线程的回调,将图片对象设置到控件中,所以也需要一个ImageView对象的引用
把图片下载下来之后,还要将图片保存到本地 还有内存中,
所以该网络缓存的工具类中,需要有ImageView的引用,还有本地和内存的缓存对象
我们将他们在构造方法中进行实现
访问网络的工具类:
package com.jishihuitong.bitmaputil;

import android.content.Context;
import android.graphics.Bitmap;
import android.graphics.BitmapFactory;
import android.os.AsyncTask;
import android.os.Handler;
import android.util.Log;
import android.widget.ImageView;

import java.io.IOException;
import java.io.InputStream;
import java.net.HttpURLConnection;
import java.net.URL;

/**
 * Created by hss on 2016/8/4.
 */
public class NetCacheUtil {
    /**
     * 内存缓存对象
     */
    private MemoryCache mMemoryCache;
    /**
     * 本地缓存对象
     */
    private SDCardCache mSDCardCache;
    /**
     * ImageView对象的引用
     */
    public ImageView mImageView;
    /**
     * 全局使用的URL
     */
    public String mUrl;
    /**
     * 上下文对象
     */
    public Context context;
    public Handler handler = new Handler();
    public static final String TAG = "NetCacheUtil";

    public NetCacheUtil(Context context,MemoryCache memoryCache, SDCardCache sdcardCache) {
        this.mMemoryCache = memoryCache;
        this.mSDCardCache = sdcardCache;
        this.context = context;
    }
    public void getBitmapFromNet(ImageView view,String url){
        //开启一个任务去下载图片,并设置到view上
        new BitmapAsyncTask().execute(view,url);
    }

    /**
     * 下载图片的多线程任务
     *
     * 第一个泛型 : 参数类型  对应doInBackground()
     * 第二个泛型 : 更新进度   对应onProgressUpdate()
     * 第三个泛型 : 返回结果result   对应onPostExecute
     */
    class BitmapAsyncTask extends AsyncTask{

        @Override
        protected Bitmap doInBackground(Object... params) {
            //获取到参数
            mImageView = (ImageView) params[0];
            mUrl = (String) params[1];
            //在主线程执行,让ImageView和URL进行绑定,防止图片错乱
            handler.post(new Runnable() {
                @Override
                public void run() {
                    mImageView.setTag(mUrl);
                }
            });
            //执行下载图片的任务
            Bitmap bitmap = downloadBitmap(mUrl);
            return bitmap;
        }

        @Override
        protected void onProgressUpdate(Void... values) {
            super.onProgressUpdate(values);
        }

        @Override
        protected void onPostExecute(Bitmap bitmap) {
            //该方法将在DoInBackground之后执行,
            if(bitmap!=null){
                String url = (String) mImageView.getTag();
                //防止图片错乱,对刚才的图片URL和现在获取到的URL进行比对
                if(url.equals(mUrl)){
                    mImageView.setImageBitmap(bitmap);
                    LogUtil.d(TAG,"将图片保存在本地和内存中" +context +"      "+mUrl+"      "+bitmap  );
                    mSDCardCache.saveBitmapToSDCard(context, mUrl, bitmap);
                    mMemoryCache.putBitmap(mUrl, bitmap);
                }
            }
        }
    }

    /**
     * 链接网络下载图片,下载下来之后将图片保存在本地和内存中
     * @param mUrl
     * @return
     */
    private Bitmap downloadBitmap(String mUrl) {
        HttpURLConnection conn =null;
        try {
            conn = (HttpURLConnection) new URL(mUrl).openConnection();
            conn.setReadTimeout(5 * 1000);
            conn.setRequestMethod("GET");
            conn.setConnectTimeout(5 * 1000);
            conn.connect();
            int code = conn.getResponseCode();
            if(code == 200){
                InputStream inputStream = conn.getInputStream();
                Bitmap bitmap = BitmapFactory.decodeStream(inputStream);
                return bitmap;
            }
        } catch (IOException e) {
            e.printStackTrace();
        }finally {
            if(conn!=null){
                conn.disconnect();
                conn = null;
            }
        }
        return null;
    }
}
三个阶段的缓存工具类都准备好了,接下来定义一个类,一个方法,可以让他们一次性执行,那么这个方法就是display方法
package com.jishihuitong.bitmaputil;

import android.content.Context;
import android.graphics.Bitmap;
import android.widget.ImageView;

/**
 * Created by hss on 2016/8/4.
 *
 * 综合使用三级缓存的工具类
 */
public class BitmapUtil {

    /**
     * 内存缓存类
     */
    private final MemoryCache memoryCache;
    /**
     * SD卡缓存类
     */
    private final SDCardCache sdCardCache;
    /**
     * 网络缓存类
     */
    private final NetCacheUtil netCacheUtil;
    /**
     * 上下文对象
     */
    private Context context;

    public BitmapUtil(Context context) {
        memoryCache = new MemoryCache();
        sdCardCache = new SDCardCache();
        netCacheUtil = new NetCacheUtil(context, memoryCache, sdCardCache);
        this.context = context;
    }

    /**
     * 调用该方法可以进入图片三级缓存流程,将图片展示在UI界面上
     * @param view ImageView对象
     * @param url 图片访问路径
     */
    public void display(ImageView view,String url){
        //根URL从内存中获取,
        Bitmap memoryCacheBitmap = memoryCache.getBitmap(url);
        //如果获取到的不为空,将图片设置到控件上,返回
        if(memoryCacheBitmap!=null){
            view.setImageBitmap(memoryCacheBitmap);
            return;
        }
        //如果内存获取为空的话,再根据URL从内存中获取,
        Bitmap sdCardBitmap = sdCardCache.getSDCardBitmap(context, url);
        //如果不为空,将图片设置给控件,然后将图片保存在内存中 返回
        if(sdCardBitmap!=null){
            view.setImageBitmap(sdCardBitmap);
            memoryCache.putBitmap(url,sdCardBitmap);
            return;
        }
        //本地也没有的话就只能到网络去找了,该方法里有直接将图片设置给控件的方法
        netCacheUtil.getBitmapFromNet(view,url);
    }
}
工具类都写好之后,我们在一个activity里面简单的调用一下,
首先整个布局就是一个ListView,然后里面的item就是一个ImageView
布局代码如下
main_activity.xml:
<LinearLayout xmlns:android="http://schemas.android.com/apk/res/android"
    android:layout_width="match_parent"
    android:layout_height="wrap_content">
    <ListView
        android:layout_width="match_parent"
        android:layout_height="wrap_content"
        android:id="@+id/lv">

    ListView>
LinearLayout>
view_listview.xml
<LinearLayout xmlns:android="http://schemas.android.com/apk/res/android"
    android:layout_width="match_parent"
    android:layout_height="180dp"
    android:orientation="vertical"
    >
    <ImageView
        android:layout_width="match_parent"
        android:layout_height="180dp"
        android:id="@+id/iv"
        android:src="@mipmap/empty_photo"
        />

LinearLayout>
在MainActivity里面调用方法 让图片填充ListView
package com.jishihuitong.bitmaputil;

import android.content.Context;
import android.graphics.BitmapFactory;
import android.media.Image;
import android.support.v7.app.AppCompatActivity;
import android.os.Bundle;
import android.view.View;
import android.view.ViewGroup;
import android.widget.ArrayAdapter;
import android.widget.BaseAdapter;
import android.widget.ImageView;
import android.widget.ListAdapter;
import android.widget.ListView;
import android.widget.TextView;

import java.util.ArrayList;
import java.util.List;

public class MainActivity extends AppCompatActivity {


    private ArrayList list;
    private BitmapUtil bitmapUtil;
    private static final String TAG = "MainActivity";
    @Override
    protected void onCreate(Bundle savedInstanceState) {
        super.onCreate(savedInstanceState);
        setContentView(R.layout.activity_main);
        //准备数据
        list = new ArrayList();
        list.add("http://192.168.0.11:8080/images/10001.png");
        list.add("http://192.168.0.11:8080/images/10002.png");
        list.add("http://192.168.0.11:8080/images/10003.png");
        list.add("http://192.168.0.11:8080/images/10004.png");
        list.add("http://192.168.0.11:8080/images/10005.png");
        list.add("http://192.168.0.11:8080/images/10006.png");
        //初始化图片缓存工具类
        bitmapUtil = new BitmapUtil(this);
        ListView lv = (ListView) findViewById(R.id.lv);
        lv.setAdapter(new MyAdapter(getApplication(),0,list));
    }

    class MyAdapter extends ArrayAdapter {


        public MyAdapter(Context context, int resource, List list) {
            super(context, resource, list);
        }

        @Override
        public View getView(int position, View convertView, ViewGroup parent) {
            View view;
            ImageView iv;
            if (convertView == null) {
                view = View.inflate(getApplicationContext(), R.layout.view_listview, null);
            } else {
                view = convertView;
            }
            iv = (ImageView) view.findViewById(R.id.iv);
            iv.setImageBitmap(BitmapFactory.decodeResource(getResources(), R.mipmap.empty_photo));
            //为了防止图片乱跳,给imageView设置标记
            iv.setTag(list.get(position));
            LogUtil.d(TAG, "访问的URL为 " + list.get(position));
            //加载图片
            bitmapUtil.display(iv, list.get(position));
            return view;
        }


    }
}
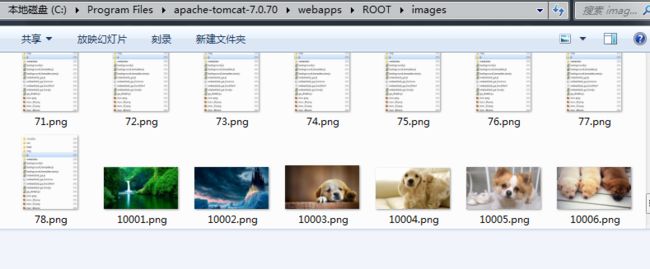
部署在tomcat上面的图片路径如图所示:
点击下载代码
