Android工程中配置OpenCV
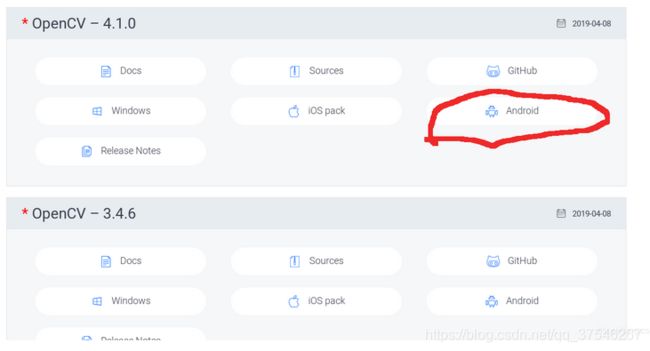
本文记录在Android studio中配置OpenCV,并利用其进行简单的图像处理,将结果图像显示出来,主要用到JNI技术。
环境安装
-
安装Android相关环境
各个系统下安装都是大同小异,安装jdk,sdk,ndk,AS,可以参考以下博客:
安装Android Studio
Ubuntu: Ubuntu18.04安装Android Studio
Windows:Windows安装Android Studio
Mac:Mac 安装Android Studio
实例
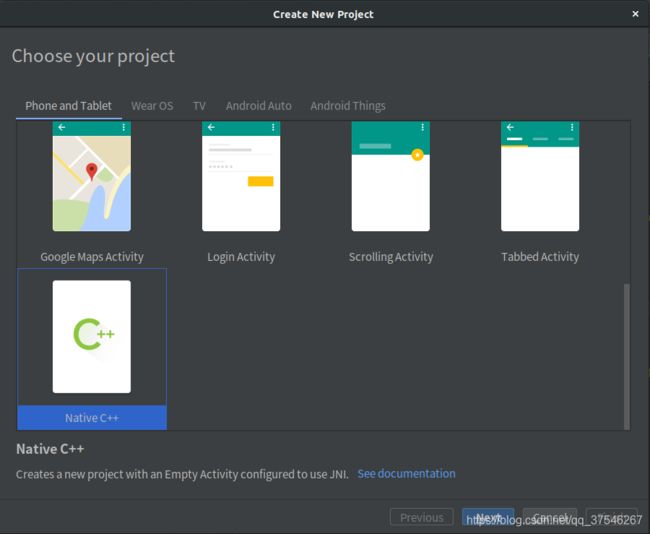
- 创建一个新项目,选择"Native C++"
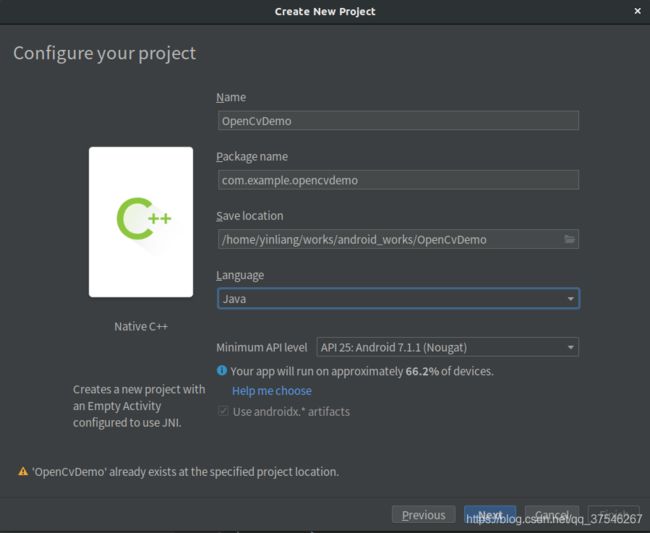
 2. 填写工程名字,包名,语言选择Java,点击下一步。
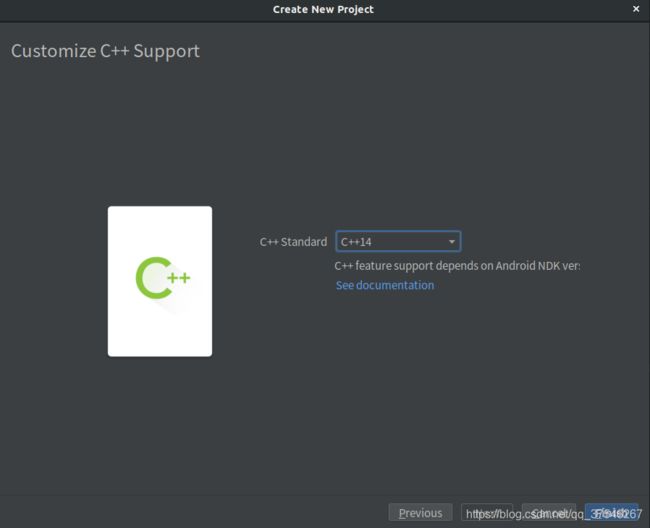
 3. 选择C++14,点击完成。
 工程新建好之后,project结构如下图所示
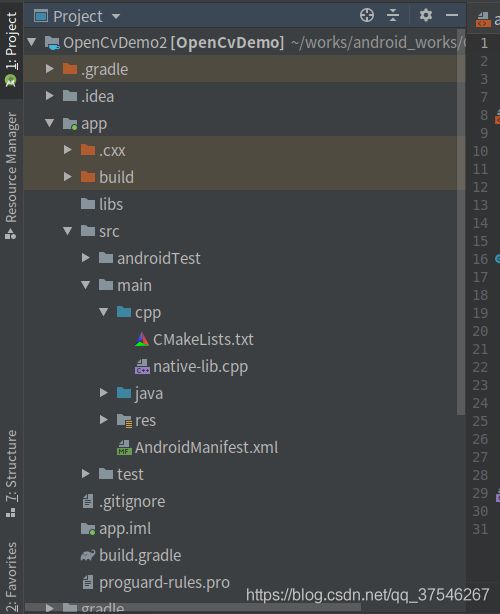 可以看到,项目里已经自动帮我们添加了cpp目录,其中包含了CMakeLists.txt文件和native-lib.cpp文件。(熟悉C++的人想必都不用解释CMake 0.0,而native-lib.cpp就是我们需要实现我们想要给JAVA调用的C++本地方法的位置)
 - 配置CMakeLists.txt
cmake_minimum_required(VERSION 3.4.1)

# ##################### OpenCV 环境 ############################
#设置OpenCV-android-sdk路径
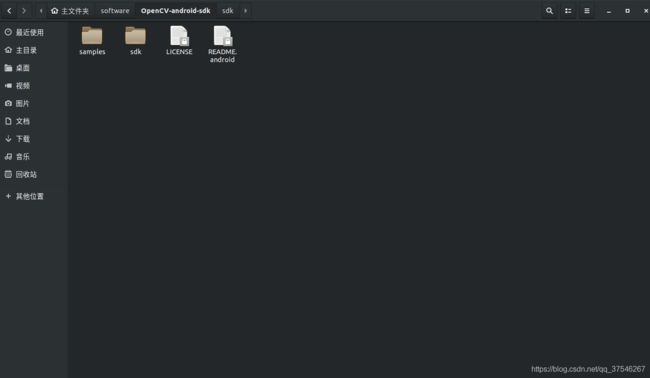
set( OpenCV_DIR /home/yinliang/software/OpenCV-android-sdk/sdk/native/jni )

find_package(OpenCV REQUIRED )
if(OpenCV_FOUND)
    include_directories(${OpenCV_INCLUDE_DIRS})
    message(STATUS "OpenCV library status:")
    message(STATUS "    version: ${OpenCV_VERSION}")
    message(STATUS "    libraries: ${OpenCV_LIBS}")
    message(STATUS "    include path: ${OpenCV_INCLUDE_DIRS}")
else(OpenCV_FOUND)
    message(FATAL_ERROR "OpenCV library not found")
endif(OpenCV_FOUND)

# ###################### 项目原生模块 ###########################

add_library( native-lib
        SHARED
        native-lib.cpp)

target_link_libraries( native-lib
        ${OpenCV_LIBS}
        log
        jnigraphics)
- 实现本地方法
这里展示opencv里面两个常用的操作:图像灰度化和边缘检测。
#include - 在MainActivity中调用
package com.example.opencvdemo;

import androidx.appcompat.app.AppCompatActivity;

import android.graphics.Bitmap;
import android.graphics.BitmapFactory;
import android.os.Bundle;
import android.view.View;
import android.widget.ImageView;
import android.widget.TextView;

public class MainActivity extends AppCompatActivity implements View.OnClickListener {

    private ImageView imageView;

    static {//加载so库
        System.loadLibrary("native-lib");
    }
    //获得Canny边缘
    native void getEdge(Object bitmap);
    //灰度化
    native void getGray(Object bitmap);

    @Override
    protected void onCreate(Bundle savedInstanceState) {
        super.onCreate(savedInstanceState);
        setContentView(R.layout.activity_main);
        imageView = findViewById(R.id.imageView);
        findViewById(R.id.show).setOnClickListener(this);
        findViewById(R.id.process).setOnClickListener(this);
        findViewById(R.id.gray).setOnClickListener(this);
    }

    @Override
    public void onClick(View v) {
        if (v.getId() == R.id.show) {
            Bitmap bitmap = BitmapFactory.decodeResource(getResources(), R.drawable.test);
            imageView.setImageBitmap(bitmap);
        }
        else if(v.getId() == R.id.gray){
            Bitmap bitmap = BitmapFactory.decodeResource(getResources(), R.drawable.test);
            getGray(bitmap);
            imageView.setImageBitmap(bitmap);
        }
        else {
            Bitmap bitmap = BitmapFactory.decodeResource(getResources(), R.drawable.test);
            getEdge(bitmap);
            imageView.setImageBitmap(bitmap);
        }
    }
    @Override
    public void onPointerCaptureChanged(boolean hasCapture) {
    }
}
- activity_main.xml文件
<RelativeLayout xmlns:android="http://schemas.android.com/apk/res/android"
android:layout_width="match_parent"
android:layout_height="match_parent">

<ImageView
    android:id="@+id/imageView"
    android:layout_width="match_parent"
    android:layout_height="match_parent" />

<LinearLayout
    android:layout_width="match_parent"
    android:layout_height="wrap_content"
    android:layout_alignParentBottom="true"
    android:orientation="horizontal">

    <Button
        android:id="@+id/show"
        android:layout_width="match_parent"
        android:layout_height="wrap_content"
        android:layout_weight="1"
        android:text="show" />

    <Button
        android:id="@+id/process"
        android:layout_width="match_parent"
        android:layout_height="wrap_content"
        android:layout_weight="1"
        android:text="process" />

    <Button
        android:id="@+id/gray"
        android:layout_width="match_parent"
        android:layout_height="wrap_content"
        android:layout_weight="1"
        android:text="gray" />
LinearLayout>

RelativeLayout>
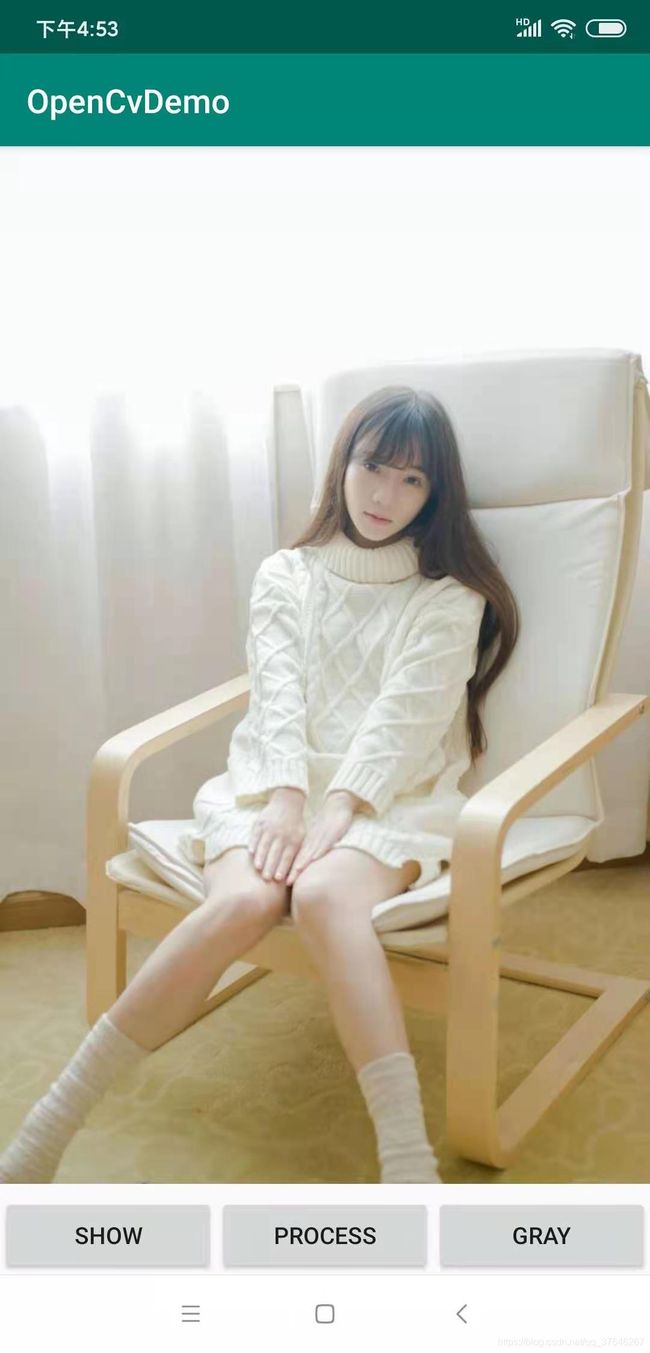
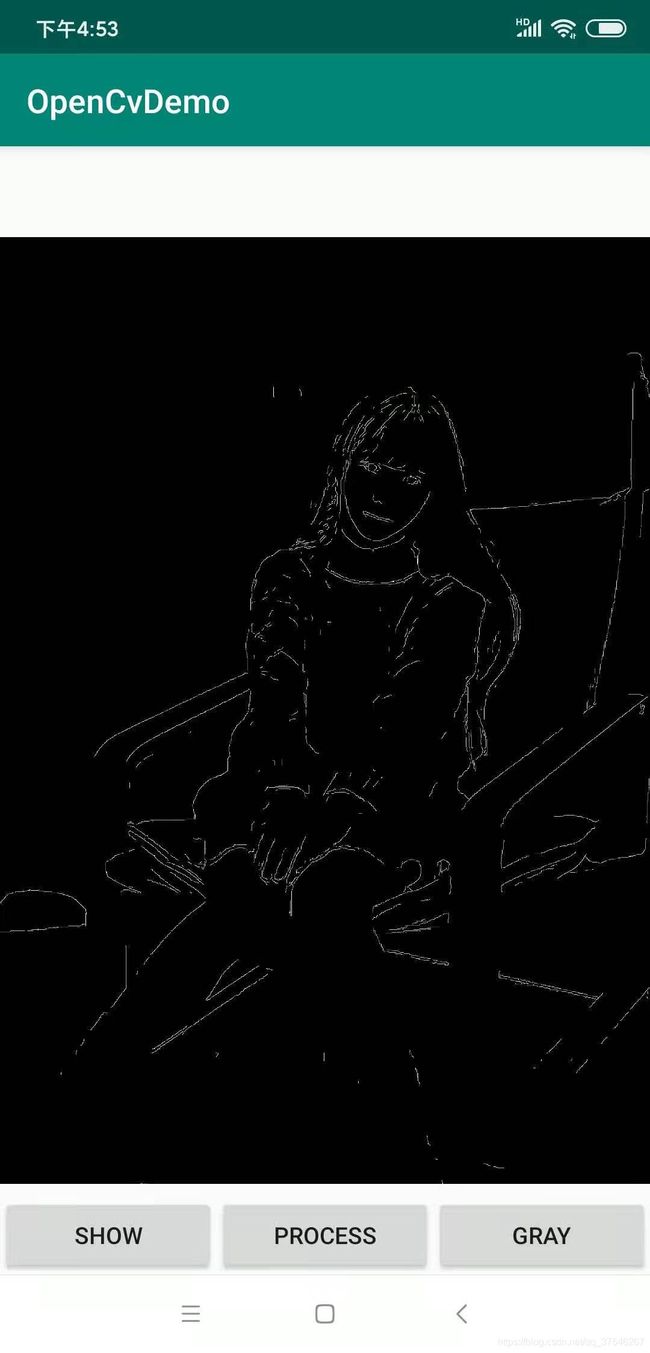
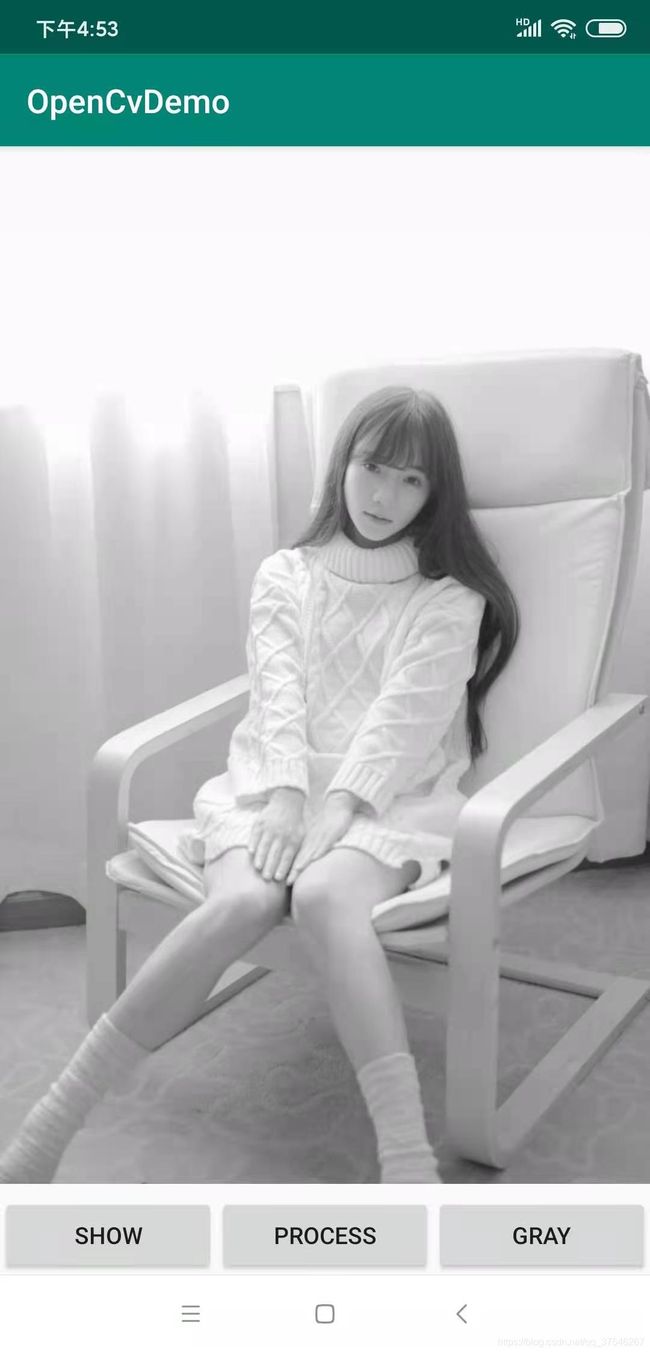
哦, 对了, 放一张图像到“…/OpenCvDemo/app/src/main/res/drawable”目录下。安装好到手机上之后分别点击三个按钮,可以显示以下效果,分别是图像原图、边缘图像和灰度图。
直接调用.so文件
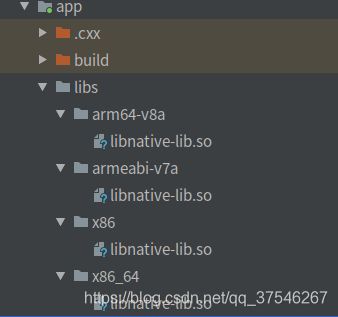
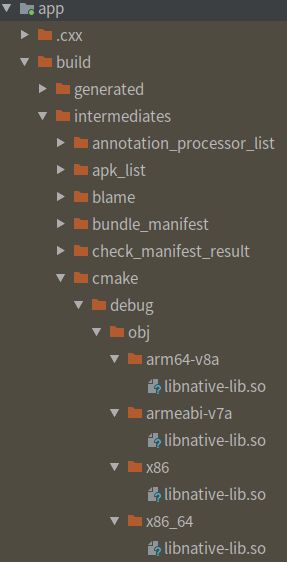
如果安卓的同学想要调用我们实现的功能的时候,当然是不用关心我们的C++代码的,只需要将上述过程中生成的.so文件交给它们便可以。编译生成的.so文件在如下位置:
apply plugin: 'com.android.application'

android {
    compileSdkVersion 30
    defaultConfig {
        applicationId "com.example.cv"
        minSdkVersion 25
        targetSdkVersion 30
        versionCode 1
        versionName "1.0"
        testInstrumentationRunner "androidx.test.runner.AndroidJUnitRunner"
        externalNativeBuild {
            cmake {
                cppFlags "-std=c++14"
            }
        }
    }
    buildTypes {
        release {
            minifyEnabled false
            proguardFiles getDefaultProguardFile('proguard-android-optimize.txt'), 'proguard-rules.pro'
        }
    }

    //    externalNativeBuild {
//        cmake {
//            path "src/main/cpp/CMakeLists.txt"
//            version "3.10.2"
//        }
//    }
//添加以下内容
    sourceSets {
        main {
            jniLibs.srcDirs = ['libs']
        }
    }
}
dependencies {
    implementation fileTree(dir: 'libs', include: ['*.jar'])
    implementation 'androidx.appcompat:appcompat:1.2.0'
    implementation 'androidx.constraintlayout:constraintlayout:1.1.3'
    testImplementation 'junit:junit:4.12'
    androidTestImplementation 'androidx.test:runner:1.2.0'
    androidTestImplementation 'androidx.test.espresso:espresso-core:3.2.0'
}
注释掉cmake编译的那块,添加导入jnilibs。这样在MainActivity里面就能和前面一样直接调用我们的本地方法,而不用再次编译native-lib.cpp里的C++程序了。
