第五章:Spring Security 原理与权限认证
先说我们的目标,我们的目标是没有蛀牙。是使用Spring Security来帮助我们拦截那些没有权限,却又非要来访问我们的资源的操作。比如必须要登录了才能访问某一张图片,没有登录的话就不能访问,在比如没有新增用户权限就不能访问我们的新增用户的方法。
原理
Spring Security的主要(只是主要,不是全部)功能:
- 认证(authentication),用户登录
- 授权(authorization),判断用户有什么权限,可以访问什么资源
- 安全防护,拦截跨站请求,session攻击等
我们先来看看他的实现原理。首先Spring Security是基于Filter来实现的。
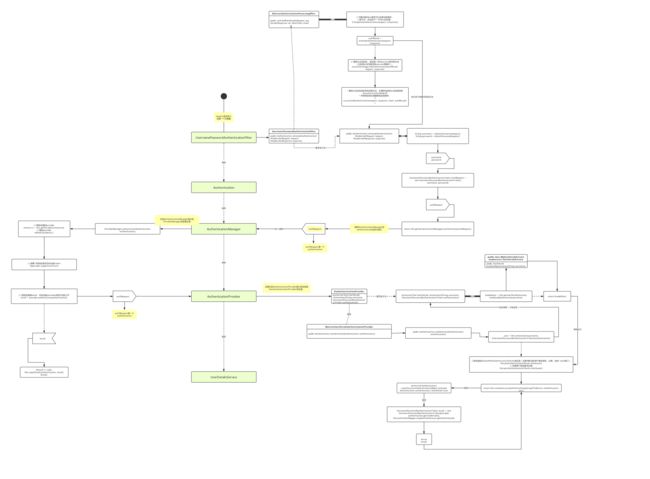
SpringSecurity 采用的是责任链的设计模式,它有一条很长的过滤器链。这是一张Spring Security的原理流程图(我花了3C币才下载下来的)
上一章节中的Spring Security配置类(SecurityConfiguration)上我们加上了一个注解,@EnableWebSecurity这个注解呢,就是开启Spring Security的过滤器链。那么最先执行的一个过滤器是springSecurityFilterChain。在我们没有使用Spring boot来进行开发的时候,引入Spring Security需要在web.xml文件中引入:
   springSecurityFilterChain
   org.springframework.web.filter.DelegatingFilterProxy


   springSecurityFilterChain
   /*
这里的DelegatingFilterProxy是一个委派代理过滤器,他不实现过滤逻辑,他会尝试寻找filter-name节点所配置的springSecurityFilterChain,并将过滤行为委托给springSecurityFilterChain来处理。
我们可以从源码@EnableWebSecurity --> WebSecurityConfiguration中找到springSecurityFilterChain:
@Bean(
    name = {"springSecurityFilterChain"}
)
public Filter springSecurityFilterChain() throws Exception {
    boolean hasConfigurers = this.webSecurityConfigurers != null && !this.webSecurityConfigurers.isEmpty();
    if (!hasConfigurers) {
        WebSecurityConfigurerAdapter adapter = (WebSecurityConfigurerAdapter)this.objectObjectPostProcessor.postProcess(new WebSecurityConfigurerAdapter() {
        });
        this.webSecurity.apply(adapter);
    }

    return (Filter)this.webSecurity.build();
}
Spring Security就是通过springSecurityFilterChain来开启整个的过滤链条。里面包含了很多很多的过滤器,每一个都有不同的功能。
具体的呢,可以去看看这一篇文章,我就不做搬运工了:https://blog.csdn.net/u012702547/article/details/89629415
那么我们要做权限认证需要怎么做呢?
- 配置我们自定义的UserDetailsService实现
- 在UserDetailsService实现类(CustomUserDetailsService)中,插入用户的权限信息
- 配置打开方法上添加注解的支持
- 在对应的方法上加上所需要的权限注解
UserDetailsService我们已经在上一章实现了,我们给用户加上角色信息(这里先写死,后面在从数据库读取):
@Override
public UserDetails loadUserByUsername(String userAccount) throws UsernameNotFoundException {
    CustomUserDetails details = userService.getUserByAccount(userAccount);
    if(details == null){
        String errorMsg = "账号 " + userAccount + "不存在";
        log.error(errorMsg);
        throw new UsernameNotFoundException(errorMsg);
    }
    // 设置权限
    Collection grantedAuthorities = new ArrayList<>();
    List list = AuthorityUtils.createAuthorityList("TEST","TEST_USER_GET");
    GrantedAuthority auth = new SimpleGrantedAuthority("ROLE_TEST");
    grantedAuthorities.addAll(list);
    grantedAuthorities.add(auth);
    details.setAuthorities(grantedAuthorities);
    return details;
}
这里我们可以使用AuthhorityUtils来批量添加,也可以使用SimpleGrantedAuthority构造来添加。
现在我们配置一下打开方法注解的支持:@EnableGlobalMethodSecurity(prePostEnabled=true,securedEnabled=true,jsr250Enabled = true)
/**
 * spring security 配置
 */
@Configuration
@EnableWebSecurity
@EnableGlobalMethodSecurity(prePostEnabled=true,securedEnabled=true,jsr250Enabled = true)
public class SecurityConfiguration extends WebSecurityConfigurerAdapter {
    ...
}
这里打开了三种注解方式,让我们来一个个试试。
jsr250Enabled
/**
 * 全部拒绝
 * @return
 */
@DenyAll()
@GetMapping("/denyAll")
public Object denyAll(){
    return "全部拒绝";
}

/**
 * 全部通过
 * @return
 */
@PermitAll()
@GetMapping("/permitAll")
public Object permitAll(){
    return "全部通过";
}

/**
 * 代表标注的方法只要具有TEST, ADMIN任意一种权限就可以访问。这里可以省略前缀ROLE_,实际的权限可能是ROLE_TEST
 * @return
 */
@RolesAllowed({"TEST","ADMIN"})
@GetMapping("/double/auth")
public Object doubleAuth(){
    return "两个只需满足其中一个的权限!";
}
securedEnabled
/**
 * 需要TEST权限
 * @return
 */
@Secured("ROLE_TEST")
@GetMapping("/secured")
public Object secured(){
    return "secured 权限";
}
// 这里需要注意,我们的@Secured注解需要权限编码的前缀是ROLE,其他的前缀他不认
/**
 * 需要TEST或者ADMIN权限
 * @return
 */
@Secured({"ROLE_TEST","ROLE_ADMIN"})
@GetMapping("/securedMany")
public Object securedMany(){
    return "securedMany 权限";
}
prePostEnabled
/**
 * 两个只需满足其中一个的权限
 * @return
 */
@PreAuthorize("hasAnyRole('ROLE_TEST','ROLE_ADMIN')")
@GetMapping("/test/auth")
public Object testAuth(){
    return "两个只需满足其中一个的权限!";
}

/**
 * ROLE_ADMIN 权限
 * @return
 */
@PreAuthorize("hasRole('ROLE_ADMIN')")
@GetMapping("/admin/auth")
public Object adminAuth(){
    return "ROLE_ADMIN 权限!";
}

/**
 * 两个只需满足其中一个的权限
 * @param test
 * @return
 */
@PreAuthorize("hasAnyAuthority('TEST','TEST_USER_GET')")
@GetMapping("/{test}")
public Object test(@PathVariable String test){
    return test + " 你好!";
}

/**ss
 * 获得当前用户信息
 * @return
 */
@PreAuthorize("hasAuthority('TEST_USER_GET')")
@GetMapping("/user")
public Object getUser(){
    return SecurityContextHolder.getContext().getAuthentication().getPrincipal();
}
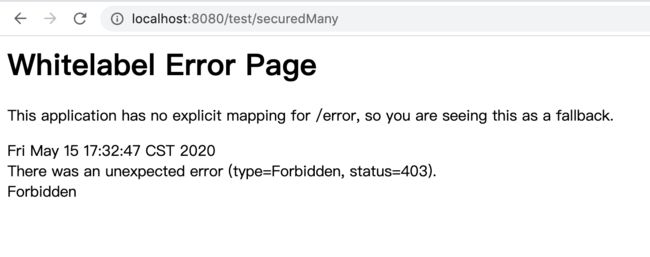
然后在登录过后访问资源,没有访问权限
"authorities": [{
		"authority": "TEST"
	}, {
		"authority": "TEST_USER_GET"
	}, {
		"authority": "ROLE_TEST"
	}],
数据库查询权限
上面我们的权限是手动写死在代码里面的,现在我们需要改成从数据库中去查询权限。
- 查询角色用户关系表
- 得到角色后查询角色权限关系表
这里我们的通过上面的事例看到了,角色跟权限的编码都是存放在一起的,并没有被分开,所以我们就要在新增角色的时候给角色的编码加上ROLE_的前缀,然后判断角色权限的时候,使用@RolesAllowed注解,他可以不带ROLE_。这样就可以将我们的角色跟权限全部都放在一个集合里面而不用担心他们会重复(不是绝对的)。至于权限也就是我们的菜单表那边,因为加上了唯一索引跟菜单和权限我们都是放在同一张表里面的,所以这边肯定不会重复。
SQL
# 插入用户
INSERT INTO `fast`.`sys_user`(`user_id`, `user_account`, `user_pass`, `user_name`, `user_phone`, `user_email`, `user_status`, `create_time`, `is_deleted`, `create_user_id`, `modify_time`, `modify_user_id`, `remark`) VALUES ('1255795451725041665', 'admin', '$2a$10$DtALZDK/.ihjMyJT97QqFuVsRaiBIuyo6PL7jUpjR6gWtKKjEtMrW', '胡汉三', '11111111111', '[email protected]', 1, '2020-04-30 17:45:32', 0, NULL, NULL, NULL, NULL);
# 插入角色
INSERT INTO `fast`.`sys_role`(`role_id`, `role_name`, `role_code`, `parent_role_id`, `is_deleted`, `create_time`, `create_user_id`, `modify_time`, `modify_user_id`, `remark`) VALUES ('454398794329430295483902', '管理员', 'ROLE_ADMIN', '0', 0, '2020-05-15 17:58:57', '1255795451725041665', '2020-05-15 17:59:23', '1255795451725041665', NULL);
# 插入角色用户关系
INSERT INTO `fast`.`sys_role_user`(`role_user_id`, `role_id`, `user_id`, `create_time`, `create_user_id`) VALUES ('98589437274375943891', '454398794329430295483902', '1255795451725041665', '2020-05-15 18:04:07', '1255795451725041665');
# 插入菜单(权限)
INSERT INTO `fast`.`sys_menu`(`menu_id`, `menu_name`, `menu_code`, `parent_menu_id`, `menu_class`, `menu_icon`, `menu_type`, `menu_url`, `routing_json`, `sort_id`, `is_deleted`, `is_enabled`, `create_time`, `create_user_id`, `modify_time`, `modify_user_id`, `remark`) VALUES ('980859432549743728954', 'PC端菜单', 'PC', '0', NULL, NULL, 1, NULL, NULL, 1, 0, 1, '2020-05-15 18:01:09', '454398794329430295483902', '2020-05-15 18:01:36', '454398794329430295483902', NULL);
INSERT INTO `fast`.`sys_menu`(`menu_id`, `menu_name`, `menu_code`, `parent_menu_id`, `menu_class`, `menu_icon`, `menu_type`, `menu_url`, `routing_json`, `sort_id`, `is_deleted`, `is_enabled`, `create_time`, `create_user_id`, `modify_time`, `modify_user_id`, `remark`) VALUES ('980859432549743728955', '系统管理', 'SYSTEM', '980859432549743728954', NULL, NULL, 1, NULL, NULL, 1, 0, 1, '2020-05-15 18:01:09', '454398794329430295483902', '2020-05-15 18:01:36', '454398794329430295483902', NULL);
INSERT INTO `fast`.`sys_menu`(`menu_id`, `menu_name`, `menu_code`, `parent_menu_id`, `menu_class`, `menu_icon`, `menu_type`, `menu_url`, `routing_json`, `sort_id`, `is_deleted`, `is_enabled`, `create_time`, `create_user_id`, `modify_time`, `modify_user_id`, `remark`) VALUES ('980859432549743728956', '用户管理', 'USER_MANAGER', '980859432549743728955', NULL, NULL, 1, NULL, NULL, 1, 0, 1, '2020-05-15 18:01:09', '454398794329430295483902', '2020-05-15 18:01:36', '454398794329430295483902', NULL);
# 插入角色菜单关系表
INSERT INTO `fast`.`sys_role_menu`(`role_menu_id`, `role_id`, `menu_id`, `create_time`, `create_user_id`) VALUES ('5794375947350437054', '454398794329430295483902', '980859432549743728954', '2020-05-15 18:06:48', '1255795451725041665');
INSERT INTO `fast`.`sys_role_menu`(`role_menu_id`, `role_id`, `menu_id`, `create_time`, `create_user_id`) VALUES ('5794375947350437055', '454398794329430295483902', '980859432549743728955', '2020-05-15 18:06:48', '1255795451725041665');
INSERT INTO `fast`.`sys_role_menu`(`role_menu_id`, `role_id`, `menu_id`, `create_time`, `create_user_id`) VALUES ('5794375947350437056', '454398794329430295483902', '980859432549743728956', '2020-05-15 18:06:48', '1255795451725041665');
MAPPER
查询用户拥有的角色
/**
 * 根据用户编号查询角色编码
 * @param userId
 * @return
 */
List getRoleCodeByUserId(@Param("userId") String userId);
查询角色拥有的权限
/**
 * 根据角色编号查询菜单权限
 * @param list
 * @return
 */
List getMenuByRoles(List list);
MAPPER-XML
查询用户拥有的角色
查询角色拥有的权限
SERVICE
接口
查询用户拥有的角色
/**
 * 根据用户编号查询角色编码
 * @param userId
 * @return
 */
List getRoleCodeByUserId(String userId);
查询角色拥有的权限
/**
 * 根据角色编号查询菜单权限
 * @param list
 * @return
 */
List getMenuByRoles(List list);
实现
查询用户拥有的角色
@Override
public List getMenuByRoles(List list) {
    return mapper.getMenuByRoles(list);
}
查询角色拥有的权限
@Override
public List getMenuByRoles(List list) {
    return mapper.getMenuByRoles(list);
}
调用
import com.google.common.collect.Lists;
import com.hzw.code.fast.sys.model.SysRoleModel;
import com.hzw.code.fast.sys.service.SysMenuService;
import com.hzw.code.fast.sys.service.SysRoleService;
import com.hzw.code.security.model.CustomUserDetails;
import com.hzw.code.fast.sys.service.SysUserService;
import lombok.RequiredArgsConstructor;
import lombok.extern.slf4j.Slf4j;
import org.springframework.security.core.GrantedAuthority;
import org.springframework.security.core.authority.SimpleGrantedAuthority;
import org.springframework.security.core.userdetails.UserDetails;
import org.springframework.security.core.userdetails.UserDetailsService;
import org.springframework.security.core.userdetails.UsernameNotFoundException;
import org.springframework.stereotype.Service;

import java.util.ArrayList;
import java.util.Collection;
import java.util.List;

/**
 * 自定义UserDetailsService
 */
@Service
@Slf4j
@RequiredArgsConstructor
public class CustomUserDetailsService implements UserDetailsService {

    private final SysUserService userService;
    private final SysRoleService roleService;
    private final SysMenuService menuService;

    @Override
    public UserDetails loadUserByUsername(String userAccount) throws UsernameNotFoundException {
        CustomUserDetails details = userService.getUserByAccount(userAccount);
        if(details == null){
            String errorMsg = "账号 " + userAccount + "不存在";
            log.error(errorMsg);
            throw new UsernameNotFoundException(errorMsg);
        }
        // 设置权限
        Collection grantedAuthorities = new ArrayList<>();
        List roleList = roleService.getRoleCodeByUserId(details.getUserId());
        if(roleList == null || roleList.size() <= 0){
            details.setAuthorities(grantedAuthorities);
            return details;
        }

        // 角色
        List roleStrs = Lists.newArrayList();
        for(SysRoleModel role : roleList){
            grantedAuthorities.add(new SimpleGrantedAuthority(role.getRoleCode()));
            roleStrs.add(role.getRoleId());
        }

        // 菜单
        List codeArr = menuService.getMenuByRoles(roleStrs);
        if(codeArr != null && codeArr.size() > 0){
            for (String code: codeArr) {
                grantedAuthorities.add(new SimpleGrantedAuthority(code));
            }
        }

        details.setAuthorities(grantedAuthorities);
        return details;
    }
}
然后,就可以继续调用我们的test方法测试了。
酱紫就将数据库存储的权限设置到了Security的用户信息里面。Security会在FilterSecurityInterceptor过滤器中验证我们是否登录、是否有对应操作的权限。到这里我们使用了注解的方式对权限进行了统一的拦截,如果没有相应的权限是访问不到对应的资源的。而且也达到了我们颗粒化权限的一个要求。那么接下来,我们就可以开始撸代码了。在正式开撸之前,我们很有必要先进行一下代码的生成。下一章,我们来说说代码生成器。
----------------------------------------------------------
项目的源码地址:https://gitee.com/gzsjd/fast
----------------------------------------------------------


