使用sphinx为python注释生成docAPI文档
sphinx简介
sphinx是一种基于Python的文档工具,它可以令人轻松的撰写出清晰且优美的文档,由Georg Brandl在BSD许可证下开发。
新版的Python3文档就是由sphinx生成的,并且它已成为Python项目首选的文档工具,同时它对C/C++项目也有很好的支持。
更多详细特性请参考spinx官方文档
https://zh-sphinx-doc.readthedocs.io/en/latest/intro.html
sphinx安装
- 需要安装python
- pip install sphinx
示例
1. 新建一个项目
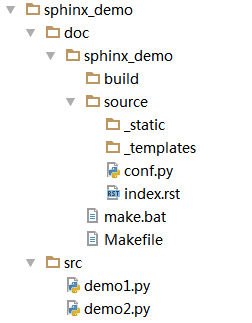
目录结构如下,doc目录使用来存放API文档,src目录是用来存放项目的源码

2.src目录下的源码
demo1文件
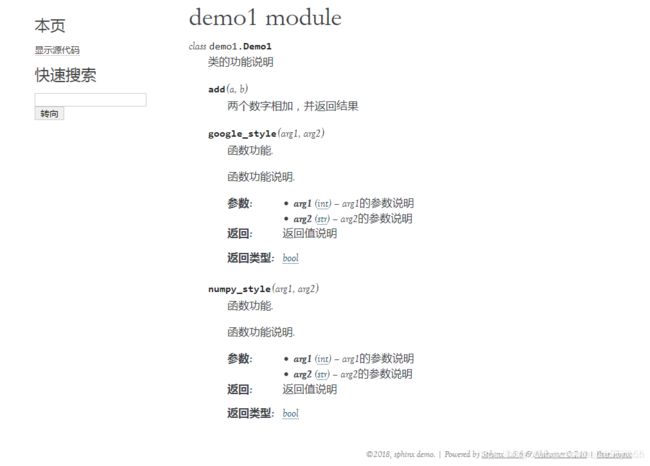
主要使用了两种不同的Python注释分格。对于简单的例子和简单的函数以及文档说明,
使用google style显得更为简洁,而对于比较复杂详细的文档说明numpy style更为流行。
#coding=UTF-8
class Demo1():
"""类的功能说明"""

def add(self,a,b):
    """两个数字相加,并返回结果"""
    return a+b

def google_style(arg1, arg2):
    """
    函数功能.
    函数功能说明.
    Args:
        arg1 (int): arg1的参数说明
        arg2 (str): arg2的参数说明
    Returns:
        bool: 返回值说明
    """
    return True

def numpy_style(arg1, arg2):
    """
    函数功能.
    函数功能说明.
    Parameters
    ----------
    arg1 : int
        arg1的参数说明
    arg2 : str
        arg2的参数说明
    Returns
    -------
    bool
        返回值说明
    """
    return True
demo2文件
注释看起来像Python命令行输入的文档字符串,主要是用来检查命令输出是否匹配下行的内容,它允许开发人员在源码中嵌入真实的示例和函数的用法,还能确保代码被测试和工作。
'''
遇到问题没人解答?小编创建了一个Python学习交流QQ群:579817333
寻找有志同道合的小伙伴,互帮互助,群里还有不错的视频学习教程和PDF电子书!
'''
#coding=UTF-8
def my_function(a, b):
"""
函数功能说明
 >>> my_function(2, 3)
 6
 >>> my_function('a', 3)
 'aaa'
"""
return a * b
3.使用sphinx建立API文档项目
进入到doc目录下cd 项目路径/doc输入sphinx-quickstart命令,会输出选项
> Root path for the documentation [.]: sphinx_demo
> Separate source and build directories (y/n) [n]: y
> Name prefix for templates and static dir [_]:
> Project name: sphinx_demo
> Author name(s): sphinx demo
> Project version []: 1.0
> Project release [1.0]:
> Project language [en]: zh_CN
> Source file suffix [.rst]:
> Name of your master document (without suffix) [index]:
> Do you want to use the epub builder (y/n) [n]:
> autodoc: automatically insert docstrings from modules (y/n) [n]: y
> doctest: automatically test code snippets in doctest blocks (y/n) [n]: y
> intersphinx: link between Sphinx documentation of different projects (y/n) [n]: y
> todo: write "todo" entries that can be shown or hidden on build (y/n) [n]: y
> coverage: checks for documentation coverage (y/n) [n]: y
> imgmath: include math, rendered as PNG or SVG images (y/n) [n]: y
> mathjax: include math, rendered in the browser by MathJax (y/n) [n]: y
> ifconfig: conditional inclusion of content based on config values (y/n) [n]:
> viewcode: include links to the source code of documented Python objects (y/n) [n]:
> githubpages: create .nojekyll file to publish the document on GitHub pages (y/n) [n]:
> Create Makefile? (y/n) [y]:
> Create Windows command file? (y/n) [y]:
因为我们需要从Python代码的注释中自动导出API文档,所以需要将autodoc: automatically insert docstrings from modules (y/n) [n]: y如果忘记设置,可以在conf.py中的extensions中添加sphinx.ext.autodoc。
选项后面没有输入的,直接按回车键使用默认设置。
选项后面有输入的,按照我的设置即可,如果不使用中文文档,可以在language配置中使用默认设置。
设置完成之后,可以看到如下的目录结构

后面如果需要修改配置,在选项source/conf.py文件中修改即可
extensions = ['sphinx.ext.autodoc',
'sphinx.ext.doctest',
'sphinx.ext.intersphinx',
'sphinx.ext.todo',
'sphinx.ext.coverage',
'sphinx.ext.mathjax']
额外的扩展
通过设置conf.py中的extensions,可以为sphinx添加额外的扩展,如果想要将html文档转换为PDF,只需要先安装扩展,然后再此处添加即可使用。
由于我们的注释代码主要同时支持google style和numpy style,所以我们需要添加一个扩展来支持。
sphinx.ext.napoleon
4.为源码生成html文件
修改source/conf.py文件的19-21行
'''
遇到问题没人解答?小编创建了一个Python学习交流QQ群:579817333
寻找有志同道合的小伙伴,互帮互助,群里还有不错的视频学习教程和PDF电子书!
'''
import os
import sys
sys.path.insert(0, os.path.abspath('../../../src'))  # 指向src目录
将命令行切换到doc目录下,执行以下命令sphinx-apidoc -o sphinx_demo/source …/src/
>Creating file sphinx_demo/source\demo1.rst.
>Creating file sphinx_demo/source\demo2.rst.
>Creating file sphinx_demo/source\modules.rst.
5.清理文件
cd sphinx_demo
make clean

>Removing everything under 'build'...
6.生成html文件
make html

// 请确保这一步没有输出error和exception
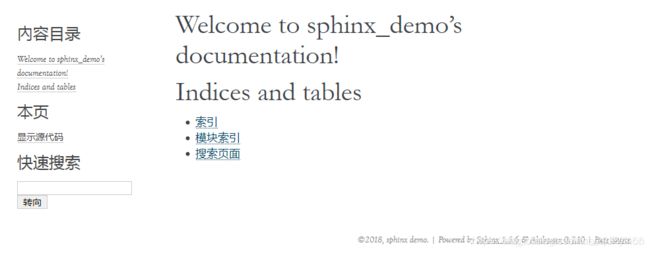
7.打开build/html/index.html


8.修改API的主题
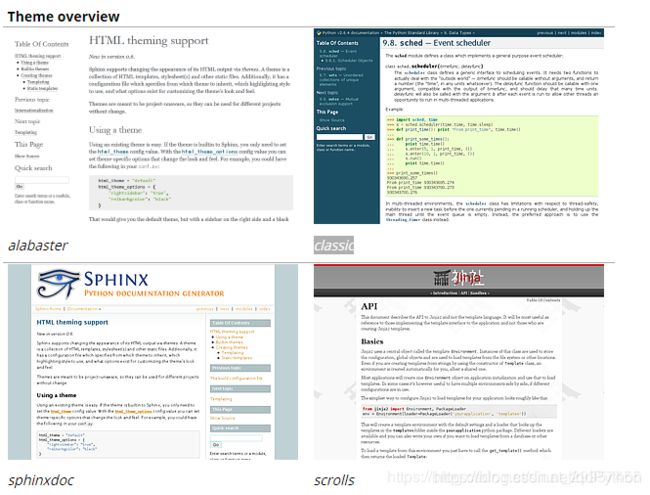
打开source/conf.py文件,找到html_theme = ‘alabaster’,修改即可,sphinx官方提供了几种主题可以进行选择,sphinx主题设置

相关错误解决办法
SyntaxError:Non-ASCII character ‘\xba’ in file …py
在*.py文件的第一行添加#coding=UTF-8
Encoding error:‘utf8’ codec can’t decode byte 0xc0 in position 44:invalid start byte
确保*.py文件的编码格式为utf-8,通过notepad++可以进行查看,如果不是请修改为utf-8格式
添加sphinx.ext.napoleon后报Exception occurred …return translator[‘sphinx’].ugettext(message) KeyError:‘sphinx’
Sphinx1.3,napoleon扩展使用sphinx.ext.napoleon,Sphinx <= 1.2使用sphinxcontrib.napoleon