仿v-moudle实战
我们先看一下效果图

实战
- 我们先建立一个html,和vue实战一样:
<html lang="en">
	<head>
		<meta charset="UTF-8">
		<title>simulate-vuetitle>
	head>
	<style>
		#app {
        text-align: center;
    }
style>
	<body>
		<div id="app">
			<h2>{{title}}h2>
			<input v-model="value">
			<h1>{{value}}h1>
			<button v-on:click="clickMe">{{clickMeName}}button>
		div>
	body>
	<script src="js/simulateVue.js">script>
	<script type="text/javascript">
		new SimulateVue({
			el: '#app',
			data: {
				title: 'hello world',
				value: '',
				clickMeName: "点我",
				title_setTime: "你好,我的世界"
			},
			methods: {
				// 点击事件修改title名字为value名字
				clickMe: function() {
					if (this.value == "") {
						return;
					} else {
						this.title = this.value;
					}

				}
			},

			// 加载完毕后执行方法
			mounted: function() {
				// 1s后改变titile名字
				window.setTimeout(() => {
					this.title = this.title_setTime;
				}, 2000);
			}
		});
	script>
html>
- 我们建立一个js文件,用来放我们的vue函数、监听器observer和watcher、解析器compile
/***************simulateVue.js**********/

//
/**
 * @description: 声明vue函数
 * @param :{options:}
 * @return: 无
 * @author: herry
 * @Date: 2020年7月18日11:52:13
 */
function SimulateVue(options) {
	var vm = this;
	this.data = options.data;
	this.methods = options.methods;
	// 返回一个给定对象的自身枚举属性组成数组,组中属性名排序和遍历返回顺序一致
	Object.keys(this.data).forEach(function(key) {
		vm.proxyKeys(key); // 绑定代理属性
	});

	observe(this.data);
	new Compile(options.el, this);
	options.mounted.call(this); // 所有事情处理好后执行mounted函数,call为调用mounted方法
}

/**
 * @description: 添加proxyKeys方法:添加data值
 * @param :{options:}
 * @return: 无
 * @author: herry
 * @Date: 2020年7月18日11:52:13
 */
SimulateVue.prototype = {
	proxyKeys: function(key) {
		var vm = this;
		// defineProperty直接在Object对象定义一个新的属性或修改现有属性
		Object.defineProperty(this, key, {
			// enumerable为true时候出现在对象的枚举属性中,默认false
			enumerable: false,
			// configurable为true时候可以修改值,并可删除
			configurable: true,
			get: function getter() {
				return vm.data[key];
			},
			set: function setter(newVal) {
				vm.data[key] = newVal;
			}
		});
	}
}


/***************监听器observer.js**********/
/*** 劫持并监听所有属性,如有变动则通知订阅者 ***/

// 创建Observer对象及属性data和walk
function Observer(data) {
	this.data = data;
	this.walk(data);
}

// 向Observer对象添加方法
Observer.prototype = {
	// 添加walk方法: 遍历data里面的值
	walk: function(data) {
		var vm = this;
		//Object.keys(data):返回一个所有元素为字符串的数组,其元素来自于从给定的object上面可直接枚举的属性。这些属性的顺序与手动遍历该对象属性时的一致。
		Object.keys(data).forEach(function(key) {
			vm.defineReactive(data, key, data[key]);
		});
	},
	// 添加defineReactive方法
	defineReactive: function(data, key, val) {
		var dep = new Dep();
		var childObj = observe(val);
		Object.defineProperty(data, key, {
			enumerable: true,
			configurable: true,
			get: function getter() {
				if (Dep.target) {
					dep.addSub(Dep.target);
				}
				return val;
			},
			set: function setter(newVal) {
				if (newVal === val) {
					return;
				}
				val = newVal;
				dep.notify();
			}
		});
	}
};

// 如果传入有值且是对象则new一个Observer对象
var observe = function(value, vm) {
	if (!value || typeof value !== 'object') {
		return;
	}
	return new Observer(value);
};

// 消息订阅器:收集订阅者在Observer和Watcher进行统一管理
function Dep() {
	this.subs = [];
}
Dep.prototype = {
	addSub: function(sub) {
		this.subs.push(sub);
	},
	notify: function() {
		this.subs.forEach(function(sub) {
			sub.update();
		});
	}
};


// 触发事件元素置null
Dep.target = null;


/***************watcher.js**********/
/**** 接收到属性的变化通知并执行相应的函数,更新view ****/
function Watcher(vm, exp, cb) {
	this.cb = cb;
	this.vm = vm;
	this.exp = exp;
	this.value = this.get(); // 将自己添加到订阅器的操作
}

Watcher.prototype = {
	update: function() {
		this.run();
	},
	run: function() {
		var value = this.vm.data[this.exp];
		var oldVal = this.value;
		if (value !== oldVal) {
			this.value = value;
			this.cb.call(this.vm, value, oldVal);
		}
	},
	get: function() {
		Dep.target = this; // 缓存自己
		var value = this.vm.data[this.exp] // 强制执行1监听器里的get函数
		Dep.target = null; // 释放自己
		return value;
	}
};


/***************解析器compile.js**********/
/*** 扫描和解析每个节点的相关指令,根据初始化模块数据以及初始化相应的订阅器 ***/
function Compile(el, vm) {
	this.vm = vm;
	this.el = document.querySelector(el); // 获取第一个元素
	this.fragment = null;
	this.init();
}

Compile.prototype = {
	init: function() {
		if (this.el) {
			this.fragment = this.nodeToFragment(this.el);
			this.compileElement(this.fragment);
			this.el.appendChild(this.fragment);
		} else {
			console.log('Dom元素不存在');
		}
	},

	// 将操作的dom存储到fragment中
	nodeToFragment: function(el) {
		// 创建虚拟节点对象(包含所有属性和方法)
		var fragment = document.createDocumentFragment();
		//返回被选节点的第一个子节点
		var child = el.firstChild;
		while (child) {
			// 将Dom元素移入fragment中
			fragment.appendChild(child);
			child = el.firstChild;
		}
		return fragment;
	},

	// 解析{{}}形式的内容
	compileElement: function(el) {
		var childNodes = el.childNodes;
		var self = this;
		[].slice.call(childNodes).forEach(function(node) {
			var reg = /\{\{(.*)\}\}/;
			var text = node.textContent;

			if (self.isElementNode(node)) {
				self.compile(node);
			} else if (self.isTextNode(node) && reg.test(text)) {
				self.compileText(node, reg.exec(text)[1]);
			}

			if (node.childNodes && node.childNodes.length) {
				self.compileElement(node);
			}
		});
	},
	compileText: function(node, exp) {
		var self = this;
		var initText = this.vm[exp];
		this.updateText(node, initText); // 将初始化数据初始化到视图中
		new Watcher(this.vm, exp, function(value) { // 生成订阅器绑定更新函数
			self.updateText(node, value);
		});
	},

	// 解析指令
	compile: function(node) {
		var nodeAttrs = node.attributes;
		var self = this;
		Array.prototype.forEach.call(nodeAttrs, function(attr) {
			var attrName = attr.name;
			if (self.isDirective(attrName)) {
				var exp = attr.value;
				var dir = attrName.substring(2);
				if (self.isEventDirective(dir)) { // 事件指令
					self.compileEvent(node, self.vm, exp, dir);
				} else { // v-model 指令
					self.compileModel(node, self.vm, exp, dir);
				}
				node.removeAttribute(attrName);
			}
		});
	},

	compileEvent: function(node, vm, exp, dir) {
		var eventType = dir.split(':')[1];
		var cb = vm.methods && vm.methods[exp];

		if (eventType && cb) {
			node.addEventListener(eventType, cb.bind(vm), false);
		}
	},
	compileModel: function(node, vm, exp, dir) {
		var self = this;
		var val = this.vm[exp];
		this.modelUpdater(node, val);
		new Watcher(this.vm, exp, function(value) {
			self.modelUpdater(node, value);
		});

		node.addEventListener('input', function(e) {
			var newValue = e.target.value;
			if (val === newValue) {
				return;
			}
			self.vm[exp] = newValue;
			val = newValue;
		});
	},
	updateText: function(node, value) {
		node.textContent = typeof value == 'undefined' ? '' : value;
	},
	modelUpdater: function(node, value, oldValue) {
		node.value = typeof value == 'undefined' ? '' : value;
	},
	isDirective: function(attr) {
		return attr.indexOf('v-') == 0;
	},
	isEventDirective: function(dir) {
		return dir.indexOf('on:') === 0;
	},
	isElementNode: function(node) {
		return node.nodeType == 1;
	},
	isTextNode: function(node) {
		return node.nodeType == 3;
	}
}
理解defineProperty
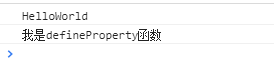
先创建一个html调用此函数,此函数方法会直接在一个对象上定义一个新属性,或者修改一个对象的现有属性,并返回此对象。
<script>
			// defineProperty 函数实现
			function Archiver() {
				var name = 'HelloWorld';
				Object.defineProperty(this, 'name', {
					set: function(value) {
						name = value;
					},
					get: function() {
						return name
					}
				})
			}
			var arc = new Archiver();
			console.log(arc.name)
			arc.name = '我是defineProperty函数';
			console.log(arc.name);
		</script>
结果:
我们通过get函数进行调用,然后通过set哈数进行修改
理解MVVM原理与演变:
MVVM演化过程
实现mvvm步骤
-
实现数据监听器Observer,用来监听所有属性,如有变动并通知订阅者。
-
实现一个Watcher,作为连接Observer和Compile的桥梁,可以收到属性变化并执行绑定函数,从而更新视图。
-
实现一个指令解析器Compile,对每个元素节点指令进行扫描和解析,根据指令模板替换数据,以及绑定相应的更新函数
流程图如下:

实现Observer.js
- 建立一个mvvm.html文件,然后引入Observer.js文件
<html>
	<head>
		<meta charset="utf-8">
		<title>title>
	head>
	<body>
		<script src="./Observer.js">script>
	body>
html>
- 建立Observer.js文件
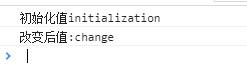
Observer.js就是一个监听器,我们遍历所有的data中的属性,下面解决了数据改变后可以监听到。
var data = {
	name: 'initialization'
};
observe(data);

function observe(data) {
	if (!data || typeof data !== 'object') {
		return;
	}
	// 取出所有属性遍历
	Object.keys(data).forEach(function(key) {
		defineReactive(data, key, data[key]);
	});
};

function defineReactive(data, key, val) {
	observe(val); // 监听子属性
	Object.defineProperty(data, key, {
		enumerable: true, //为true时候出现在对象的枚举属性中,默认false
		configurable: false, // 不能改变值
		get: function() {
			return val;
		},
		set: function(newVal) {
			console.log("初始化值:" + val); // 此值虽然改变但是没有赋值。
			val = newVal;

		}
	});
}

data.name = 'change';
console.log("改变后值:" + data.name);
此时我们实现了基本的监听数据变化了,但是我们怎么通知订阅者呢,我们还需要一个订阅器,我们直接修改Observers.js文件添加一个Dep
var data = {
	name: 'initialization'
};
observe(data);

function observe(data) {
	if (!data || typeof data !== 'object') {
		return;
	}
	// 取出所有属性遍历
	Object.keys(data).forEach(function(key) {
		defineReactive(data, key, data[key]);
	});
};

function defineReactive(data, key, val) {

	var dep = new Dep();

	observe(val); // 监听子属性
	Object.defineProperty(data, key, {
		enumerable: true, //为true时候出现在对象的枚举属性中,默认false
		configurable: false, // 不能改变值
		get: function() {
			// 需要闭包内添加watcher,暂不加
			// 通过Dep定义全局target属性,暂存watcher,用完删除
			Dep.target && dep.addSub(Dep.target)
			return val;
		},
		set: function(newVal) {

			if (val == newVal) return;

			console.log("初始化值:" + val); // 此值虽然改变但是没有赋值。
			val = newVal;
			// 通知订阅者

		}
	});
}

function Dep() {
	this.subs = [];
}

Dep.prototype = {
	addSub: function(sub) {
		this.subs.push(sub);
	},
	notify: function() {
		this.subs.forEach(function(sub) {
			sub.update();
		})
	}
}


data.name = 'change';
console.log("改变后值:" + data.name);
此时基本实现了Observer.js。
实现wathcer
刚刚我们实现了对数据更改的监听,这个时候我们添加一下watcher将我们修改的值进行强制赋值当然我们需要修改下我们的Observer文件来进行调用
我们将所有代码都暂时放到了Observer.js文件中,但是我们的mvvm.html暂时不动只调用即可。
function SelfVue(data, el, exp) {
	this.data = data;
	observe(data);
	el.innerHTML = this.data[exp]; // 初始化模板数据的值
	new Watcher(this, exp, function(value) {
		el.innerHTML = value;
	});
	return this;
}


/************** observer.js ***************/

var data = {
	name: 'initialization'
};

function observe(data) {
	if (!data || typeof data !== 'object') {
		return;
	}
	// 取出所有属性遍历
	Object.keys(data).forEach(function(key) {
		defineReactive(data, key, data[key]);
	});
};

function defineReactive(data, key, val) {

	var dep = new Dep();

	observe(val); // 监听子属性
	Object.defineProperty(data, key, {
		enumerable: true, //为true时候出现在对象的枚举属性中,默认false
		configurable: true, // 不能改变值
		get: function() {
			// 需要闭包内添加watcher,暂不加
			// 通过Dep定义全局target属性,暂存watcher,用完删除
			if (Dep.target) {
				dep.addSub(Dep.target);
			}

			// Dep.target && dep.addSub(Dep.target)
			return val;
		},
		set: function(newVal) {

			if (val == newVal) return;
			console.log("初始化值:" + val); // 此值虽然改变但是没有赋值。
			val = newVal;
			console.log("改变后值:" + val); // 此值虽然改变但是没有赋值。
			dep.notify();
			// 通知订阅者

		}
	});
}

function Dep() {
	this.subs = [];
}

Dep.prototype = {
	addSub: function(sub) {
		this.subs.push(sub);
	},
	notify: function() {
		this.subs.forEach(function(sub) {
			sub.update();
		});
	}
}


/************ 实现watcher ****************/

function Watcher(vm, exp, cb) {
	this.cb = cb;
	this.vm = vm;
	this.exp = exp;
	this.value = this.get(); // 将自己添加到订阅器的操作
}

Watcher.prototype = {
	update: function() {
		this.run();
	},
	run: function() {
		var value = this.vm.data[this.exp];
		var oldVal = this.value;
		if (value !== oldVal) {
			this.value = value;
			this.cb.call(this.vm, value, oldVal);
		}
	},
	get: function() {
		Dep.target = this; // 缓存自己
		var value = this.vm.data[this.exp] // 强制执行监听器里的get函数
		Dep.target = null; // 释放自己
		return value;
	}
};


observe(data);
data.name = 'change';
// console.log("改变后值:" + data.name);
此次结果替换了之前的值:

增加SimulateVue方法实现基本双向绑定
在observer.js文件中添加SimulateVue方法连接observe和watcher
function SimulateVue(data, el, exp) {
	this.data = data;
	observe(data);
	el.innerHTML = this.data[exp]; // 初始化模板数据的值
	new Watcher(this, exp, function(value) {
		el.innerHTML = value;
	});
	return this;
}
html代码进行引入:
<html>
	<head>
		<meta charset="utf-8">
		<title>title>
	head>
	<body>
		<h1 id="name">{{name}} h1>
	body>

	<script src="./Observer.js">script>
	<script type="text/javascript">
		var ele = document.querySelector('#name');
		var simulateVue = new SimulateVue({
			name: "hello world"
		}, ele, 'name');

		window.setTimeout(function() {
			console.log('name值改变了');
			simulateVue.data.name = 'save change';
		}, 2000);
	script>
html>
结果如下:

我们这个时候虽然完成了简单的双向绑定,但是我们访问数据的时候通过simulateVue.data.name,但是vue我们不要使用data,我们直接simulateVue.name,那么我们需要在defineProperty方法上包一层直接获取data里面内容
修改SimulateVue函数即可:
function SimulateVue(data, el, exp) {

	var vm = this;
	this.data = data;


	Object.keys(data).forEach(function(key) {
		vm.proxyKeys(key); //绑定代理属性
	})
	observe(data);

	el.innerHTML = this.data[exp]; // 初始化模板数据的值
	new Watcher(this, exp, function(value) {
		el.innerHTML = value;
	});
	return this;
}

SimulateVue.prototype = {
	proxyKeys: function(key) {
		var vm = this;
		Object.defineProperty(this, key, {
			enumerable: false,
			configurable: true,
			get: function proxyGetter() {
				return vm.data[key];
			},
			set: function proxySetter(newVal) {
				vm.data[key] = newVal;
			}
		})
	}
}
将html文件中simulateVue.data.name = ‘save change’; 改为simulateVue.name = ‘save change’;
实现结果:一模一样哦
实现compile
虽然我们当前实现了双向绑定,但是我们是写的死值,接下来我们需要一个解析器去遍历dom对象; 首先我们解析模板指令,将 模板中的变量替换成数据,然后初始化渲染视图,并将每个指令对应节点绑定更新函数,添加监听数据订阅者,一旦数据有变动则更新视图。
因为遍历解析过程需要多次操作dom节点,为了提高效率我们将节点el转为文档碎片fragment进行解析编译操作,解析完成,再讲fragment添加回原来的真实的dom节点。
function Compile(el, vm) {
	this.vm = vm;
	this.el = document.querySelector(el); // 获取第一个元素
	this.fragment = null;
	this.init();
}


Compile.prototype = {
  init: function () {
        if (this.el) {
            this.fragment = this.nodeToFragment(this.el);
            this.compileElement(this.fragment);
            this.el.appendChild(this.fragment);
        } else {
            console.log('Dom元素不存在');
        }
    },
	nodeToFragment: function(el) {
		// 创建虚拟节点对象(包含所有属性和方法)
		var fragment = document.createDocumentFragment();
		//返回被选节点的第一个子节点
		var child = el.firstChild;
		while (child) {
			// 将Dom元素移入fragment中
			fragment.appendChild(child);
			child = el.firstChild;
		}
		return fragment;
	}
}
添加解析{{}}形式的函数到Compile对象中
// 解析{{}}形式的内容
	 compileElement: function (el) {
        var childNodes = el.childNodes;
        var simulate = this;
        [].slice.call(childNodes).forEach(function(node) {
            var reg = /\{\{\s*(.*?)\s*\}\}/;
            var text = node.textContent;
            if (simulate.isTextNode(node) && reg.test(text)) {  // 判断是否是符合这种形式{{}}的指令
                simulate.compileText(node, reg.exec(text)[1]);
            }

            if (node.childNodes && node.childNodes.length) {
                simulate.compileElement(node);  // 继续递归遍历子节点
            }
        });
    },
    compileText: function(node, exp) {
        var simulate = this;
        var initText = this.vm[exp];
        this.updateText(node, initText);  // 将初始化的数据初始化到视图中
        new Watcher(this.vm, exp, function (value) { // 生成订阅器并绑定更新函数
            simulate.updateText(node, value);
        });
    },
    updateText: function (node, value) {
        node.textContent = typeof value == 'undefined' ? '' : value;
    },
    isTextNode: function(node) {
        return node.nodeType == 3;
    }
修改html文件:
<html>
	<head>
		<meta charset="utf-8">
		<title>title>
	head>
	<body>
		<div id="app">
			<h2>{{title}}h2>
			<h1>{{name}}h1>
		div>
	body>

	<script src="./Observer.js">script>
	<script type="text/javascript">
		var simulate = new SimulateVue({
			el: '#app',
			data: {
				title: 'hello world',
				value: '',
			}
		});
		// 加载完毕后执行方法
		window.setTimeout(function() {
			simulate.title = '你好';
		}, 2000);

		window.setTimeout(function() {
			simulate.name = 'canfoo';
		}, 2500);
	script>
html>
我们看下结果:
当前已经基本完成了,我们还需要添加一些指令以及事件指令解析,我们在添加一个compile进行解析:
在Compile对象中添加:
// 解析指令
	compile: function(node) {
		var nodeAttrs = node.attributes;
		var self = this;
		Array.prototype.forEach.call(nodeAttrs, function(attr) {
			var attrName = attr.name;
			if (self.isDirective(attrName)) {
				var exp = attr.value;
				var dir = attrName.substring(2);
				if (self.isEventDirective(dir)) { // 事件指令
					self.compileEvent(node, self.vm, exp, dir);
				} else { // v-model 指令
					self.compileModel(node, self.vm, exp, dir);
				}
				node.removeAttribute(attrName);
			}
		});
	},
然后我们在添加一些其他指令方法,并且修改SimulateVue,和我们最开始的代码一致,这个时候我们就已经完成了对整个mvvm框架撸了一遍,完成结果返回到我们开始处吧!