基于Web的浮动图片墙
个人博客:http://www.chenjianqu.com/
原文链接:http://www.chenjianqu.com/show-33.html
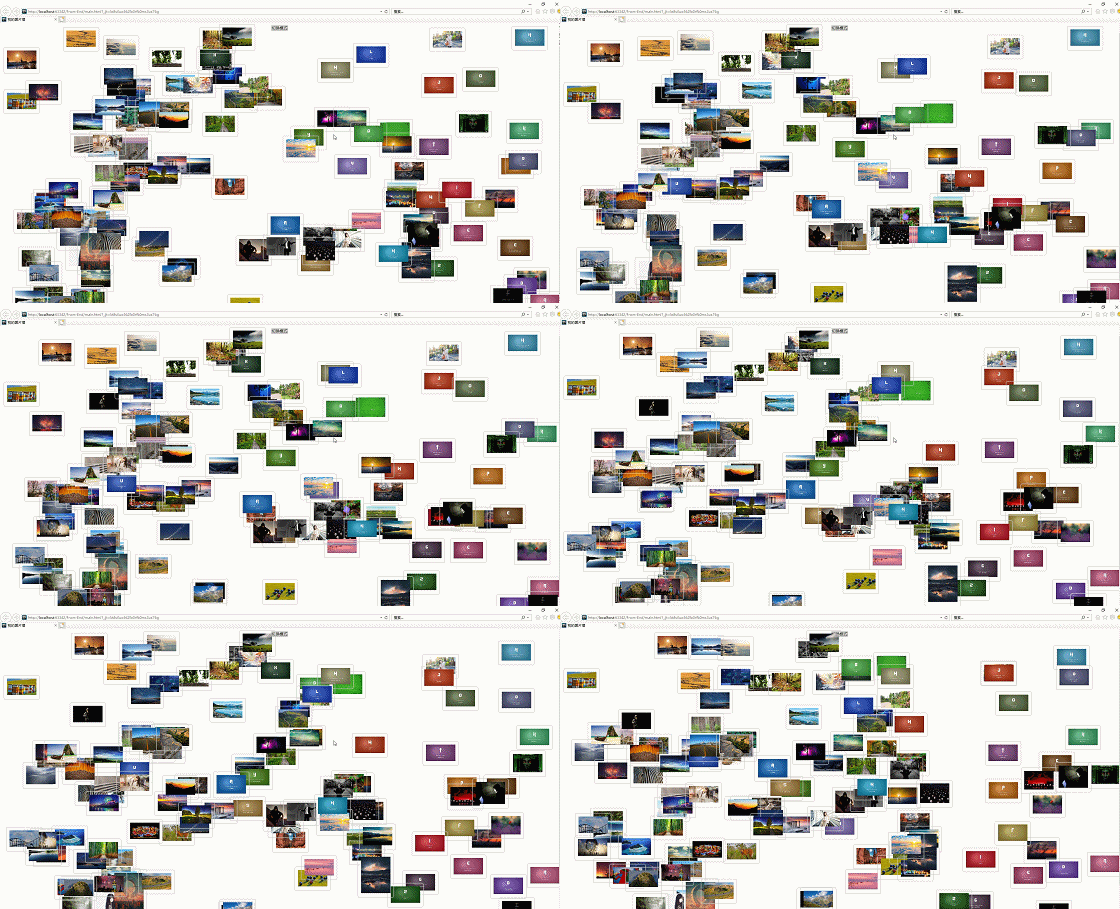
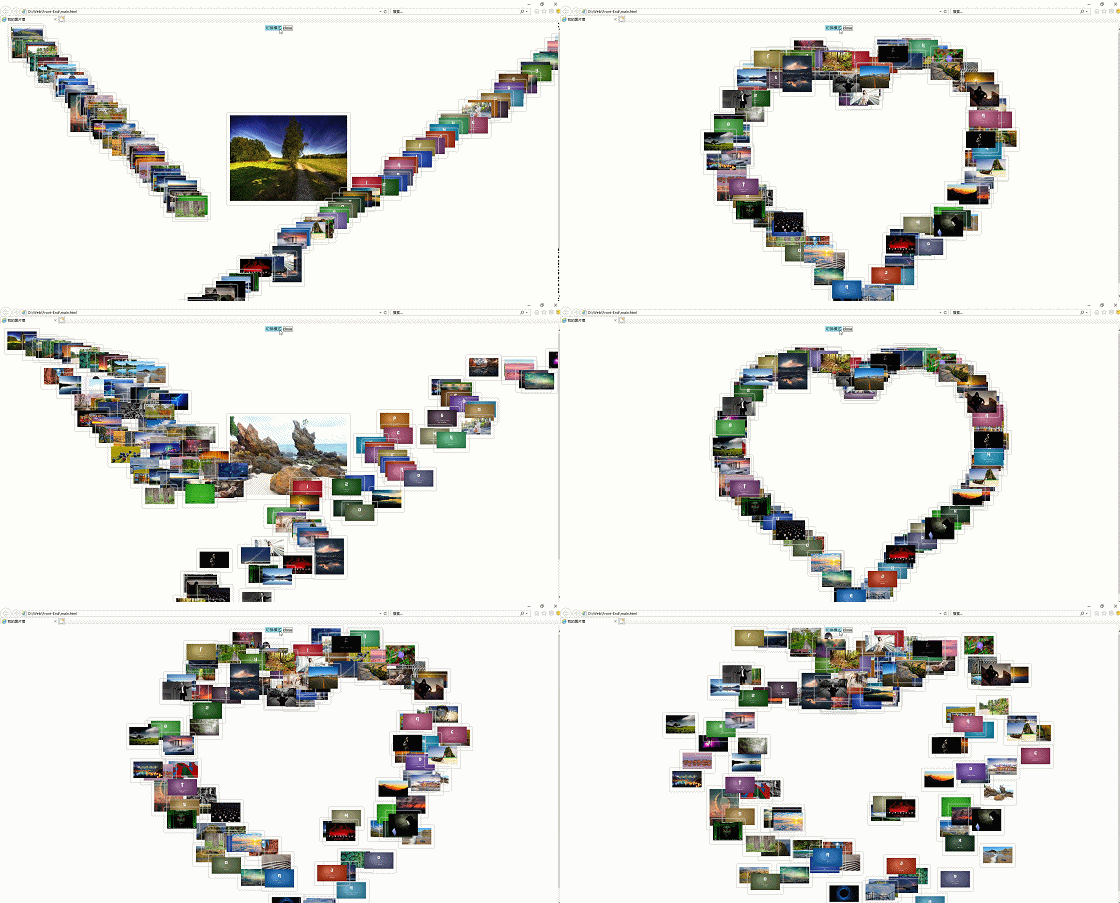
直接上效果图:
Html设计
我的图片墙
CSS设计
*{//通过通配符 去掉所有元素的边框
    margin:0;
    padding: 0;
}
#main{
    position:absolute;
    top:0;
}
.bar{
    margin: 0 auto;
    text-align: center;
}
#menu{
    positon:fixed;
    z-index:999;
    top:0;
}
.close{
    positon:absolute;
    right: 0;
    top:0
}
.box{
    padding:5px 5px 5px 5px;//顶部 右边 下边 左边的边距
}
.pic{
    padding:10px;
    border:1px solid #ccc;
    border-radius: 5px;
    box-shadow: 0 0 5px #ccc;
}
.pic image{
    width:100px;
    height: auto;
}
JS
从上面的HTML和CSS可以知道,此时的页面中还没有放入图片,所以JS的代码的第一部分是加入往网页中写入图片:
//添加图片
function AddPic() {
var addStr="";
for(var i=1;i<=120;i++)
{
addStr+='\n' +
'\n' +
' \n' +
'\n' +
'\n'
}
$("#pidAddTag").after(addStr);
}
\n' +
'\n' +
'\n'
}
$("#pidAddTag").after(addStr);
}然后要实现瀑布流界面:
实现瀑布流的思路很简单,首先要设置所有图片的宽度一致,然后首先排列好第一列。在第一列的基础上,按照最小宽度的原则,依次插入图片,最后就可以得到如上图所示的瀑布流效果了。代码实现如下:
//以瀑布流的方式排布图片
function waterfall() {
    clearInterval(tick);
    StopAllPicAnimate();
    currentPoint=1;
    var w=100;
    var hArr=[];
    $(".box").css({
        "position":"absolute",
//        "float":"left",
    });
    $(".pic").css({
       "width":"auto",
       "height":"auto",
    });
    $(".pic").children().css({
        "width":w,
        "height":"auto",
    });
    var $boxs=$("#main").children();
    var cols=Math.floor($(window).width()/(w+20));//得到列数
    $('#main').width((w+20)*cols).css('margin','0 auto');//设置main div的宽度 同时让它居中
    picObjArr.each(function (index,value) {//遍历boxs,两个参数:元素索引和值
        var h = $boxs.eq(index).outerHeight();//包括padding的高度
        if (index < cols) {
            $(value).css({
                "position":"absolute",
                "top":50,
                "left":index*(w+20)
            });
            hArr[index] = h+50;
            wallfallPosArr[index] = {left: index*(w+20), top: 50};
        }
    });
    picObjArr.each(function (index,value) {
        if(index>=cols) {
            var h = $boxs.eq(index).outerHeight();
            var minH = Math.min.apply(null, hArr);//找到hArr中的最小值
            var minH_Index = $.inArray(minH, hArr);//找到minH在数组中的索引
            $(value).css({
                "position": "absolute",
                "top": minH,
                "left": minH_Index * (w + 20)
            });
            wallfallPosArr[index] = {left: minH_Index * (w+20), top: minH};
            hArr[minH_Index] += $boxs.eq(index).outerHeight();//更新高度数组里面的值
        }
    });
}
接下来实现Y型排列:
这个实现还是很简单的,遍历每一张图片,然后递增设置Margin就可以了。代码如下:
function centerMode()
{
//初始化属性
    $(".box").css({
    "position":"absolute",
    "float":null,
    });
    $(".pic").children().css({
    "width":100,
    "height":"auto",
    });
    //设置中心图片的位置
    var len=picObjArr.length;
    picObjArr.each(function (index,value) {//获得所有图片的位置
        posArray[index].width=$(this).children().outerWidth();
        posArray[index].height=$(this).children().outerHeight();
        if(index
然后是实现心形排列:
心形曲线的极坐标方程请自行百度,下面直接给出代码。
function ShowWXY() {
    StopAllPicAnimate();//清除动画队列
    //初始化属性
    $(".box").css({
        "position":"absolute",
        "float":null,
    });
    $(".pic").children().css({
        "width":100,
        "height":"auto",
    });
    currentPoint=-1;
    //设置中心图片的位置
    var len=picObjArr.length;
    picObjArr.each(function (index,value) {//获得所有图片的位置
        posArray[index].width = $(this).children().outerWidth();
        posArray[index].height = $(this).children().outerHeight();
        if (index < len / 2) {
            posArray[index].left = index * 10;
            posArray[index].top = index * 10;
        } else {
            posArray[index].left = $(window).width() - (index - len / 2) * 25;
            posArray[index].top = (index - len / 2) * 18;
        }
    });
    var dx=10,dy=10;
    var r=200;
    var last_t=-1;
    var m, n, x, y, i,t;
    for (i = 0; i <= 200; i += 0.04) {
        m = i;
        n=-r*(((Math.sin(i)*Math.sqrt(Math.abs(Math.cos(i))))/(Math.sin(i)+1.4))-2*Math.sin(i)+2);
        x = n * Math.cos(m) + $(window).width()/2;
        y = n * Math.sin(m) + 200;
       t=Math.floor(i%posArray.length);
       if(t!=last_t) {
           //console.log(t);
           posArray[t].left = x;
           posArray[t].top = y;
       }
        last_t=t;
    }
}
加下来是编写浮动的代码。若想要图片产生浮动的效果,只需要设置一个定时器,每隔一段时间图片x和y方向上偏移一段距离即可。
首先对每个图片的x和y方向设置一个偏移量随机数。
//初始化图片位置数组
for(var i=0;i
然后设置定时器事件,并限制图片浮动的范围。
//设置图片游动定时器
tick=setInterval(PicFloat, 500);
function PicFloat() {
var cl=centerPicPos.left,ct=centerPicPos.top,cw=centerPicPos.w,ch=centerPicPos.h;
var cr=cl+cw,cb=ct+ch;
//限制图片的游走区域
for(var i=0;i$(window).width())
posArray[i].randomLeft=-Math.abs(posArray[i].randomLeft);
if(pt<0)
posArray[i].randomTop=Math.abs(posArray[i].randomTop);
else if(pb>aeraHeight )
posArray[i].randomTop=-Math.abs(posArray[i].randomTop);
//图片不能盖住中心图片
if(pb>ct && ptcl &&plct && ptcr))
posArray[i].randomLeft = -posArray[i].randomLeft;
if(pb>ct && ptcl))
posArray[i].randomTop = -posArray[i].randomTop;
if(pb>cb && ptcl))
posArray[i].randomTop = -posArray[i].randomTop;
if(pbct &&pl>cl &&pr
最后就是编写图片的打开和关闭。
这部分的代码原理上很简单的,但是由于是要考虑各种情况,所以反而是编写最麻烦的一段。
//点击关闭按钮
$closeBtn.click(function () {
    isShowFullPic=false;
    if(mode==1) {
        centerPicObj.css({
             "left": wallfallPosArr[currentPoint].left,
            "top": wallfallPosArr[currentPoint].top,
            "z-index":1,
        });
        centerPicObj.children().children().css({
            "width": 100,
            "height": "auto",
        });
    }
    else if(mode==2) {
        centerPicObj.css({
            "left": posArray[currentPoint].left,
            "top": posArray[currentPoint].top,
            "z-index":1,
        });
        centerPicObj.children().children().css({
            "width": 100,
            "height": "auto",
        });
    }
    else if(mode==3) {
        if(currentPoint==-1)
            currentPoint=1;
        centerPicObj.css({
            "left": posArray[currentPoint].left,
            "top": posArray[currentPoint].top,
            "z-index":1,
        });
        centerPicObj.children().children().css({
            "width": 100,
            "height": "auto",
        });
    }
    centerPicPos.w=0
    centerPicPos.h=0;
    centerPicPos.left=0;
    centerPicPos.top=0;
    $closeBtn.hide();
});
//设置图片的点击事件
picObjArr.each(function (index,value) {
$(this).click(function () {
StopAllPicAnimate();//清除动画队列
isShowFullPic=true;
$closeBtn.show();
//重置中心图片的大小和位置
if(mode==1) {
centerPicObj.css({
"left": wallfallPosArr[currentPoint].left,
"top": wallfallPosArr[currentPoint].top,
"z-index":1,
});
centerPicObj.children().children().css({
"width": 100,
"height": "auto",
});
}
else if(mode==2)
{
clearInterval(tick);
centerPicObj.css({
"left": posArray[currentPoint].left,
"top": posArray[currentPoint].top,
"z-index":1,
});
centerPicObj.children().children().css({
"width": 100,
"height": "auto",
});
}
else if(mode==3)
{
if(currentPoint==-1)
currentPoint=1;
clearInterval(tick);
centerPicObj.css({
"left": posArray[currentPoint].left,
"top": posArray[currentPoint].top,
"z-index":1,
});
centerPicObj.children().children().css({
"width": 100,
"height": "auto",
});
count++;
if(count==4)say();
}
ResetSomePic();
currentPoint=index;
centerPicObj=$(this);
centerPicObjPos={"left":$(this).left}
centerPicPos.w=800;
centerPicPos.h=$(this).height()/$(this).width()*800;
centerPicPos.left=$(window).width()/2-centerPicPos.w/2;
centerPicPos.top=300;
$(this).css({
"left":centerPicPos.left,
"top":centerPicPos.top,
"z-index":10.
});
$(this).children().css({
"width":"auto",
});
$(this).children().children().css({
"width":centerPicPos.w,
"height":centerPicPos.h,
});
if(mode==2||mode==3)
{
tick=setInterval(PicFloat, 100);
}
});
})完整的项目代码请看我的github: https://github.com/chenjianqu/FloatingPictureWall


