迭代阈值法,otsu阈值法,特征空间类聚法对图像进行分割(python)
用到:迭代阈值法,Otsu阈值,特征空间聚类法
实验用图:

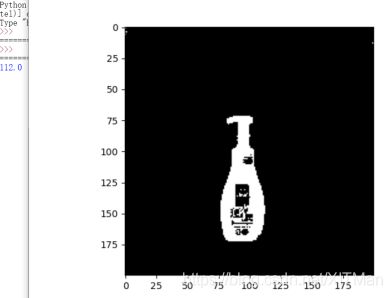
1.用迭代阈值法确定阈值,对图像进行分割,显示阈值和分割结果;
import cv2
import numpy as np
import matplotlib.pyplot as plt
import matplotlib.cm as cm
def diedai(img):
    img_array = np.array(img).astype(np.float32)#转化成数组
    I=img_array
    zmax=np.max(I)
    zmin=np.min(I)
    tk=(zmax+zmin)/2#设置初始阈值
    #根据阈值将图像进行分割为前景和背景,分别求出两者的平均灰度  zo和zb
    b=1
    m,n=I.shape;
    while b==0:
        ifg=0
        ibg=0
        fnum=0
        bnum=0
        for i in range(1,m):
             for j in range(1,n):
                tmp=I(i,j)
                if tmp>=tk:
                    ifg=ifg+1
                    fnum=fnum+int(tmp)  #前景像素的个数以及像素值的总和
                else:
                    ibg=ibg+1
                    bnum=bnum+int(tmp)#背景像素的个数以及像素值的总和
        #计算前景和背景的平均值
        zo=int(fnum/ifg)
        zb=int(bnum/ibg)
        if tk==int((zo+zb)/2):
            b=0
        else:
            tk=int((zo+zb)/2)
    return tk
img = cv2.imread("1.jpg")
img = cv2.cvtColor(img,cv2.COLOR_BGR2RGB)
gray = cv2.cvtColor(img,cv2.COLOR_RGB2GRAY)
img = cv2.resize(gray,(200,200))#大小
yvzhi=diedai(img)
ret1, th1 = cv2.threshold(img, yvzhi, 255, cv2.THRESH_BINARY)
print(ret1)
plt.imshow(th1,cmap=cm.gray)
plt.show()
结果图:

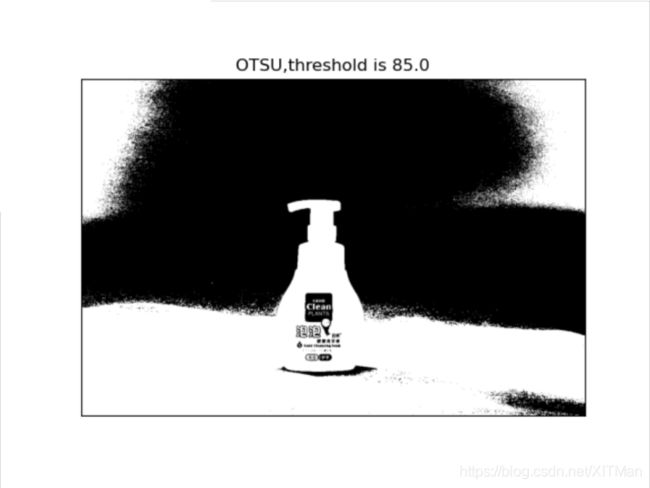
2.用Otsu阈值,对图像分割,显示阈值和分割结果;
#coding:utf-8
import cv2
import numpy as np
from matplotlib import pyplot as plt

image = cv2.imread("1.jpg")
gray = cv2.cvtColor(image, cv2.COLOR_BGR2GRAY)


plt.title("source image"), plt.xticks([]), plt.yticks([])

plt.title("Histogram"), plt.xticks([]), plt.yticks([])
ret1, th1 = cv2.threshold(gray, 0, 255, cv2.THRESH_OTSU)  #方法选择为THRESH_OTSU
plt.imshow(th1, "gray")
plt.title("OTSU,threshold is " + str(ret1)), plt.xticks([]), plt.yticks([])
plt.show()
结果图如下:

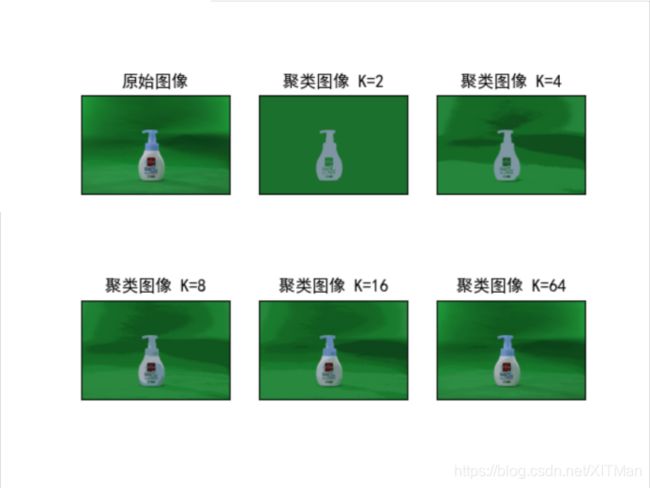
3.用特征空间聚类法,对彩色图像分割,显示分割结果。
# coding: utf-8
import cv2
import numpy as np
import matplotlib.pyplot as plt

#读取原始图像
img = cv2.imread('1.jpg')
print(img.shape)

#图像二维像素转换为一维
data = img.reshape((-1,3))
data = np.float32(data)

#定义中心 (type,max_iter,epsilon)
criteria = (cv2.TERM_CRITERIA_EPS +
            cv2.TERM_CRITERIA_MAX_ITER, 10, 1.0)

#设置标签
flags = cv2.KMEANS_RANDOM_CENTERS

#聚集成2类
compactness, labels2, centers2 = cv2.kmeans(data, 2, None, criteria, 10, flags)

#聚集成4类
compactness, labels4, centers4 = cv2.kmeans(data, 4, None, criteria, 10, flags)

#聚集成8类
compactness, labels8, centers8 = cv2.kmeans(data, 8, None, criteria, 10, flags)

#聚集成16类
compactness, labels16, centers16 = cv2.kmeans(data, 16, None, criteria, 10, flags)

#聚集成64类
compactness, labels64, centers64 = cv2.kmeans(data, 64, None, criteria, 10, flags)

#图像转换回uint8二维类型
centers2 = np.uint8(centers2)
res = centers2[labels2.flatten()]
dst2 = res.reshape((img.shape))

centers4 = np.uint8(centers4)
res = centers4[labels4.flatten()]
dst4 = res.reshape((img.shape))

centers8 = np.uint8(centers8)
res = centers8[labels8.flatten()]
dst8 = res.reshape((img.shape))

centers16 = np.uint8(centers16)
res = centers16[labels16.flatten()]
dst16 = res.reshape((img.shape))

centers64 = np.uint8(centers64)
res = centers64[labels64.flatten()]
dst64 = res.reshape((img.shape))

#图像转换为RGB显示
img = cv2.cvtColor(img, cv2.COLOR_BGR2RGB)
dst2 = cv2.cvtColor(dst2, cv2.COLOR_BGR2RGB)
dst4 = cv2.cvtColor(dst4, cv2.COLOR_BGR2RGB)
dst8 = cv2.cvtColor(dst8, cv2.COLOR_BGR2RGB)
dst16 = cv2.cvtColor(dst16, cv2.COLOR_BGR2RGB)
dst64 = cv2.cvtColor(dst64, cv2.COLOR_BGR2RGB)

#用来正常显示中文标签
plt.rcParams['font.sans-serif']=['SimHei']

#显示图像
titles = [u'原始图像', u'聚类图像 K=2', u'聚类图像 K=4',
          u'聚类图像 K=8', u'聚类图像 K=16',  u'聚类图像 K=64']
images = [img, dst2, dst4, dst8, dst16, dst64]
for i in range(6):
   plt.subplot(2,3,i+1), plt.imshow(images[i], 'gray'),
   plt.title(titles[i])
   plt.xticks([]),plt.yticks([])
plt.show()
结果图如下:

这里注意,k值越大,所需要的计算量越大,所以要等待一段时间,如果你只要较小的几个k值的图片,那你能够很快的得到结果。
利用图像分割技术对给出的绿幕图像进行一系列处理,实现
1.前景目标和背景分离,即提取前景目标;
2.将提取出来的目标和其他背景(自备)合成为一幅新背景图像。
import cv2
import  numpy as np

img=cv2.imread('1.jpg')
img_back=cv2.imread('back.jpg')
#日常缩放
rows,cols,channels = img_back.shape
img_back=cv2.resize(img_back,None,fx=1.1,fy=1.1)
#cv2.imshow('img_back',img_back)

rows,cols,channels = img.shape
img=cv2.resize(img,None,fx=0.4,fy=0.4)
#cv2.imshow('img',img)
rows,cols,channels = img.shape#rows,cols最后一定要是前景图片的,后面遍历图片需要用到

#转换hsv
hsv=cv2.cvtColor(img,cv2.COLOR_BGR2HSV)
#获取mask
lower_blue=np.array([33,43,46])
upper_blue=np.array([77,255,255])
mask = cv2.inRange(hsv, lower_blue, upper_blue)
#cv2.imshow('Mask', mask)

#腐蚀膨胀
erode=cv2.erode(mask,None,iterations=1)
#cv2.imshow('erode',erode)
dilate=cv2.dilate(erode,None,iterations=1)
#cv2.imshow('dilate',dilate)

#遍历替换
center=[50,50]#在新背景图片中的位置
for i in range(rows):
    for j in range(cols):
        if dilate[i,j]==0:#0代表黑色的点
            img_back[center[0]+i,center[1]+j]=img[i,j]#此处替换颜色,为BGR通道
cv2.imshow('res',img_back)

cv2.waitKey(0)
cv2.destroyAllWindows()
结果图:

这里的效果不是很好,我这里是对绿色的背景进行筛选,还可以有以上的几种方法对图片的前景进行提取,也可以得到类似的效果。可能效果比这个好一点。
背景图如下:

这里要注意的是,你的背景图输出的时候不能比你的提取图片小,负责会出错,可以使用缩放进行调整。