dubbo学习一:使用idea+maven+spring创建一个dubbo工程
下面介绍下如何从零开始,使用idea+maven+spring(不使用zookeeper)搭建一个dubbo项目,并正常运行起来。
一.新建一个idea工程,选择maven就行。
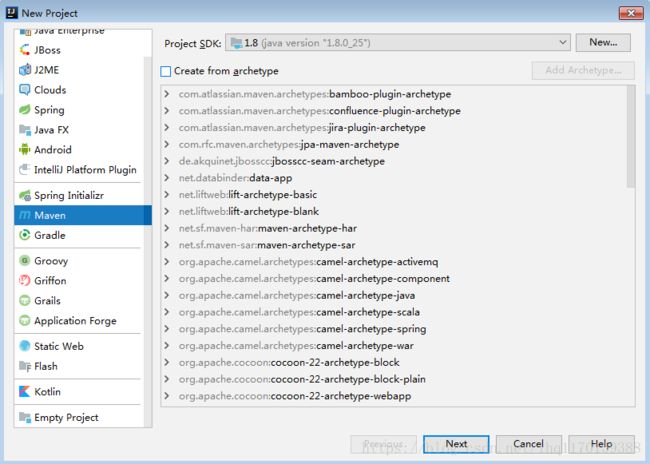
选择maven工程,不需要选择“create from archetype”。点击“next”,输入groupiD和ArtifactId,
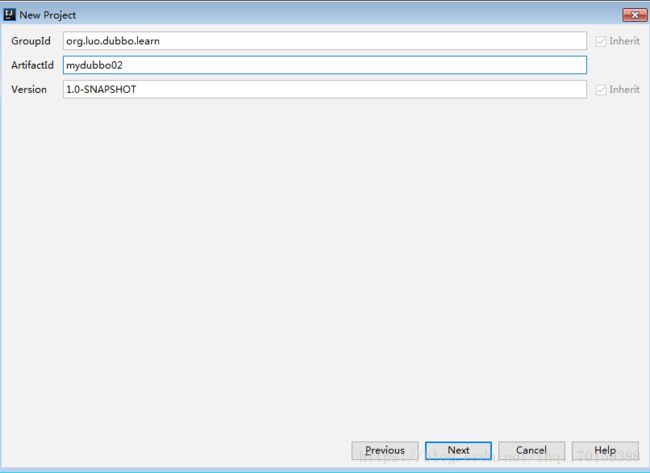
点击“next”,完成工程创建。
这个是空的父工程,用于包含两个module子工程,它里面不需要写java代码。我们可以在该父工程的pom文件中引入一些所需的公共依赖,这样其子工程就都可以使用这些公共依赖,而不用每个子工程都分别引入相同的依赖。
其pom内容如下:
<project xmlns="http://maven.apache.org/POM/4.0.0"
        xmlns:xsi="http://www.w3.org/2001/XMLSchema-instance"
        xsi:schemaLocation="http://maven.apache.org/POM/4.0.0 http://maven.apache.org/xsd/maven-4.0.0.xsd">
    <modelVersion>4.0.0modelVersion>

    <groupId>org.luo.dubbo.learngroupId>
    <artifactId>mydubbo02artifactId>
    <version>1.0-SNAPSHOTversion>

    <properties>
        <project.build.sourceEncoding>UTF-8project.build.sourceEncoding>
        <maven.compiler.source>1.7maven.compiler.source>
        <maven.compiler.target>1.7maven.compiler.target>
        <spring.version>4.3.5.RELEASEspring.version>
        <dubbo.version>2.6.2dubbo.version>
    properties>

    <dependencyManagement>
        <dependencies>

            <dependency>
                <groupId>org.springframeworkgroupId>
                <artifactId>spring-coreartifactId>
                <version>${spring.version}version>
            dependency>
            <dependency>
                <groupId>org.springframeworkgroupId>
                <artifactId>spring-beansartifactId>
                <version>${spring.version}version>
            dependency>
            <dependency>
                <groupId>org.springframeworkgroupId>
                <artifactId>spring-contextartifactId>
                <version>${spring.version}version>
            dependency>
            <dependency>
                <groupId>org.springframeworkgroupId>
                <artifactId>spring-jdbcartifactId>
                <version>${spring.version}version>
            dependency>
            <dependency>
                <groupId>org.springframeworkgroupId>
                <artifactId>spring-txartifactId>
                <version>${spring.version}version>
            dependency>
            <dependency>
                <groupId>org.springframeworkgroupId>
                <artifactId>spring-webartifactId>
                <version>${spring.version}version>
            dependency>
            <dependency>
                <groupId>org.springframeworkgroupId>
                <artifactId>spring-webmvcartifactId>
                <version>${spring.version}version>
            dependency>
            <dependency>
                <groupId>org.springframeworkgroupId>
                <artifactId>spring-testartifactId>
                <version>${spring.version}version>
            dependency>


            <dependency>
                <groupId>com.alibabagroupId>
                <artifactId>dubboartifactId>
                <version>${dubbo.version}version>
                <exclusions>
                    <exclusion>

                        <artifactId>springartifactId>
                        <groupId>org.springframeworkgroupId>
                    exclusion>
                exclusions>
            dependency>

        dependencies>
    dependencyManagement>

    <dependencies>

        <dependency>
            <groupId>org.springframeworkgroupId>
            <artifactId>spring-coreartifactId>
        dependency>
        <dependency>
            <groupId>org.springframeworkgroupId>
            <artifactId>spring-beansartifactId>
            <version>${spring.version}version>
        dependency>
        <dependency>
            <groupId>org.springframeworkgroupId>
            <artifactId>spring-contextartifactId>
        dependency>
        <dependency>
            <groupId>org.springframeworkgroupId>
            <artifactId>spring-jdbcartifactId>
        dependency>
        <dependency>
            <groupId>org.springframeworkgroupId>
            <artifactId>spring-txartifactId>
        dependency>
        <dependency>
            <groupId>org.springframeworkgroupId>
            <artifactId>spring-webartifactId>
        dependency>
        <dependency>
            <groupId>org.springframeworkgroupId>
            <artifactId>spring-webmvcartifactId>
        dependency>
        <dependency>
            <groupId>org.springframeworkgroupId>
            <artifactId>spring-testartifactId>
        dependency>


        <dependency>
            <groupId>com.alibabagroupId>
            <artifactId>dubboartifactId>
        dependency>

    dependencies>

project>
二.创建module,名为dubbo-provider。
右键项目名->new->module,选择maven工程,点击next:
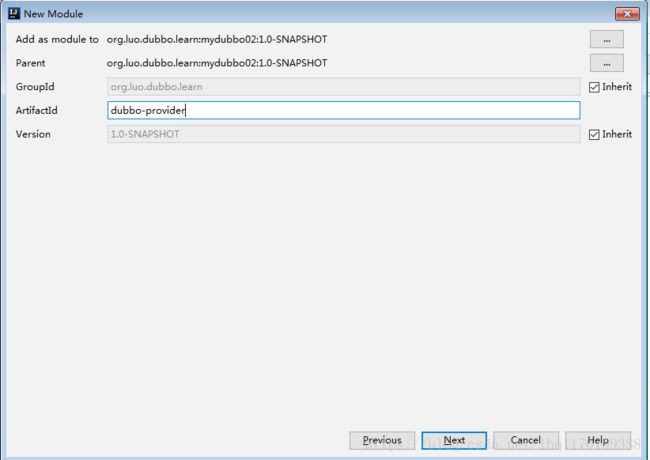
输入module的ArtifactId,完成子module的创建。
1.在dubbo-provider的Java目录下,创建三个类,分别如下:
(1)HelloService接口(服务提供者)
public interface HelloService {

    String hello(String msg);
}
(2)helloServiceImpl实现类
public class HelloServiceImpl implements HelloService {

    @Override
    public String hello(String msg) {
        System.out.println("客户端传过来的信息:" + msg);
        Calendar calendar = Calendar.getInstance();
        SimpleDateFormat sdf = new SimpleDateFormat("yyyy-MM-dd HH:mm:ss");
        String currentTime = sdf.format(calendar.getTime());
        return "服务端返回的信息:" + msg + ",当前时间:" + currentTime;
    }
}
(3)Provider类:用于启动Provider提供的服务。
public class Provider {

    public static void main(String[] args) throws IOException {
        ClassPathXmlApplicationContext context = new ClassPathXmlApplicationContext("springContext.xml");
        context.start();
        System.in.read();
    }
}
(4)在resources目录下,创建springContext.xml文件,用于配置dubbo的服务提供方(provider)。
<beans xmlns="http://www.springframework.org/schema/beans"
      xmlns:xsi="http://www.w3.org/2001/XMLSchema-instance"
      xmlns:dubbo="http://code.alibabatech.com/schema/dubbo"
      xsi:schemaLocation="http://www.springframework.org/schema/beans
        http://www.springframework.org/schema/beans/spring-beans-4.3.xsd
        http://code.alibabatech.com/schema/dubbo
        http://code.alibabatech.com/schema/dubbo/dubbo.xsd">


    <dubbo:application name="hello-world-app"/>


    <dubbo:registry address="multicast://224.5.6.7:1234"/>


    <dubbo:protocol name="dubbo" port="20880"/>


    <bean id="helloService" class="org.service.impl.HelloServiceImpl"/>


    <dubbo:service interface="org.service.HelloService" ref="helloService"/>

beans>
dubbo-provider模块创建完成。
三.创建一个module,名为dubbo-consumer,即服务消费方。
与上述一样,创建一些类与xml文件:
(1)远程服务的本地接口HelloService
public interface HelloService {
    String hello(String msg);
}
(2)创建Consumer类,用于启动消费者模块。
public class Consumer {

    public static void main(String[] args) {
        ClassPathXmlApplicationContext context = new ClassPathXmlApplicationContext("springContext.xml");
        context.start();
        HelloService helloService = context.getBean("helloService", HelloService.class);
        String hello = helloService.hello("我在学习dubbo");
        System.out.println(hello);
    }
}
(3)在resources目录下,创建springContext.xml文件,用于配置dubbo的消费者(consumer)。
<beans xmlns="http://www.springframework.org/schema/beans"
      xmlns:xsi="http://www.w3.org/2001/XMLSchema-instance"
      xmlns:dubbo="http://code.alibabatech.com/schema/dubbo"
      xsi:schemaLocation="http://www.springframework.org/schema/beans
        http://www.springframework.org/schema/beans/spring-beans-4.3.xsd
        http://code.alibabatech.com/schema/dubbo
        http://code.alibabatech.com/schema/dubbo/dubbo.xsd">


    <dubbo:application name="consumer-of-hello-world-app"/>


    <dubbo:registry address="multicast://224.5.6.7:1234"/>


    <dubbo:reference id="helloService" interface="org.service.HelloService"/>

beans>
整个项目搭建完成。
四。项目运行。
1.先启动provider:运行Provider类的main方法。
2.启动Consumer:运行Consumer类的main方法。
此时,Provider打印如下信息:

Consumer会打印如下信息:
服务端返回的信息:我在学习dubbo,当前时间:2018-08-27 02:04:06项目运行成功。
五.可能会出现的异常:
有些人在启动Provider或者Consumer是会出现如下异常:
Cannot start process, the working directory 'D:\idea_workspace\mydubbo01\idea_workspace\mydubbo01' does not exist。解决方法:点击Edit-Configurations->Application下的项目->右侧面板中的Configuration,修改working directory即可。
六.项目源码:git地址