使用SpringJDBC+SpringMVC+JSP实现三层架构
三层架构就是把一个程序的业务划分为表现层+业务逻辑层+数据访问层,可以有效的实现程序的高内聚与低耦合。处于练习和巩固知识的目的。我花了一下午时间把它实现了。
为了实现这种三层模型,我使用SpringJDBC进行数据库的访问,实现了数据访问层(DAO)。使用SpringMVC进行前后端的分离,有了更清晰的业务逻辑,实现了业务逻辑层(Service)。使用JSP作为前端的展示页面,实现了表现层(Web)。
现在用这三层结构模拟实现一个用户登录/注册的小页面,用户的数据用MySQL存储。
话不多说先上代码,注释很详细的
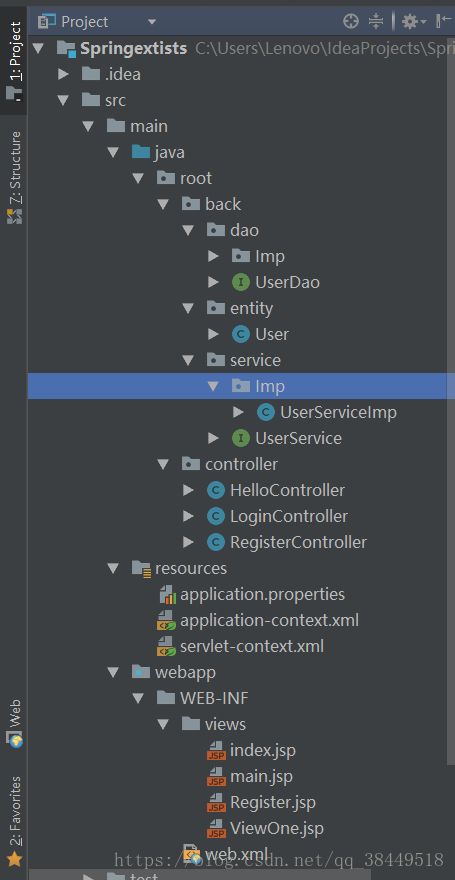
一、项目结构
在这里说一下,我用的IDE是idea
二、pom.xml
Maven项目的配置文件,一般来说没有什么太大的改动的话,可以直接CV
    4.0.0

    spring.mvc
    spring
    1.0-SNAPSHOT


    war


                org.springframework
                spring-framework-bom
                4.3.9.RELEASE
                pom
                import


            org.springframework
            spring-context


            org.springframework
            spring-jdbc


            org.springframework
            spring-web


            org.springframework
            spring-aspects


            org.springframework
            spring-webmvc


            javax.servlet
            javax.servlet-api
            3.1.0
            provided


            com.google.code.gson
            gson
            2.8.2


            org.projectlombok
            lombok
            1.16.16


            com.alibaba
            druid
            1.1.2


            mysql
            mysql-connector-java
            5.1.43


            org.slf4j
            slf4j-api
            1.7.25


            ch.qos.logback
            logback-classic
            1.2.3


                org.apache.maven.plugins
                maven-compiler-plugin
                3.7.0

                    1.8
                    1.8
三、web.xml
Web项目的一些配置文件,里面配置了前端控制器(DispatcherServlet),这个项目很简单,我并没有配置Filter和Listener
        contextConfigLocation
        classpath:application-context.xml


        org.springframework.web.context.ContextLoaderListener


        DispatcherServlet


        org.springframework.web.servlet.DispatcherServlet


            contextConfigLocation
            classpath:servlet-context.xml


        DispatcherServlet
        /
四、application-context.xml
SpringIOC容器的配置,里面有数据访问层和业务逻辑层的各种Bean,还有数据源等等......
五、servlet-context.xml
SpringMVC前端控制器的配置,里面配置了视图解析器以及模型类的Bean
主要的配置差不多完了,现在主要看三层架构的实现
数据访问层
首先定义接口,因为数据访问层只需要向业务逻辑层提供接口就可以了,这就是典型的接口式编程,实现类我们是可以随便换的
UserDao(数据访问层接口):
package root.back.dao;

import root.back.entity.User;

public interface UserDao {

    //登录的时候检验是否存在用户
    User login(User user);

    //用户注册
    Integer insert(User user);

    //检查用户名是否存在
    boolean exist(String userName);


}
嗯嗯还有实现类,项目简单,只有一个
UserDaoImp(数据访问层实现类)
package root.back.dao.Imp;


import root.back.dao.UserDao;
import root.back.entity.User;
import org.springframework.beans.factory.annotation.Autowired;
import org.springframework.jdbc.core.JdbcTemplate;
import org.springframework.jdbc.core.RowMapper;
import org.springframework.stereotype.Repository;

import java.sql.ResultSet;
import java.sql.SQLException;
import java.util.List;

@Repository
public class UserDaoImp implements UserDao {

    @Autowired
    private JdbcTemplate jdbcTemplate;

    public User login(User user) {
        String sql = "select id, userName,password from message where userName=? and password=?";
        List userList = jdbcTemplate.query(sql,
                new Object[]{
                        user.getUserName(),
                        user.getPassword()
                },
                new UserRowMapper());
        if (userList.isEmpty() || userList.size() > 1) {
            return null;
        } else {
            return userList.get(0);
        }
    }

    @Override
    public Integer insert(User user) {
        String sql = "insert into message (userName,password) values (?,?)";
        return jdbcTemplate.update(sql, user.getUserName(), user.getPassword());
    }

    @Override
    public boolean exist(String username) {
        String sql = "select count(id) from message where userName=?";
        //query相关的方法主要执行查询类的sql语句
        int count = jdbcTemplate.queryForObject(sql, new Object[]{username}, Integer.class);
        return count > 0;
    }

    public static class UserRowMapper implements RowMapper {
        @Override
        public User mapRow(ResultSet rs, int rowNum) throws SQLException {
            User user = new User();
            user.setId(rs.getString("id"));
            user.setUserName(rs.getString("userName"));
            user.setPassword(rs.getString("password"));
            return user;
        }
    }

}
现在对底层数据的访问就已经结束了,接下来只需要向上一层提供接口就行了
业务逻辑层
这一层主要用的是SpringMVC的Controller还有一些对接数据访问层接口的类。以下是业务逻辑层的流程:
当用户访问url的时候,SpringMVC查找到对应的Controller来处理用户的请求,Controller获取到用户请求中的参数,调用一些类来进行业务逻辑的识别,之后调用数据访问层的接口。并根据数据访问层返回的信息结果决定应该把哪个视图呈现给用户。
LoginController:
package root.controller;

import org.springframework.beans.factory.annotation.Autowired;
import root.back.service.UserService;
import org.springframework.stereotype.Controller;
import org.springframework.web.bind.annotation.RequestMapping;
import org.springframework.web.bind.annotation.RequestMethod;
import org.springframework.web.bind.annotation.RequestParam;

import org.springframework.web.servlet.ModelAndView;

import javax.servlet.ServletException;
import javax.servlet.http.HttpServletRequest;
import javax.servlet.http.HttpServletResponse;
import javax.servlet.http.HttpSession;
import java.io.IOException;
import java.io.UnsupportedEncodingException;
import java.util.Date;
import java.util.HashMap;
import java.util.Map;


//处理登录请求的后端控制器

//注意:@RequestParam注解中的required注解对表单提交中的属性是没有用的,就算不填它也会默认为空字符串,它只对GET请求中
//在url后加的key-value的属性有限制作用
@Controller
@RequestMapping(value = {"/test"})
public class LoginController {

    private static final String CURRENT_USER = "Now_user";

    //业务层接口
    @Autowired
    private UserService userService;


    //如果是GET方法请求的话,就直接给用户返回登录的页面,此页面表单请求的方法为POST
    @RequestMapping(value = {"/login"},method = {RequestMethod.GET})
    public ModelAndView LoginGet(){
        ModelAndView modelAndView = new ModelAndView();
        modelAndView.setViewName("index");
        return modelAndView;
    }

    //该方法主要是用来处理表单提交上来的请求的,@RequestParam中的value属性就是表单中的属性名
    //可以通过这种方法重新定义参数的名字
    @RequestMapping(value = {"login"},method = {RequestMethod.POST})
                                //让请求的url后面必须跟上一个叫做userName的属性,是用户的用户名
    public ModelAndView LoginPost(@RequestParam(value = "userName") String userName,
                              //请求的url后必须跟上password属性,为用户当前的密码
                              @RequestParam(value = "password") String password,
                              //Spring MVC框架集成了Servlet请求响应等一系列参数,可以在有需要的时候使用
                              HttpServletRequest request, HttpServletResponse response, HttpSession session) {

        //这里是和后端交互的代码,如果是用户登录的话就在数据库中查找对应的用户信息
        if(userName.isEmpty() || password.isEmpty()){
            ModelAndView modelAndView = new ModelAndView();
            modelAndView.addObject("error","用户名或密码为空");
            modelAndView.setViewName("index");
            return modelAndView;
        }

        //用户名和密码不为空,进入登录的业务层
        //如果登录业务失败,说明用户已经注册过了
        if(!userService.login(userName, password)){
            ModelAndView modelAndView = new ModelAndView();
            modelAndView.addObject("error","用户名或密码错误");
            modelAndView.setViewName("index");
            return modelAndView;
        }

        //到了这里就说明用户登录成功了
//        System.out.println("用户名是:" + userName + "密码是:" + password);
        //使用session进行会话跟踪
        session.setAttribute(CURRENT_USER, userName);

        ModelAndView modelAndView = new ModelAndView();
        try {
            //我的chrome这里只能选择GBK的编码方式,其他方式会出现乱码
            //把用户名和密码作为模型数据塞到ModelAndView中
            modelAndView.addObject("userName", new String(userName.getBytes(), "GBK"));
            modelAndView.addObject("password",new String(password.getBytes(),"GBK"));
        } catch (UnsupportedEncodingException e) {
            e.printStackTrace();
        }
        //视图名选择主界面
        modelAndView.setViewName("main");
        return modelAndView;
    }


}
RegisterController:
package root.controller;


import org.springframework.beans.factory.annotation.Autowired;
import org.springframework.stereotype.Controller;
import org.springframework.web.bind.annotation.RequestMapping;
import org.springframework.web.bind.annotation.RequestMethod;
import org.springframework.web.bind.annotation.RequestParam;
import org.springframework.web.servlet.ModelAndView;
import root.back.service.UserService;

import javax.servlet.http.HttpServletRequest;
import javax.servlet.http.HttpServletResponse;
import javax.servlet.http.HttpSession;
import java.util.HashMap;
import java.util.Map;

@Controller
@RequestMapping(value = {"/test"})
public class RegisterController {

    public static final String CURRENT_USER = "Now_user";
    @Autowired
    private UserService userService;

    @RequestMapping(value = {"/register"},method = {RequestMethod.GET})
    public ModelAndView RegisterGet(){
        ModelAndView modelAndView = new ModelAndView();
        modelAndView.setViewName("Register");
        return modelAndView;
    }

    @RequestMapping(value = {"register"},method = {RequestMethod.POST})
    public ModelAndView Register(@RequestParam(value = "userName") String userName,
                                 @RequestParam(value = "password") String password,
                                 HttpSession session, HttpServletRequest request,
                                 HttpServletResponse response){

        //假设用户名或者密码为空就继续回到当前页面
        if(userName.isEmpty() || password.isEmpty()){
            ModelAndView modelAndView = new ModelAndView();
            modelAndView.addObject("error","用户名或密码为空");
            modelAndView.setViewName("Register");
            return modelAndView;
        }

        if(userService.exist(userName)){
            ModelAndView modelAndView = new ModelAndView();
            modelAndView.addObject("error","该用户已经注册过了");
            modelAndView.setViewName("Register");
            return modelAndView;
        }
        //用户名和密码的判空和重复性已经判定完了,说明用户注册成功了
        session.setAttribute(CURRENT_USER,userName);
        //把用户的信息加入数据库
        userService.register(userName,password);
        ModelAndView modelAndView = new ModelAndView();

        Map map = new HashMap<>();
        map.put("userName",userName);
        map.put("password",password);
        map.put("SuccessMassage","注册成功");
        modelAndView.addAllObjects(map);
        modelAndView.setViewName("index");
        return modelAndView;


    }


}
UserService(业务层接口):
package root.back.service;


public interface UserService {

    boolean login(String userName, String password);

    boolean register(String userName, String password);

    boolean exist(String userName);

}
UserServiceImp(业务层实现类,进行简单的业务处理)
package root.back.service.Imp;

import root.back.dao.UserDao;
import root.back.entity.User;
import root.back.service.UserService;
import org.springframework.beans.factory.annotation.Autowired;
import org.springframework.stereotype.Repository;


//业务层代码,只需要对用户提交的信息做一些判定和包装
//不进行任何底层数据的访问工作,只用对web层返回业务的执行结果(true/false)
@Repository
public class UserServiceImp implements UserService {

    @Autowired
    private UserDao userDao;

    @Override
    public boolean login(String userName, String password) {
        if(userName.isEmpty() || password.isEmpty()){
            return false;
        }
        //把用户的用户名和密码装配成一个User对象
        User user = new User();
        user.setUserName(userName);
        user.setPassword(password);
        //如果返回不为空的话,就说明用户表中有且只有一条信息,就是该用户的id
        //所以说明登陆成功
        return userDao.login(user) != null;
    }

    //用户注册的业务层
    @Override
    public boolean register(String userName, String password) {
        if(userName.isEmpty() || password.isEmpty()){
            return false;
        }
        //如果数据库中有该用户的信息,那肯定是不能注册了
        if(userDao.exist(userName)){
            return false;
        }
        //现在该用户可以注册了,继续把用户名和密码包装成类,交给Dao层进行数据库存储
        User user = new User();
        user.setUserName(userName);
        user.setPassword(password);
        //存储成功就说明数据库的行数改动为1,只要在这里进行判断就可以了
        //同样的,业务层只需要告诉web层业务执行成功或者失败
        return userDao.insert(user) == 1;
    }

    @Override
    public boolean exist(String userName) {
        if(userName.isEmpty()){
            return false;
        }
        return userDao.exist(userName);
    }


}
表现层
表现层都是一些JSP页面,很好理解,这个小程序主要的地方还是在SpringMVC的Controller上
1、index.jsp(登录界面)
<%@ page contentType="text/html;charset=UTF-8" language="java" %>
登录界面
2、Resgister.jsp(注册界面)
<%@ page contentType="text/html;charset=UTF-8" language="java" %>
注册页面
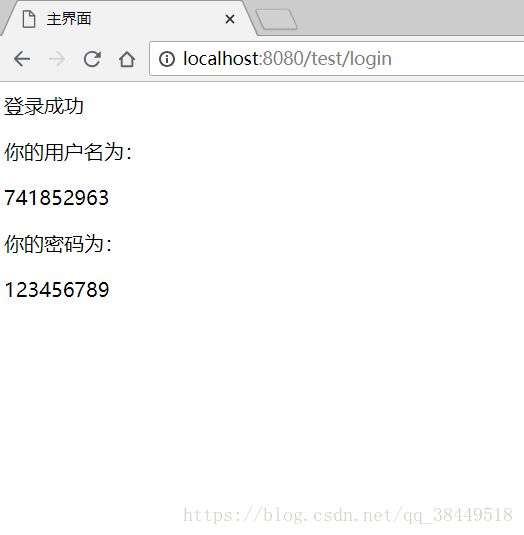
3、main.jsp(主界面)
<%@ page contentType="text/html;charset=UTF-8" language="java" %>


    主界面


登录成功
你的用户名为:${userName}
你的密码为:${password}
现在来测试一下吧
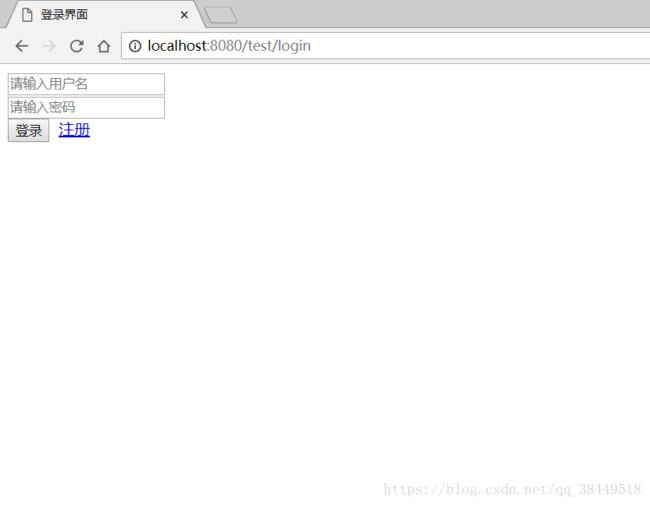
首先到登录界面上
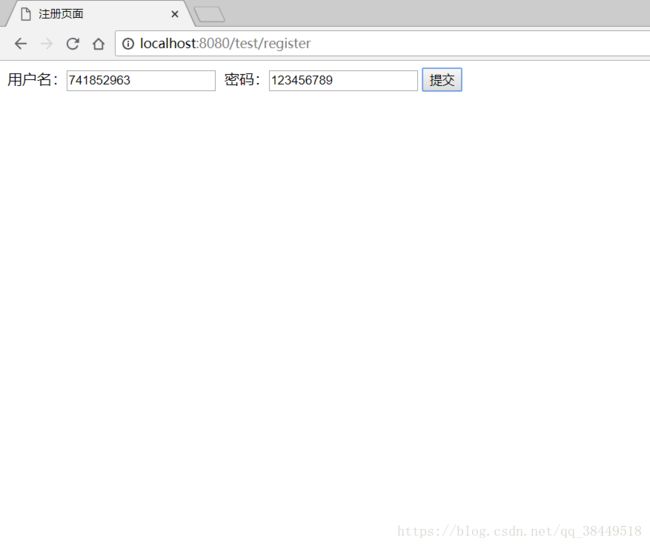
现在还没有用户,注册一个!
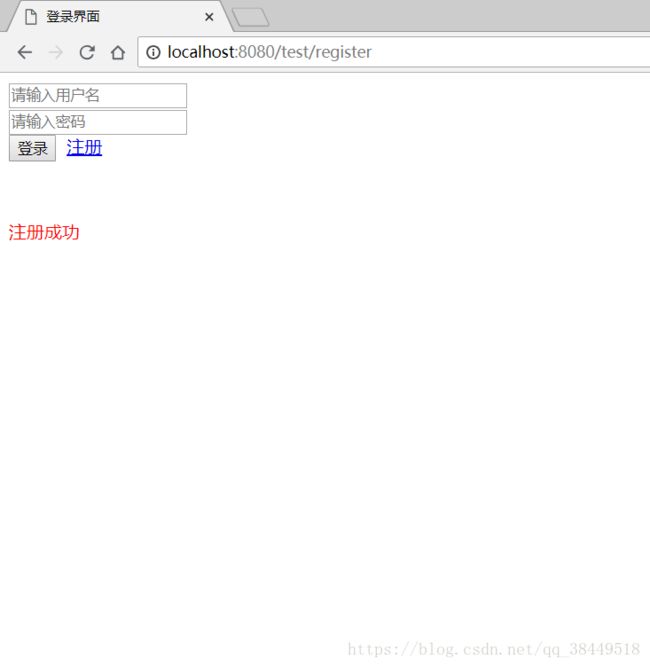
好了,点击提交!
嗯现在我们可以在数据库中看到刚刚注册的用户了
现在直接登录!
好了现在成功了,从前端到后端已经连起来了。
今天总结到这里,编码问题我还没有弄,这只是练习,仅供个人学习使用。
