Jupyter Notebook如何修改主题、字体、字号?分分钟搞定!!!
Jupyter Notebook修改主题、字体、字号
文章目录
- Jupyter Notebook修改主题、字体、字号
- 1. 主流方案
- 1.1 安装
- 1.2 查看主题
- 1.3 恢复默认主题
- 1.4 设置主题参数
- 1.5 替换图形样式
- 2. 最完美方案(仅我认为)
- 2.1 找到custom.css
- 2.2 修改内容
- 3. 最简便方案
对于强迫症的我来说,Jupyter Notebook的代码字体实在是不能忍受;我试过CSDN、简书、知乎上面的主流方法,由于各种原因还是失败,历经多时终于成功了,感谢GitHub大佬,打造了这款“神器”以适应大众需求。
下面来说说我为了更改Jupyter Notebook界面外观的惨痛经历!对于修改失败的童鞋们很有用,定会一击必中!!!!!
1. 主流方案
下面就是GitHub大佬打造的“神器”,牛X!
1.1 安装
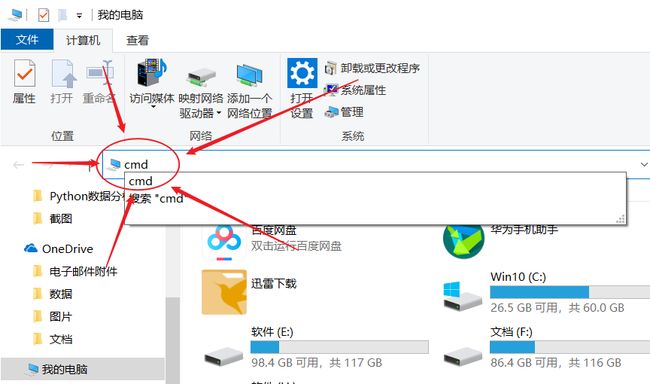
在资源管理器中输出“cmd”,按回车键打开window命令提示符;或win+R,键入cmd,回车:
输入以下代码中任何一条,回车:
# 安装
pip install jupyterthemes
# 更新到最新版本
pip install -- upgrade jupyterthemes
我想大伙刚开始都是这么干的,应该大家和我一样总是在获取该库是请求失败,简直龟速下载,深恶痛觉真是,所以…
兜兜转转,我终于发现了豆瓣这个美妙的东西,感谢豆瓣!利用豆瓣的python库来源,就可以刷刷刷秒速下载,看着很爽!
pip install -i https://pypi.doubanio.com/simple/ jupyterthemes
1.2 查看主题
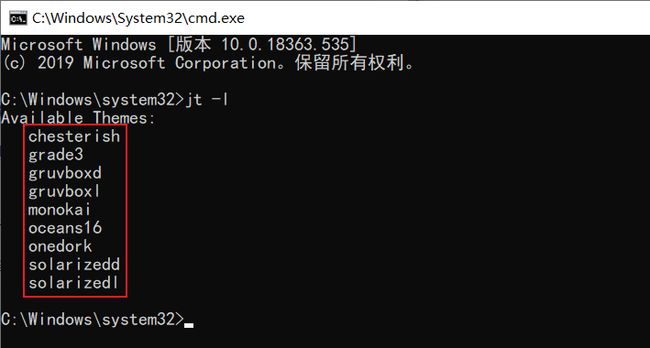
成功安装了jupyterthemes ,接下来 ,看看我们可以选择那些主题,在命令提示符中输入:
jt -l
可以都试试,选自己喜欢的(如果不想一个一个试,确实挺烦,看这里)
jt -t oceans16 #可以挨个试试
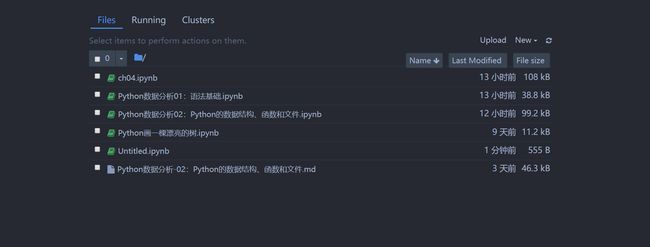
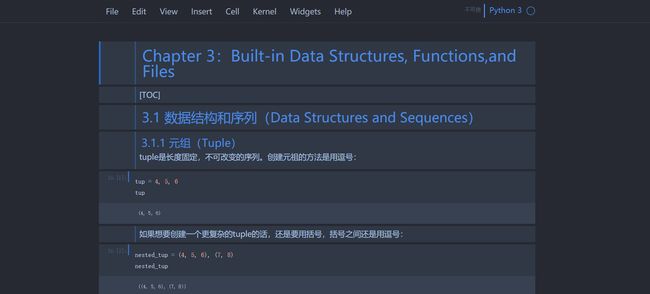
看看oceans16是啥样子:
1.3 恢复默认主题
换了不喜欢,就换回来:
jt -r
相对来说我是比较喜欢oceans16
1.4 设置主题参数
jupyterthemes中的许多参数都是可以修改的,比如 -t 是设置主题,-f 设置代码的字体,-nf 设置
notebook的字体等。
jupyterthemes的参数设置说明
| cl options | arg | default |
|---|---|---|
| Usage help | -h | – |
| List Themes | -l | – |
| Theme Name to Install | -t | – |
| Code Font | -f | – |
| Code Font-Size | -fs | 11 |
| Notebook Font | -nf | – |
| Notebook Font Size | -nfs | 13 |
| Text/MD Cell Font | -tf | – |
| Text/MD Cell Fontsize | -tfs | 13 |
| Pandas DF Fontsize | -dfs | 9 |
| Output Area Fontsize | -ofs | 8.5 |
| Mathjax Fontsize (%) | -mathfs | 100 |
| Intro Page Margins | -m | auto |
| Cell Width | -cellw | 980 |
| Line Height | -lineh | 170 |
| Cursor Width | -cursw | 2 |
| Cursor Color | -cursc | – |
| Alt Prompt Layout | -altp | – |
| Alt Markdown BG Color | -altmd | – |
| Alt Output BG Color | -altout | – |
| Style Vim NBExt* | -vim | – |
| Toolbar Visible | -T | – |
| Name & Logo Visible | -N | – |
| Kernel Logo Visible | -kl | – |
| Reset Default Theme | -r | – |
| Force Default Fonts | -dfonts | – |
这样我们就可以美化我们notebook界面了,下面附上我的设置代码:
jt -t oceans16 -f consolamono -nf robotosans -tf robotosans -N -T -cellw 60% -dfs 9 -ofs 9
具体操作看看神器中Command Line Examples
1.5 替换图形样式
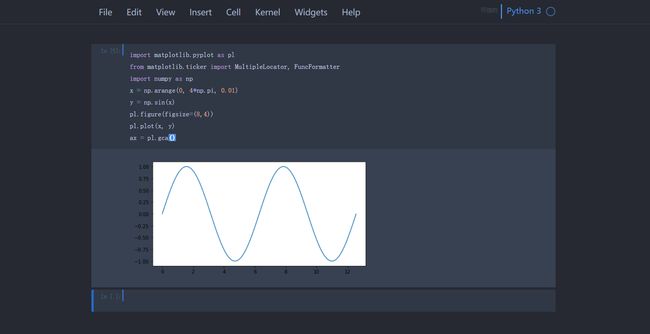
这是换主题延伸处的一个问题,如果不替换图表样式的话,图表输出是白底,同时黑色字体会和背景融为一体,就像这样:
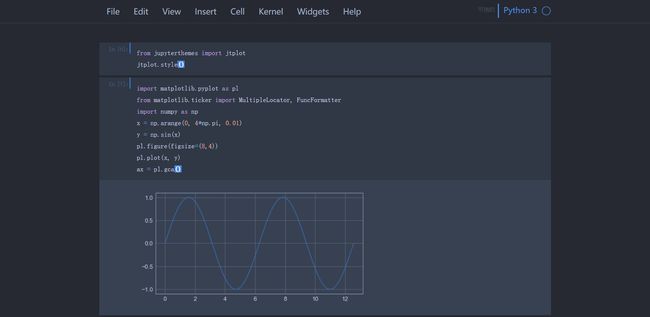
jtplot.style()函数会自动使用当前主题样式进行图表背景填充:
from jupyterthemes import jtplot
jtplot.style()
这样就比较完美了^_^
2. 最完美方案(仅我认为)
使用过上面的方法之后你就会发现,这些主题跟默认主题相比整体效果并不尽人意;我就想,能不能在默认主题的基础上修改代码字体,notebook字体,结果是失败,jupyterthemes不允许这样的操作,极度失望…
兜兜转转,又找到了一位知乎大神的回答
我的是window系统,下面只说win方案:
我们需要找到在本地jupyter的cumtom.css文件,修改默认主题字体,颜色,代码高亮方案等等等等。
- 优点:从Jupyter导出html时,新样式会保留(自定义代码高亮无法保留,暂时还没有找到解决方案)
- 缺点:每次调整样式都需要到特定路径,多端同步麻烦
2.1 找到custom.css
文件路径:
C:\Users\user\.jupyter\custom\custom.css
2.2 修改内容
在万欣的方案之上略作修改:
/* Body */
/* #notebook-container {
    width: 60%
} */

/* Markdown */
div#notebook {
    font-family: san francisco, "PingFangSC-Medium", "Microsoft YaHei";
    line-height: 20px;
    -webkit-font-smoothing: antialiased !important;
}

/* Markdown - h2 */
div#notebook h2 {
    color: #007aff;
}

/* Markdown - quote */
div#notebook blockquote{
    background-color: #f8f8f8;
    color: #505050;
    padding: 8.5px;
    margin: 0.5em -0.5em 0.5em -0.4em;
}

/* Markdown - code in paragraph */
div#notebook p code, div#notebook li code {
    font-family: Consolas, "PingFangSC-Medium", "Microsoft YaHei";
    font-size: 1em !important;
    color: #111111;
    border: 0.5px solid #cfcfcf;
    border-radius: 2px;
    background-color: #f7f7f7;
    padding: .1em .2em;
    margin: 0px 2px;
}

/* Markdown - code */
div.text_cell_render pre {
    border: 1px solid #cfcfcf;
    border-radius: 2px;
    background: #f7f7f7;
    line-height: 1.21429em;
    padding: 8.5px;
    margin: 0.5em -0.5em 0.5em -0.4em;
}
div.text_cell_render code {
    background: #f7f7f7;
}

/* Code */
div.CodeMirror pre {
    font-family: Consolas, "PingFangSC-Medium", "Microsoft YaHei";
    font-size: 11pt;
    line-height: 140%;
    -webkit-font-smoothing: antialiased !important;
}

/* Code - output */
div.output pre {
    font-family: Consolas, "PingFangSC-Medium", "Microsoft YaHei";
    line-height: 20px;
    -webkit-font-smoothing: antialiased !important;
}

/* Code - comment */
span.cm-comment {
    font-family: san francisco, "PingFangSC-Medium", "Microsoft YaHei" !important;
    font-style: normal !important;
}


/* Code - highlighting (grade3)*/
.cm-s-ipython .CodeMirror-cursor {
    border-left: 1px solid #ff711a !important;
}
.cm-s-ipython span.cm-comment {
    color: #8d8d8d;
    font-style: italic;
}
.cm-s-ipython span.cm-atom {
    color: #055be0;
}
.cm-s-ipython span.cm-number {
    color: #ff8132;
}
.cm-s-ipython span.cm-property {
    color: #303030;
}
.cm-s-ipython span.cm-attribute {
    color: #303030;
}
.cm-s-ipython span.cm-keyword {
    color: #713bc5;
    font-weight: bold;
}
.cm-s-ipython span.cm-string {
    color: #009e07;
}
.cm-s-ipython span.cm-meta {
    color: #aa22ff;
}
.cm-s-ipython span.cm-operator {
    color: #055be0;
}
.cm-s-ipython span.cm-builtin {
    color: #e22978;
}
.cm-s-ipython span.cm-variable {
    color: #303030;
}
.cm-s-ipython span.cm-variable-2 {
    color: #de143d;
}
.cm-s-ipython span.cm-variable-3 {
    color: #aa22ff;
}
.cm-s-ipython span.cm-def {
    color: #e22978;
    font-weight: bold;
}
.cm-s-ipython span.cm-error {
    background: rgba(191, 97, 106, .40);
}
.cm-s-ipython span.cm-tag {
    color: #e22978;
}
.cm-s-ipython span.cm-link {
    color: #ff8132;
}
.cm-s-ipython span.cm-storage {
    color: #055be0;
}
.cm-s-ipython span.cm-entity {
    color: #e22978;
}
.cm-s-ipython span.cm-quote {
    color: #009e07;
}
div.CodeMirror span.CodeMirror-matchingbracket {
    color: #1c1c1c;
    background-color: rgba(30, 112, 199, .30);
}
div.CodeMirror span.CodeMirror-nonmatchingbracket {
    color: #1c1c1c;
    background: rgba(191, 97, 106, .40) !important;
}
.cm-s-default .cm-hr {
    color: #055be0;
}
3. 最简便方案
适用Mac&Win
看另一位大佬(许大森)的回答,通过安装插件的方式,Chrome插件Stylish,然后再新建自己的Jupyter样式
- 优点:应用和取消样式比较方便,同步和更新可以借助Stylish;
- 缺点:从Jupyter导出html时,会恢复到原来的丑样式;
大家细细看看许大森的回答,不再赘述
结束喽
