For project reason I have to measure the performance of OData service being accessed parallelly. And I plan to use the open source tool JMeter to generate a huge number of request in parallel and measure the average response time. Since I am a beginner for JMeter, I write down what I have learned into this blog. I will continue to explorer the advanced feature of JMeter in my daily work.
我们公司某团队开发了一个OData服务,现在我接到任务,要测试这个服务在高并发访问场景下的性能指标,比如5万个请求同时到来后,每个请求的平均响应时间,因此我选择了jMeter这个好用的工具来模拟高并发请求。
- Download JMeter from its official website:
Go to the installation folder, add the following text in file binuser.properties:
httpclient4.retrycount=1
hc.parameters.file=hc.parameters
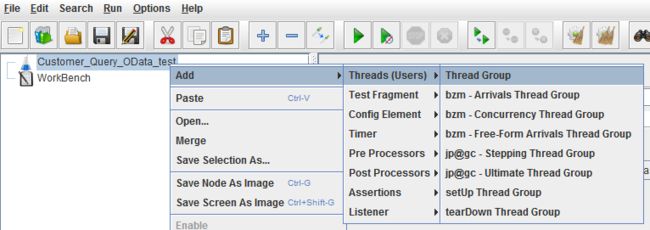
- Create a new test plan for example Customer_Query_OData_test, and right click on it and create a thread group from context menu.
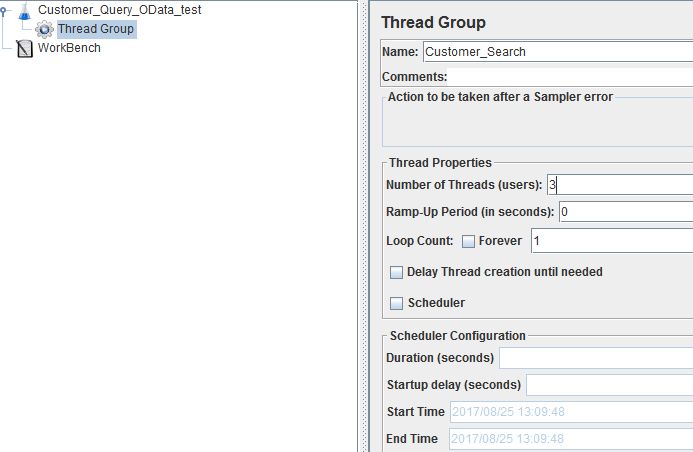
Below configuration means I would like to generate three request in parallel via three threads, each thread is executed only once. And there is no delay during the spawn of each threads ( Ramp-Up Period = 0 )
下列设置意思是我想创建三个并发请求,每个请求通过一个线程实现,每个线程仅仅执行一次。每个线程派生后的延时是0秒,意思是主线程同时创建三个线程。
创建一个新的HTTP请求,维护下列设置:
Create a new Http Request and maintain the following settings:
(1) Protocol: https
(2) Server name:
(3) Http request method: GET
(4) Http path: /sap/c4c/odata/v1/c4codata/AccountCollection/ - 这就是OData服务的相对路径了
(5) Use KeepAlive: do NOT select this checkbox - 记得这个勾别打上
In Parameter tab, maintain query option $search with value ‘Wang’
这个意思就是每个并发请求同时发起OData查询,参数为我的名字Wang
Switch to Advanced tab, choose “HttpClient4” from drop down list for Implementation, and maintain proxy server name and port number.
如果有代理的话,在下图位置维护代理服务器信息。
- Create a new HTTP Header Manager and specify the basic authentication header field and value.
在HTTP Header Manager里维护访问这个Odata服务的credential。因为我们开发的OData服务支持Basic Authentication这种认真方式,所以我在此处的HTTP header字段里维护Authentication信息。
- Create a listener for the test plan. In my test I simply choose the most simple one: View Results in Table.
创建listener,主要用途当然是显示测试结果了。我使用的是jMeter自带的Listener,Table类型的,以表格形式显示高并发请求和响应的各项指标。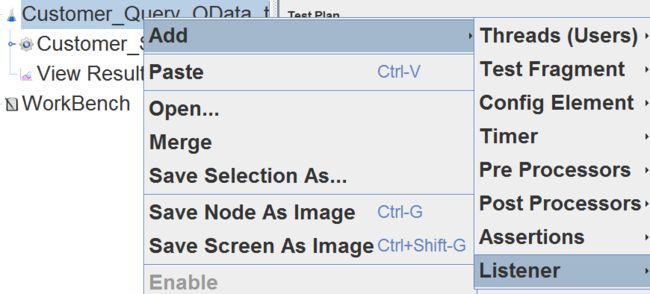
Once done, start the test:
一切就绪,点击这个绿色的三角形开始测试:
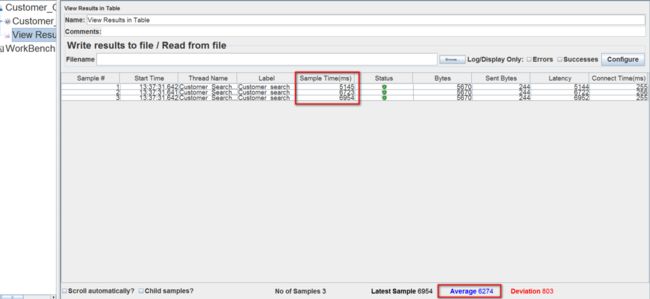
After the test is finished, double click on View Result Listener and the response time for each request and the average response time is displayed there:
测试完毕后,双击我们之前创建的Table Result Listener,我这三个并发请求的性能指标就显示出来了。可以看到三个请求中,最快的请求用了5.1秒,最慢的6.9秒
当然,jMeter也支持命令行方式使用:
Or you can use command line to achieve the same:
-n: use non-GUI mode
-t: specify which test plan you want to run
-l: specify the path of output result file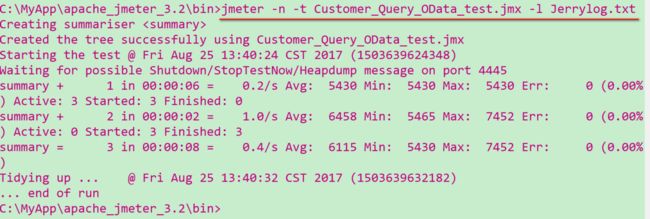
为了检验jMeter采集的数据是否正确可靠,我还花时间写了一个Java程序,用JDK自带的线程池产生并发请求,测试的结果和jMeter是一致的。
And I have written a simple Java application to generate parallel request via multiple thread and the result measured in Java program is consistent with the one got from JMeter.
The source code could be found from my github:
我的Java程序放在我的github上:
https://github.com/i042416/Ja...
How to generate random query for each thread in JMeter
到目前为止,我的三个并发请求进行搜索的参数都是硬编码的Wang,这个和实际场景不太符合。有没有办法生成一些随机的搜索字符串,这样更贴近真实使用场景呢?
Suppose we would like each thread in JMeter to generate different customer query via OData with the format JerryTestCustomer_<1~100>, we can simply create a new user parameter:
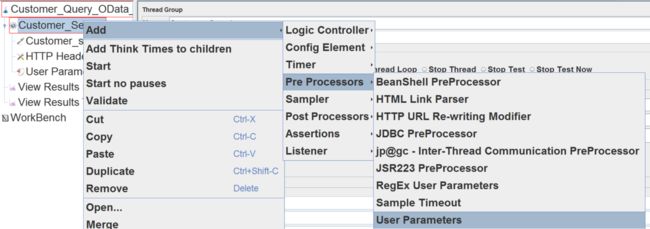
当然有办法:右键菜单,Add->Pre Processors(预处理器)->User Parameters:
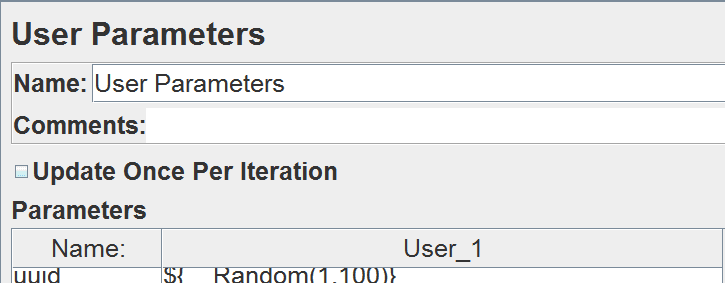
参数名Parameter name,取为uuid
参数值Parameter value: use JMeter predefined function __Random to generate random number.
使用jMeter自带的随机数生成函数__Random。
因此最后参数uuid的值为${__Random(1,100)},意思是生成1到100内的随机正整数
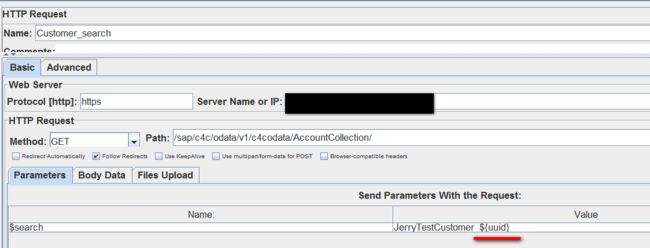
and in http request, just specify reference to this variable via ${uuid}:
在http请求里,用固定的前缀JerryTestCustomer_加上随机参数,以此来构造随机搜索字符串:
So that in the end each thread will issue different query to OData service end point.
通过Table Result listener,能观察到这次确实每个请求发起的搜索都使用了不同的字符串了。
希望这篇文章介绍的jMeter使用技巧对大家工作有所帮助。
要获取更多Jerry的原创文章,请关注公众号"汪子熙":
![]()

