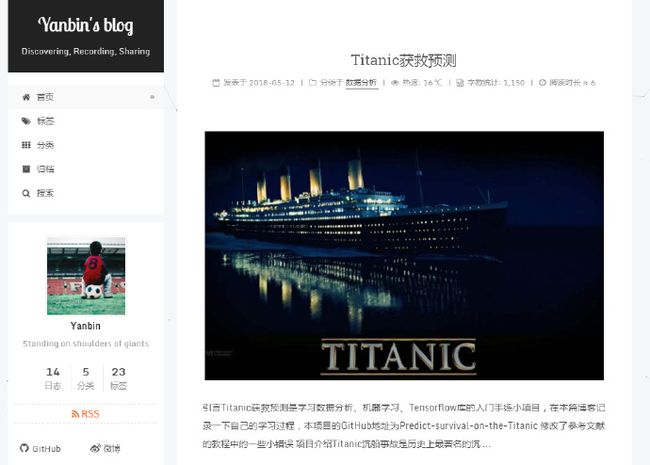
Hexo博客提供了主题可供选择,我的主题是NexT-V5.1.4,简约黑白风格。
首先说明一下站点配置文件_config.yml和主题配置文件_config.yml
| 配置文件 | 目录 |
|---|---|
| 站点配置文件_config.yml | blog |
| 主题配置文件_config.yml | blog/themes/next |
[注]blog是我的Hexo博客文件夹,文件夹下面有node_modules,source,themes等文件夹
安装NexT主题
# 在blog目录下,打开cmd
git clone --branch v5.1.4 https://github.com/iissnan/hexo-theme-next themes/next
# 打开站点配置文件_config.yml,找到theme
theme: next
Ok,完成!
选择主题样式
# 打开主题配置文件_config.yml,找到scheme,自行选择一种样式
# Schemes
#scheme: Muse
#scheme: Mist
scheme: Pisces
#scheme: Gemini
添加RSS功能
- 执行命令,安装插件
npm install hexo-generator-feed –save
- 编辑主题配置文件_config.yml, rss修改为如下
rss: /atom.xml
添加标签页面
- 新建页面
在终端窗口下,定位到 Hexo 站点目录下。使用 hexo new page 新建一个页面,命名为 tags :
cd your-hexo-site
hexo new page tags
- 设置页面类型
编辑刚新建的页面,将页面的类型设置为 tags ,主题将自动为这个页面显示标签云。页面内容如下:
title: 标签
date: 2014-12-22 12:39:04
type: "tags"
comments: false
---
注意:如果有集成评论服务,页面也会带有评论。 若需要关闭的话,请添加字段 comments 并将值设置为 false,如:
- 修改菜单
在菜单中添加链接。编辑主题配置文件_config.yml,添加 tags 到 menu 中,如下:
menu:
  home: / || home
  #about: /about/ || user
  tags: /tags/ || tags
  categories: /categories/ || th
  archives: /archives/ || archive
  #schedule: /schedule/ || calendar
  #sitemap: /sitemap.xml || sitemap
  #commonweal: /404/ || heartbeat
添加分类页面
- 新建页面
在终端窗口下,定位到 Hexo 站点目录下。使用 hexo new page 新建一个页面,命名为 categories :
cd your-hexo-site
hexo new page categories
- 设置页面类型
编辑刚新建的页面,将页面的 type 设置为 categories ,主题将自动为这个页面显示分类。页面内容如下:
title: 分类
date: 2014-12-22 12:39:04
type: "categories"
comments: false
---
注意:如果有集成评论服务,页面也会带有评论。 若需要关闭的话,请添加字段 comments 并将值设置为 false,如:
- 修改菜单
在菜单中添加链接。编辑主题配置文件_config.yml,添加 categories 到 menu 中,如下:
menu:
  home: / || home
  #about: /about/ || user
  tags: /tags/ || tags
  categories: /categories/ || th
  archives: /archives/ || archive
  #schedule: /schedule/ || calendar
  #sitemap: /sitemap.xml || sitemap
  #commonweal: /404/ || heartbeat
添加sitemap站点地图
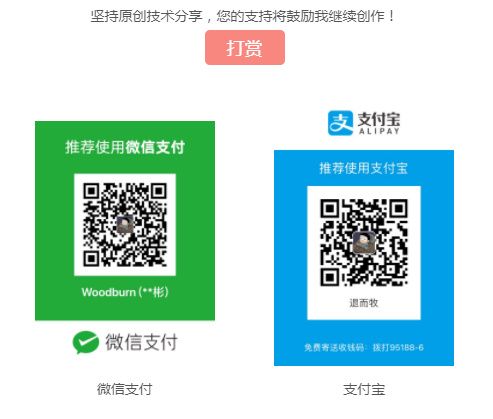
开启打赏功能
越来越多的平台(微信公众平台,新浪微博,,百度打赏等)支持打赏功能,付费阅读时代越来越近,特此增加了打赏功能,支持微信打赏和支付宝打赏。只需要主题配置文件_config.yml 中填入微信和支付宝收款二维码图片地址 即可开启该功能。
reward_comment: 坚持原创技术分享,您的支持将鼓励我继续创作!
wechatpay: /path/to/wechat-reward-image
alipay: /path/to/alipay-reward-image
数学公式支持
# MathJax Support
mathjax:
  enable: true
腾讯分析
请登录腾讯分析,登录并获取分析的ID。 然后在主题配置文件_config.yml里将ID放置tencent_analytics字段。
不蒜子统计
编辑主题配置文件_config.yml中的busuanzi_count的配置项
# Show PV/UV of the website/page with busuanzi.
# Get more information on http://ibruce.info/2015/04/04/busuanzi/
busuanzi_count:
  # 开启全局开关enable: true
  enable: true
  # 站点UV配置
  site_uv: true
  site_uv_header: 本站访客数
  site_uv_footer: 人次
  # 站点PV配置
  site_pv: true
  site_pv_header: 本站总访问量
  site_pv_footer: 次
  # 单页面PVp配置,这里我没有启用这个功能,我使用了leancloud的文章阅读次数统计
  page_pv: false
  page_pv_header:
  page_pv_footer:

文章阅读量统计
打开LeanCloud官网,进行注册并登录。
- 创建应用,命名为blog
- 打开blog
- 新建Class,命名为Counter
- 点击应用key,获取App ID和App Key
- 打开主题配置文件_config.yml,找到leancloud_visitors:,填入你的App ID和App Key
# Show number of visitors to each article.
# You can visit https://leancloud.cn get AppID and AppKey.
leancloud_visitors:
  enable: true
  app_id:
  app_key:
# 添加来比力评论
优点:配置简单
登陆来必力获取你的 LiveRe UID。 编辑主题配置文件_config.yml,编辑 livere_uid字段,设置如下:
livere_uid: #your livere_uid
添加valine评论
如果对hypercomments不满意,可以试一下valine。valine是LeanCloud的一款极简的评论系统,并且还支持markdown功能!
打开LeanCloud官网,登录。
- 创建应用,命名为comment
- 打开comment
- 点击应用key,获取App ID和App Key
- 打开主题配置文件_config.yml,找到valine,填入你的App ID和App Key
# Valine.
# You can get your appid and appkey from https://leancloud.cn
# more info please open https://valine.js.org
valine:
  enable: true
  appid:
  appkey:
  notify: false # mail notifier , https://github.com/xCss/Valine/wiki
  verify: false # Verification code
  placeholder: Just go go # comment box placeholder
  avatar: mm # gravatar style
  guest_info: nick,mail,link # custom comment header
  pageSize: 10 # pagination size
主题页脚
由Hexo强力驱动 | 主题 - NexT.Pisces
打开主题配置文件_config.yml,找到copyright,powered: false
footer:
  # Specify the date when the site was setup.
  # If not defined, current year will be used.
  #since: 2015

  # Icon between year and copyright info.
  icon: user

  # If not defined, will be used `author` from Hexo main config.
  copyright:
  # -------------------------------------------------------------
  # Hexo link (Powered by Hexo).
  powered: false
效果如下
主题 — NexT.Pisces v5.1.4
添加版权信息
在目录 next/layout/_macro/下添加 my-copyright.swig:
{% if page.copyright %}
本文标题:{{ page.title }}
文章作者:{{ theme.author }}
发布时间:{{ page.date.format("YYYY年MM月DD日 - HH:MM") }}
最后更新:{{ page.updated.format("YYYY年MM月DD日 - HH:MM") }}
原始链接:{{ page.permalink }}
许可协议: 署名-非商业性使用-禁止演绎 4.0 国际 转载请保留原文链接及作者。
{% endif %}
在目录next/source/css/_common/components/post/下添加my-post-copyright.styl:
.my_post_copyright {
  width: 85%;
  max-width: 45em;
  margin: 2.8em auto 0;
  padding: 0.5em 1.0em;
  border: 1px solid #d3d3d3;
  font-size: 0.93rem;
  line-height: 1.6em;
  word-break: break-all;
  background: rgba(255,255,255,0.4);
}
.my_post_copyright p{margin:0;}
.my_post_copyright span {
  display: inline-block;
  width: 5.2em;
  color: #b5b5b5;
  font-weight: bold;
}
.my_post_copyright .raw {
  margin-left: 1em;
  width: 5em;
}
.my_post_copyright a {
  color: #808080;
  border-bottom:0;
}
.my_post_copyright a:hover {
  color: #a3d2a3;
  text-decoration: underline;
}
.my_post_copyright:hover .fa-clipboard {
  color: #000;
}
.my_post_copyright .post-url:hover {
  font-weight: normal;
}
.my_post_copyright .copy-path {
  margin-left: 1em;
  width: 1em;
  +mobile(){display:none;}
}
.my_post_copyright .copy-path:hover {
  color: #808080;
  cursor: pointer;
}
修改next/layout/_macro/post.swig,在代码
      {% if not is_index %}
        {% include 'wechat-subscriber.swig' %}
      {% endif %}
之前添加增加如下代码:
      {% if not is_index %}
        {% include 'my-copyright.swig' %}
      {% endif %}
修改next/source/css/_common/components/post/post.styl文件,在最后一行增加代码:
@import "my-post-copyright"

百度分享
编辑主题配置文件_config.yml,找到baidushare
# Baidu Share
# Available value:
#    button | slide
# Warning: Baidu Share does not support https.
baidushare:
  type: button
搜索功能
- 安装 hexo-generator-searchdb,在站点的根目录下执行以下命令:
npm install hexo-generator-searchdb --save
- 编辑站点配置文件_config.yml,新增以下内容到任意位置:
search:
  path: search.xml
  field: post
  format: html
  limit: 10000
- 编辑主题配置文件_config.yml,启用本地搜索功能:
# Local search
local_search:
  enable: true
修改文章底部的那个带#号的标签
修改模板/themes/next/layout/_macro/post.swig,搜索 rel="tag">#,将 # 换成
Pisces文章分割线长度
修改blog\themes\next\source\css_common\components\post文件夹下的post-eof.styl
.posts-expand {
  .post-eof {
    display: block;
    margin: $post-eof-margin-top auto $post-eof-margin-bottom;
    width: 8%;  # 分割线长度
    height: 1px;
    background: $grey-light;
    text-align: center;
  }
}
博文压缩
在blog/目录下
- 执行一下命令:
npm install gulp -g
npm install gulp-minify-css gulp-uglify gulp-htmlmin gulp-htmlclean gulp --save
- 新建gulpfile.js,并填入一下内容
var gulp = require('gulp');
var minifycss = require('gulp-minify-css');
var uglify = require('gulp-uglify');
var htmlmin = require('gulp-htmlmin');
var htmlclean = require('gulp-htmlclean');
// 压缩 public 目录 css
gulp.task('minify-css', function() {
    return gulp.src('./public/**/*.css')
        .pipe(minifycss())
        .pipe(gulp.dest('./public'));
});
// 压缩 public 目录 html
gulp.task('minify-html', function() {
  return gulp.src('./public/**/*.html')
    .pipe(htmlclean())
    .pipe(htmlmin({
         removeComments: true,
         minifyJS: true,
         minifyCSS: true,
         minifyURLs: true,
    }))
    .pipe(gulp.dest('./public'))
});
// 压缩 public/js 目录 js
gulp.task('minify-js', function() {
    return gulp.src('./public/**/*.js')
        .pipe(uglify())
        .pipe(gulp.dest('./public'));
});
// 执行 gulp 命令时执行的任务
gulp.task('default', [
    'minify-html','minify-css','minify-js'
]);
- 执行
hexo g && gulp就会根据 gulpfile.js 中的配置,对 public 目录中的静态资源文件进行压缩
参考文献
- GitHub+Hexo 搭建个人网站详细教程
- 安装Next主题
- 第三方集成服务
- 为NexT主题添加文章阅读量统计功能
- 为你的Hexo加上评论系统-Valine
- 主题配置
- Blog + SEO
- hexo的next主题个性化教程:打造炫酷网站