react-router简介
- react-router包含3个库,react-router、react-router-dom和react-router-native。
- react-router提供最基本的路路由功能,实际使⽤的时候我们不会直接安装react-router,⽽是根据应⽤运行的环境选择安装 react-router-dom(在浏览器器中使⽤)或react-router-native(在rn中使⽤)。
- react-router-dom和 react-router-native都依赖react-router,所以在安装时,react-router也会自动安装,
react-Routerg(中文官网):http://react-router.docschina...
创建web应用的使用:
yarn add react-router-domreact-Router的基本使用
import React,{Component} from 'react'
import { BrowserRouter as Router,Route, Link, Switch} from "react-router-dom";

import HomePage from './pages/HomePage'
import LoginPage from './pages/LoginPage'
import UserPage from './pages/UserPage'
import _404Page from './pages/_404Page'

export default function App(){
  return(


          首页


          用户中心


          登陆


          商品


         {/* 没有swtich  就会把匹配到的进行现实*/}
            // exact精确的
           HomePage-children}
           component={HomePage}
           render={()=>HomePage-render}
           >
           {/* 优先级顺序 */}
           // 三个都存在,只渲染一个;都可以获取到`router props`
           //  children 不管location 是否匹配了,都会现实
           {/* children>componentrender */}


  )
}
当 Switch 标签没有包裹需要渲染的Route组建时,如果又一个路由 写了children 渲染方式,那么每一个路径都会渲染这个children;
当然这个404 也会这样一直存在。
Switch 用于渲染与路径匹配的第一个或
children 被使用的场景,比如导航、菜单,每次都需要被渲染出来。当然一般导航 我们用组建复合比较多。children 也是一种可以实现的方式。
component: component
合理使用 children、component、render
import React, {Component, useEffect} from "react";
import {BrowserRouter as Router, Route} from "react-router-dom";
export default class RouteComponentPage extends Component {
constructor(props) {
super(props);
this.state = { count: 0 };
}
render() {
const {count} = this.state;
return (
RouteComponentPage
{/* 渲染component的时候会调⽤用React.createElement,如果使⽤用下⾯面这种匿匿名函数的 形式,每次都会⽣生成⼀一个新的匿匿名的函数,
导致⽣生成的组件的type总是不不相同,这个时候会产⽣生重复的卸载和挂载 */}
{/* 错误举例例 观察下child的didMount和willUnmount函数 */}
{/*
);
}
}
class Child extends Component {
componentDidMount(){
console.log("componentDidMount") //sy-log
}
componentWillUnmount() {
console.log("componentWillUnmount")//sy-log
}
render() {
return child-{this.props.count};
}
}
function FunctionChild(props) {
useEffect(() => {
return () => {
console.log("FunctionChild-WillUnmount"); //sy-log
};
}, [])
return (child-{props.count})
}
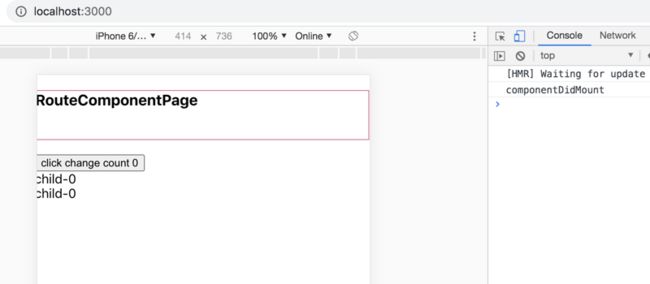
当我们去执行
/>} /> } /> 首次加载的时候会执行,Child里面的componentDidMount

- 当我们点击按钮叠加时
无论时函数组建,还是class 组建 都会出现,频繁加载
componentDidMount、componentWillUnmount
这是十分消耗性能的
所以我们最好时使用 render 和 child来加载组建
我们需要合理选用:route在没有swtich的情况下,匹配到才进行渲染,我们选择render和component,组建选择 component,匿名函数选择render
接下来我们看下三种渲染方式时如何执行的
三种渲染方式的执行
Rputer 核心渲染源码:
return(

    {props.match // match的情况下
      ? children // 先判断 children 是否匹配
         // children 的数据类型: fn, 对象, 数组
        ? typeof children === 'function' //  如果是fn
          ? __DEV__
            ? evalChilderDev(children,props,this.props.path)
            :children(props) // 执行fn 函数
          :children // children 存在,但是不是fn;组建复合的形式存在,就直接渲染children
        : component // 如果没有children;判断component, 优先级第二
        ? React.createElement(component, props) // component 存在,使用React.createElement(),渲染当前的组建
        : render // component 也不存在,最后判断render
        ? render(props) // render 存在,直接执行
        : null // 都不存在 返回null
      : typeof children === 'function' // 不match,不匹配的情况直接看children是不是一个fn
      ? __DEV__
        ? evalChilderDev(children,props, this.props.path)
        :children(props) // 是fn 直接执行
      :null // 不是返回null
    }

)

// 不管是否匹配都会渲染children,但是呢,如果不匹配只去渲染,children是fn的情况
- 匹配porps.match; 三元表达式,首先匹配是否是children;
- children 可以是function类型,在组建符合的情况下,children可以是单一的对象,还可以是一个数组;数组也被称之为对象。
严格来说,children有三种结构:
- 函数
- 组建复合中的对象
- 数组的形式
动态路由
商品
function Product(props){
  console.log('Product-props:', props)
  const {match} = props
  const {id} =match.params
   return Product- id:{id}
}
嵌套路由
商品
// 用 render 或者 children 或者component 都是可以的,都能拿到props,我就是多些几种方式而已
function Product(props){
  console.log('Product-props:', props)
  // useEffect(() => {
  //   // effect
  //   return () => {
  //     console.log('cleanup')
  //     // cleanup
  //   }
  // }, [])
  const {match} = props
  const {params,url} =match
  const {id} =params
   return
      Product- id:{id}

        详情


}
//Detail 商品详情
function Detail(){
  return

        详情来了———————— Detail


}
实现react-Router来了~~~
my-react-router-dom实现
我们只需要实现 BrowserRouter、Link、Route
1. 初步搭建
BrowserRouter.js
Router主要是分为:
- BrowserRouter
- HashRouter
- MemoryRouter
- NativeRouter
- StaticRouter
Router的不同主要是history不同
// BrowserRouter ,组建复合,我们在使用的时候,也是在其中进行children。
import react,{Component} from 'react'
import {createBrowserHistory} from 'history' // 安装了 react-router-dom ;就不需要在安装history了;已经涵盖
import Router from './Router'
// BrowserRouter 是基于Router来进行实现的
export default class BrowserRouter extends Component{
  constructor(props){
    super(props)
    this.history = createBrowserHistory()
  }
  render() {
    return(


    )
  }
}
children 是
在使用BrowserRouter的时候,我们起了个别名Router;这里面就是children内容
Router.js
import React,{Component} from 'react'

export default class Router extends Component{
  constructor(){
    super()
  }
  render(){
    const{ history, children} =this.props
    // 主要目的是返回children
    return  children
  }
}
Route.js
import React,{Component} from 'react'

export default class Route extends Component{
  constructor(){
    super()
  }
  render(){
    return(

        Route

    )
  }
}
Link.js
import React,{Component} from 'react'

export default class Link extends Component{
  constructor(){
    super()
  }
  render(){
    return(

        Link

    )
  }
}
目前页面的展示
import {
  BrowserRouter as Router,
  Route,
  Link,
  // Switch
} from "./my-react-router-dom";
最后实现Switch
2. 完善
Router.js
import React,{Component} from 'react'
import {RouterContext} from './Context'
export default class Router extends Component{
  constructor(props){
    super(props)
    // 用于路由变化匹配path用的参数
    this.state={
      location: props.history.location
    }
    // 监听history
    props.history.listen(location=>{
      // 改变了就修改location
      this.setState(location)
    })
  }
  render(){
    const{ history, children} =this.props
     console.log(history,'history')
    // 主要目的是返回children
    return
          {children}

    ;
  }
}
创建 Context.js,来解决跨层级通讯
这么没有什么要说明的,就是跨组建通讯
import React from 'react'

const RouterConetxt =React.createContext()
export {RouterConetxt}
Link.js
平时我们是如何使用Link
首页Link组建
- to
- 首页相当于children
import React,{Component} from 'react'

export default class Link extends Component{
  constructor(){
    super()
  }
  render(){
    const {to, children, ...restProps} = this.props
    return(
      {children}
    )
  }
}
处理link a标签的默认事件
- 去除默认事件,可以用点击事件中添加“e.preventDefalut”
- 去掉之后,那么href事件就会被禁止,我们就需要手动去跳转,命令式修改路由
- 命令式:
history.push(this.props.to)考虑到兼容问题,不采用window.history; 其实在最开始,
BrowserRouter中,我们往下穿了一个history;组建通讯,跨层级使用;这个时候我们可以考虑用context来进行传递下来,这样其他的组建,比如Route也可以使用到history
import React,{Component} from 'react'
import { RouterConetxt } from './Conetxt';

export default class Link extends Component{
  // 引用
  static contextType = RouterConetxt
  constructor(){
    super()
  }
  handleClick=(e)=>{
    e.preventDefault();
    // 跳转
    this.context.history.push(this.props.to)
  }
  render(){
    const {to, children, ...restProps} = this.props
    return(
      {children}
    )
  }
}
Route.js
根据路由,匹配到对应的path,展示对应的组建内容
首先先渲染component
我们平时的使用
参数为:
- path
- component
import React,{Component} from 'react'
import { RouterContext } from './Context';

export default class Route extends Component{
  constructor(){
    super()
  }
  render(){
    return (

        {
          context=>{
            const {location} = context
            const {path,component} =this.props
            // 目前component 还不是一个组建,所以我们需要用到React.createElement() 来进行创建
            // 用来判断,筛选到的路由进行展示
            // 如果用 window.location;只会首次渲染,只有state发生改变的时候才会重新render
            const match= location.pathname === path
            //为true 就展示,为false就返回null
            return match?React.createElement(component):null
          }
        }

    )
  }
}
Route.js 继续完善,实现children、render的渲染
是我们最开始分析的 router的核心,一串三目表达式
// 将props 进行一个组合为的是更好的传递参数
const props={
...context,
location,
match
}
// match 匹配到:优先级-children>component>render|| null
// match 不匹配到: children是function形式 || null
return match?
 (children?():())
  :
 (typeof children==='function'? children(props) : >null)
// match 匹配到:优先级-children>component>render|| null
            // match 不匹配到: children是function形式 || null
            return match?
              children?
                (typeof children==='function'?
                  // 是函数就直接执行
                  children(props)
                  // 组建复合
                  :children
                )
                :
                (component?
                  (React.createElement(component,props))
                  :(render?render(props):null)
                )
            :
            (typeof children==='function'? children(props) : null)
404页面展示现实
- 在route页面,我们做的match判断是必须匹配,才会进行渲染;
- 但是404页面,在没有switch 的情况下,应该是每个路由都会被渲染出来;没有写path值默认应该是匹配404页面状态;需要加一个默认的match值。
- 在router中添加默认的match值,不写path值,返回默认的match;
- 接下来了我们会将mtch储存为一个对象
源码中,有一个
matchpath.js的文件,主要是将match处理成一个对象
首先 Router.js 的修改
修改的部分
 // 默认match
 // 不写match的情况下,默认返回 path:'/' 的对象
 // 这一段是直接从源码中抄的
 static computeRootMatch(pathname){
   return {path:'/',url:'/',params:{}, isExact: >pathname==='/'}
 }
render(){ returnmatch:Router.computeRootMatch(this.state.location.pathname) }}> {children} ; }
完整版Router.js
import React,{Component} from 'react'
import {RouterContext} from './Context'
export default class Router extends Component{
  // 默认match
  // 不写match的情况下,默认返回 path:'/' 的对象
  // 这一段是直接从源码中抄的
  static computeRootMatch(pathname){
    return {path:'/',url:'/',params:{}, isExact: pathname==='/'}
  }
  constructor(props){
    super(props)
    // 用于路由变化匹配path用的参数
    this.state={
      location: props.history.location
    }
    // 监听history
    props.history.listen(location=>{
      // 改变了就修改location
      this.setState({location})
    })
  }
  render(){
    const{ history, children} =this.props
    // 主要目的是返回children
    return
        {children}

    ;
  }
}
static的解释
这里涉及到了ES6的class,我们定义一个组件的时候通常是定义了一个类,而static则是创建了一个属于这个类的属性或者方法。
组件则是这个类的一个实例,component的props和state是属于这个实例的,所以实例还未创建,我们又怎么可能读得到props和state呢?
总结来说static并不是react定义的,而加上static关键字,就表示该方法不会被实例继承,而是直接通过类来调用
-------百度搜索而来 ---------
matchPath.js
去源码中找也是一样的,如果我写的这个版本不是最新的可以去源码中找,但这个文件被修改和调整,目测可能性不太大。
import pathToRegexp from "path-to-regexp";

const cache = {};
const cacheLimit = 10000;
let cacheCount = 0;

function compilePath(path, options) {
  const cacheKey = `${options.end}${options.strict}${options.sensitive}`;
  const pathCache = cache[cacheKey] || (cache[cacheKey] = {});

  if (pathCache[path]) return pathCache[path];

  const keys = [];
  const regexp = pathToRegexp(path, keys, options);
  const result = { regexp, keys };

  if (cacheCount < cacheLimit) {
    pathCache[path] = result;
    cacheCount++;
  }

  return result;
}

/**
 * Public API for matching a URL pathname to a path.
 */
function matchPath(pathname, options = {}) {
  if (typeof options === "string" || Array.isArray(options)) {
    options = { path: options };
  }

  const { path, exact = false, strict = false, sensitive = false } = options;

  const paths = [].concat(path);

  return paths.reduce((matched, path) => {
    if (!path && path !== "") return null;
    if (matched) return matched;

    const { regexp, keys } = compilePath(path, {
      end: exact,
      strict,
      sensitive
    });
    const match = regexp.exec(pathname);

    if (!match) return null;

    const [url, ...values] = match;
    const isExact = pathname === url;

    if (exact && !isExact) return null;

    return {
      path, // the path used to match
      url: path === "/" && url === "" ? "/" : url, // the matched portion of the URL
      isExact, // whether or not we matched exactly
      params: keys.reduce((memo, key, index) => {
        memo[key.name] = values[index];
        return memo;
      }, {})
    };
  }, null);
}

export default matchPath;
Route.js 的修改
修改的部分
 // 用来判断,筛选到的路由进行展示
 // match:首先判断 path是否存在?
 //   存在使用matchPath来进行正则匹配,两个参数一个是:location.path、 this.props
 //   不存在 使用顶层传进来的默认的match,context中的。
const match= path? matchPath(location.pathname,this.props):context.match
完整版Route.js
import React,{Component} from 'react'
import { RouterContext } from './Context';
import matchPath from './matchPath';

export default class Route extends Component{
  constructor(){
    super()
  }
  render(){
    return (

        {
          context=>{
            // 这个是Router 使用contex传进来的参数
            const {location} = context
            // 这个是组建调用传进来的参数
            const {path,component,children,render} =this.props
            // 用来判断,筛选到的路由进行展示
            // match:首先判断 path是否存在?
            //   存在使用matchPath来进行正则匹配,两个参数一个是:location.path、 this.props
            //   不存在 使用顶层传进来的默认的match,context中的。
            const match= path? matchPath(location.pathname,this.props):context.match
            console.log('route-match', match)
            // 将props 进行一个组合为的是更好的传递参数
            const props={
              ...context,
              location,
              match
            }

            // match 匹配到:优先级-children>component>render|| null
            // match 不匹配到: children是function形式 || null
            return match?
              children?
                (typeof children==='function'?
                  // 是函数就直接执行
                  children(props)
                  // 组建复合
                  :children
                )
                :
                (component?
                  (React.createElement(component,props))
                  :(render?render(props):null)
                )
            :
            (typeof children==='function'? children(props) : null)
          }
        }

    )
  }
}
目前404页面展示效果
页面代码
export default function App(){
  return(


          首页


          用户中心


          登陆


          商品


           HomePage-children}
          //  component={HomePage}
           render={()=>HomePage-render}
           >


  )
}
现实 Switch 独占路由
组建复合
Switch 要做的是将children遍历一遍,找到第一个匹配项之后展示
children的数据类型,可以有一个{}或者多个[]
初步搭建import React, { Component } from 'react' export default class Switch extends Component { render() { let match; // 找到匹配的元素,match设置为true let element; // 匹配的元素,没有匹配到就没有初始值 // 还需要做的是查找到匹配到的元素 // ......... // 在Switch这块,element 这块已经是一个元素了。 // 如果找到匹配的元素 ?就显示elment,克隆一下是待会儿会加属性 : null return match? React.cloneElement(element,{}):null } }
import React, { Component } from 'react'
import matchPath from './matchPath';
import { RouterContext } from './Context';

export default class Switch extends Component {
  render() {
    return (
      {context=> {
        const {location} =context
        console.log('Switch=====location',location)
        let match; // 找到匹配的元素,match设置为true
        let element; // 匹配的元素,没有匹配到就没有初始值

        const {children}= this.props
        // 还需要做的是查找到匹配到的元素
        React.Children.forEach(children, child=>{
          // if条件 :match 我们最上面定义是undefined,所以用==;&& 有有效的element元素
          if(match==null &&React.isValidElement(child)){
            element= child
            const {path}= child.props
            // path路径匹配到 ? matchPath(location, ...),这块就需要用到Conetxt: 不匹配就用传下来的默认match
            match = path? matchPath(location.pathname, child.props):context.match
          }
        })
        // 在Switch这块,element 这块已经是一个元素了。
        // 如果找到匹配的元素 ?就显示elment,克隆一下是待会儿会加属性 : null
        return match? React.cloneElement(element,{}):null
        }
      }
    )
  }
}
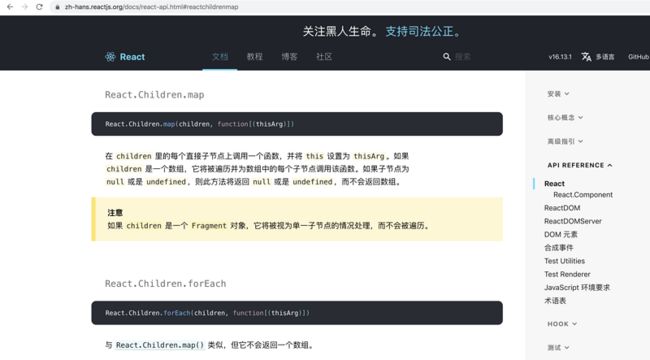
React.children.forEarch 介绍: https://zh-hans.reactjs.org/d...

调整 Route
src/my-react-router-dom/Route.js
// computedMatch 是从Switch里面传进来的,用来match判断,优先使用
   const {path,component,children,render,computedMatch} =this.props
// 用来判断,筛选到的路由进行展示
// match:首先判断computedMatch 在判断path是否存在?
// 存在使用matchPath来进行正则匹配,两个参数一个是:location.path、 this.props
// 不存在 使用顶层传进来的默认的match,context中的。
const match= computedMatch
?computedMatch
:path
? matchPath(location.pathname,this.props)
:context.matchmy-react-router-dom中 hooks方法的实现
例子
router中}> 如果我们需要在函数组建中,用到props,我们只能这样去使用,进行参数的传递
Productfunction Product(props){ console.log('Product-props:', props) const {match} = props const {params,url} =match const {id} =params return}Product- id:{id}
详情如果我们不进行props参数的传递,可以使用hooks的方法来获取到
}> import { useRouteMatch, useHistory, useParams, useLocation } from "react-router-dom";function Product(props){ const match =useRouteMatch() const history =useHistory() const location =useLocation() const Params = useParams() // 参数 console.log('match:',match); console.log('history:',history); console.log('location:',location); console.log('Params:',Params); }
hook.js
index.js 调整
src/my-react-router-dom/index.js
import BrowserRouter from './BrowserRouter'
import Route from './Route'
import Link from './Link'
import Switch from './Switch'
import {
  useLocation,
  useRouteMatch,
  useParmas,
  useHistory
} from './hook'
export {BrowserRouter, Route, Link,Switch,useLocation,useRouteMatch,useParmas,useHistory }
src/my-react-router-dom/hook.js
// 就是History对象
export function useHistory(){

}
// useLocation:
// {pathname: "/product/123", search: "", hash: "", state: undefined, key: "y14yf2"}
// hash: ""
// key: "y14yf2"
// pathname: "/product/123"
// search: ""
// state: undefined
// }
export function useLocation(){

}

// match:
// {path: "/product/:id", url: "/product/123", isExact: true, params: {…}}
// isExact: true
// params: {id: "123"}
// path: "/product/:id"
// url: "/product/123"
// }
export function useRouteMatch(){

}

// useParams:
// {id: "123"}
export function useParams(){

}
useHistory
// 就是History对象
export function useHistory(){
  // 返回的就是history对象
  // 在BrowserRouter中,我们使用import {createBrowserHistory} from 'history';const history= createBrowserHistory()
  // 在hook对象中,我们要使用 usecontext;
  return context = useContext(RouterContext).history;
}
useLocation
export function useLocation(){
  return useContext(RouterContext).location;
}
我们现在打印看下:

这里,useParams没有进行展示,而在match是展示的,我们默认的参数,我们写的默认值,也就是说,当match进行修改了之后,context中的match没有进行修改。所以我们需要在修改match的地方进行context中重新赋值。
Route.js 调整
src/my-react-router-dom/Route.js
return(

    {
      match?
      children?
        (typeof children==='function'?
          // 是函数就直接执行
          children(props)
          // 组建复合
          :children
        )
        :
        (component?
          (React.createElement(component,props))
          :(render?render(props):null)
        )
    :
    (typeof children==='function'? children(props) : null)
    }

)
又包了一层RouterContext,在使用useParams时,往上找参数,当找到RouterContext 就会停止在往上查找。
打印内容:
到这里react——router的hook方法就已经就已经实现了。
现在我们思考一个问题,如果是class组建在不传递props的情况下如何实现,在class组建内获取props
class Product extends Component{
  render() {
    // const {id} = this.props
    console.log(this.props,'props')
    return
      {/* Product- id:{id} */}
      Product- id

  }
}react-router中有一个高阶组建,withRouter;
接下来我们来实现下withRouter
实现withRouter
src/my-react-router-dom/withRouter.js
// 高阶组建
import React from 'react'
import {RouterContext} from './Context'
const withRouter= WrappendComponent=>props=>{
// 需要用到context 可以传递location match 等参数;因为在context中有记录
return
{context=>
}
export default withRouter实现prompt
首先我们来使用一下
class Product extends Component{
constructor(){
super()
this.state={
cofirm:true,
}
}
change=()=>{
this.setState({
cofirm: !this.state.cofirm
})
}
render(){
console.log('this.state.cofirm',this.state.cofirm)
return(
Product
Prompt 是react-router 的方法;
属性 when:为true,跳转其他页面时,会出现弹窗提示
属性 message:弹窗中的消息
src/my-react-router-dom/Prompt.js
import React from 'react'
import { RouterContext } from './Context';
import LifeCycle from './LifeCycle'
// 接收两个参数
// when 是一个Boolean
// message 是一个String|| function
export default function Prompt({when=true,message}){
// 我们需要用到histroy,path来判断跳转,所以用到context
return(
{
context=>{
// 当首次进来时,when是true;history.block方法已经挂载在组建上。
// 当设置为false的时候,history.block还会执行们因为没有卸载。所以还需要在LifeCycle中进行卸载
if(!when){
return null
}
const method = context.history.block
console.log('method:',method)
// render返回组件必须是{
//设置一个方法release,
self.release=method(message)
}}
onUnmount={(self)=>{
self.release()
}}
>
}
}
)
}src/my-react-router-dom/LifeCycle.js
import React, { Component } from 'react'

export default class LifeCycle extends Component {
  // 挂载
  componentDidMount(){
    // 当前的方法都定义在this里面,
    console.log('componentDidMount',this)
    if(this.props.onMount){
      this.props.onMount.call(this,this)
    }
  }
  // 取消挂载
  componentWillUnmount(){
    console.log('componentWillUnmount', this)
    if(this.props.onUnmount){
      this.props.onUnmount.call(this,this)
    }
  }
  render() {
    return null
  }
}


