Android高德地图功能总结
前言
最近项目用到了高德地图,基于地图的应用需求还是比较广的,所以想记录一下高德地图的用法,文章基于最新版的高德地图SDK,由于是记录使用方法,所以文字比较枯燥,看不下去的可以看源码,文末会附上源码地址,源码可以直接使用..。
前期准备
- 首先申请高德开发者;
- 接着创建应用和获取key;
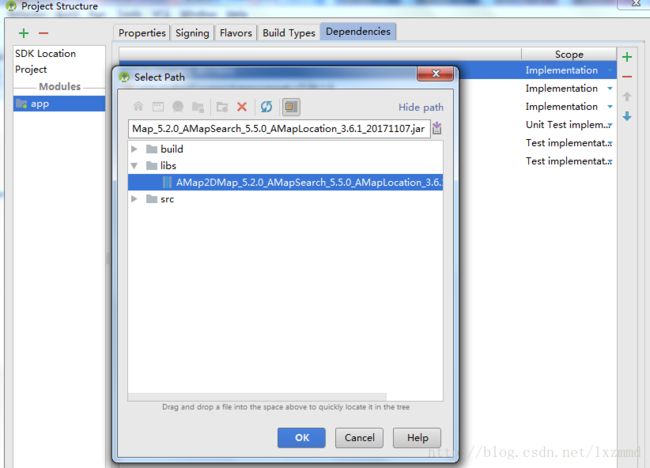
- 接着是根据需求下载高德地图的sdk;
然后是在AndroidManifest添加相关的权限
    <uses-permission android:name="android.permission.INTERNET" />

    <uses-permission android:name="android.permission.WRITE_EXTERNAL_STORAGE" />

    <uses-permission android:name="android.permission.ACCESS_NETWORK_STATE" />

    <uses-permission android:name="android.permission.ACCESS_WIFI_STATE" />

    <uses-permission android:name="android.permission.READ_PHONE_STATE" />

<uses-permission android:name="android.permission.ACCESS_COARSE_LOCATION" />- 将申请好的key复制到AndroidManifest下的application目录下
 <meta-data
            android:name="com.amap.api.v2.apikey"
            android:value="bf5f5aa56d91db419f2acb75d36649d0" />
基础地图
前期准备之后就可以开始的弄功能了,首先是显示一个hello map的基础地图
public class BaseMapActivity extends AppCompatActivity {

    private MapView mMapView;

    @Override
    protected void onCreate(Bundle savedInstanceState) {
        super.onCreate(savedInstanceState);
        setContentView(R.layout.activity_base_map);

        mMapView = (MapView) findViewById(R.id.map);
        //在activity执行onCreate时执行mMapView.onCreate(savedInstanceState),创建地图
        mMapView.onCreate(savedInstanceState);

    }

    @Override
    protected void onResume() {
        super.onResume();
        mMapView.onResume();
    }

    @Override
    protected void onPause() {
        super.onPause();
        mMapView.onPause();
    }

    @Override
    protected void onDestroy() {
        super.onDestroy();
        mMapView.onDestroy();

    }

}
是的,就这个代码就可以显示一个基础地图了,效果如下,可以说是非常简单了(虽然并没有什么用..) 
跳转到系统地图导航
由于导航功能需要导入3D地图等,我们app不需要内置导航功能,而是选择跳转到用户安装的地图应用进行导航。我们只需要把要导航的地点坐标信息在唤起地图应用时传过去即可。代码如下:
public class NavigationActivity extends AppCompatActivity {

    private MapView mMapView;
    AMap aMap;

    @Override
    protected void onCreate(@Nullable Bundle savedInstanceState) {
        super.onCreate(savedInstanceState);
        setContentView(R.layout.activity_location_map);

        mMapView = findViewById(R.id.map);
        mMapView.onCreate(savedInstanceState);// 此方法必须重写
        aMap = mMapView.getMap();
        initMap();
        initListener();
    }


    private void initMap() {

        MyLocationStyle myLocationStyle;
        myLocationStyle = new MyLocationStyle();//初始化定位蓝点样式类myLocationStyle.myLocationType(MyLocationStyle.LOCATION_TYPE_LOCATION_ROTATE);//连续定位、且将视角移动到地图中心点,定位点依照设备方向旋转,并且会跟随设备移动。(1秒1次定位)如果不设置myLocationType,默认也会执行此种模式。
        myLocationStyle.interval(2000); //设置连续定位模式下的定位间隔,只在连续定位模式下生效,单次定位模式下不会生效。单位为毫秒。
        aMap.setMyLocationStyle(myLocationStyle);//设置定位蓝点的Style
//aMap.getUiSettings().setMyLocationButtonEnabled(true);设置默认定位按钮是否显示,非必需设置。
        aMap.setMyLocationEnabled(true);// 设置为true表示启动显示定位蓝点,false表示隐藏定位蓝点并不进行定位,默认是false。
        aMap.moveCamera(CameraUpdateFactory.zoomTo(17.9f));
    }


    private void initListener() {
        findViewById(R.id.tv_gaode).setOnClickListener(new View.OnClickListener() {
            @Override
            public void onClick(View view) {

                if (SystemUtil.isGaoDeMapAvailable(NavigationActivity.this)) {
                    goToGaode("中国光大银行(广州分行营业部)", "23.141683", "113.342089");

                } else {
                    ToastUtil.showShort(NavigationActivity.this, "请先安装高德地图");
                }
            }
        });
        findViewById(R.id.tv_baidu).setOnClickListener(new View.OnClickListener() {
            @Override
            public void onClick(View view) {

                if (SystemUtil.isBaiduMapAvailable(NavigationActivity.this)) {
                    goToBaidu("中国光大银行(广州分行营业部)", "23.141683", "113.342089");
                } else {
                    ToastUtil.showShort(NavigationActivity.this, "请先安装百度地图");
                }
            }
        });


    }


    /**
     * 跳转高德导航
     *
     * @param name 地点
     * @param lat  纬度
     * @param lon  精度
     */
    public void goToGaode(String name, String lat, String lon) {
        try {
            Intent intent = Intent.getIntent("androidamap://viewMap?sourceApplication=&poiname=" + name + "&lat=" + lat + "&lon=" + lon + "&dev=0");
            NavigationActivity.this.startActivity(intent);
        } catch (URISyntaxException e) {
            e.printStackTrace();
        }
    }

    /**
     * 跳转百度地图导航
     * @param name
     * @param lat
     * @param lon
     */
    public void goToBaidu(String name, String lat, String lon) {
        try {
            Intent intent = Intent.getIntent("intent://map/direction?origin=latlng:" + lat + "," + lon + "| name:&destination=" + name + "&mode=driving®ion=&src=yourCompanyName|yourAppName#Intent;scheme=bdapp;package=com.baidu.BaiduMap;end");
            NavigationActivity.this.startActivity(intent);
        } catch (URISyntaxException e) {
            e.printStackTrace();
        }
    }

    @Override
    protected void onResume() {
        super.onResume();
        mMapView.onResume();
    }

    @Override
    protected void onPause() {
        super.onPause();
        mMapView.onPause();
    }
    @Override
    protected void onDestroy() {
        super.onDestroy();
        mMapView.onDestroy();

    }
}
效果如下,下图是高德地图的导航 
在做完导航的时候我就想着初始化MapView以及初始化定位的代码是重复的,理论上应该封装起来,然后我就进行了简单的封装,封装如下:
public class BaseActivity extends AppCompatActivity {
    MapView mMapView;

    AMap aMap;
    private FrameLayout contentArea;
    private View mView;

    Bundle savedInstanceState;

    @Override
    protected void onCreate(Bundle savedInstanceState) {
        super.onCreate(savedInstanceState);

        super.setContentView(R.layout.activity_base);
        contentArea = findViewById(R.id.contentArea);

        this.savedInstanceState = savedInstanceState;
    }

    @Override
    public void setContentView(int layoutResID) {
        View v = getLayoutInflater().inflate(layoutResID, contentArea, false);
        setContentView(v);

    }

    @Override
    public void setContentView(View view) {
        setContentView(view, view.getLayoutParams());
    }

    @Override
    public void setContentView(View view, ViewGroup.LayoutParams params) {
        contentArea.addView(view, 0, params);
        this.mView = view;

    }

    public void setMapViewID(int layoutResID) {
        mMapView = mView.findViewById(layoutResID);
        initMap();
    }

    /**
     * 获取AMap对象
     */
    public AMap getAMap() {
        return aMap == null ? null : aMap;

    }

    private void initMap() {
        //在activity执行onCreate时执行mMapView.onCreate(savedInstanceState),创建地图
        mMapView.onCreate(savedInstanceState);
        aMap = mMapView.getMap();
        MyLocationStyle myLocationStyle;
        myLocationStyle = new MyLocationStyle();//初始化定位蓝点样式类myLocationStyle.myLocationType(MyLocationStyle.LOCATION_TYPE_LOCATION_ROTATE);//连续定位、且将视角移动到地图中心点,定位点依照设备方向旋转,并且会跟随设备移动。(1秒1次定位)如果不设置myLocationType,默认也会执行此种模式。

        myLocationStyle.interval(2000); //设置连续定位模式下的定位间隔,只在连续定位模式下生效,单次定位模式下不会生效。单位为毫秒。
        myLocationStyle.myLocationIcon(BitmapDescriptorFactory.fromResource(R.drawable.public_location_my));// 设置小蓝点的图标


        aMap = mMapView.getMap();
        aMap.setMyLocationStyle(myLocationStyle);//设置定位蓝点的Style
        //aMap.getUiSettings().setMyLocationButtonEnabled(true);设置默认定位按钮是否显示,非必需设置。
        aMap.setMyLocationEnabled(true);// 设置为true表示启动显示定位蓝点,false表示隐藏定位蓝点并不进行定位,默认是false。
        aMap.moveCamera(CameraUpdateFactory.zoomTo(14.9f));//缩放级别 地图的缩放级别一共分为 17 级,从 3 到 19。数字越大,展示的图面信息越精细。
    }


    @Override
    protected void onResume() {
        super.onResume();
        mMapView.onResume();
    }

    @Override
    protected void onPause() {
        super.onPause();
        mMapView.onPause();
    }

    @Override
    protected void onDestroy() {
        super.onDestroy();
        mMapView.onDestroy();

    }
}
布局文件activity_base如下:
<LinearLayout xmlns:android="http://schemas.android.com/apk/res/android"
    android:id="@+id/parentArea"
    android:layout_width="match_parent"
    android:layout_height="match_parent"
    android:background="@color/white"
    android:fitsSystemWindows="true"
    android:orientation="vertical">

    <FrameLayout
        android:id="@+id/contentArea"
        android:layout_width="match_parent"
        android:layout_height="match_parent"
       >

    FrameLayout>
LinearLayout>
这样只需要在应用Activity中继承BaseActivity然后在setContentView()后调用setMapViewID(int)方法就不用写这些功能了,我把导航的代码优化了如下:
public class NavigationActivity2 extends BaseActivity {

    AMap aMap;

    @Override
    protected void onCreate(@Nullable Bundle savedInstanceState) {
        super.onCreate(savedInstanceState);
        setContentView(R.layout.activity_location_map);

        setMapViewID(R.id.map);

        aMap =getAMap();
        initListener();
    }

    private void initListener() {
        findViewById(R.id.tv_gaode).setOnClickListener(new View.OnClickListener() {
            @Override
            public void onClick(View view) {

                if (SystemUtil.isGaoDeMapAvailable(NavigationActivity2.this)) {
                    goToGaode("中国光大银行(广州分行营业部)", "23.141683", "113.342089");

                } else {
                    ToastUtil.showShort(NavigationActivity2.this, "请先安装高德地图");
                }
            }
        });
        findViewById(R.id.tv_baidu).setOnClickListener(new View.OnClickListener() {
            @Override
            public void onClick(View view) {

                if (SystemUtil.isBaiduMapAvailable(NavigationActivity2.this)) {
                    goToBaidu("中国光大银行(广州分行营业部)", "23.141683", "113.342089");
                } else {
                    ToastUtil.showShort(NavigationActivity2.this, "请先安装百度地图");
                }
            }
        });


    }


    /**
     * 跳转高德导航
     *
     * @param name 地点
     * @param lat  纬度
     * @param lon  精度
     */
    public void goToGaode(String name, String lat, String lon) {
        try {
            Intent intent = Intent.getIntent("androidamap://viewMap?sourceApplication=&poiname=" + name + "&lat=" + lat + "&lon=" + lon + "&dev=0");
            NavigationActivity2.this.startActivity(intent);
        } catch (URISyntaxException e) {
            e.printStackTrace();
        }
    }

    /**
     * 跳转百度地图导航
     * @param name
     * @param lat
     * @param lon
     */
    public void goToBaidu(String name, String lat, String lon) {
        try {
            Intent intent = Intent.getIntent("intent://map/direction?origin=latlng:" + lat + "," + lon + "| name:&destination=" + name + "&mode=driving®ion=&src=yourCompanyName|yourAppName#Intent;scheme=bdapp;package=com.baidu.BaiduMap;end");
            NavigationActivity2.this.startActivity(intent);
        } catch (URISyntaxException e) {
            e.printStackTrace();
        }
    }


}
这样可以说是少了很多重复的代码了,也不需要在当前Activity管理MapView的生命周期,理论上来说应该是要封装的,但是为了便于以后复制粘贴..后续的功能就不使用封装的,这里仅做一个思路。。
打卡功能
这是一个基于位置的打卡功能,这个功能在很多办公app都有应用,以规定的打卡地点一定半径为圆,如果用户定位位于圆内则视为打卡成功。代码如下:
public class PlayCardMapActivity extends AppCompatActivity {
    private MapView mMapView;
    private AMap aMap;
    private LatLng latLng1;//打卡地点
    private LatLng latLng2;//定位地点

    @Override
    protected void onCreate(@Nullable Bundle savedInstanceState) {
        super.onCreate(savedInstanceState);
        setContentView(R.layout.activity_play_card_map);

        mMapView = findViewById(R.id.map);
        mMapView.onCreate(savedInstanceState);// 此方法必须重写

        initMap();
        initCardLocation();
        initListener();
    }


    private void initMap() {

        MyLocationStyle myLocationStyle;
        myLocationStyle = new MyLocationStyle();//初始化定位蓝点样式类myLocationStyle.myLocationType(MyLocationStyle.LOCATION_TYPE_LOCATION_ROTATE);//连续定位、且将视角移动到地图中心点,定位点依照设备方向旋转,并且会跟随设备移动。(1秒1次定位)如果不设置myLocationType,默认也会执行此种模式。
        myLocationStyle.interval(2000); //设置连续定位模式下的定位间隔,只在连续定位模式下生效,单次定位模式下不会生效。单位为毫秒。

        aMap = mMapView.getMap();
        aMap.setMyLocationStyle(myLocationStyle);//设置定位蓝点的Style
        //aMap.getUiSettings().setMyLocationButtonEnabled(true);设置默认定位按钮是否显示,非必需设置。
        aMap.setMyLocationEnabled(true);// 设置为true表示启动显示定位蓝点,false表示隐藏定位蓝点并不进行定位,默认是false。
        aMap.moveCamera(CameraUpdateFactory.zoomTo(14.9f));//缩放级别 地图的缩放级别一共分为 17 级,从 3 到 19。数字越大,展示的图面信息越精细。


    }

    /**
     * 打卡地点
     */
    private void initCardLocation() {
        latLng1 = new LatLng(23.141683, 113.342089);
        aMap.addCircle(new CircleOptions()
                .center(latLng1)//圆心坐标
                .radius(500)//半径
                .fillColor(Color.argb(30, 1, 1, 1))//圆背景颜色
                .strokeColor(Color.argb(100, 1, 1, 1))//圆边颜色
                .strokeWidth(1));//圆边宽度
        MarkerOptions option = new MarkerOptions();
        option.position(latLng1);
        aMap.addMarker(option);
    }

    /**
     * 当前位置监听
     */
    private void initListener() {

        aMap.setOnMyLocationChangeListener(new AMap.OnMyLocationChangeListener() {
            @Override
            public void onMyLocationChange(Location location) {
                double latitude = location.getLatitude();//纬度
                double longitude = location.getLongitude();//经度
                latLng2 = new LatLng(latitude, longitude);


            }
        });
        findViewById(R.id.btn_play_card).setOnClickListener(new View.OnClickListener() {
            @Override
            public void onClick(View view) {
                float distance = AMapUtils.calculateLineDistance(latLng1, latLng2);//两点距离
                if (distance < 500) {
                    ToastUtil.showShort(PlayCardMapActivity.this, "打卡成功");
                } else {
                    ToastUtil.showShort(PlayCardMapActivity.this, "打卡失败");
                }
            }
        });
    }

    @Override
    protected void onResume() {
        super.onResume();
        mMapView.onResume();
    }

    @Override
    protected void onPause() {
        super.onPause();
        mMapView.onPause();
    }

    @Override
    protected void onDestroy() {
        super.onDestroy();
        mMapView.onDestroy();

    }
}
为了便于理解我加了很多注释,当然定位的代码是直接从高德的开发文档中复制粘贴的..,效果图如下: 
是的,那个定位的默认坐标点很丑,而且没有我们平常见到的类似功能,所以下面进行改造。是的,这时候我们需要一个UI给一张类似下面的图 
有了图之后就可以改造打卡的代码了,改造入下:
public class PlayCardMapActivity extends AppCompatActivity implements SensorEventListener {
    private MapView mMapView;
    private AMap aMap;
    private LatLng latLng1;//打卡地点
    private LatLng latLng2;//定位地点

    //传感器管理者
    private SensorManager mSensorManager;
    //传感器
    private Sensor mSensor;


    @Override
    protected void onCreate(@Nullable Bundle savedInstanceState) {
        super.onCreate(savedInstanceState);
        setContentView(R.layout.activity_play_card_map);

        mMapView = findViewById(R.id.map);
        mMapView.onCreate(savedInstanceState);// 此方法必须重写

        initMap();
        initCardLocation();
        initListener();
    }


    private void initMap() {

        MyLocationStyle myLocationStyle;
        myLocationStyle = new MyLocationStyle();//初始化定位蓝点样式类myLocationStyle.myLocationType(MyLocationStyle.LOCATION_TYPE_LOCATION_ROTATE);//连续定位、且将视角移动到地图中心点,定位点依照设备方向旋转,并且会跟随设备移动。(1秒1次定位)如果不设置myLocationType,默认也会执行此种模式。

        myLocationStyle.interval(2000); //设置连续定位模式下的定位间隔,只在连续定位模式下生效,单次定位模式下不会生效。单位为毫秒。
        myLocationStyle.myLocationIcon(BitmapDescriptorFactory.fromResource(R.drawable.public_location_my));// 设置小蓝点的图标

        //获得SensorManager对象
        mSensorManager = (SensorManager) getSystemService(SENSOR_SERVICE);
        //获得特定的传感器(这里用的是方向传感器)
        mSensor = mSensorManager.getDefaultSensor(Sensor.TYPE_ORIENTATION);
        //注册监听
        mSensorManager.registerListener(this, mSensor, SensorManager.SENSOR_DELAY_UI);

        aMap = mMapView.getMap();
        aMap.setMyLocationStyle(myLocationStyle);//设置定位蓝点的Style
        //aMap.getUiSettings().setMyLocationButtonEnabled(true);设置默认定位按钮是否显示,非必需设置。
        aMap.setMyLocationEnabled(true);// 设置为true表示启动显示定位蓝点,false表示隐藏定位蓝点并不进行定位,默认是false。
        aMap.moveCamera(CameraUpdateFactory.zoomTo(14.9f));//缩放级别 地图的缩放级别一共分为 17 级,从 3 到 19。数字越大,展示的图面信息越精细。


    }

    /**
     * 打卡地点
     */
    private void initCardLocation() {
        latLng1 = new LatLng(23.141683, 113.342089);
        aMap.addCircle(new CircleOptions()
                .center(latLng1)//圆心坐标
                .radius(500)//半径
                .fillColor(Color.argb(30, 1, 1, 1))//圆背景颜色
                .strokeColor(Color.argb(100, 1, 1, 1))//圆边颜色
                .strokeWidth(1));//圆边宽度
        MarkerOptions option = new MarkerOptions();
        option.position(latLng1);
        aMap.addMarker(option);
    }

    /**
     * 当前位置监听
     */
    private void initListener() {

        aMap.setOnMyLocationChangeListener(new AMap.OnMyLocationChangeListener() {
            @Override
            public void onMyLocationChange(Location location) {
                double latitude = location.getLatitude();//纬度
                double longitude = location.getLongitude();//经度
                latLng2 = new LatLng(latitude, longitude);


            }
        });
        findViewById(R.id.btn_play_card).setOnClickListener(new View.OnClickListener() {
            @Override
            public void onClick(View view) {
                float distance = AMapUtils.calculateLineDistance(latLng1, latLng2);//两点距离
                if (distance < 500) {
                    ToastUtil.showShort(PlayCardMapActivity.this, "打卡成功");
                } else {
                    ToastUtil.showShort(PlayCardMapActivity.this, "打卡失败");
                }
            }
        });
    }


    /**
     * 传感器值改变时调用
     *
     * @param sensorEvent
     */
    @Override
    public void onSensorChanged(SensorEvent sensorEvent) {
        if (sensorEvent.sensor.getType() == Sensor.TYPE_ORIENTATION) {
            //SensorEvent.values[0]: 绕着Z轴旋转的角度。1 绕着X轴旋转的度数。2绕着Y轴旋转的度数。
            float degree = sensorEvent.values[0];
            aMap.setMyLocationRotateAngle(-degree);


        }
    }

    @Override
    public void onAccuracyChanged(Sensor sensor, int i) {

    }

    @Override
    protected void onResume() {
        super.onResume();
        mMapView.onResume();
    }

    @Override
    protected void onPause() {
        super.onPause();
        mMapView.onPause();
    }

    @Override
    protected void onDestroy() {
        super.onDestroy();
        mMapView.onDestroy();
        //注销监听,防止内存泄漏
        mSensorManager.unregisterListener(this);
    }

}
用到了系统的方向传感器
        //获得SensorManager对象
        mSensorManager = (SensorManager) getSystemService(SENSOR_SERVICE);
        //获得特定的传感器(这里用的是方向传感器)
        mSensor = mSensorManager.getDefaultSensor(Sensor.TYPE_ORIENTATION);
        //注册监听
        mSensorManager.registerListener(this, mSensor, SensorManager.SENSOR_DELAY_UI);
以及监听传感器改变
    @Override
    public void onSensorChanged(SensorEvent sensorEvent) {
        if (sensorEvent.sensor.getType() == Sensor.TYPE_ORIENTATION) {
            //SensorEvent.values[0]: 绕着Z轴旋转的角度。1 绕着X轴旋转的度数。2绕着Y轴旋转的度数。
            float degree = sensorEvent.values[0];
            aMap.setMyLocationRotateAngle(-degree);

        }
    }
为了避免内存泄漏记注销监听:
    @Override
    protected void onDestroy() {
        super.onDestroy();
        mMapView.onDestroy();
        //注销监听,防止内存泄漏
        mSensorManager.unregisterListener(this);
}自定义兴趣点
高德支持用户自己定义相关的兴趣点及兴趣点点击事件等
public class MarkerActivity extends AppCompatActivity {

    private MapView mMapView;
    AMap aMap;

    @Override
    protected void onCreate(@Nullable Bundle savedInstanceState) {
        super.onCreate(savedInstanceState);
        setContentView(R.layout.activity_marker);

        mMapView = findViewById(R.id.map);
        mMapView.onCreate(savedInstanceState);// 此方法必须重写
        aMap = mMapView.getMap();

        initMap();
        initMarker();
    }

    private void initMap() {

        MyLocationStyle myLocationStyle;
        myLocationStyle = new MyLocationStyle();//初始化定位蓝点样式类myLocationStyle.myLocationType(MyLocationStyle.LOCATION_TYPE_LOCATION_ROTATE);//连续定位、且将视角移动到地图中心点,定位点依照设备方向旋转,并且会跟随设备移动。(1秒1次定位)如果不设置myLocationType,默认也会执行此种模式。
        myLocationStyle.interval(2000); //设置连续定位模式下的定位间隔,只在连续定位模式下生效,单次定位模式下不会生效。单位为毫秒。
        aMap.setMyLocationStyle(myLocationStyle);//设置定位蓝点的Style
//aMap.getUiSettings().setMyLocationButtonEnabled(true);设置默认定位按钮是否显示,非必需设置。
        aMap.setMyLocationEnabled(true);// 设置为true表示启动显示定位蓝点,false表示隐藏定位蓝点并不进行定位,默认是false。
        aMap.moveCamera(CameraUpdateFactory.zoomTo(17.9f));
    }


    private void initMarker() {
        for (int i = 0; i < 2; i++) {
            //添加一个位置--经度,纬度---marker对应一个markerOptions,用来设置marker的属性等
            MarkerOptions markerOptions = new MarkerOptions();
            if (i == 0) {
                markerOptions.position(new LatLng(23.141683, 113.342089));
                //添加图标
                markerOptions.icon(BitmapDescriptorFactory.fromResource(R.drawable.public_location_red));
            } else {
                markerOptions.position(new LatLng(23.14129, 113.34518));
                markerOptions.icon(BitmapDescriptorFactory.fromResource(R.drawable.public_location_green));
            }
            //在地图上添加兴趣点
          aMap.addMarker(markerOptions);


        }

    }

    @Override
    protected void onResume() {
        super.onResume();
        mMapView.onResume();
    }

    @Override
    protected void onPause() {
        super.onPause();
        mMapView.onPause();
    }

    @Override
    protected void onDestroy() {
        super.onDestroy();
        mMapView.onDestroy();

    }
}
上述代码就可以在地图上添加了两个自定义的兴趣点,效果如下: 
这时候兴趣点是不可点击的,如果要点击需要监听点击事件,高德地图的Marker监听方法为AMap.OnMarkerClickListener,所以我们实现这个监听,代码如下:
public class MarkerActivity extends AppCompatActivity implements AMap.OnMarkerClickListener{

    private MapView mMapView;
    AMap aMap;
    private List mList;

    @Override
    protected void onCreate(@Nullable Bundle savedInstanceState) {
        super.onCreate(savedInstanceState);
        setContentView(R.layout.activity_marker);

        mMapView = findViewById(R.id.map);
        mMapView.onCreate(savedInstanceState);// 此方法必须重写
        aMap = mMapView.getMap();

        initMap();
        initMarker();
    }

    private void initMap() {

        MyLocationStyle myLocationStyle;
        myLocationStyle = new MyLocationStyle();//初始化定位蓝点样式类myLocationStyle.myLocationType(MyLocationStyle.LOCATION_TYPE_LOCATION_ROTATE);//连续定位、且将视角移动到地图中心点,定位点依照设备方向旋转,并且会跟随设备移动。(1秒1次定位)如果不设置myLocationType,默认也会执行此种模式。
        myLocationStyle.interval(2000); //设置连续定位模式下的定位间隔,只在连续定位模式下生效,单次定位模式下不会生效。单位为毫秒。
        aMap.setMyLocationStyle(myLocationStyle);//设置定位蓝点的Style
//aMap.getUiSettings().setMyLocationButtonEnabled(true);设置默认定位按钮是否显示,非必需设置。
        aMap.setMyLocationEnabled(true);// 设置为true表示启动显示定位蓝点,false表示隐藏定位蓝点并不进行定位,默认是false。
        aMap.moveCamera(CameraUpdateFactory.zoomTo(17.9f));

        aMap.setOnMarkerClickListener(this);// 设置点击marker事件监听器
    }


    private void initMarker() {

        mList = new ArrayList<>();
        for (int i = 0; i < 2; i++) {
            //添加一个位置--经度,纬度---marker对应一个markerOptions,用来设置marker的属性等
            MarkerOptions markerOptions = new MarkerOptions();
            if (i == 0) {
                markerOptions.position(new LatLng(23.141683, 113.342089));
                //添加图标
                markerOptions.icon(BitmapDescriptorFactory.fromResource(R.drawable.public_location_red));
            } else {
                markerOptions.position(new LatLng(23.14129, 113.34518));
                markerOptions.icon(BitmapDescriptorFactory.fromResource(R.drawable.public_location_green));
            }
            //在地图上添加兴趣点
            Marker marker = aMap.addMarker(markerOptions);
            mList.add(marker);

        }

    }

    @Override
    protected void onResume() {
        super.onResume();
        mMapView.onResume();
    }

    @Override
    protected void onPause() {
        super.onPause();
        mMapView.onPause();
    }

    @Override
    protected void onDestroy() {
        super.onDestroy();
        mMapView.onDestroy();

    }

    @Override
    public boolean onMarkerClick(Marker marker) {
        for (Marker marker1 : mList) {
            if (marker.equals(marker1)) {// 在这个方法里干活
                marker.showInfoWindow();

                marker.setTitle("李明");
                marker.setSnippet("签到时间:2017/12/11" + "\n" + "签到地点:广州市白云区白云大道211号");

            }
        }
        return false;
    }
} 弹出的infowinfow窗口是高德默认的,如果需要自定义:则添加下列的方法:
/**
     * 自定义infowinfow窗口
     */
    public void render(Marker marker, View view) {

        String title = marker.getTitle();
        TextView titleUi = ((TextView) view.findViewById(R.id.title));
        if (title != null) {
            SpannableString titleText = new SpannableString(title);
            titleText.setSpan(new ForegroundColorSpan(getResources().getColor(R.color.text_color_333333)), 0,
                    titleText.length(), 0);
            titleUi.setTextSize(14);
            titleUi.setText(titleText);

        } else {
            titleUi.setText("");
        }
        String snippet = marker.getSnippet();
        TextView snippetUi = ((TextView) view.findViewById(R.id.snippet));
        if (snippet != null) {
            SpannableString snippetText = new SpannableString(snippet);
            snippetText.setSpan(new ForegroundColorSpan(getResources().getColor(R.color.text_color_333333)), 0,
                    snippetText.length(), 0);
            snippetUi.setTextSize(14);
            snippetUi.setText(snippetText);
        } else {
            snippetUi.setText("");
        }
    }
然后添加点击的监听:
private void initMarker() {

        mList = new ArrayList<>();
        for (int i = 0; i < 2; i++) {
            //添加一个位置--经度,纬度---marker对应一个markerOptions,用来设置marker的属性等
            MarkerOptions markerOptions = new MarkerOptions();
            if (i == 0) {
                markerOptions.position(new LatLng(23.141683, 113.342089));
                //添加图标
                markerOptions.icon(BitmapDescriptorFactory.fromResource(R.drawable.public_location_red));
            } else {
                markerOptions.position(new LatLng(23.14129, 113.34518));
                markerOptions.icon(BitmapDescriptorFactory.fromResource(R.drawable.public_location_green));
            }
            //在地图上添加兴趣点
            Marker marker = aMap.addMarker(markerOptions);
            mList.add(marker);

            //自定义infowindow的监听
            aMap.setInfoWindowAdapter(new AMap.InfoWindowAdapter() {
                @Override
                public View getInfoWindow(Marker marker) {
                    if (infoWindow == null) {
                        infoWindow = LayoutInflater.from(MarkerActivity.this).inflate(
                                R.layout.custom_info_window, null);
                    }
                    render(marker, infoWindow);
                    return infoWindow;
                }

                @Override
                public View getInfoContents(Marker marker) {
                    return null;
                }
            });
        }

    }
其中自定义的布局文件如下:
<LinearLayout xmlns:android="http://schemas.android.com/apk/res/android"
    android:layout_width="100dp"
    android:layout_height="wrap_content"
    android:background="@drawable/deal_search_bg"
    android:orientation="horizontal" >

    <ImageView
        android:id="@+id/badge"
        android:layout_width="wrap_content"
        android:layout_height="wrap_content"
        android:layout_marginRight="5dp" >
    ImageView>

    <LinearLayout
        android:layout_width="wrap_content"
        android:layout_height="wrap_content"
        android:orientation="vertical" >

        <TextView
            android:id="@+id/title"
            android:layout_width="wrap_content"
            android:layout_height="wrap_content"
            android:singleLine="true"
            android:textColor="#ff000000"
            android:textSize="14sp"
          />

        <TextView
            android:id="@+id/snippet"
            android:layout_width="wrap_content"
            android:layout_height="wrap_content"
            android:textSize="14sp" />
    LinearLayout>

LinearLayout>android:background="@drawable/deal_search_bg"小结
高德地图的功能还有很多,我本来是打算把能列的都列出来的,但是我发现写到这里时已经很多了,碍于篇幅有限所以就先暂时写这么多,后续有空会接着把其他功能接着分析(也有可能会留坑就这样过去了..)
源码地址:http://download.csdn.net/download/lxzmmd/10213220


