1. Mongodb Driver(不做介绍)
npm install mongodb --save
2. mongoose
2.1 介绍
Mongoose 是在 node.js 异步环境下对 mongodb 进行便捷操作的对象模型工具。Mongoose 是 NodeJS 的驱动,不能作为其他语言的驱动。
2.2 特点
- 通过关系型数据库的思想来设计非关系型数据库
- 基于 Mongodb 驱动,简化操作
2.3 使用步骤
- 安装
首先确保已经安装了MongoDB和Node.js
npm install mongoose --save
- 引入 mongoose 并连接数据库
const mongoose = require('mongoose');
// 连接到本地test数据库
// useNewUrlParser这个属性会在url中识别验证用户所需的db,未升级前不需要指定
mongoose.connect('mongodb://localhost:27017/test', { useNewUrlParser: true });

// 如果有账户密码需要采用下面的连接方式:
// mongoose.connect('mongodb://用户名:密码@localhost:27017/test');
判断是否连接成功并监听error
定义Schema
数据库中的 Schema即为数据库对象的集合。schema是mongoose里用到的一种数据模式,可以理解为表结构的定义。每个schema会映射到mongodb中的一个 collection,它不具备操作数据库的能力。
// Schema里面的对象要和数据库集合里面的字段一一对应
const UserSchema = new mongoose.Schema({
  name: String,
  age: Number,
  status: Number,
});
- 创建数据模型
model是由schema生成的模型,可以对数据库的操作。
Note:
mongoose.model(模型名称(首字母大写), Schema, [集合名称])
如果没有传入第三个参数,则Mongoose会自动查找以模型名称的复数形式命名的集合,否则该模型将与第三个参数定义的名称的集合建立连接。
The first argument is the singular name of the collection your model is for. Mongoose automatically looks for the plural version of your model name.
// 模型将会操作users这个集合
const User = mongoose.model('User', UserSchema);
- 查询集合数据
User.find({}, (err, docs) => {
  if (err) {
    console.log(err);
    return;
  }
  console.log(docs);
})
- 增加数据
// 实例化Model, 通过实例化User Model创建增加的数据
const user = new User({
  name: 'Graceji',
  age: 18,
  status: 1,
});

// 执行增加操作
user.save((err, user) => {
  if (err) {
    console.log(err);
    return;
  }
  console.log(user.name);
});
- 更新数据
// 将name字段值为'Graceji'的文档的age字段值设置为28
User.updateOne({ name: 'Graceji' }, { age: 28 }, (err, doc) => {
  if (err) {
    console.log(err);
    return;
  }
  console.log(doc);
});
- 删除数据
// 删除name字段值为'Graceji'的文档
User.deleteOne({ name: 'Graceji' }, (err, result) => {
  if (err) {
    console.log(err);
    return;
  }
  console.log(result);
});
3. Schema
3.1 Schema 数据类型( SchemaTypes)
mongoose中支持的合法的SchemaTypes如下:
- String
- Number
- Date
- Buffer
- Boolean
- Mixed
- ObjectId
- Array
- Decimal128
- Map
例如:
const mongoose = require('mongoose');
const Schema = mongoose.Schema;
const schema = new Schema({
  name:    String,
  binary:  Buffer,
  living:  Boolean,
  updated: { type: Date, default: Date.now },
  age:     { type: Number, min: 18, max: 65 },
  mixed:   Schema.Types.Mixed,
  _someId: Schema.Types.ObjectId,
  decimal: Schema.Types.Decimal128,
  array: [],
  ofString: [String],
  ofNumber: [Number],
  ofDates: [Date],
  ofBuffer: [Buffer],
  ofBoolean: [Boolean],
  ofMixed: [Schema.Types.Mixed],
  ofObjectId: [Schema.Types.ObjectId],
  ofArrays: [[]],
  ofArrayOfNumbers: [[Number]],
  nested: {
    stuff: { type: String, lowercase: true, trim: true }
  },
  map: Map,
  mapOfString: {
    type: Map,
    of: String
  }
})

// example use

const Thing = mongoose.model('Thing', schema);

const m = new Thing;
m.name = 'Statue of Liberty';
m.age = 125;
m.updated = new Date;
m.binary = Buffer.alloc(0);
m.living = false;
m.mixed = { any: { thing: 'i want' } };
/*
  Since Mixed is a schema-less type, you can change the value to anything else you like, but Mongoose loses the ability to auto detect and save those changes. To "tell" Mongoose that the value of a Mixed type has changed, call the .markModified(path)
*/
m.markModified('mixed');
m._someId = new mongoose.Types.ObjectId;
m.array.push(1);
m.ofString.push("strings!");
m.ofNumber.unshift(1,2,3,4);
m.ofDates.addToSet(new Date);
m.ofBuffer.pop();
m.ofMixed = [1, [], 'three', { four: 5 }];
m.nested.stuff = 'good';
m.map = new Map([['key', 'value']]);
m.save(callback);
3.2 SchemaType Options
可以直接使用以上数据类型来定义一个schema type,也可以使用有type属性的对象来定义。
例如:
const schema1 = new Schema({
  test: String // `test` 为String类型
});

const schema2 = new Schema({
  test: { type: String } // `test` 为String类型
});
除了type属性,也可以指定其它属性。
例如:
const schema2 = new Schema({
  test: {
    type: String,
    lowercase: true // 将`test` 转变为小写
  }
});
3.2.1 适用于所有Schema Types的option
-
required: boolean or function,如果为true,则为该属性添加了一个required validator -
default: Any or function,设置属性默认值。如果为函数,则函数的返回值为默认值。 -
select: boolean,specifies default projections for queries -
validate: function, 为属性添加一个validator function -
get: function,使用Object.defineProperty()为属性自定义一个getter -
set: function,使用Object.defineProperty()为属性自定义一个setter -
alias: string, 只适用于mongoose >= 4.10.0的版本中. Defines a virtual with the given name that gets/sets this path.
以set为例说明:
const mongoose = require('mongoose');

mongoose.connect('mongodb://localhost:27017/test', { useNewUrlParser: true });

const focusSchema = new mongoose.Schema({
  title: {
    type: String,
    trim: true,
  },
  pic: {
    type: String,
    get: val => `图片地址为${val}`,
  },
  redirect: {
    type: String,
    // 保存数据时对redirect字段进行处理
    set: val => {
      // val为redirect字段的值
      // 该函数的返回值即为redirect字段在数据库中实际保存的值
      const reg = /^(http|https).*/
      if (!val) return '';
      if (!reg.test(val)) {
        return `http://${val}`;
      }
      return val;
    }
  },
  status: {
    type: Number,
    default: 1,
  },
});

const FocusModel = mongoose.model('Focus', focusSchema);

const focus = new FocusModel({
  title: 'focus',
  pic: 'www.xxx.com/x.png',
  redirect: 'www.baidu.com',
});

focus.save((err) => {
  if (err) {
    console.log(err);
    return;
  }
  FocusModel.find({}, (err, docs) => {
    if (err) {
      console.log(err);
      return;
    }
    // [{
    //   status: 1,
    //   _id: 5badd934ee8e6bbf89d2bb62,
    //   title: 'focus',
    //   pic: 'www.xxx.com/x.png',
    //   redirect: 'http://www.baidu.com',
    //   __v: 0
    // }]
    console.log(docs);
    console.log(focus.pic); // 图片地址为www.xxx.com/x.png
  });
});
Note:
- set修饰符是在保存数据时对数据进行格式化,最终保存到数据库中的值为set函数的返回值
- get修饰符是在实例获取数据的时候对数据格式化,不会影响保存到数据库中的值
3.2.2 定义索引的option
可以使用schema type options来定义MongoDB indexes
-
index: boolean,是否在该属性上定义index -
unique: boolean,是否在该属性上定义unique index -
sparse: boolean,是否在该属性上定义sparse index
3.2.3 适用于String类型的option
-
lowercase: boolean,是否对属性值调用.toLowerCase() -
uppercase: boolean,是否对属性值调用.toUpperCase() -
trim: boolean,是否对属性值调用.trim() -
match: RegExp,创建了一个validator来检查属性值是否匹配正则 -
enum: Array,创建了一个validator来检查属性值是否在给定的数组中 -
minlength: Number,创建了一个validator来检查属性值的长度是否大于等于给定值 -
maxlength: Number,创建了一个validator来检查属性值的长度是否小于等于给定值
3.2.4 适用于Number类型的option
-
min: Number,创建了一个validator来检查属性值是否大于等于给定值 -
max: Number,创建了一个validator来检查属性值是否小于等于给定值
3.2.5 适用于Date类型的option
- min: Date
- max: Date
3.2.6 自定义校验器
Mongoose有很多内置数据校验器:
- 所有SchemaTypes都有内置的required校验器
- Numbers类型有min and max校验器
- String类型有enum, match, maxlength and minlength校验器
当内置校验器不能够满足要求时可以通过SchemaType#validate()自定义校验器。
例如:
const userSchema = new mongoose.Schema({
  name: {
    type: String,
    get: v => {
      return `aoo1${v}`;
    }
  },
  age: Number,
  status: Number,
  sn: {
    type: String,
    match: /^sn(.*)/,
    validate: {
      validator: (v) => (v.length > 10),
      message: props => `${props.value} 长度不符合要求`
    },
    // 也可直接指定函数
    // validate: (sn) => (sn.length > 10),
  }
});
若这样添加文档数据
const user = new UserModel({
  name: 'Graceji',
  age: 18,
  status: 1,
  sn: 'sn123'
});
则报错:
3.3 Schemas
Schemas 不仅可以定义文档的结构以及属性的类型,它也可以扩展文档的实例方法以和Model的静态方法,定义索引,以及文档生命周期钩子([middleware]。
3.3.1 扩展Mongoose Model的实例方法
Models的实例即为documents。Documents有许多内置方法,也可以通过Schema来扩展Model的实例方法。
  // define a schema
  const animalSchema = new Schema({ name: String, type: String });

  // 使用 Schema.methods对象来保存实例方法
  animalSchema.methods.findSimilarTypes = function(cb) {
    // this 指向document
    return this.model('Animal').find({ type: this.type }, cb);
  };
现在Animal model的实例都会有一个findSimilarTypes方法。
 const Animal = mongoose.model('Animal', animalSchema);
  const dog = new Animal({ type: 'dog' });

  dog.findSimilarTypes(function(err, dogs) {
    console.log(dogs);
  });
3.3.2 扩展Mongoose Model的静态方法
依然使用animalSchema为例,为Model添加静态方法
  // assign a function to the "statics" object of our animalSchema
  animalSchema.statics.findByName = function(name, cb) {
    // this指向当前的Model
    return this.find({ name: new RegExp(name, 'i') }, cb);
  };

  const Animal = mongoose.model('Animal', animalSchema);
  Animal.findByName('fido', (err, animals) => {
    console.log(animals);
  });
Model扩展实例方法时,不要使用箭头函数(=>)。因为箭头函数会阻止this的绑定。
4. Mongoose内置CURD方法
Deleting:
Model.deleteMany()Model.deleteOne()
Querying:
Model.find()Model.findById()Model.findByIdAndDelete()Model.findByIdAndRemove()Model.findByIdAndUpdate()Model.findOne()Model.findOneAndDelete()Model.findOneAndRemove()Model.findOneAndUpdate()
Updating:
Model.replaceOne()Model.updateMany()Model.updateOne()
5. Mongoose聚合管道(Aggregate)
方法:Model.aggregate( [pipeline], [callback] )
- [pipeline] «Array» aggregation pipeline as an array of objects
- [callback] «Function»
Examples:
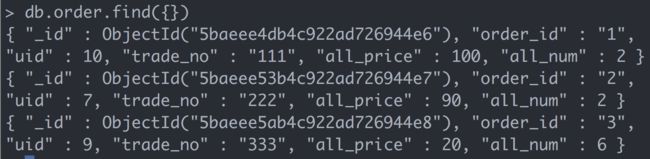
order.js
const Schema = mongoose.Schema;

const orderSchema = new Schema({
  order_id: String,
  uid: Number,
  trade_no: String,
  all_price: Number,
  all_num: Number
});

const orders = [{
  order_id: '1',
  uid: 10,
  trade_no:'111',
  all_price: 100,
  all_num: 2,
}, {
  order_id: '2',
  uid: 7,
  trade_no: '222',
  all_price: 90,
  all_num: 2,
}, {
  order_id: '3',
  uid: 9,
  trade_no: '333',
  all_price: 20,
  all_num: 6,
}];

const OrderModel = mongoose.model('Order', orderSchema, 'order');

OrderModel.insertMany(orders, (error, docs) => {
  if (error) return;
  console.log('插入文档成功');
  console.log(docs);
});
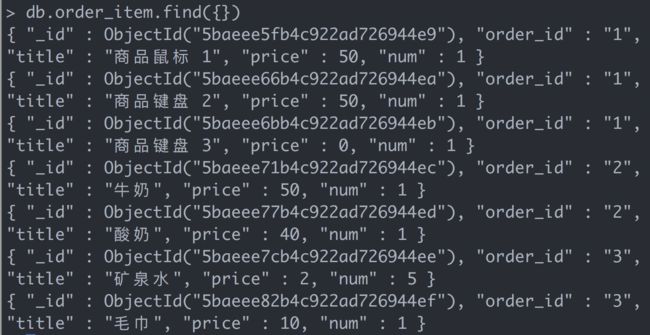
orderItem.js
const Schema = mongoose.Schema;

const orderItemSchema = new Schema({
  order_id: String,
  title: String,
  price: Number,
  num: Number,
});

const orderItems = [{
  order_id: '1', title: '商品鼠标 1', price: 50, num: 1
}, {
  order_id: '1', title: '商品键盘 2', price: 50, num: 1
}, {
  order_id: '1', title: '商品键盘 3', price: 0, num: 1
}, {
  order_id: '2', title: '牛奶', price: 50, num: 1,
}, {
  order_id: '2', title: '酸奶', price: 40, num: 1
}, {
  order_id: '3', title: '矿泉水', price: 2, num: 5
}, {
  order_id: '3', title: '毛巾', price: 10, num: 1
}];

const OrderItemModel = mongoose.model('OrderItem', orderItemSchema, 'order_item');

OrderItemModel.insertMany(orderItems, (error, docs) => {
  if (error) return;
  console.log('插入文档成功');
  console.log(docs);
});
运行以上代码就能插入两张表,分别为order和order_item。
-
两个表关联查询
情景一:查询订单,并找到每个订单下对应的所有商品。
app.js
const OrderModel = require('./order');

// 第一种写法
OrderModel.aggregate([
  {
    $lookup: {
      from: 'order_item',
      localField: 'order_id',
      foreignField: 'order_id',
      as: 'items',
    }
  }
], (err, docs) => {
  if (err) return;
  console.log(JSON.stringify(docs));
});

// 第二种写法
OrderModel.aggregate([
  {
    $lookup: {
      from: 'order_item',
      localField: 'order_id',
      foreignField: 'order_id',
      as: 'items',
    }
  }
])
  .then(function (res) {
    console.log(JSON.stringify(res));
  });

// 第三种写法
OrderModel
  .aggregate()
  .lookup({
    from: 'order_item',
    localField: 'order_id',
    foreignField: 'order_id',
    as: 'items',
  })
  .exec(function (err, res) {
    if (err) return handleError(err);
    console.log(JSON.stringify(res));
  });
运行结果:
[{
    "_id": "5baf15e985d168faa49a28b7",
    "order_id": "1",
    "uid": 10,
    "trade_no": "111",
    "all_price": 100,
    "all_num": 2,
    "__v": 0,
    "items": [{
        "_id": "5baf172e609251fb2b5798f7",
        "order_id": "1",
        "title": "商品鼠标 1",
        "price": 50,
        "num": 1,
        "__v": 0
    }, {
        "_id": "5baf172e609251fb2b5798f8",
        "order_id": "1",
        "title": "商品键盘 2",
        "price": 50,
        "num": 1,
        "__v": 0
    }, {
        "_id": "5baf172e609251fb2b5798f9",
        "order_id": "1",
        "title": "商品键盘 3",
        "price": 0,
        "num": 1,
        "__v": 0
    }]
}, {
    "_id": "5baf15e985d168faa49a28b8",
    "order_id": "2",
    "uid": 7,
    "trade_no": "222",
    "all_price": 90,
    "all_num": 2,
    "__v": 0,
    "items": [{
        "_id": "5baf172e609251fb2b5798fa",
        "order_id": "2",
        "title": "牛奶",
        "price": 50,
        "num": 1,
        "__v": 0
    }, {
        "_id": "5baf172e609251fb2b5798fb",
        "order_id": "2",
        "title": "酸奶",
        "price": 40,
        "num": 1,
        "__v": 0
    }]
}, {
    "_id": "5baf15e985d168faa49a28b9",
    "order_id": "3",
    "uid": 9,
    "trade_no": "333",
    "all_price": 20,
    "all_num": 6,
    "__v": 0,
    "items": [{
        "_id": "5baf172e609251fb2b5798fc",
        "order_id": "3",
        "title": "矿泉水",
        "price": 2,
        "num": 5,
        "__v": 0
    }, {
        "_id": "5baf172e609251fb2b5798fd",
        "order_id": "3",
        "title": "毛巾",
        "price": 10,
        "num": 1,
        "__v": 0
    }]
}]
情景二:查询order_item,找出商品名称是酸奶的商品,并找出该商品对应的订单号以及订单的总价格。
app.js
const OrderItemModel = require('./orderItem');

OrderItemModel
  .aggregate()
  .match({
    'title': '酸奶',
  })
  .lookup({
    from: 'order',
    localField: 'order_id',
    foreignField: 'order_id',
    as: 'order_info',
  })
  .exec(function (err, res) {
    if (err) return handleError(err);
    console.log(JSON.stringify(res));
  });
运行结果:
[{
    "_id": "5baf172e609251fb2b5798fb",
    "order_id": "2",
    "title": "酸奶",
    "price": 40,
    "num": 1,
    "__v": 0,
    "order_info": [{
        "_id": "5baf15e985d168faa49a28b8",
        "order_id": "2",
        "uid": 7,
        "trade_no": "222",
        "all_price": 90,
        "all_num": 2,
        "__v": 0
    }]
}]
-
多个表关联查询
Examples:
user.js
const Schema = mongoose.Schema;

const userSchema = new Schema({
  username: String,
  password: String,
  age: Number,
  sex: String,
  tel: Number,
});

const UserModel = mongoose.model('User', userSchema, 'user');

module.exports = UserModel;
article.js
const Schema = mongoose.Schema;

const articleSchema = new Schema({
  title: {
    type: String,
    unique: true,
  },
  cid: Schema.Types.ObjectId,
  author_name: {
    type: String,
    default: 'Graceji',
  },
  author_id: Schema.Types.ObjectId,
  description: String,
  add_time: Date,
  content: String,
});

const ArticleModel = mongoose.model('Article', articleSchema, 'article');

module.exports = ArticleModel;
articleCate.js
const Schema = mongoose.Schema;

const articleCateSchema = new Schema({
  title: {
    type: String,
    unique: true,
  },
  description: String,
});

const ArticleCateModel = mongoose.model('ArticleCate', articleCateSchema, 'article_cate');

module.exports = ArticleCateModel;
插入数据的过程省略。
情景一:查询文章信息,并显示文章的分类以及作者信息
app.js
const ArticleModel = require('./article');

ArticleModel
  .aggregate()
  .lookup({
    from: 'article_cate',
    localField: 'cid',
    foreignField: '_id',
    as: 'category_info',
  })
  .lookup({
    from: 'user',
    localField: 'author_id',
    foreignField: '_id',
    as: 'user_info',
  })
  .exec(function (err, res) {
    if (err) return handleError(err);
    console.log(JSON.stringify(res));
  });
运行结果
[{
    "_id": "5baf316a271fd1017037d4e2",
    "author_name": "Graceji1",
    "title": "我是一条国际新闻1",
    "cid": "5baf2debab859800f81fa96b",
    "author_id": "5baf2e292397450118c35d16",
    "description": "我是一条国际新闻的内容1",
    "add_time": "2018-09-29T08:01:46.655Z",
    "content": "啦啦啦啦啦啦1",
    "__v": 0,
    "category_info": [{
        "_id": "5baf2debab859800f81fa96b",
        "title": "国际新闻",
        "description": "这是国际新闻",
        "__v": 0
    }],
    "user_info": [{
        "_id": "5baf2e292397450118c35d16",
        "username": "Graceji1",
        "password": "123",
        "age": 18,
        "sex": "女",
        "tel": 18717716965,
        "__v": 0
    }]
}, {
    "_id": "5baf316a271fd1017037d4e3",
    "author_name": "Graceji2",
    "title": "我是一条国际新闻2",
    "cid": "5baf2debab859800f81fa96b",
    "author_id": "5baf2e292397450118c35d17",
    "description": "我是一条国际新闻的内容2",
    "add_time": "2018-09-29T08:01:46.655Z",
    "content": "啦啦啦啦啦啦2",
    "__v": 0,
    "category_info": [{
        "_id": "5baf2debab859800f81fa96b",
        "title": "国际新闻",
        "description": "这是国际新闻",
        "__v": 0
    }],
    "user_info": [{
        "_id": "5baf2e292397450118c35d17",
        "username": "Graceji2",
        "password": "123",
        "age": 28,
        "sex": "女",
        "tel": 18717716966,
        "__v": 0
    }]
}, {
    "_id": "5baf316a271fd1017037d4e4",
    "author_name": "Graceji5",
    "title": "我是一条国内新闻",
    "cid": "5baf2debab859800f81fa96c",
    "author_id": "5baf2e292397450118c35d1a",
    "description": "我是一条国内新闻的内容",
    "add_time": "2018-09-29T08:01:46.655Z",
    "content": "啦啦啦啦啦啦",
    "__v": 0,
    "category_info": [{
        "_id": "5baf2debab859800f81fa96c",
        "title": "国内新闻",
        "description": "这是国内新闻",
        "__v": 0
    }],
    "user_info": [{
        "_id": "5baf2e292397450118c35d1a",
        "username": "Graceji5",
        "password": "123",
        "age": 38,
        "sex": "女",
        "tel": 18717716965,
        "__v": 0
    }]
}]