PHP7语言基础——图形图像处理
文章目录
- 前提条件
- 在PHP中加载GD库
- GD的图像处理函数
- 图像信息
- 获取图像信息
- 图像绘制
- 创建画布
- 定义颜色
- 绘制图形
- 绘制文字
- 图像处理
- 复制图像
- 旋转图像
- 应用实例
- 图像水印
- 图像验证码
- 扩展——Jpgraph库的使用
- Jpgraph库的安装配置
- 使用Jpgraph创建图形的一般姿势
PHP能做很多事情,用于web开发只是冰山一角,如果你愿意或者你对PHP足够了解,你甚至可以用PHP来开发一条PS系统,是的,没错,PHP可以创建和处理包括GIF、PNG、JPEG、WBMP以及XPM在内的多种格式的图像。比PS等软件更加方便的是,PHP可以直接将图像数据流输出到浏览器。
前提条件
要在PHP中使用图像处理功能,需要加载GD库,或者安装其他的第三方图形库。
在PHP中加载GD库
一下内容引用自官方手册:
要激活 GD 支持,配置 PHP 时加上 –with-gd[=DIR] ,DIR 是 GD 的基本安装目录。要使用推荐的绑定的 GD 库版本(首次绑定于 PHP 4.3.0),使用 –with-gd 。要编译 GD 库,需要libpng 和 libjpeg。
在 Windows 中,需要将 GD2 的 DLL 文件 php_gd2.dll 作为一个扩展包含在 php.ini 中。GD1 的 DLL 文件 php_gd.dll 在 PHP 4.3.2 中被删除了。此外要注意首选的真彩色图像函数,例如
imagecreatetruecolor(),需要 GD2。
自PHP5.0开始,就自带GD库了。
启用GD库,只需要将php.ini中extension=php_gd2.dll前面的“;”去掉即可。
GD的图像处理函数
| 函数 | 功能 |
|---|---|
| gd_info | 获得当前安装的GD库的信息,返回一个关联数组描述了安装的 GD 库的版本和性能。 |
| getimagesize | 取得图像大小 |
| getimagesizefromstring | 从字符串中获取图像尺寸信息 |
| image_type_to_extension | 取得图像类型的文件后缀 |
| image_type_to_mime_type | 取得getimagesize、exif_read_data、exif_thumbnail、exif_imagetype所返回的图像类型的MIME类型 |
| image2wbmp | 以WBMP格式将图像输出到浏览器或文件 |
| imageaffine | 返回经过仿射变换后的图像,剪切区域可选 |
| imageaffinematrixconcat | 连接两个仿射变换矩阵 |
| imageaffinematrixget | 得到一个仿射变换矩阵 |
| imagealphablending | 设定图像的混色模式 |
| imageantialias | 是否使用antialias(抗锯齿)功能 |
| imageearc | 画椭圆弧 |
| imagechar | 水平地画一个字符 |
| imagecharup | 垂直地画一个字符 |
| imagecolorallocate | 为一幅图像分配颜色 |
| imagecolorallocatealpha | 为一幅图像分配颜色+alpha |
| imagecolorat | 取得某像素的颜色索引值 |
| imagecolorclosest | 取得指定的颜色最进阶的颜色索引值 |
| imageclolorclosetalpha | 取得与指定的颜色加透明度最接近的颜色 |
| imagecolorclosesthwb | 取得与给定颜色最仅仅的色度的黑白色的索引 |
| imagecolordeallocate | 取消图像颜色的分配 |
| imagecolorexact | 取得指定颜色的索引值 |
| imagecolorexactalpha | 取得指定的颜色加透明度的索引值 |
| imagecolormatch | 是一个图像中调色板版本的颜色与真彩色版本更能匹配 |
| imagecolorresolve | 取得指定颜色的索引值或有可能得到的最接近的替代值 |
| imagecolorresolvealpha | 取得指定颜色 + alpha 的索引值或有可能得到的最接近的替代值 |
| imagecolorset | 给指定调色板索引设定颜色 |
| imagecolorsforindex | 取得某索引的颜色 |
| imagecolorstotal | 取得一幅图像的调色板中颜色的数目 |
| imagecolortransparent | 将某个颜色定义为透明色 |
| imageconvolution | 用系数 div 和 offset 申请一个 3x3 的卷积矩阵 |
| imagecopy | 复制图像的一部分 |
| imagecopymerge | 复制并合并图像的一部分 |
| imagecopymergegray | 用灰度拷贝并合并图像的一部分 |
| imagecopyresampled | 重采样复制部分图像并调整大小 |
| imagecopyresized | 复制部分图像并调整大小 |
| imagecreate | 新建一个基于调色板的图像 |
| imagecreatefrombmp | 由BMP文件或 URL 创建一个新图象。 |
| imagecreatefromgd2 | 从GD2文件或URL新建一个图像 |
| imagecreatefromgd2part | 从给定的GD2文件或URL中的部分新建一个图像 |
| imagecreatefromgd | 从GD文件或URL新建一个图像 |
| imagecreatefromgif | 从gif文件或URL新建一个图像 |
| imagecreatefromjpeg | 从JPEG文件或URL新建一个图像 |
| imagecreatefrompng | 从PNG文件或URL新建一个图像 |
| imagecreatefromstring | 从字符串中的图像流新建一图像 |
| imagecreatefromwbmp | 从WBMP文件或URL新建一个图像 |
| imagecreatefromxbm | 从XBM文件或URL新建一个图像 |
| imagecreatefromxpm | 从XPM文件或URL新建一个图像 |
| imagecreatetruecolor | 新建一个真彩色图像 |
| imagecrop | 剪裁图像到给定的矩形 |
| imagecropauto | 使用一种模式自动剪裁图像到给定矩形 |
| iamgedashedline | 画一虚线 |
| imagedestroy | 销毁一图像 |
| imageellipse | 画一个椭圆 |
| imagefill | 区域填充 |
| imagefilledarp | 画一椭圆弧且填充 |
| imagefilledellipse | 画一椭圆并填充 |
| imagefilledpolygon | 画一多边形并填充 |
| imagefilledrectangle | 画一矩形并填充 |
| imagefilltoborder | 区域填充到指定颜色的边界为止 |
| imagefilter | 对图像使用过滤器 |
| imageflip | 使用给定模式翻转图像 |
| imagefontheight | 取得字体高度 |
| imagefontwidth | 得字体宽度 |
| imageftbbox | 给出一个使用 FreeType 2 字体的文本框 |
| imagefttext | 使用 FreeType 2 字体将文本写入图像 |
| imagegammacorrect | 对 GD 图像应用 gamma 修正 |
| imagegd | 将 GD 图像输出到浏览器或文件 |
| imagegd2 | 将 GD2 图像输出到浏览器或文件 |
| imagegetclip | 得到剪裁矩形 |
| imagegif | 以GIF格式将图像输出到浏览器或文件 |
| imagegrabscreen | 捕获整个屏幕 |
| imagegrabwindow | 捕获一个窗口 |
| imageinterlace | 激活或禁止隔行扫描 |
| imageistruecolor | 检查图像是否为真彩色图像 |
| imagejpeg | 以JPEG格式将图像输出到浏览器或文件 |
| imagelayereffect | 设定alpha混色标志以使用绑定的libgd分层效果 |
| imageline | 画一条直线 |
| imageloadfont | 载入一个新字体 |
| imagepalettecopy | 将调色板从一幅图像拷贝到另一幅 |
| imagepalettetotruecolor | 将基于调色板的文件转换为真彩色 |
| imageopenpolygon | 画一个开放多边形 |
| imagepng | 以PNGF格式将图像输出到浏览器或文件 |
| imagepolygon | 画一个多边形 |
| imagerectangle | 画一个矩形 |
| imagerotate | 用给定角度旋转图像 |
| imagesetstyle | 设定画线的风格 |
| imagesetthickness | 设定画线的宽度 |
| imagesx | 取得图像宽度 |
| imagesy | 取得图像高度 |
| imagetruecolortopalette | 将真彩色图像转换为调色板图像 |
| imagettfbbox | 取得使用 TrueType 字体的文本的范围 |
| imagettftext | 用 TrueType 字体向图像写入文本 |
图像信息
获取图像信息
-
getimagesize()
函数定义:getimagesize(string $filename[, array &$imageinfo]):array该函数将测定任何JPG,PNG,SWF,SWC,PSD,TIFF,BMP,IFF,JP2,JPX,JB2,JPC,XBM 或 WBMP 图像文件的大小并返回图像的尺寸以及文件类型和一个可以用于普通HTML 文件中
IMG标记中的 height/width 文本字符串。如果filename指定的图像不能访问或者不是一个有效的图像文件,该函数将返回FALSE并产生一条E_WARNING级别的错误。参数:
- filename:待测定的图像文件路径。
- imageinfo:可选参数
imageinfo允许从图像文件中提取一些扩展信息。它将以关联数组返回不同的JPG文件的APP标识。一些程序用这些APP标识来在图像中嵌入文本信息。一个非常常见的是在APP13标识中嵌入IPTC信息。可以用iptcparse()函数来将二进制的APP13标识解析为可读的信息。
返回值:
该函数返回一个具有四个元素的数组。索引 0 包含图像宽度的像素值,索引 1 包含图像高度的像素值。索引 2 是图像类型的标记:1 = GIF,2 = JPG,3 = PNG,4 = SWF,5 = PSD,6 = BMP,7 = TIFF(intel byte order),8 = TIFF(motorola byte order),9 = JPC,10 = JP2,11 = JPX,12 = JB2,13 = SWC,14 = IFF,15 = WBMP,16 = XBM。这些标记与 PHP 4.3.0 新加的 IMAGETYPE 常量对应。索引 3 是文本字符串,内容为"height=“yyy” width=“xxx”",可直接用于 IMG 标记。
该函数还会返回额外的参数mime,符合该图像的MIME类型。此信息可以用来在HTTP Content-type头信息中发送正确的信息。对于JPG图像,还会多返回两个索引:channels和bits。对于RGB图像,channels值为3;对于CMYK图像,channels值为4。bits是每种颜色的位数。
【示例】
";echo ""
; // 查看gd库信息 print_r(gd_info()); $imageinfo = array(); // 获取图像信息 print_r(getimagesize('1.jpg', $imageinfo)); echo "
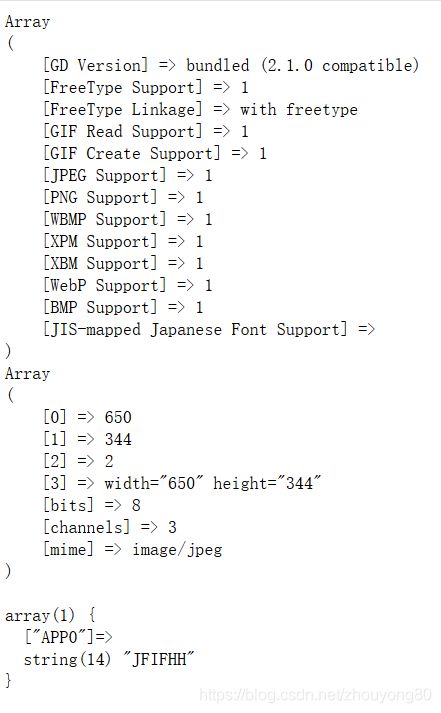
"; var_dump($imageinfo); echo "通过以上打印结果可知,该图像的宽度为650,高度为344,索引值为2的值为2说明图像是jpg图像,除此之外,还获得了图像的channels、bits以及mime类型。
-
getimagesizeformstring()
该函数与getimagesize()函数相同。不同之处在于该函数第一个参数是图像数据的字符串表达,而不是文件名。该函数定义如下:getimagesizefromstring(string $imagedata[, array &$imageinfo]):array参数:
- imagedata:图像数据的字符串表示。
- imageinfo:与
getimagesize()函数的imageinfo参数相同。
返回值:
与
getimagesize()函数返回值相同。【示例】
";// 以文件名方式打开 $img = '1.jpg'; $img_info1 = getimagesize($img); // 以字符串格式打开 // 首先将图片读入到流中 $img_data = file_get_contents($img); $img_info2 = getimagesizefromstring($img_data); // 输出图片信息 echo ""
; print_r($img_info1); print_r($img_info2); echo "程序输出结果:
从输出可以看到,两个函数返回的结果是一致的,只是使用函数时图像文件的打开方式不同。
-
imagesx()和imagesy()
这两个函数分别获取图像的宽度和高度,先来看一下函数定义:imagesx(resource $img):int imagesy(resource $img):int这两个函数都接收一个
img资源作为参数,分别返回所代表的图像的宽度和高度。这两个函数没什么可说,使用起来也很简单,没什么可说的。
【示例】
// 创建一个resource
$img = imagecreatetruecolor(300, 200);
echo imagesx($img) . "
";
echo imagesy($img) . "
";
以上代码会分别输出300和200。
图像绘制
PHP中的GD库可用于创建和处理图片,一般通过以下4个步骤对图像进行操作。
- 创建画布
- 在画布上绘制图形
- 保存并输出结果图像
- 销毁图像资源
创建画布
使用imagecreate()函数可以创建一个基于调色板的图像。语法如下:
imagecreate(int $x_size, int $y_size):resource
该函数返回一个图像资源,代表了一幅大小为x_size和y_size的空白图像。
【示例】
// 设置mime类型
header("Content-type: image/png");

// 第一步:创建画布
$im = @imagecreate(100, 50) or die("无法初始化新的GD图像流");
// 第二步:在画布上创建图像
// 设置背景色
$background_color = imagecolorallocate($im, 255, 255, 255);
// 设置文字颜色
$text_color = imagecolorallocate($im, 233, 14, 91);
// 在画布上画一个字符串
imagestring($im, 1, 5, 5, "A Simple Text String", $text_color);
// 第三步:保存并输出图像
imagepng($im);
// 第四步:销毁图像资源
imagedestroy($im);
程序输出结果:
也可以使用imagecreatetruecolor()创建画布资源。并且系统推荐使用此函数。其函数定义如下:
imagecreatetruecolor(int $width, int $height):resource
该函数创建一个基于真彩色的图像。也返回一个图像资源,代表了一幅大小为width和height的黑色图像。
【示例】
// 设置mime类型
header("Content-type: image/png");

// 第一步:创建画布
$im = @imagecreatetruecolor(100, 50) or die("无法初始化新的GD图像流");
// 第二步:在画布上创建图像
// 设置文字颜色
$text_color = imagecolorallocate($im, 233, 14, 91);
// 在画布上画一个字符串
imagestring($im, 1, 5, 5, "A Simple Text String", $text_color);
// 第三步:保存并输出图像
imagepng($im);
// 第四步:销毁图像资源
imagedestroy($im);
程序输出结果:
注意:以上函数中在图像中输出的字符串为英文,如果是中文字符串将显示乱码,要输出中文最好使用imagettftext()函数。
定义颜色
既然要处理图像,自然少不了和颜色打交道,在PHP中可以使用imagecolorallocate()函数来指定颜色,其函数定义如下:
imagecolorallocate(resource $image, int $red, int $green, int $blue):int
该函数返回一个标识符,代表了由给定的RGB成分组成的颜色。red,green和blue分别是所需要的颜色的红、绿、蓝成分。这些参数是0到255的整数或者十六进制的0x00到0xFF。
PHP中还有一个imagecolorallocatealpha()函数,可以给图像分配颜色,同时还能指定透明度。其函数定义如下:
imagecolorallocatealpha(resource $image, int $red, int $green, int $blue, int $alpha):int
该函数的行为同imagecolorallocate()相同,只是多了一个额外的透明度参数alpha,其值从0到127。0表示完全不透明,127表示完全透明。
以上两个函数在颜色分配失败时都返回FALSE。
【示例】
// 不要忘记设置mime类型,否则无法输出图像
header("Content-type: image/png");

// 第一步:创建画布
$size = 300;
// 创建一个300×300的画布
$im = imagecreatetruecolor($size, $size);
// 第二步:在画布上创建图像
// 用白色背景加黑色边框画个方框
// 设置白色背景
$back = imagecolorallocate($im, 255,255,255);
// 设置黑色边框
$border = imagecolorallocate($im, 0, 0, 0);
// 用白色背景填充一个矩形
imagefilledrectangle($im, 0, 0, $size - 1, $size - 1, $back);
// 画一个矩形不填充颜色,设置边框颜色为黑色
imagerectangle($im, 0, 0, $size-1, $size - 1, $border);
// 在矩形中绘制三个圆
// 指定圆的坐标
$yellow_x = 100;
$yellow_y = 75;
$red_x = 120;
$red_y = 165;
$blue_x = 187;
$blue_y = 125;
// 设置圆的半径
$radius = 150;

// 用alpha值分配一些颜色
$yellow = imagecolorallocatealpha($im, 255, 255, 0, 75);
$red = imagecolorallocatealpha($im, 255, 0, 0, 75);
$blue = imagecolorallocatealpha($im, 0, 0, 255, 75);

// 在矩形中画出三个交迭的圆
imagefilledellipse($im, $yellow_x, $yellow_y, $radius, $radius, $yellow);
imagefilledellipse($im, $red_x, $red_y, $radius, $radius, $red);
imagefilledellipse($im, $blue_x, $blue_y, $radius, $radius, $blue);

// 第三步:保存并输出图像
imagepng($im);

// 第四步:销毁图像资源
imagedestroy($im);
程序输出结果:
绘制图形
PHP的GD库提供了许多绘制图像的函数,可以像画图工具一样,绘制一些简单的形状图形。
-
绘制椭圆
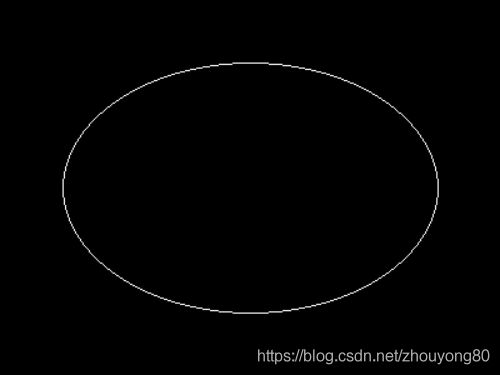
使用imageellipse()函数可以绘制一个椭圆,其函数定义如下:imageellipse(resource $image, int $cx, int $cy, int $width, int $height, int $color):bool该函数在指定坐标上画一个椭圆。成功时返回TRUE,否则返回FALSE。
参数:
- image:由图像创建函数返回的图像资源。
- cx:圆心的X坐标。
- cy:圆心的Y坐标。
- width:椭圆的宽度。
- height:椭圆的高度。
- color:椭圆的颜色。
【示例】
// 新建一个画布
$im = imagecreatetruecolor(400, 300);
// 填充背景色
$bg = imagecolorallocate($im, 0, 0, 0);
// 选择椭圆的颜色
$color_ellipse = imagecolorallocate($im, 255, 255, 255);
// 在画布上画出椭圆
imageellipse($im, 200, 150, 300, 200, $color_ellipse);
// 输出图像
header("Content-type: image/png");
imagepng($im);
// 关闭图像资源
imagedestroy($im);
程序输出结果:
还有一个函数
imagefilledellipse()也是绘制一个椭圆,区别是它会为椭圆填充指定的color颜色。 -
绘制多边形
PHP中使用imagepolygon()和imagefilledpolygon()函数绘制多边形,函数定义如下:imagepolygon(resource $image, array $points, int $num_points, int $color):bool imagefilledpolygon(resource $image, array $points, int $numn_points, int $color):bool以上两个函数都是用来创建多边形的。参数
points是一个PHP数组,包含了多边形的各个顶点坐标,参数num_points是顶点的总数。两个函数的区别在于一个用color作为边框颜色,一个用color作为填充颜色。【示例】
// 新建一个画布
$im = imagecreatetruecolor(800, 600);
// 填充背景色
$bg = imagecolorallocate($im, 0, 0, 0);
// 为多边形设置边框或填充的颜色
$color_polygon = imagecolorallocate($im, 255, 255, 255);
// 在画布上画出无填充的多边形
imagepolygon($im,
             array(
                 0, 0,
                 100, 200,
                 300, 200
             ),
             3,
             $color_polygon);
// 在画布上画出填充的多边形
imagefilledpolygon($im,
                    array(
                        300, 400,
                        200, 600,
                        500, 500
                    ),
                    3,
                    $color_polygon);
// 输出图像
header("Content-type: image/png");
imagepng($im);
// 关闭图像资源
imagedestroy($im);
程序输出结果:
-
绘制矩形
在PHP中使用imagerectangle()和imagefilledrectangle()函数来绘制矩形,函数语法格式如下:imagerectangle(resource $image, int $x1, int $y1, int $x2, int $y2, int $color):bool imagefilledrectangle(resource $image, int $x1, int $y1, int $x2, int $y2, int $color):bool以上两个函数用col颜色在image图像资源中画一个矩形,其左上角坐标为x1, y1, 右下角坐标为x2, y2.图像的左上角坐标为0,0。
【示例】
// 新建一个画布
$im = imagecreatetruecolor(250, 250);
// 填充背景色
$bg = imagecolorallocate($im, 10, 110, 25);
// 设置矩形填充色
$color_rectangle = imagecolorallocate($im, 0, 0, 255);
// 在画布上画出填充矩形
imagefilledrectangle($im, 100, 200, 50, 50, $color_rectangle);
// 输出图像
header("Content-type: image/png");
imagepng($im);
// 关闭图像资源
imagedestroy($im);
程序输出结果:
-
绘制椭圆弧
在PHP中使用imagearc()和imagefilledarc()绘制椭圆弧,其函数定义如下:imagearc(resource $image, int $cx, int $cy, int $w, int $h, int $s, int $e, int $color):bool imagefilledarc(resource $image, int $cx, int, $cy, int $w, int $h, int $s, int $e, int color, int $style):bool以上两个函数以
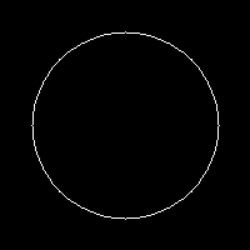
cx,cy(图像左上角为0,0)为中心在image所代表的图像中画一个椭圆弧。w和h分别制定了椭圆的宽度和高度,起始和结束点以s和e参数为角度指定。0°位于三点钟位置,以顺时针方向绘制。【示例】
// 新建一个画布
$im = imagecreatetruecolor(200, 200);
// 填充背景色
$bg = imagecolorallocate($im, 0, 0, 0);
// 设置圆弧填充色
$color_arc = imagecolorallocate($im, 255, 255, 255);
// 在画布上画出图像
imagearc($im, 100, 100, 150, 150, 0, 360, $color_arc);
// 输出图像
header("Content-type: image/png");
imagepng($im);
// 关闭图像资源
imagedestroy($im);
程序输出结果:
绘制文字
PHP中还提供了多个绘制文字的函数。
-
imagechar水平地画一个字符
该函数定义如下:imagechar(resource $image, int $font, int $x, int $y, string $c, int $color):bool该函数将字符串
c的第一个字符画在image指定的图像中,其左上角位于x,y(图像左上角为0,0),颜色为color。如果font是1,2,3,4,5,则使用内置字体(更大的数字对应于更大的子图。)【示例】
// 第一步:创建画布
$im = imagecreate(100, 100);

// 第二步:绘制图像
$string = 'PHP';
// 定义背景色
$bg = imagecolorallocate($im, 255, 255,255);
// 定义字体颜色
$font_color = imagecolorallocate($im, 0, 0, 0);
// 在图像的左上角打印一个黑色的P
imagechar($im, 1, 40, 40, $string, $font_color);

// 第三步:输出图像
header('Content-type: image/png');
imagepng($im);
// 第四步:关闭图像资源
imagedestroy($im);
程序输出结果:
-
imagecharup()垂直地画一个字符
该函数语法格式与imagechar()相同,区别只是字符的方向不同,这里不再累述。 -
imagefttext()将文本写入图像
该函数定义如下:imagefttext(resource $image, float $size, float $angle, int $x, int $y, int $color, string $fontfile, string $text[, array $extrainfo]):array该函数使用FreeType2字体将文本写入图像。
参数:
- image:由图像穿件函数返回的图像资源。
- size:以像素点位点位的字体大小。
- angle:角度(以度为单位),0度表示从左向右输出文本。较高的值表示逆时针旋转。例如,值为90将导致自下而上的输出文本。
- x,y:x和y给出的坐标将定义第一个字符的基点(大致是字符的左下角)。这与imagestring()不同,后者中x和y定义第一个字符的左上角。
- color:字体颜色。
- fontfile:字体路径。
- text:输出文本。
【示例】
// 第一步:创建画布
$im = imagecreatetruecolor(300, 100);

// 第二步:绘制图像
// 定义背景色
$red = imagecolorallocate($im, 0xFF, 0x00, 0x00);
// 定义字体颜色
$black = imagecolorallocate($im, 0x00, 0x00, 0x00);
// 画一个红色填充的矩形
imagefilledrectangle($im, 0, 0, 299, 99, $red);
// 定义字体路径,(这里的1.ttf与程序文件在同一目录下)
$font_file = '1.ttf';
// 使用13号字,画出字符串'I LOVE PHP'
imagefttext($im, 30, 20, 55, 85, $black, realpath($font_file), "I LOVE PHP");

// 第三步:输出图像
header('Content-type: image/png');
imagepng($im);
// 第四步:关闭图像资源
imagedestroy($im);
程序输出结果:
注意:由于GD库版本更新后,字体路径需要使用绝对路径,所以以上代码中使用
realpath()来获得1.ttf的绝对路径。同样的,想让该函数成功的输出中文,需要指定中文字体。
-
使用TrueType字体处理中文生成图片
在PHP中有imagestring(),imagefttext()等函数用来生成字符串图片,但是它们支持的默认字体是十分有限的。TrueType字体是字体中极其常用的格式。PHP使用GD2库,在windows环境下,需要给出TrueType字体所在的文件夹路径,可以在程序开头加入以下语句,引入系统字库:
putenv('GDFONTPATH=c:\WINDOWS\Fonts');
使用TrueType字体也可以直接使用imagettftext()函数,即使用ttf字体的imagestring()函数,其定义如下:imagettftext(resource $image, float $size, float $angle, int $x, int $y, int $color, string $fontfile, string $text):array该函数使用TrueType字体将指定的
text写入图像,函数返回一个含有8个元素的数组,分别表示了文本外框的四个角的坐标,顺序为左下角、右下角、右上角、左上角。这些点相对于文本和角度无关,因此左上角指的是以水平方向看文字时其左上角。参数:
- image:由图像创建函数返回的图像资源。
- size:字体的尺寸。根据GD的版本,为像素尺寸(GD1)或点(磅)尺寸(GD2)。
- angle:角度,0度为从左向右的文本。角度按逆时针旋转。
- x,y:定义了第一个字符的基本点(大概是字符的左下角)。
- color:字体颜色。
- fontfile:TrueType字体的路径。
- text:UTF-8编码的文本字符串。可以包含十进制数字化字符表示(形式为:
€)来访问字体中超过位置 127 的字符。UTF-8 编码的字符串可以直接传递。 命名实体,比如©是不支持的。可以考虑使用 html_entity_decode() 来解码命名实体为 UTF-8 字符。如果字符串中使用的某个字符不被字体支持,将使用一个空心矩形替换该字符。(也就是所谓的乱码)
【示例】
// 引入系统字库
putenv('GDFONTPATH=c:\WINDOWS\Fonts');
// 定义画布尺寸
$xsize = 300;
$ysize = 200;
// 创建画布
$im = imagecreatetruecolor($xsize, $ysize);
// 定义背景色
$bg = imagecolorallocate($im, 8, 2, 133);
// 定义字体颜色
$font_color = imagecolorallocate($im, 230, 22, 22);
// 填充画布
imagefill($im, 0, 0, $bg);
// 定义字体
$font_file = 'simhei.ttf';
// 定义字符串
$text = "这是一个把中文用黑体显示的图片。";
// 如果你的编辑器使用的不是UTF-8编码,则需要将中文编码转换为UTF-8
// $text = iconv("GB2312", "UTF-8", $text);
// 将字符串画到画布上
imagettftext($im, 12, 0, 20, 100,$font_color, $font_file, $text);

// 输出图像
header('Content-type: image/png');
imagepng($im);

// 关闭图像资源
imagedestroy($im);
程序输出结果:
-
图像处理
复制图像
imagecopy()可用来复制图像,其函数定义如下:
imagecopy(resource $dst_im, resource $src_im, int $dst_x, int $dst_y, int $src_x, int $src_y, int $src_w, int $src_h):bool
该函数将src_im图像中坐标从src_x,src_y开始,宽度为src_w,高度为src_h的一部分拷贝到dst_im图像中坐标为dst_x和dst_y的位置上。
【示例】
$imdst = imagecreatefromjpeg('2.jpg');
$imsrc = imagecreatefromjpeg('1.jpg');
imagecopy($imdst, $imsrc, 40, 50, 40, 50, 160, 100);
header('Content-type: image/jpeg');
imagejpeg($imdst);
imagedestroy($imdst);
imagedestroy($imsrc);
程序输出结果:
原图如下:1.jpg
2.jpg
程序输出图:
旋转图像
函数imagerotate()可将图像旋转一个给定的角度。函数定义如下:
imagerotate(resource $image, float $angle, int $bgd_color[, int $ignore_transparent = 0]):resource
该函数返回将src_im图像用给定的angle角度旋转后的图像资源。bgd_color指定了旋转后没有覆盖到的部分的颜色。旋转的中心是图像的中心,旋转后的图像会按比例缩小以适合目标图像的大小——边缘不会被剪去。
参数:
- image:由图像创建函数返回的图像资源。
- angle:旋转角度,以逆时针方向旋转图像。
- bgd_color:指定旋转后覆盖区域的颜色。
- ignore_transparent:如果被设为非零值,则透明色会被忽略(否则会被保留)。
【示例】
// 待旋转的图片文件名
$filename = '1.jpg';
// 旋转角度
$degrees = 100;
// 定义HTTP头
header('Content-type: image/jpeg');
// 加载图像
$source = imagecreatefromjpeg($filename);
// 旋转图像
$rotate = imagerotate($source, $degrees, 0);
// 输出旋转后的图像
imagejpeg($rotate);

// 关闭资源
imagedestroy($rotate);
imagedestroy($source);
程序输出结果:
应用实例
图像水印
图像水印的原理就是把一张图片复制到另一张背景图片上。GD库的imagecopymerge()函数,可以实现图片水印,该函数定义如下:
imagecopymerge(resource $dst_im, resource $src_im, int $dst_x, int $dst_y, int $src_x, int $src_y, int $src_w, int $src_h, int $pct):bool
该函数将src_im图像中坐标从src_x,src_y开始,宽度为src_w,高度src_h的一部分拷贝到dst_im图像中坐标为dst_x和dst_y的位置上。两图像将根据pct来决定合并程度,其值范围从0到100。当pct=0时,实际上什么也没做,当为100时对于调色板图像本函数和imagecopy()完全一样,它对真彩色图像实现了alpha透明。
【示例】
// 加载待添加水印的图片
$imgdst = imagecreatefromjpeg('1.jpg');
// 创建水印图像
$water = imagecreate(200, 50);
// 设置透明背景
$bg = imagecolorallocatealpha($water, 0, 0, 0, 127);
// 设置水印文字
$text = 'I am water';
// 设置文字颜色
$black = imagecolorallocate($water,255, 255, 255);
// 设置字体路径
$font_file = '1.ttf';
// 关闭混合模式,以便透明颜色能覆盖原画板
imagealphablending($water, false);
// 用透明色填充背景
imagefill($water, 0, 0, $bg);
// 创建水印图像
imagefttext($water, 12, 20,10, 48, $black, realpath($font_file), $text);
// 将水印加入图片
imagecopymerge($imgdst, $water, 20, 200, 0, 0, 200, 50, 30);
// 输出图片
header('Content-type: image/jpeg');
imagepng($imgdst);

// 关闭图像资源
imagedestroy($imgdst);
imagedestroy($water);
程序输出结果:
图像验证码
图像验证码的原理就是生成一张图片,然后在图片上写入字符,并辅之一些干扰元素(通常为像素点和斜线)。图像验证码经常用在用户登陆、发帖等验证场景中,其目的是为了防止机器人(程序)自动操作,验证此行为来自用户。
【示例】
function random($len) {
    // 组成验证码的字符集合,一般情况下会去掉01小写l等容易混淆的字符
    $srcstr = "ABCDEFGHIJKLMNOPQRSTUVWXYZ23456789";
    // 设置随机数种子
    mt_srand();
    $captcha_text = "";
    // 循环生成验证码字符串
    for ($i = 0; $i < $len; $i++) {
        $captcha_text .= $srcstr[mt_rand(0, strlen($srcstr))];
    }
    // 返回验证码字符串
    return strtoupper($captcha_text);
}
// 生成验证码字符串
$captcha = random(4);
// 设置验证码宽度
$width = 50;
// 设置验证码高度
$height = 25;
@header("Content-type:image/png");

// 创建验证码图像
$im = imagecreate($width, $height);
// 设置背景色
$back = imagecolorallocate($im, 0xFF, 0xFF, 0xFF);
// 模糊点颜色
$pix = imagecolorallocate($im, 187, 230, 247);
// 设置字体颜色
$font = imagecolorallocate($im, 41, 163, 238);
// 绘制模糊点
mt_srand();
for ($i = 0; $i < 1000; $i++) {
    imagesetpixel($im, mt_rand(0, $width), mt_rand(0, $height), $pix);
}
// 将验证码写入图片
imagestring($im, 5, 7, 5, $captcha, $font);
imagerectangle($im, 0, 0, $width-1, $height -1, $font);
imagepng($im);

// 关闭图像资源
imagedestroy($im);
程序输出结果:
以上代码是为了理解验证码生成的原理,下面给出一个验证码类,用面向对象的方式再实现验证码的生成,也算是复习一下面向对象的知识。
tips:建议以类名+.class+.php的方式来命名类文件
/**
 * 文件名:captcha.class.php
 * 验证码类
 */
class Captcha {
    private $width;     // 验证码宽度
    private $height;    // 验证码高度
    private $codeNum;   // 验证码中的字符数
    private $type;      // 验证码类型,0=数字,1=字母,2=字母+数字(默认值)
    private $font_file; // 验证码字体
    private $dot;       // 干扰点数量
    private $line;      // 干扰线数量
    private $image;     // 验证码图像
    private $chars;     // 验证码字符串

    /* 构造函数 */
    function __construct($width=100, $height=40, $codeNum=4, $type=2, $session='captcha', $font_file='1.ttf', $dot=50, $line=4)
    {
        // 开启session
        session_start();
        $this->width = $width;
        $this->height = $height;
        $this->codeNum = $codeNum;
        $this->type = $type;
        $this->session = $session;
        $this->font_file = $font_file;
        $this->dot = $dot;
        $this->line - $line;
        $this->image = $this->createCaptchaImage();
        $this->chars = $this->createCaptchaText();
        // 将生成的验证码放入session,以便用于验证
        $_SEESION[$this->session] = $this->chars;
    }

    // 穿件验证码画布
    private function createCaptchaImage(){
        $image = imagecreatetruecolor($this->width, $this->height);
        return $image;
    }

    // 生成随机验证码字符串
    private function createCaptchaText(){
        switch ($this->type){
            case 0:
                $chars = implode('', range(0, 9));
                break;
            case 1:
                $chars = implode('', array_merge(range('A', 'Z'), range('a', 'z')));
                break;
            case 2:
                $chars = implode('', array_merge(range(0, 9), range('A', 'Z'), range('a', 'z')));
                break;
            default:
                break;
        }
        if (!empty($chars)) {
            $chars = str_shuffle($chars);   // 打乱字符排列顺序
        }
        // 截取字符
        if ($this->codeNum > strlen($chars)) {
            exit('验证码长度超出限制!');
        }else {
            $chars = substr($chars, 0, $this->codeNum);
        }
        // 返回验证码字符串
        return $chars;
    }

    // 生成干扰元素
    private function interferon(){
        // 生成干扰线
        for ($i = 0; $i < $this->line; $i++) {
            // 生成随机颜色
            $color = imagecolorallocate($this->image, mt_rand(0, 255), mt_rand(0, 255), mt_rand(0, 255));
            imageline($this->image, mt_rand(0, $this->width - 1), mt_rand(0, $this->height - 1), mt_rand(0, $this->width - 1), mt_rand(0, $this->height - 1), $color);
        }
        // 生成干扰点
        for ($i = 0; $i < $this->dot; $i++) {
            $color = imagecolorallocate($this->image, mt_rand(0, 255), mt_rand(0, 255), mt_rand(0, 255));
            imagesetpixel($this->image, mt_rand(0, $this->width - 1), mt_rand(0, $this->height - 1), $color);
        }
    }

    // 生成并输出验证码图像
    public function captcha($red=232, $green=155, $blue=55) {
        $color = imagecolorallocate($this->image, $red, $green, $blue);
        imagefilledrectangle($this->image, 0, 0, $this->width, $this->height, $color);
        for($i = 0; $i < $this->codeNum; $i++) {
            $size = mt_rand(16, 18);
            $angle = mt_rand(-15, 15);
            $x = 10 + $i * $size;
            $y = mt_rand(20, 26);
            $color = imagecolorallocate($this->image, mt_rand(0, 255), mt_rand(0, 255), mt_rand(0, 255));
            $text = substr($this->chars, $i, 1);
            imagettftext($this->image, $size, $angle, $x, $y, $color, realpath($this->font_file), $text);
        }
        $this->interferon();
        header('Content-type:image/gif');
        imagegif($this->image);
        imagedestroy($this->image);
    }
}

// 使用方法
$captcha = new Captcha();
$captcha->captcha();
程序输出结果:
扩展——Jpgraph库的使用
Jpgraph是一个功能强大且十分流行的PHP第三方图片处理库,其建立在内部库文件GD2基础之上。优点是建立了很多方便操作的对象和函数,能够大大简化使用GD库对图片进行处理的编码过程。
Jpgraph库的安装配置
- 登陆Jpgraph官网 下载最新的Jpgraph压缩包。

- 将文件解压,(推荐放到你项目目录下)
- 修改php.ini文件:
- 内存 memory_limit=X,至少为32M
- 执行时间max_execution_time=X,对于复杂的图片加载时需要较多的时间,官方推荐为30秒,可以根据图片的复杂度做相应的修改
- 在开发环境中注释掉缓存output_buffering,便于调试,生产环境关闭。
使用Jpgraph创建图形的一般姿势
- 包含所需的类库文件
require_once(); - 初始化数据
$data = array();
这里的数据可以是静态的,也可以是动态的,也可以是通过GET或POST方法传递的。 - 创建Graph类实例
$graph = new Graph();
可以同时设置图形的尺寸 - 设置标题、X轴标题、Y轴标题的内容,以及字体、颜色、位置等
- 创建对应的图实例
可以是折线图、柱形图、饼状图、3D图等 - 将数据添加到图形上
$graph->Add(); - 显示图片
$graph->Stroke(); - 解决中文乱码Gpgraph默认显示汉字时是把汉字编码认为gb2312,转化为utf-8以后再显示,如果文件的编码方式是gb2312,只需把SetFont()方法的第一个参数设置为FF_SIMSUN即可如果是utf-8编码的,需要先把汉字编码转化为gb2312,这样汉字才能正常显示转换编码方式可以使用:
iconv("UTF-8","gb2312",$x);
Jpgraph压缩包中自带了大量的demo,下面使用barlinealphaex1.php来说明其用法,该文件在Jpgraph库的src/Example目录下。其代码如下:
// 包含文件需要修改
// 加载jpgraph的基本类库
require_once ('jpgraph/src/jpgraph.php');
// 加载柱状图类库
require_once ('jpgraph/src/jpgraph_bar.php');
// 加载折线图类库
require_once ('jpgraph/src/jpgraph_line.php');

// 定义柱状图和折线图在Y轴上的数据坐标,也是图形展示的主要信息
$ydata  = array(10,120,80,190,260,170,60,40,20,230);
$ydata2 = array(10,70,40,120,200,60,80,40,20,5);

// 定义了月份使用短格式显示
$months = $gDateLocale->GetShortMonth();

// 创建图形$graph,宽300,高200
$graph = new Graph(300,200);
// 设置刻度为自动生成的刻度形式
$graph->SetScale("textlin");
// 设置图形边框颜色为白色
$graph->SetMarginColor('white');

// 调整边框宽度
$graph->SetMargin(30,1,20,5);

// 在背景图上添加边框
$graph->SetBox();

// 取消整个图片的边框
$graph->SetFrame(false);

// 设置标题和字体
$graph->tabtitle->Set('Year 2003');
$graph->tabtitle->SetFont(FF_ARIAL,FS_BOLD,10);

// 设置x坐标,y坐标的颜色、字体和是否显示
$graph->ygrid->SetFill(true,'#[email protected]','#[email protected]');
$graph->ygrid->SetLineStyle('dashed');
$graph->ygrid->SetColor('gray');
$graph->xgrid->Show();
$graph->xgrid->SetLineStyle('dashed');
$graph->xgrid->SetColor('gray');

// 使用$months变量中的数据设置X轴显示字体及角度
$graph->xaxis->SetTickLabels($months);
$graph->xaxis->SetFont(FF_ARIAL,FS_NORMAL,8);
$graph->xaxis->SetLabelAngle(45);

// 使用$ydata数据生成柱状图,定义柱状图的宽度为0.6,
$bplot = new BarPlot($ydata);
$bplot->SetWidth(0.6);
$fcol='#440000';
$tcol='#FF9090';
// 填充柱状图,并且使用填充的渐变样式和两个渐变的颜色。
$bplot->SetFillGradient($fcol,$tcol,GRAD_LEFT_REFLECTION);

// Set line weigth to 0 so that there are no border
// around each bar
$bplot->SetWeight(0);

$graph->Add($bplot);

// 使用$ydata2数据生成折线图
$lplot = new LinePlot($ydata2);
$lplot->SetFillColor('[email protected]');
$lplot->SetColor('[email protected]');
$lplot->SetBarCenter();

$lplot->mark->SetType(MARK_SQUARE);
$lplot->mark->SetColor('[email protected]');
$lplot->mark->SetFillColor('lightblue');
$lplot->mark->SetSize(6);

$graph->Add($lplot);

// 将图像输出到浏览器
$graph->Stroke();
?>
程序输出结果:
该第三方库还有许多其他图形,请自行研究吧。


