Android MQTT消息推送实践

大概的消息推送过程就是这样,手机端订阅(Subscribe)一个Topic,当服务器有新消息的时候就发布(public)到所有的订阅者哪里去.
MQTT全称Message Queuing Telemetry Transport,消息队列遥测传输
本文记录Android客户端的实现.实现参考自开源项目https://www.eclipse.org/paho/
在开始阅读Android客户端代码之前,先看一下Java SE平台中如何使用MQTT.jar
以下代码给出了如何发布消息到服务器:
import org.eclipse.paho.client.mqttv3.MqttClient;
import org.eclipse.paho.client.mqttv3.MqttConnectOptions;
import org.eclipse.paho.client.mqttv3.MqttException;
import org.eclipse.paho.client.mqttv3.MqttMessage;
import org.eclipse.paho.client.mqttv3.persist.MemoryPersistence;


/**
 *@Description:
 *@author lx
 *@date 2017-1-12 下午1:19:42
 */
public class TestMQTT {

    public static void main(String args[]){

        //消息的类型
          String topic        = "TOPIC MQTT Examples";
          //消息内容
          String content      = "XX发布了消息";
          //消息发送的模式   选择消息发送的次数,依据不同的使用环境使用不同的模式
          int qos             = 2;
          //服务器地址
          String broker       = "tcp://iot.eclipse.org:1883";
          //客户端的唯一标识
          String clientId     = "CLIENTID JavaSample";
          //消息缓存的方式  内存缓存
          MemoryPersistence persistence = new MemoryPersistence();

          try {
              //创建以恶搞MQTT客户端
              MqttClient sampleClient = new MqttClient(broker, clientId, persistence);
              //消息的配置参数
              MqttConnectOptions connOpts = new MqttConnectOptions();
              //不记忆上一次会话
              connOpts.setCleanSession(true);
              System.out.println("Connecting to broker: "+broker);
              //链接服务器
              sampleClient.connect(connOpts);
              System.out.println("Connected");
              System.out.println("Publishing message: "+content);
              //创建消息
              MqttMessage message = new MqttMessage(content.getBytes());
              //给消息设置发送的模式
              message.setQos(qos);
              //发布消息到服务器
              sampleClient.publish(topic, message);
              System.out.println("Message published");
              //断开链接
              sampleClient.disconnect();
              System.out.println("Disconnected");
              System.exit(0);
          } catch(MqttException me) {
              System.out.println("reason "+me.getReasonCode());
              System.out.println("msg "+me.getMessage());
              System.out.println("loc "+me.getLocalizedMessage());
              System.out.println("cause "+me.getCause());
              System.out.println("excep "+me);
              me.printStackTrace();
          }

    }

}
使用上边的代码可以发布消息到服务器。
客户端接受消息:Demo示例参考https://github.com/eclipse/paho.mqtt.android
在该Demo中给出了如何运行该Demo的方法。Demo中包含3个Module。
org.eclipse.paho.android.service
客户端的MQTT需要运行在一个服务中,这个Module对MQTT的操作进行封装。
org.eclipse.paho.android.sample
这个Module演示了如何使用上边给出的Service。该Service既有订阅也有发布功能。一般我们使用订阅即可。
paho.mqtt.android.example
没有使用Service,也没有断线重连机制。代码量非常少,但是演示可订阅的核心操作。建议先看这一个。
下面主要分析org.eclipse.paho.android.sample
首次运行需要,画面如下:

由于没有没有连接到服务器,所以这里需要创建一个链接。
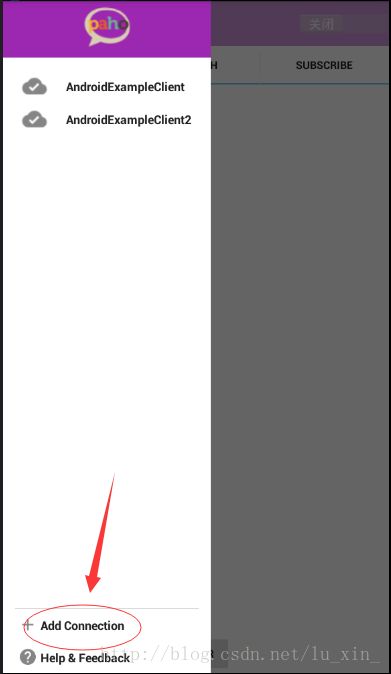

点击保存,一个链接信息保存完毕。在实际开发过程中,我们的与服务器的链接信息是直接在代码中写死的。
到这里我们将链接的信息已经保存起来了。下一次打开的时候就会显示如下画面
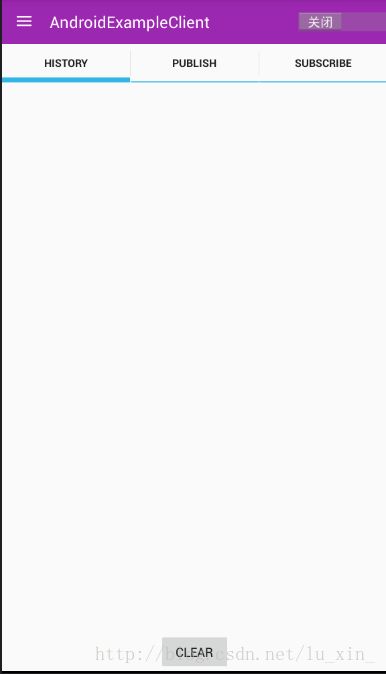
打开Toolbar上的开关,会调用MQTT的Connect方法,建立与服务器的链接。
// org.eclipse.paho.android.sample.activity.ConnectionFragment
connectSwitch.setOnCheckedChangeListener(new CompoundButton.OnCheckedChangeListener() {
@Override
public void onCheckedChanged(CompoundButton buttonView, boolean isChecked) {
if (isChecked) {
((MainActivity) getActivity()).connect(connection);
changeConnectedState(true);
} else {
((MainActivity) getActivity()).disconnect(connection);
changeConnectedState(false);
}
}
});
可见这里当打开开关的时候,建立连接。进入connect方法
// org.eclipse.paho.android.sample.activity.MainActivity
public void connect(Connection connection) {
String[] actionArgs = new String[1];
actionArgs[0] = connection.getId();
final ActionListener callback = new ActionListener(this,
ActionListener.Action.CONNECT, connection, actionArgs);
connection.getClient().setCallback(new MqttCallbackHandler(this, connection.handle()));
try {
//这里重点 connection.getClient().connect(connection.getConnectionOptions(), null, callback);
}
catch (MqttException e) {
Log.e(this.getClass().getCanonicalName(),
“MqttException Occured”, e);
}
}
这里又调用connection.getClient().connect
Connection代表我们之前保存的服务器信息,当让,我么可以根据Connection中保存的信息来创建一个Client对象。所以这里调用getClient方法,其实内部是一个创建对象的过程。这个Client对象并不是我们实际上的MQTT.jar中的Client,而是一个广播接收者。
public MqttAndroidClient getClient() {
return client;
}
而MqttAndroidClient
public class MqttAndroidClient extends BroadcastReceiver implements
IMqttAsyncClient
这个广播接受者的connect方法中又启动了一个绑定的服务。在这个服务中才真正运行MQTT.jar.我们后续所有的操作都是通过这个Service来对MQTT.jar进行操作的。当MQTT.jar操作完成,会发送广播,这样我们就可以收到消息订阅成功的状态了。
/*
* The actual connection depends on the service, which we start and bind
* to here, but which we can’t actually use until the serviceConnection
* onServiceConnected() method has run (asynchronously), so the
* connection itself takes place in the onServiceConnected() method
* 启动服务
*/
if (mqttService == null) { // First time - must bind to the service
Intent serviceStartIntent = new Intent();
serviceStartIntent.setClassName(myContext, SERVICE_NAME);
Object service = myContext.startService(serviceStartIntent);
if (service == null) {
IMqttActionListener listener = token.getActionCallback();
if (listener != null) {
listener.onFailure(token, new RuntimeException(
“cannot start service ” + SERVICE_NAME));
}
}
// We bind with BIND_SERVICE_FLAG (0), leaving us the manage the lifecycle
// until the last time it is stopped by a call to stopService()
myContext.bindService(serviceStartIntent, serviceConnection,
Context.BIND_AUTO_CREATE);
//当然,其实广播也不是MQTT发送,不过可以这样简单的理解。
广播都是我们自己定义的。MQTT怎么知道发什么样的广播呢?所以,在订阅消息的时候,我们会给MQTT设置一个对调函数,当调用成功后就会产生一个回掉,这时我们自己在这里发送广播通知消息接受成功。
订阅消息的代码由从Service开始分析,前面的调用就掠过了。
public void subscribe(final String topic, final int qos,
String invocationContext, String activityToken) {
service.traceDebug(TAG, “subscribe({” + topic + “},” + qos + “,{”
+ invocationContext + “}, {” + activityToken + “}”);
final Bundle resultBundle = new Bundle();
resultBundle.putString(MqttServiceConstants.CALLBACK_ACTION,
MqttServiceConstants.SUBSCRIBE_ACTION);
resultBundle.putString(MqttServiceConstants.CALLBACK_ACTIVITY_TOKEN,
activityToken);
resultBundle.putString(
MqttServiceConstants.CALLBACK_INVOCATION_CONTEXT,
invocationContext);
if ((myClient != null) && (myClient.isConnected())) {
IMqttActionListener listener = new MqttConnectionListener(
resultBundle);
try {
//看这里
myClient.subscribe(topic, qos, invocationContext, listener);
} catch (Exception e) {
handleException(resultBundle, e);
}
} else {
resultBundle.putString(MqttServiceConstants.CALLBACK_ERROR_MESSAGE,
NOT_CONNECTED);
service.traceError(“subscribe”, NOT_CONNECTED);
service.callbackToActivity(clientHandle, Status.ERROR, resultBundle);
}
}
Service里调用的myClient.subscribe(topic, qos, invocationContext, listener);
这里的myClient就是MQTT里的Client对象的。看见没有,这里给设置了一个listener.就是这个回掉函数。
我们看看这个回掉函数的实现MqttConnectionListener,这里类创建接受一个Boundle对象。Boundle里边设置了
resultBundle.putString(MqttServiceConstants.CALLBACK_ACTION,
MqttServiceConstants.SUBSCRIBE_ACTION);
CALLBACK——ACTION
对就是这个常量。
然后在这个实现类的onSuccess方法中传入Service的就是方才的Boundle
@Override
public void onSuccess(IMqttToken asyncActionToken) {
service.callbackToActivity(clientHandle, Status.OK, resultBundle);
然后在看你Service的callbackToActivity
void callbackToActivity(String clientHandle, Status status,
Bundle dataBundle) {
// Don’t call traceDebug, as it will try to callbackToActivity leading
// to recursion.
Intent callbackIntent = new Intent(
MqttServiceConstants.CALLBACK_TO_ACTIVITY);
if (clientHandle != null) {
callbackIntent.putExtra(
MqttServiceConstants.CALLBACK_CLIENT_HANDLE, clientHandle);
}
callbackIntent.putExtra(MqttServiceConstants.CALLBACK_STATUS, status);
if (dataBundle != null) {
callbackIntent.putExtras(dataBundle);
}
LocalBroadcastManager.getInstance(this).sendBroadcast(callbackIntent);
}
}
传入的Boundle由被放到一个Intent中。最后以广播的方式发送出去。
if (dataBundle != null) {
callbackIntent.putExtras(dataBundle);
}
这时,我们在MqttAndroidClient
这个广播接收者中就收到了订阅成功的消息。
关于消息接受:
消息是怎样接受到的,我们没有去监听消息,MQTT帮我们做了。同样是回掉。
在创建一个MqttConnection中链接的时候窜入一个this
myClient = new MqttAsyncClient(serverURI, clientId,
persistence, new AlarmPingSender(service));
myClient.setCallback(this);
看Callback这方法的参数
public void setCallback(MqttCallback callback) {
this.mqttCallback = callback;
comms.setCallback(callback);
}
public interface MqttCallback {
/**
* This method is called when the connection to the server is lost.
*
* @param cause the reason behind the loss of connection.
*/
public void connectionLost(Throwable cause);
/**
* This method is called when a message arrives from the server.
*
*
* This method is invoked synchronously by the MQTT client. An
* acknowledgment is not sent back to the server until this
* method returns cleanly.
*
* If an implementation of this method throws an Exception, then the
* client will be shut down. When the client is next re-connected, any QoS
* 1 or 2 messages will be redelivered by the server.
*
* Any additional messages which arrive while an
* implementation of this method is running, will build up in memory, and
* will then back up on the network.
*
* If an application needs to persist data, then it
* should ensure the data is persisted prior to returning from this method, as
* after returning from this method, the message is considered to have been
* delivered, and will not be reproducible.
*
* It is possible to send a new message within an implementation of this callback
* (for example, a response to this message), but the implementation must not
* disconnect the client, as it will be impossible to send an acknowledgment for
* the message being processed, and a deadlock will occur.
*
* @param topic name of the topic on the message was published to
* @param message the actual message.
* @throws Exception if a terminal error has occurred, and the client should be
* shut down.
*/
public void messageArrived(String topic, MqttMessage message) throws Exception;
/**
* Called when delivery for a message has been completed, and all
* acknowledgments have been received. For QoS 0 messages it is
* called once the message has been handed to the network for
* delivery. For QoS 1 it is called when PUBACK is received and
* for QoS 2 when PUBCOMP is received. The token will be the same
* token as that returned when the message was published.
*
* @param token the delivery token associated with the message.
*/
public void deliveryComplete(IMqttDeliveryToken token);
}
可以看到,messageArrived
Ok,这里消息也接受到了,接受到继续发广播。
有点乱,凑合看看,以后再整理。