Android window弹窗小结
1、简介
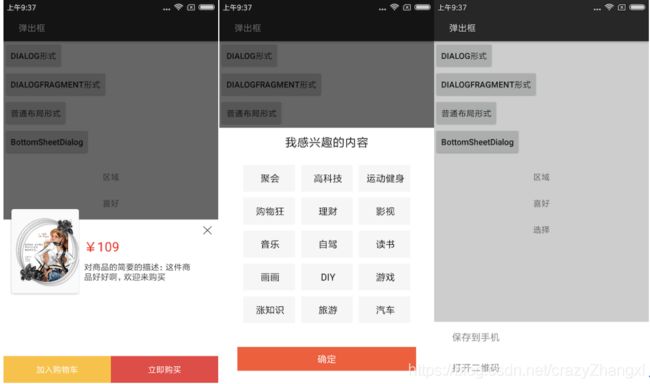
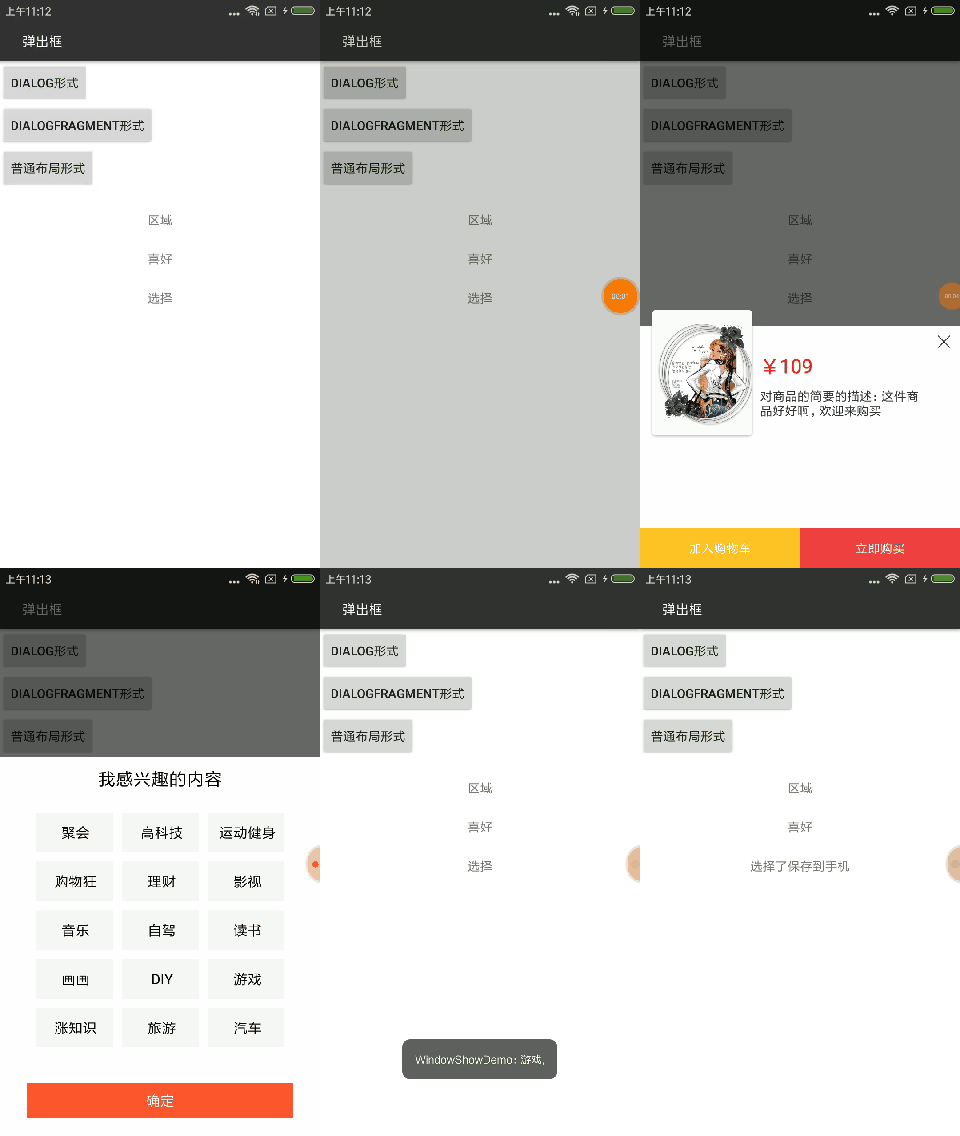
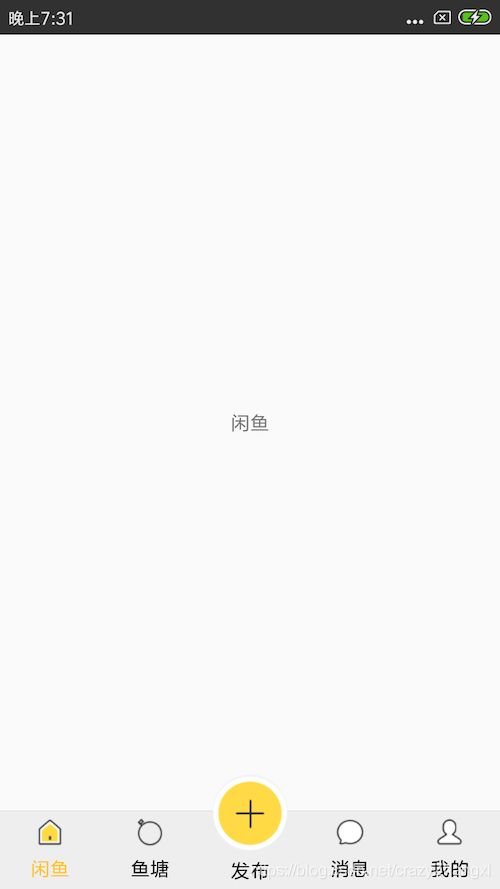
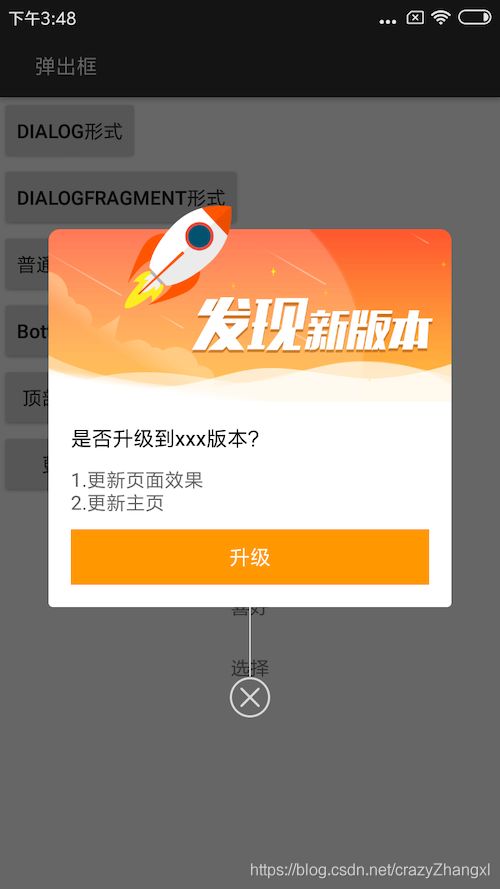
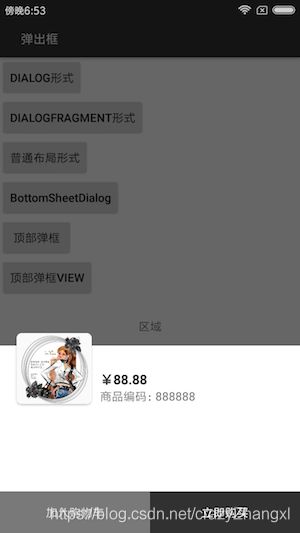
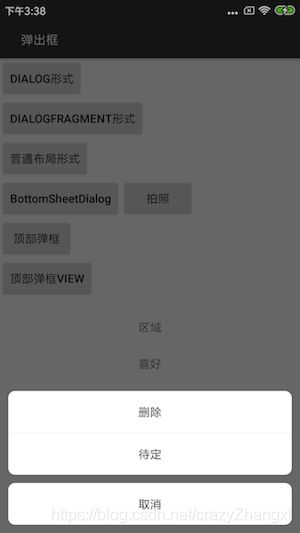
本文将介绍的是从底部弹出窗体以供用户进行交互的例子,本文将介绍使用Dialog,View和DialogFragment的方式分别来进行实现。除此之外还将研究介绍BottomSheetDialog实现案例,上部分弹框的效果实现,也是仿制了58同城的弹出喜好的UI显示和交互。弹出框真的是很常见的,在安卓中有广泛的用途,故而有必要对其进行好好的梳理,后面使用起来也能够得心应手。案例比较多,基本你可以说将涵盖工作中的使用场景。咸鱼底部菜单,底部菜单。
2、和前面一样也是先看效果吧
2.1 Dialog形式
注释写的还是很清晰的,如下。
    private void showPurchaseView() {
        // 以特定的风格创建一个dialog
        Dialog dialog = new Dialog(this,R.style.MyDialog);
        // 加载dialog布局view
        View purchase = LayoutInflater.from(this).inflate(R.layout.dialog_purchase, null);
        // 设置外部点击 取消dialog
        dialog.setCancelable(true);
        // 获得窗体对象
        Window window = dialog.getWindow();
        // 设置窗体的对齐方式
        window.setGravity(Gravity.BOTTOM);
        // 设置窗体动画
        window.setWindowAnimations(R.style.AnimBottom);
        // 设置窗体的padding
        window.getDecorView().setPadding(0, 0, 0, 0);
        WindowManager.LayoutParams lp = window.getAttributes();
        lp.width = WindowManager.LayoutParams.MATCH_PARENT;
        lp.height = WindowManager.LayoutParams.WRAP_CONTENT;
        window.setAttributes(lp);
        dialog.setContentView(purchase);
        dialog.show();
    }
下面给出style的设置。
R.layout.dialog_purchase.xml
其实这里还是挺重要的:
1. 得为布局设置白色背景 否则为dialog背景色
2. 这种错落的效果 是使用的 clipChildren = "false" 属性,需要去了解
chilpchildren实现错落效果
        ...
        ...


        ...
        ...
动态设置radioButton 的 drawable的大小
Drawable dbHome = getResources().getDrawable(R.drawable.selector_home);
dbHome.setBounds(0, 0, 40, 40);
mRbHome.setCompoundDrawables(null, dbHome, null, null);
2.2 DialogFragment形式
主要是创建一个Java类,然后继承自DialogFragment方法即可,下面给出部分代码
    @Override
    public Dialog onCreateDialog(Bundle savedInstanceState) {
        // 使用不带Theme的构造器, 获得的dialog边框距离屏幕仍有几毫米的缝隙。
        Dialog dialog = new Dialog(getActivity(), R.style.MyDialog);
        mContext = getActivity();
        dialog.requestWindowFeature(Window.FEATURE_NO_TITLE); // 设置Content前设定
        dialog.setContentView(R.layout.fragment_dialog_show_enjoy);
        dialog.setCanceledOnTouchOutside(true); // 外部点击取消
        // 设置宽度为屏宽, 靠近屏幕底部。
        final Window window = dialog.getWindow();
        window.setWindowAnimations(R.style.AnimBottom);
        final WindowManager.LayoutParams lp = window.getAttributes();
        lp.gravity = Gravity.BOTTOM; // 紧贴底部
        lp.width = WindowManager.LayoutParams.MATCH_PARENT; // 宽度持平
        lp.height = getActivity().getWindowManager().getDefaultDisplay().getHeight() * 2/ 3;
        window.setAttributes(lp);
        getDataFromBefore();
        initView(dialog);
        // 窗口初始化后 请求网络数据
        return dialog;
    }
Activity 与 DialogFragment 传值问题
ShowEnjoyDialogFragment showEnjoyDialogFragment = new ShowEnjoyDialogFragment();
Bundle bundle = new Bundle();
// bundle.putStringArrayList(AppConst.HOBBY_KEY_ENJOY, mHobbyStrList);
showEnjoyDialogFragment.setArguments(bundle);
showEnjoyDialogFragment.show(getFragmentManager(), "showEnjoyDialogFragment");
2.3 普通的View形式
这里的思想主要是通过布局的显示与隐藏加上动画来实现特定的效果
2.4 BottomSheetDialog实现购买页凹凸效果
    /**
     * 展开底部的Dialog 这种Dialog效果真的好
     */
    private void showSheetDialog() {
        mBottomDialog = new BottomDialog(this,0,true);
        View view = LayoutInflater.from(this).inflate(R.layout.bottom_purchase, null, false);
        mBottomDialog.setContentView(view);
        // 设置背景为透明色 那么白色的就能呈现出来了
        mBottomDialog.getDelegate().findViewById(android.support.design.R.id.design_bottom_sheet)
                .setBackgroundColor(getResources().getColor(android.R.color.transparent));

        mBottomDialog.show();
    }
2.5 popupWindow实现顶部弹框效果
主要继承PopupWindow,实现业务逻辑。代码如下
public class ListPopWindow extends PopupWindow{
    private Context context;
    private View window;
    private Animation animationIn, animationOut;
    private boolean isDismiss = false;
    private LinearLayout id_ll_root;
    private BaseQuickAdapter adapter;
    private List mList = new ArrayList<>();
    /* 用于修改上下箭头的 很牛皮啊!! 这里以后可以拿来用非常不错
    *
    * */
    private TextView picture_title;
    private Drawable drawableUp, drawableDown;
    private RecyclerView recyclerView;
    private final RequestOptions mOptions;
    private OnPopItemSelectedListener mOnPopItemSelectedListener;
    public ListPopWindow(Context context, List mList) {
        this.context = context;
        this.mList = mList;
        window = LayoutInflater.from(context).inflate(R.layout.pop_my_show, null);
        this.setContentView(window);
        this.setWidth(UIUtils.getScreenWidth(context));
        this.setHeight(UIUtils.getScreenHeight(context));
        this.setAnimationStyle(R.style.WindowStyle);
        this.setFocusable(true);
        this.setOutsideTouchable(true);
        this.update();
        this.setBackgroundDrawable(new ColorDrawable(Color.argb(123, 0, 0, 0)));
        /* 获得图片*/
        drawableUp = ContextCompat.getDrawable(context, R.mipmap.ic_arrow_top);
        drawableDown = ContextCompat.getDrawable(context, R.mipmap.ic_arrow_bottom);
        animationIn = AnimationUtils.loadAnimation(context, R.anim.photo_album_show);
        animationOut = AnimationUtils.loadAnimation(context, R.anim.photo_album_dismiss);
        mOptions = new RequestOptions()
                .placeholder(com.luck.picture.lib.R.drawable.ic_placeholder)
                .centerCrop()
                .sizeMultiplier(0.5f)
                .diskCacheStrategy(DiskCacheStrategy.ALL)
                .override(160, 160);
        initView();
    }

    public void setPictureTitleView(TextView picture_title) {
        this.picture_title = picture_title;
    }

    private void initView() {
        id_ll_root = (LinearLayout) window.findViewById(R.id.llPopRoot);
        recyclerView = window.findViewById(R.id.rvList);
        /* 设置列表的高度 ----- */
        recyclerView.getLayoutParams().height = (int) (ScreenUtils.getScreenHeight(context) * 0.6);
        recyclerView.addItemDecoration(new RecycleViewDivider(
                context, LinearLayoutManager.HORIZONTAL, 0, ContextCompat.getColor(context, R.color.colorTransparent)));
        recyclerView.setLayoutManager(new LinearLayoutManager(context));
        adapter = new BaseQuickAdapter(R.layout.item_pic_pop_show,mList) {
            @Override
            protected void convert(BaseViewHolder helper, GalleryBean item) {
                helper.setText(R.id.tvTitleName,item.getTitle());
                helper.itemView.setSelected(item.isChecked());
                ImageView view = helper.getView(R.id.first_image);
                Glide.with(context)
                        .asBitmap()
                        .load("")
                        .apply(mOptions)
                        .into(new BitmapImageViewTarget(view) {
                            @Override
                            protected void setResource(Bitmap resource) {
                                RoundedBitmapDrawable circularBitmapDrawable =
                                        RoundedBitmapDrawableFactory.
                                                create(mContext.getResources(), resource);
                                circularBitmapDrawable.setCornerRadius(8);
                                view.setImageDrawable(circularBitmapDrawable);
                            }
                        });
            }
        };
        adapter.setOnItemClickListener(new BaseQuickAdapter.OnItemClickListener() {
            @Override
            public void onItemClick(BaseQuickAdapter adapter, View view, int position) {
                for (GalleryBean bean:mList){
                    bean.setChecked(false);
                }
                mList.get(position).setChecked(true);
                adapter.notifyDataSetChanged();
                if (mOnPopItemSelectedListener != null){
                    mOnPopItemSelectedListener.popItemSelected(mList.get(position).getTitle());
                }
            }
        });
        recyclerView.setAdapter(adapter);
        id_ll_root.setOnClickListener(new View.OnClickListener() {
            @Override
            public void onClick(View v) {
                ListPopWindow.this.dismiss();
            }
        });
    }

    @Override
    public void showAsDropDown(View anchor) {
        try {
            if (Build.VERSION.SDK_INT >= 24) {
                Rect rect = new Rect();
                anchor.getGlobalVisibleRect(rect);
                int h = anchor.getResources().getDisplayMetrics().heightPixels - rect.bottom;
                setHeight(h);
            }
            super.showAsDropDown(anchor);
            isDismiss = false;
            id_ll_root.startAnimation(animationIn);
            UIUtils.modifyTextViewDrawable(picture_title, drawableUp, 2);
        } catch (Exception e) {
            e.printStackTrace();
        }
    }

    @Override
    public void dismiss() {
        if (isDismiss) {
            return;
        }
        UIUtils.modifyTextViewDrawable(picture_title, drawableDown, 2);
        isDismiss = true;
        id_ll_root.startAnimation(animationOut);
        dismiss();
        animationOut.setAnimationListener(new Animation.AnimationListener() {
            @Override
            public void onAnimationStart(Animation animation) {

            }

            @Override
            public void onAnimationEnd(Animation animation) {
                isDismiss = false;
                if (Build.VERSION.SDK_INT <= Build.VERSION_CODES.JELLY_BEAN) {
                    dismiss4Pop();
                } else {
                    ListPopWindow.super.dismiss();
                }
            }

            @Override
            public void onAnimationRepeat(Animation animation) {

            }
        });
    }

    /**
     * 在android4.1.1和4.1.2版本关闭PopWindow
     */
    private void dismiss4Pop() {
        new Handler().post(new Runnable() {
            @Override
            public void run() {
                ListPopWindow.super.dismiss();
            }
        });
    }

    public interface OnPopItemSelectedListener{
        void popItemSelected(String title);
    }

    public void setOnItemSelectedListener(OnPopItemSelectedListener onItemSelectedListener){
        this.mOnPopItemSelectedListener = onItemSelectedListener;
    }
}
2.6 自定义仿制Dialog实现顶部弹出框的效果
这里继承子FrameLayout 将该View覆盖上我们想要显示的View布局之上,然后通过叠层阴影部分的方式加以动画来实现顶部弹框的显示。
public class FilterDropDownDialog extends FrameLayout implements View.OnClickListener {
    private Animation mAnimationIn;
    private Animation mAnimationOut;
    private Animation mMaskAnimationIn;
    private Animation mMaskAnimationOut;
    private View mContentFrame;
    private View maskView;
    private boolean isShow;
    private TextView mTextView;
    private Drawable drawableUp, drawableDown;
    public FilterDropDownDialog(@NonNull Context context, FrameLayout frameLayout, TextView textView) {
        super(context);
        initView(context);
        mTextView = textView;
        // 将布局加入
        frameLayout.addView(this,new FrameLayout.LayoutParams(LayoutParams.MATCH_PARENT, LayoutParams.MATCH_PARENT));
    }

    private void initView(Context mContext) {
        View view = LayoutInflater.from(mContext).inflate(R.layout.filter_drop_down_layout, null);
        maskView = view.findViewById(R.id.mask);
        mContentFrame = view.findViewById(R.id.contentFm);
        maskView.setOnClickListener(this);
        mContentFrame.setOnClickListener(this);
        addView(view);
        drawableUp = ContextCompat.getDrawable(mContext, R.mipmap.ic_arrow_top);
        drawableDown = ContextCompat.getDrawable(mContext, R.mipmap.ic_arrow_bottom);
        mAnimationIn = AnimationUtils.loadAnimation(mContext,R.anim.dd_menu_in);
        mAnimationOut = AnimationUtils.loadAnimation(mContext,R.anim.dd_menu_out);
        mMaskAnimationIn = AnimationUtils.loadAnimation(mContext,R.anim.dd_mask_in);
        mMaskAnimationOut = AnimationUtils.loadAnimation(mContext,R.anim.dd_mask_out);
        setVisibility(GONE);
    }

    @Override
    public void onClick(View v) {
        switch (v.getId()){
            case R.id.mask:
                dismiss();
                break;
            case R.id.contentFm:
                Toast.makeText(getContext(), "点击内容", Toast.LENGTH_SHORT).show();
                break;
                default:
                    break;
        }
    }

    public void dismiss(){
        isShow = false;
        mContentFrame.setVisibility(GONE);
        mContentFrame.startAnimation(mAnimationOut);
        maskView.setVisibility(GONE);
        maskView.startAnimation(mMaskAnimationOut);
        UIUtils.modifyTextViewDrawable(mTextView, drawableDown, 2);
    }

    public void show(){
        isShow = true;
        setVisibility(VISIBLE);
        mContentFrame.setVisibility(VISIBLE);
        mContentFrame.startAnimation(mAnimationIn);
        maskView.setVisibility(VISIBLE);
        maskView.startAnimation(mMaskAnimationIn);
        UIUtils.modifyTextViewDrawable(mTextView, drawableUp, 2);
    }

    public boolean isHasShow(){
        return isShow;
    }
}
2.7 抽象的dialogFragment
子类只需继承该fragment然后重写布局即可完成对应所期望的fragment效果,提升了开发的效率
public abstract class BaseDialogFragment extends DialogFragment {

    private Local local = Local.BOTTOM;
    private Dialog dialog;
    private static final float DEFAULT_DIM = 0.6f;
    private static final String TAG = "base_dialog";

    /**
     * 设置方向
     * 注意 该方法应该在 onCreate() super方法前调用
     * @param local
     */
    public void setLocal(Local local) {
        this.local = local;
    }

    @Override
    public void onCreate(Bundle savedInstanceState) {
        super.onCreate(savedInstanceState);
        if (local == Local.BOTTOM){
            setStyle(DialogFragment.STYLE_NO_TITLE, R.style.BottomDialog);
        }else {
            setStyle(DialogFragment.STYLE_NO_TITLE,R.style.CenterDialog);
        }
    }

    @Nullable
    @Override
    public View onCreateView(LayoutInflater inflater, @Nullable ViewGroup container, Bundle savedInstanceState) {
        dialog = getDialog();
        if(dialog!=null){
            if(dialog.getWindow()!=null){
                dialog.getWindow().requestFeature(Window.FEATURE_NO_TITLE);
            }
            dialog.setCanceledOnTouchOutside(isCancel());
            dialog.setCancelable(isCancel());
        }
        View v = inflater.inflate(getLayoutRes(), container, false);
        bindView(v);
        return v;
    }

    /**
     * 设置是否可以cancel
     * @return
     */
    protected abstract boolean isCancel();

    /**
     * 获取布局资源文件
     * @return              布局资源文件id值
     */
    @LayoutRes
    public abstract int getLayoutRes();

    /**
     * 绑定
     * @param v             view
     */
    public abstract void bindView(View v);

    /**
     * 开始展示
     */
    @Override
    public void onStart() {
        super.onStart();
        if(dialog==null){
            dialog = getDialog();
        }
        Window window = dialog.getWindow();
        if(window!=null){
            WindowManager.LayoutParams params = window.getAttributes();
            // 半透明背景的灰度
            params.dimAmount = getDimAmount();
            params.width = WindowManager.LayoutParams.MATCH_PARENT;
            if (getHeight() > 0) {
                params.height = getHeight();
            } else {
                DisplayMetrics displayMetrics = getContext().getResources().getDisplayMetrics();
                params.height = (int) (displayMetrics.heightPixels * getPercent());
            }
            if (local == Local.BOTTOM){
                params.gravity = Gravity.BOTTOM;
            }else {
                params.gravity = Gravity.CENTER;
            }
            window.setAttributes(params);
        }
    }

    /**
     * 设置相对高度
     * 子类重写即可
     * @return
     */
    public double getPercent(){
        return 0.8f;
    }

    @Override
    public void onDestroy() {
        super.onDestroy();
        dismissDialog();
    }


    public int getHeight() {
        return -1;
    }

    public float getDimAmount() {
        return DEFAULT_DIM;
    }

    public void show(FragmentManager fragmentManager) {
        if(fragmentManager!=null){
            show(fragmentManager,getFragmentTag());
        }else {
            Log.e("show","需要设置setFragmentManager");
        }
    }

    public String getFragmentTag() {
        return TAG;
    }


    public void dismissDialog(){
        if(dialog!=null && dialog.isShowing()){
            dialog.dismiss();
            dialog = null;
        }
    }
}
总结:
好了,以上主要是起一个笔记的作用,解释的不是很多,可以通过代码去看具体的实现,希望对读者有一定的帮助,写的不对的地方请多多指教,谢谢。
有一点我这里进行明确的指出,在使用dialog弹窗或者popupwindow时,一定要在回收前执行dismiss,否则会造成内存泄漏
相关博客
仿闲鱼底部菜单导航效果
popupwindow技术储备
Github地址
项目源码地址
