centos6.5中配置nfs服务器
1.nfs服务器的配置
环境:centos 6.7
首先安装nfs套件:
yum install nfs-utils.x86_64(64位系统)
yum install nfs-utils(32位系统)
yum install rpcbind
建立nfs的目录
mkdir –p /mnt/nfs
touch /mnt/nfs/test
配置nfs服务器的:
vim /etc/exports
加入下列语句:
/mnt/nfs (rw,insecure,no_root_squash,no_all_squash)
上面的意思是说nfs共享的路径为/mnt/nfs。(rw,insecure,no_root_squash,no_all_squash)表示权限。我给的是全部的权限!
重新启动nfs服务。
/etc/init.d/rpcbind start
/etc/init.d/nfs start
至此nfs服务应该能用了。
执行
showmount –e
显示
[root@Ideapadbz ~]# showmount -e 192.168.0.46
Export list for 192.168.0.46:
/mnt/nfs (everyone)
可以看到服务器能用了!
在本机上挂载或者局域网上的另一台linux挂载:
mount -t nfs 192.168.0.46:/mnt/nfs /opt/centos6/
ls /opt/centos6/
test
可以看到文件test了!
2.nfs服务器的优化
(1)设置nfs功能的开机自启
执行ntsysv命令,可以在图形化的界面中设置nfs的开机选项:
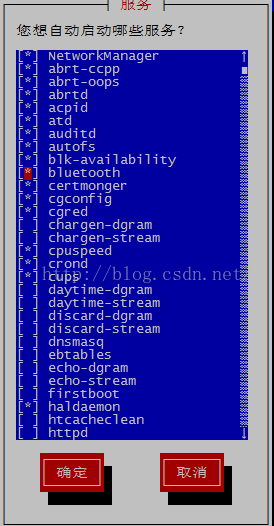
在 nfs和rpcbind前面加上*号,同时将nfslock前面的*去掉!
也可以执行:
chkconfig nfs on
chkconfig rpcbind on
来开启nfs的开机自启。
(2)防火墙的设置
因为我需要在开发板上挂载centos中的nfs,就需要关闭centos的防火墙,不然会出现no route to host的错误。
nfs用到五个服务: portmapper nfs rquotad nlockmgr mountd
其中nfs和 portmapper的端口号是固定。但是其他三个的端口号是随机的。但是防火墙的设置时需要使用固定的端口号,于是需要把另外的三个端口号也设置成固定。
法一:
临时性将防火墙关掉:
执行命令:service iptables stop
或者永久性关闭:执行chkconfig iptables off或者通过前面的图形化选项来关闭,将iptables前面的*号去掉
法二:(只关闭掉防火墙中对nfs的限制,推荐用这个方法!)
配置/etc/sysconfig/nfs
vim /etc/sysconfig/nfs
将下列几项前面的#号去掉
RQUOTAD_PORT=875
LOCKD_TCPPORT=32803
LOCKD_UDPPORT=32769
MOUNTD_PORT=892
重启nfs服务器:service nfs restart
执行命令: rpcinfo –p
[root@Ideapadbz ~]# rpcinfo -p
program vers proto port service
100000 4 tcp 111 portmapper
100000 3 tcp 111 portmapper
100000 2 tcp 111 portmapper
100000 4 udp 111 portmapper
100000 3 udp 111 portmapper
100000 2 udp 111 portmapper
100011 1 udp 875 rquotad
100011 2 udp 875 rquotad
100011 1 tcp 875 rquotad
100011 2 tcp 875 rquotad
100005 1 udp 892 mountd
100005 1 tcp 892 mountd
100005 2 udp 892 mountd
100005 2 tcp 892 mountd
100005 3 udp 892 mountd
100005 3 tcp 892 mountd
100003 2 tcp 2049 nfs
100003 3 tcp 2049 nfs
100003 4 tcp 2049 nfs
100227 2 tcp 2049 nfs_acl
100227 3 tcp 2049 nfs_acl
100003 2 udp 2049 nfs
100003 3 udp 2049 nfs
100003 4 udp 2049 nfs
100227 2 udp 2049 nfs_acl
100227 3 udp 2049 nfs_acl
100021 1 udp 32769 nlockmgr
100021 3 udp 32769 nlockmgr
100021 4 udp 32769 nlockmgr
100021 1 tcp 32803 nlockmgr
100021 3 tcp 32803 nlockmgr
100021 4 tcp 32803 nlockmgr
可以看到相关的服务的端口号已经变成了,我们上面更改的。
有了端口号就可以在防火墙中将相关的端口号设置成允许,nfs就可以很好的使用了。
修改防火墙:
[root@Ideapadbz ~]# vim /etc/sysconfig/iptables
加入如下的语句:
-A INPUT -s 192.168.0.0/16 -p tcp --dport 111 -j ACCEPT
-A INPUT -s 192.168.0.0/16 -p tcp --dport 875 -j ACCEPT
-A INPUT -s 192.168.0.0/16 -p tcp --dport 2049 -j ACCEPT
-A INPUT -s 192.168.0.0/16 -p tcp --dport 32769 -j ACCEPT
-A INPUT -s 192.168.0.0/16 -p tcp --dport 32803 -j ACCEPT
-A INPUT -s 192.168.0.0/16 -p tcp --dport 892 -j ACCEPT
-A INPUT -s 192.168.0.0/16 -p udp --dport 111 -j ACCEPT
-A INPUT -s 192.168.0.0/16 -p udp --dport 875 -j ACCEPT
-A INPUT -s 192.168.0.0/16 -p udp --dport 2049 -j ACCEPT
-A INPUT -s 192.168.0.0/16 -p udp --dport 32769 -j ACCEPT
-A INPUT -s 192.168.0.0/16 -p udp --dport 32803 -j ACCEPT
-A INPUT -s 192.168.0.0/16 -p udp --dport 892 -j ACCEPT
保存退出。
启动开发板:
[root@Ideapad /testdir]# mount -o nolock 192.168.0.46:/mnt/nfs /testdir
[root@Ideapad /testdir]# ls /testdir
Makefile plat-button.c s3c_button.c
buildroot-2012.08 plat_button.ko test_button
可以看到电脑centos中的共享文件夹/mnt/nfs挂载到了开发板上的/testdir目录下。
注:
对于方法二,还有更严谨的做法。(当然你也可以不用管我接下来的介绍了)
因为上面的做法忽视了我们设置的端口号可能centos的其他服务在用着,我们直接将端口号赋予nfs相关服务,可能影响其他的程序的运行。于是对于法二,我们可以先看看系统什么端口是空闲的。
思路:
不修改/etc/sysconfig/nfs这个文件,先开启nfs服务,这样系统就会给nfs随机分配端口号,执行rpcinfo –p就可以看到nfs相关服务被系统赋予的端口号,可以肯定这些端口号是能用的。
于是我们就不修改/etc/sysconfig/nfs这个文件了。而修改/etc/services
vim /etc/services
在文件最后添加:
mountd 42288/tcp
mountd 42288/udp
rquotad 875/tcp
rquotad 875/udp
nlockmgr 41745/tcp
nlockmgr 41745/udp
其中42288 875 41745是我在执行rpcinfo –p这个命令时得到的端口号。
重启nfs服务。查看端口号就会变成上面的。再在/etc/sysconfig/iptables中加入相应的语句就可以了。