oauth2自定义登录页面
一、前言
继上一篇文章《OAuth2认证授权流程解析》,我们对OAuth2的4种认证模型的流程做了一一跟踪了解,我们知道当用户访问的资源需要认证之后,就会重定向到登录页面/login,此时就需要用户输入用户名和密码然后post方式提交到/login页面进行登录验证,如果验证通过则会跳转到原来的页面。
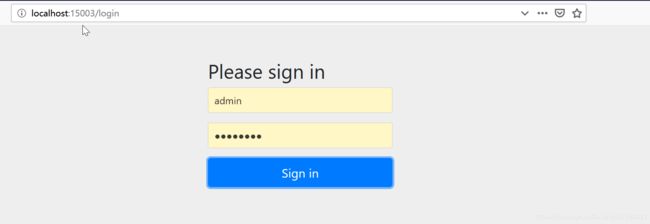
这里要说明的是OAuth2提供了默认的登录页面,当你访问资源需要认证时候,默认跳转到OAuth2的登录页面:
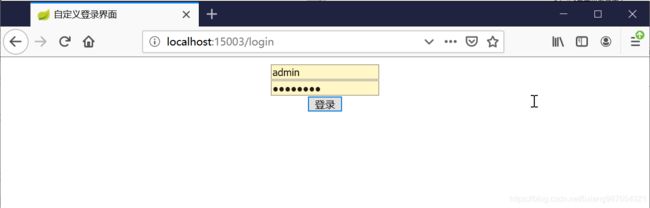
如果我们定义自己的页面,那么跳转后效果如下(虽然丑一点,不过您可以自己定制自己的样式):
二、实现
如果你想定制自己的登录页面,我们首先要知道如下两方面:
- 如何将自定义登录页面路径告知OAuth2
- 如何将自定义登录页面路径定制自己的页面
- 自定义登录页面如何登录到OAuth2的后台
1、如何将自定义登录页面路径告知OAuth2
要定制自己的登录页面,我们需要将自定义登录页面路径告知我们的security,那如何配置呢?重点就在websecurity安全配置类WebSecurityConfigurerAdapter子类中重载 “protected void configure(HttpSecurity http) throws Exception”方法,指定自己的登录页面路径,如下所示:
@Override
    protected void configure(HttpSecurity http) throws Exception {
    	// 注册各类型的登录认证过滤器
    	http
    	.addFilterBefore(openIdLoginAuthenticationFilter(), UsernamePasswordAuthenticationFilter.class)
    	.addFilterBefore(accessTokenAuthenticationFilter(), UsernamePasswordAuthenticationFilter.class)
    	.addFilterBefore(phoneLoginAuthenticationFilter(), UsernamePasswordAuthenticationFilter.class)
        .addFilterBefore(qrLoginAuthenticationFilter(), UsernamePasswordAuthenticationFilter.class);

    	// 自定义开放url过滤器配置--无需鉴权
    	ExpressionUrlAuthorizationConfigurer.ExpressionInterceptUrlRegistry registry = http.authorizeRequests();

		registry.anyRequest().authenticated().and()
	    	.formLogin()
	    		.loginPage("/login")
	    		.defaultSuccessUrl("/home")
	    		.permitAll()
	    	.and()
	    		.logout().permitAll()
	    	.and()
	    		.csrf().disable()
	    	.httpBasic();
    }
这里,我们配置了各种过滤器和安全配置选项,我们可以忽略重点关注指定自定义的登录页面路径是"/login", 该路径我们可以在controller中在对应路径端点返回指定的view即可,或者我们不创建controller,而是通过mvc控制指定对应端点路径login的视图名称即可,如我的配置如下:
/**
 * @文件名称: WebMvcConfig.java
 * @功能描述: TODO(用一句话描述该文件做什么)
 * @版权信息: www.dondown.com
 * @编写作者: [email protected]
 * @开发日期: 2020年4月8日
 * @历史版本: V1.0
 */
@SuppressWarnings("deprecation")
@Configuration
public class WebMvcConfig extends WebMvcConfigurerAdapter{
    @Override
    public void addViewControllers(ViewControllerRegistry registry) {
        // 前面是url路径,后面是视图路径,添加thymeleaf后自动配置prefix为/templates,suffix为.html
        registry.addViewController("/login").setViewName("/login");
        registry.addViewController("/home").setViewName("/home");
        registry.addViewController("/admin").setViewName("/admin");
    }
}
在SpringMVC配置中,我们配置了项目路径/login对应的视图名为/login,也就是对应我们的静态文件templates/login.html(springboot项目默认的静态目录有4个如static、template、public、resources,默认的文件名后缀为.html,这些可以通过配置文件修改)
2、如何将自定义登录页面路径定制自己的页面
经过以上配置之后,也就是说当用户访问需要授权的页面的时候,用户需要登录,跳转的登录页面路径是/login,对应自己的静态页面为login.html。所以,我们只需要在编辑静态资源目录下的login.html即可。 为了方便,我们引入thymeleaf渲染模板,使得在html中我们可以访问Controller返回的model数据。我们自定义登录页面实现代码如下:
自定义登录界面
我们可以定制自己的登录页的样式,制作一个漂亮的、满足个性化定制的登录页面出来,这个完全在自己样式控制中可以实现。
3、自定义登录页面如何登录到OAuth2的后台
配置了自己的登录路径并编写了自己个性化登录页面,最终提交到哪里去?提交哪些参数?这是我们需要关注的问题。正如以上的form表单所写:
我们看到form表单提交的地址是/login,请求方式是POST,这是为什么????
原因可以通过文章《OAuth2认证授权流程解析》一文分析可以知道:用户名密码登录处理的过滤器是UsernamePasswordAuthenticationFilter, 它拦截的url正好是/login的post请求,其完整代码如下:
public class UsernamePasswordAuthenticationFilter extends
		AbstractAuthenticationProcessingFilter {
	// ~ Static fields/initializers
	// =====================================================================================

	public static final String SPRING_SECURITY_FORM_USERNAME_KEY = "username";
	public static final String SPRING_SECURITY_FORM_PASSWORD_KEY = "password";

	private String usernameParameter = SPRING_SECURITY_FORM_USERNAME_KEY;
	private String passwordParameter = SPRING_SECURITY_FORM_PASSWORD_KEY;
	private boolean postOnly = true;

	// ~ Constructors
	// ===================================================================================================

	public UsernamePasswordAuthenticationFilter() {
		super(new AntPathRequestMatcher("/login", "POST"));
	}

	// ~ Methods
	// ========================================================================================================

	public Authentication attemptAuthentication(HttpServletRequest request,
			HttpServletResponse response) throws AuthenticationException {
		if (postOnly && !request.getMethod().equals("POST")) {
			throw new AuthenticationServiceException(
					"Authentication method not supported: " + request.getMethod());
		}

		String username = obtainUsername(request);
		String password = obtainPassword(request);

		if (username == null) {
			username = "";
		}

		if (password == null) {
			password = "";
		}

		username = username.trim();

		UsernamePasswordAuthenticationToken authRequest = new UsernamePasswordAuthenticationToken(
				username, password);

		// Allow subclasses to set the "details" property
		setDetails(request, authRequest);

		return this.getAuthenticationManager().authenticate(authRequest);
	}

	/**
	 * Enables subclasses to override the composition of the password, such as by
	 * including additional values and a separator.
	 *
	 * This might be used for example if a postcode/zipcode was required in addition to
	 * the password. A delimiter such as a pipe (|) should be used to separate the
	 * password and extended value(s). The AuthenticationDao will need to
	 * generate the expected password in a corresponding manner.
	 *
	 *
	 * @param request so that request attributes can be retrieved
	 *
	 * @return the password that will be presented in the Authentication
	 * request token to the AuthenticationManager
	 */
	protected String obtainPassword(HttpServletRequest request) {
		return request.getParameter(passwordParameter);
	}

	/**
	 * Enables subclasses to override the composition of the username, such as by
	 * including additional values and a separator.
	 *
	 * @param request so that request attributes can be retrieved
	 *
	 * @return the username that will be presented in the Authentication
	 * request token to the AuthenticationManager
	 */
	protected String obtainUsername(HttpServletRequest request) {
		return request.getParameter(usernameParameter);
	}

	/**
	 * Provided so that subclasses may configure what is put into the authentication
	 * request's details property.
	 *
	 * @param request that an authentication request is being created for
	 * @param authRequest the authentication request object that should have its details
	 * set
	 */
	protected void setDetails(HttpServletRequest request,
			UsernamePasswordAuthenticationToken authRequest) {
		authRequest.setDetails(authenticationDetailsSource.buildDetails(request));
	}

	/**
	 * Sets the parameter name which will be used to obtain the username from the login
	 * request.
	 *
	 * @param usernameParameter the parameter name. Defaults to "username".
	 */
	public void setUsernameParameter(String usernameParameter) {
		Assert.hasText(usernameParameter, "Username parameter must not be empty or null");
		this.usernameParameter = usernameParameter;
	}

	/**
	 * Sets the parameter name which will be used to obtain the password from the login
	 * request..
	 *
	 * @param passwordParameter the parameter name. Defaults to "password".
	 */
	public void setPasswordParameter(String passwordParameter) {
		Assert.hasText(passwordParameter, "Password parameter must not be empty or null");
		this.passwordParameter = passwordParameter;
	}

	/**
	 * Defines whether only HTTP POST requests will be allowed by this filter. If set to
	 * true, and an authentication request is received which is not a POST request, an
	 * exception will be raised immediately and authentication will not be attempted. The
	 * unsuccessfulAuthentication() method will be called as if handling a failed
	 * authentication.
	 *
	 * Defaults to true but may be overridden by subclasses.
	 */
	public void setPostOnly(boolean postOnly) {
		this.postOnly = postOnly;
	}

	public final String getUsernameParameter() {
		return usernameParameter;
	}

	public final String getPasswordParameter() {
		return passwordParameter;
	}
}
它会生成一个UsernamePasswordAuthenticationToken认证请求,最终提交给认证管理器authenticationManager进行认证,认证管理器会遍历所有的Provider进行逐一认证,此处能匹配的是DaoAuthenticationProvider(因为我们默认配置的是jdbcStore)。
	public Authentication authenticate(Authentication authentication)
			throws AuthenticationException {
		Assert.isInstanceOf(UsernamePasswordAuthenticationToken.class, authentication,
				() -> messages.getMessage(
						"AbstractUserDetailsAuthenticationProvider.onlySupports",
						"Only UsernamePasswordAuthenticationToken is supported"));

		// Determine username
		// 获取用户名
		String username = (authentication.getPrincipal() == null) ? "NONE_PROVIDED"
				: authentication.getName();

		boolean cacheWasUsed = true;
		UserDetails user = this.userCache.getUserFromCache(username);

		if (user == null) {
			cacheWasUsed = false;

			try {
				// 根据用户名提取用户信息
				user = retrieveUser(username,
						(UsernamePasswordAuthenticationToken) authentication);
			}
			catch (UsernameNotFoundException notFound) {
				logger.debug("User '" + username + "' not found");
				// 是否隐藏用户未找到异常
				if (hideUserNotFoundExceptions) {
					throw new BadCredentialsException(messages.getMessage(
							"AbstractUserDetailsAuthenticationProvider.badCredentials",
							"Bad credentials"));
				}
				else {
					throw notFound;
				}
			}

			Assert.notNull(user,
					"retrieveUser returned null - a violation of the interface contract");
		}

		try {
			// 检查用户是否过期、锁定、禁用
			preAuthenticationChecks.check(user);
			// 检查用户密码是否相等
			additionalAuthenticationChecks(user,
					(UsernamePasswordAuthenticationToken) authentication);
		}
		catch (AuthenticationException exception) {
			if (cacheWasUsed) {
				// There was a problem, so try again after checking
				// we're using latest data (i.e. not from the cache)
				cacheWasUsed = false;
				user = retrieveUser(username,
						(UsernamePasswordAuthenticationToken) authentication);
				preAuthenticationChecks.check(user);
				additionalAuthenticationChecks(user,
						(UsernamePasswordAuthenticationToken) authentication);
			}
			else {
				throw exception;
			}
		}
		// 后期验证
		postAuthenticationChecks.check(user);
		if (!cacheWasUsed) {
			this.userCache.putUserInCache(user);
		}

		Object principalToReturn = user;
		if (forcePrincipalAsString) {
			principalToReturn = user.getUsername();
		}

		// 成功后创建UsernamePasswordAuthenticationToken(用户对象,密码,权限)最后交给endpoint处理生成token
		return createSuccessAuthentication(principalToReturn, authentication, user);
	}
最终返回一个UsernamePasswordAuthenticationToken认证结果。我们看看认证成功后如何处理?我们查看过滤器UsernamePasswordAuthenticationFilter的父类AbstractAuthenticationProcessingFilter实现(会调用子类的attemptAuthentication方法)最终认证成功后处理:
public void doFilter(ServletRequest req, ServletResponse res, FilterChain chain)
			throws IOException, ServletException {

		HttpServletRequest request = (HttpServletRequest) req;
		HttpServletResponse response = (HttpServletResponse) res;

		if (!requiresAuthentication(request, response)) {
			chain.doFilter(request, response);

			return;
		}

		if (logger.isDebugEnabled()) {
			logger.debug("Request is to process authentication");
		}

		Authentication authResult;

		try {
			authResult = attemptAuthentication(request, response);
			if (authResult == null) {
				// return immediately as subclass has indicated that it hasn't completed
				// authentication
				return;
			}
			sessionStrategy.onAuthentication(authResult, request, response);
		}
		catch (InternalAuthenticationServiceException failed) {
			logger.error(
					"An internal error occurred while trying to authenticate the user.",
					failed);
			unsuccessfulAuthentication(request, response, failed);

			return;
		}
		catch (AuthenticationException failed) {
			// Authentication failed
			unsuccessfulAuthentication(request, response, failed);

			return;
		}

		// Authentication success
		if (continueChainBeforeSuccessfulAuthentication) {
			chain.doFilter(request, response);
		}

		successfulAuthentication(request, response, chain, authResult);
	}
可以看到认证成功后也就是
authResult = attemptAuthentication(request, response);
返回了UsernamePasswordAuthenticationToken认证结果,父类做了几件事:
- sessionStrategy.onAuthentication
sessionStrategy对应CompositeSessionAuthenticationStrategy,它是策略模式的实现,它通知所以委托对象认证成功:
	public void onAuthentication(Authentication authentication,
			HttpServletRequest request, HttpServletResponse response)
					throws SessionAuthenticationException {
		for (SessionAuthenticationStrategy delegate : this.delegateStrategies) {
			if (this.logger.isDebugEnabled()) {
				this.logger.debug("Delegating to " + delegate);
			}
			delegate.onAuthentication(authentication, request, response);
		}
	}
这里集合中有一个ChangeSessionIdAuthenticationStrategy修改会话id认证策略会更新当前会话的认证信息为已认证。
- successfulAuthentication
它的处理逻辑如下所示:
	protected void successfulAuthentication(HttpServletRequest request,
			HttpServletResponse response, FilterChain chain, Authentication authResult)
			throws IOException, ServletException {

		if (logger.isDebugEnabled()) {
			logger.debug("Authentication success. Updating SecurityContextHolder to contain: "
					+ authResult);
		}

		SecurityContextHolder.getContext().setAuthentication(authResult);

		rememberMeServices.loginSuccess(request, response, authResult);

		// Fire event
		if (this.eventPublisher != null) {
			eventPublisher.publishEvent(new InteractiveAuthenticationSuccessEvent(
					authResult, this.getClass()));
		}

		successHandler.onAuthenticationSuccess(request, response, authResult);
	}
它处理逻辑是:
1、更新当前的安全上下文对象的认证信息;
2、更新rememberMeServices信息为登录成功;
3、发布InteractiveAuthenticationSuccessEvent交互认证成功事件;
4、调用successHandler(SavedRequestAwareAuthenticationSuccessHandler)的onAuthenticationSuccess
关键就是在最后一步,情况是这样的
1、首先我在浏览器中访问的是:http://localhost:15003/admin
2、后台服务器经过投票选举发现是拒绝访问,所以后台直接通知浏览器跳转到/login页面
3、login页面返回的是自定义页面视图login.html
4、用户输入用户名、密码提交给你/login(post请求方式)
5、认证成功,通知浏览器重新重定向到:http://localhost:15003/admin
@Override
	public void onAuthenticationSuccess(HttpServletRequest request,
			HttpServletResponse response, Authentication authentication)
			throws ServletException, IOException {
		// 通过请求获取对应session然后在session查找上一次请求(对应的键的名称为SPRING_SECURITY_SAVED_REQUEST)
		SavedRequest savedRequest = requestCache.getRequest(request, response);
		// 上一次请求为null说明是直接请求而不是无权限导致的重定向
		if (savedRequest == null) {
			super.onAuthenticationSuccess(request, response, authentication);

			return;
		}
		// 获取请求的URL参数
		String targetUrlParameter = getTargetUrlParameter();
		if (isAlwaysUseDefaultTargetUrl()
				|| (targetUrlParameter != null && StringUtils.hasText(request
						.getParameter(targetUrlParameter)))) {
			requestCache.removeRequest(request, response);
			super.onAuthenticationSuccess(request, response, authentication);

			return;
		}
		// 清除上一次请求信息(本次已经处理)
		clearAuthenticationAttributes(request);

		// Use the DefaultSavedRequest URL
		// 获取上一次请求地址作为重定向地址: http://localhost:15003/admin
		String targetUrl = savedRequest.getRedirectUrl();
		logger.debug("Redirecting to DefaultSavedRequest Url: " + targetUrl);
		// 认证成功后使得浏览器重定向到上一次想要访问的地址http://localhost:15003/admin
		getRedirectStrategy().sendRedirect(request, response, targetUrl);
	}
所以,我们查看以上代码的逻辑,认证成功之后,如果有上一次的cache的访问记录了则使浏览器重新重定向到上一次的请求地址。
	public void sendRedirect(HttpServletRequest request, HttpServletResponse response,
			String url) throws IOException {
		// 获取重定向地址
		String redirectUrl = calculateRedirectUrl(request.getContextPath(), url);
		redirectUrl = response.encodeRedirectURL(redirectUrl);

		if (logger.isDebugEnabled()) {
			logger.debug("Redirecting to '" + redirectUrl + "'");
		}
		// 发送重定向响应
		response.sendRedirect(redirectUrl);
	}
源码获取、合作、技术交流请获取如下联系方式:
QQ交流群:961179337

微信账号:lixiang6153
公众号:IT技术快餐
电子邮箱:[email protected]