SpringBoot+Layui+shiro 前后端分离项目
SpringBoot+Layui+shiro 前后端分离项目
- pom文件依赖
- 开启debug调试
- 跨域配置类
- shiro相关配置
- shiro配置类*支持shiro注解
- 自定义sessionManager
- 自定义realm*
- 处理OPTIONS请求方法试探的filter
- controller
- redis
- HTML代码
学校接的毕设,才学完ssm框架想接下来练练手,看了需求,需要前后端分离,shiro权限控制。这个项目是边学边写的,记一下心得,业务逻辑很简单
pom文件依赖
	<!-- 配置spring-boot开发环境 -->
	<dependency>
		<groupId>org.springframework.boot</groupId>
		<artifactId>spring-boot-starter-web</artifactId>
		<version>2.2.2.RELEASE</version>
	</dependency>

	<!-- 配置springboot内置tomcat环境 -->
	<dependency>
		<groupId>org.springframework.boot</groupId>
		<artifactId>spring-boot-starter-tomcat</artifactId>
		<version>2.2.2.RELEASE</version>
	</dependency>
	<!-- 配置springboot热部署 -->
	<dependency>
		<groupId>org.springframework.boot</groupId>
		<artifactId>spring-boot-devtools</artifactId>
		<version>2.2.2.RELEASE</version>
	</dependency>

	<!-- jdbc -->
	<dependency>
		<groupId>org.springframework.boot</groupId>
		<artifactId>spring-boot-starter-jdbc</artifactId>
		<version>2.2.2.RELEASE</version>
	</dependency>
	<!-- https://mvnrepository.com/artifact/mysql/mysql-connector-java -->
	<dependency>
	    <groupId>mysql</groupId>
	    <artifactId>mysql-connector-java</artifactId>
	    <version>5.1.25</version>
	</dependency>
	<!-- 阿里数据源 -->
	<dependency>
	  <groupId>com.alibaba</groupId>
	  <artifactId>druid</artifactId>
	  <version>1.1.10</version>
	</dependency>
	<!-- 配置springboot集成mybatis环境 -->
	 <dependency>
			<groupId>org.mybatis.spring.boot</groupId>
			<artifactId>mybatis-spring-boot-starter</artifactId>
		    <version>2.1.1</version>
	</dependency>
	<!-- shiro spring. -->
        <dependency>
            <groupId>org.apache.shiro</groupId>
            <artifactId>shiro-core</artifactId>
            <version>1.2.2</version>
        </dependency>
        <dependency>
		    <!--spring shiro依赖-->
		    <groupId>org.apache.shiro</groupId>
		    <artifactId>shiro-spring</artifactId>
		    <version>1.4.1</version>
		</dependency>
        <dependency>
		    <!--session持久化插件-->
		    <groupId>org.crazycake</groupId>
		    <artifactId>shiro-redis</artifactId>
		    <version>3.2.3</version>
		</dependency>
		<!-- 文件上传 -->
	<dependency>
		<groupId>commons-fileupload</groupId>
		<artifactId>commons-fileupload</artifactId>
		<version>1.3.3</version>
	</dependency>
开启debug调试
在pom文件中加入如下配置就可以将springboot debug as运行起来
<build>
  	<plugins>
  		<plugin>
  			<groupId>org.springframework.boot</groupId>
  			<artifactId>spring-boot-maven-plugin</artifactId>
  			<configuration>
		       <fork>false</fork>
			</configuration>
  		</plugin>
  	</plugins>
  </build>
跨域配置类
原来用的注解解决跨域,加进shiro以后出了点问题,直接网上搜的配置类解决
@Configuration
public class CorsConfig {
	@Bean
    public WebMvcConfigurer CORSConfigurer(){

        return new WebMvcConfigurerAdapter(){
        	@Override
        	public void addCorsMappings(CorsRegistry registry) {
        		registry.addMapping("/**")
                .allowedOrigins("*")
                .allowedMethods("PUT", "DELETE", "GET", "POST")
                .allowedHeaders("*")
                .exposedHeaders("access-control-allow-headers", "access-control-allow-methods", "access-control-allow" +
                        "-origin", "access-control-max-age", "X-Frame-Options","Authorization")
                .allowCredentials(false).maxAge(3600);
        	}
        };

    }
}
shiro相关配置
shiro配置类*支持shiro注解
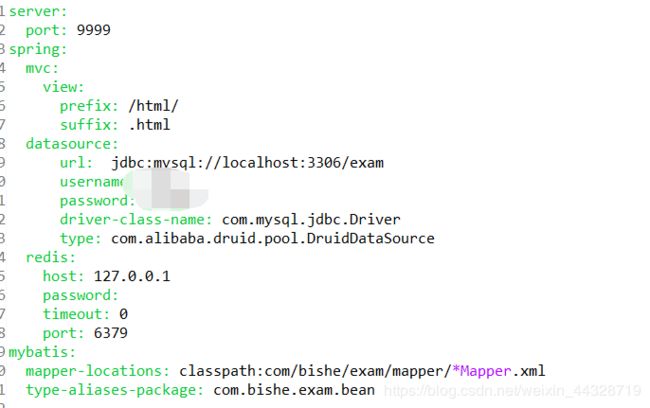
加入了redis缓存,将session持久化用于和前端验证权限
@Configuration
public class ShiroConfig {
	@Value("${spring.redis.host}")
    private String host;
	@Value("${spring.redis.port}")
    private int port;
	@Value("${spring.redis.timeout}")
    private int timeout;

    private String password;

	@Bean
	public ShiroFilterFactoryBean shirFilter(DefaultWebSecurityManager securityManager) {
		ShiroFilterFactoryBean shiroFilterFactoryBean = new ShiroFilterFactoryBean();

		// 必须设置 SecurityManager
		shiroFilterFactoryBean.setSecurityManager(securityManager);
		// 拦截器.
		Map<String, String> filterChainDefinitionMap = new LinkedHashMap<String, String>();

		Map<String, Filter> filters = new HashMap<String, Filter>();
		filters.put("authc", new MyauthFilter());
		shiroFilterFactoryBean.setFilters(filters);

		shiroFilterFactoryBean.setUnauthorizedUrl("http://127.0.0.1:8848/exam/html/404.html");
		shiroFilterFactoryBean.setLoginUrl("http://127.0.0.1:8848/exam/index.html");
		filterChainDefinitionMap.put("/regs", "anon");//注册
		filterChainDefinitionMap.put("/login", "anon");//登录
		filterChainDefinitionMap.put("/logout", "anon");//退出


		filterChainDefinitionMap.put("/**", "authc");
		shiroFilterFactoryBean.setFilterChainDefinitionMap(filterChainDefinitionMap);
		return shiroFilterFactoryBean;
	}


	//加密算法
	@Bean
	public HashedCredentialsMatcher hashedCredentialsMatcher() {
		HashedCredentialsMatcher hashedCredentialsMatcher = new HashedCredentialsMatcher();
		hashedCredentialsMatcher.setHashAlgorithmName("md5");// 散列算法:这里使用MD5算法;
		hashedCredentialsMatcher.setHashIterations(1024);// 散列的次数
		return hashedCredentialsMatcher;
	}

	//自定义realm
	@Bean
	public MyShiroRealm myShiroRealm() {
		MyShiroRealm myShiroRealm = new MyShiroRealm();
		myShiroRealm.setCredentialsMatcher(hashedCredentialsMatcher());
		return myShiroRealm;
	}

	//securityManager
	@Bean
	public DefaultWebSecurityManager securityManager() {
		DefaultWebSecurityManager securityManager = new DefaultWebSecurityManager();
		// 注入自定义的realm;
		securityManager.setRealm(myShiroRealm());
		securityManager.setSessionManager(sessionManager());
        securityManager.setCacheManager(cacheManager());

		return securityManager;
	}

	/**
     * 会话管理
     **/
    @Bean
    public SessionManager sessionManager() {
        MySessionManager sessionManager = new MySessionManager();
        sessionManager.setSessionIdUrlRewritingEnabled(false); //取消登陆跳转URL后面的jsessionid参数
        sessionManager.setSessionDAO(sessionDAO());
        sessionManager.setGlobalSessionTimeout(-1);//不过期 可以设置session的刷新周期
        return sessionManager;
    }

    /**
     * 使用的是shiro-redis开源插件 缓存依赖
     **/
    @Bean
    public RedisManager redisManager() {
        RedisManager redisManager = new RedisManager();
        redisManager.setHost(host+":"+port);
        redisManager.setTimeout(timeout);
        redisManager.setPassword(password);
        return redisManager;
    }

    /**
     * 使用的是shiro-redis开源插件 session持久化
     **/
    public RedisSessionDAO sessionDAO() {
        RedisSessionDAO redisSessionDAO = new RedisSessionDAO();
        redisSessionDAO.setRedisManager(redisManager());
        return redisSessionDAO;
    }


    /**
     * 缓存管理
     **/
    @Bean
    public CacheManager cacheManager() {
        RedisCacheManager redisCacheManager = new RedisCacheManager();
        redisCacheManager.setRedisManager(redisManager());
        redisCacheManager.setPrincipalIdFieldName("id");//在用户授权的时候可能会报错,这里填入用户的主键
        return redisCacheManager;
    }
    /**
     * Shiro生命周期处理器
     */
    @Bean(name = "lifecycleBeanPostProcessor")
    public static LifecycleBeanPostProcessor getLifecycleBeanPostProcessor() {
        return new LifecycleBeanPostProcessor();
    }

    /**
     * 开启Shiro的注解(如@RequiresRoles,@RequiresPermissions),需借助SpringAOP扫描使用Shiro注解的类,并在必要时进行安全逻辑验证
     */
    @Bean
    @DependsOn("lifecycleBeanPostProcessor")
    public DefaultAdvisorAutoProxyCreator defaultAdvisorAutoProxyCreator() {
        DefaultAdvisorAutoProxyCreator creator = new DefaultAdvisorAutoProxyCreator();
        creator.setProxyTargetClass(true);
        return creator;
    }

    /**
   * 开启shiro aop注解支持.
   * 使用代理方式;所以需要开启代码支持;
   */
    @Bean
	public AuthorizationAttributeSourceAdvisor authorizationAttributeSourceAdvisor(org.apache.shiro.mgt.SecurityManager securityManager) {
	AuthorizationAttributeSourceAdvisor authorizationAttributeSourceAdvisor = new AuthorizationAttributeSourceAdvisor();
	authorizationAttributeSourceAdvisor.setSecurityManager( (org.apache.shiro.mgt.SecurityManager) securityManager);
	return authorizationAttributeSourceAdvisor;
	}
}
自定义sessionManager
从请求头中获取Authorization来判断用户是否被授权
public class MySessionManager extends DefaultWebSessionManager {

    private static final String AUTHORIZATION = "Authorization";

    private static final String REFERENCED_SESSION_ID_SOURCE = "Stateless request";

    public MySessionManager() {
    }

    @Override
    protected Serializable getSessionId(ServletRequest request, ServletResponse response) {
        //从前端ajax headers中获取这个参数用来判断授权
        String id = WebUtils.toHttp(request).getHeader(AUTHORIZATION);
        if (StringUtils.hasLength(id)) {
            request.setAttribute(ShiroHttpServletRequest.REFERENCED_SESSION_ID_SOURCE, REFERENCED_SESSION_ID_SOURCE);
            request.setAttribute(ShiroHttpServletRequest.REFERENCED_SESSION_ID, id);
            request.setAttribute(ShiroHttpServletRequest.REFERENCED_SESSION_ID_IS_VALID, Boolean.TRUE);
            return id;
        } else {
            //从前端的cookie中取值
            return super.getSessionId(request, response);
        }

    }
}
自定义realm*
AuthorizationInfo 是授权方法
只有用户在请求授权资源或者角色资源的时候才会调用
AuthenticationInfo 用户认证方法
在相关Controller中调用 subject.login(token) 方法就会调到这个方法中,从数据库中获取密码信息,交给shiro帮我们进行比对(和前端传来的用户名和密码),这里使用的是md5盐值加密,就算是不同用户设置了相同的密码用用户账户来加盐产生了不同的加密后的密码(在注册的时候也要使用相同的加密手段录入到数据库中)
public class MyShiroRealm extends AuthorizingRealm{
	@Autowired
	private UserService userService;
	//授权
	@Override
	protected AuthorizationInfo doGetAuthorizationInfo(PrincipalCollection arg0) {
		System.out.println("授权--------------------------------");
		// TODO Auto-generated method stub
		User principal = (User) arg0.getPrimaryPrincipal();
		Set<String> roles = new HashSet<String>();
		if (principal.getType() == 1) {//学生
			roles.add("student");
		}else if (principal.getType() == 2) {//老师
			roles.add("teahcer");
			System.out.println("role:teacher");
		}else {//admin
			roles.add("admin");
		}
		SimpleAuthorizationInfo info = new SimpleAuthorizationInfo(roles);
		return info;

	}
	//认证 从loginController 中的login方法调过来
	@Override
	protected AuthenticationInfo doGetAuthenticationInfo(AuthenticationToken token) throws AuthenticationException {
		// TODO Auto-generated method stub

		UsernamePasswordToken upToken = (UsernamePasswordToken) token;
		String num = upToken.getUsername();
		User userByNum = userService.getUserByNum(num);
		if (userByNum == null) {
			throw new UnknownAccountException("无此用户!");
		}
		Object principal = userByNum;//user用户
		Object credentials = userByNum.getPwd();//数据库密码

		ByteSource credentialsSalt = ByteSource.Util.bytes(userByNum.getId());//盐值
		String realmName = this.getName();
		SimpleAuthenticationInfo info = new SimpleAuthenticationInfo(principal, credentials, credentialsSalt, realmName);
		return info;
	}
}
处理OPTIONS请求方法试探的filter
在加入shiro认证后的请求中,会先进行一次OPTIONS请求的试探,如果不放行的话会被拒绝请求(因为该请求中不带token),这个filter类重新实现了authc的过滤方法
public class MyauthFilter extends FormAuthenticationFilter{
	protected boolean isAccessAllowed(ServletRequest servletRequest, ServletResponse servletResponse, Object o) {
        HttpServletRequest httpServletRequest = WebUtils.toHttp(servletRequest);
        if ("OPTIONS".equals(httpServletRequest.getMethod())) {
            return true;
        }
        return super.isAccessAllowed(servletRequest, servletResponse, o);
    }

}
controller
@RequestMapping(value="/login",method=RequestMethod.POST)
	public Map<String, Object> login(@RequestParam("num")String num,@RequestParam("pwd")String pwd){
		System.out.println(num +":"+pwd);
		Subject subject = SecurityUtils.getSubject();
		subject.logout();
		Map<String, Object> map = new HashMap<String, Object>();
		if(!subject.isAuthenticated()){//验证是否登录
			UsernamePasswordToken token = new UsernamePasswordToken(num,pwd);
			token.setRememberMe(true);
			Serializable sessionid = subject.getSession().getId();

			try {
				subject.login(token);//会调用realm认证
				map.put("Authorization", sessionid);
				map.put("code", 1);
				return map;//登录成功
			} catch (UnknownAccountException e) {//账号不存在
				// TODO Auto-generated catch block
				e.printStackTrace();
				map.put("code", 2);
				return map;
			}catch (IncorrectCredentialsException  e) {//密码错误
				// TODO: handle exception
				e.printStackTrace();
				map.put("code", 3);
				return map;
			}catch (UnauthorizedException e) {//未授权
				map.put("code", 4);
				System.out.println("未授权");
				return map;
			}
			catch (Exception e) {//服务器繁忙
				// TODO: handle exception
				e.printStackTrace();
				map.put("code", 5);
				return map;
			}
		}
	return map;

	}
redis
在shiro认证授权的时候要session持久化,sessionDao,这里用的是redis的缓存实现
 这里我用的是redis5.0.7
HTML代码
在登陆认证以后后端会产生token(我是直接根据sessionid)传给前端完成认证,前端在每次请求头中都要带上token交给shiro进行认证,shiro将会从持久层中获取token进行比对认证判断此次请求是否被认证或授权
我这里前端直接将后端传来的token放到了sessionStorage中每次请求前再从sessionStorage拿到token加入到请求头中去
var Authorization = sessionStorage.getItem("Authorization");
$.ajax({
					url: 'http://127.0.0.1:9999/ques/levelTypes',
					method: 'get',
					headers: {
						'Authorization': Authorization//带上token
					},
					success: function(res) {
						//console.log(res);

					}
				});
至此就基本完成了前后端分离后的跨域访问shiro权限认证项目