基于nodejs实现geoserver发布服务(tif,shp)
一、使用REST接口操作Geoserver
Geoserver有REST接口, 通过调用它的REST接口,可以实现在外部程序中对Geoserver的发布服务、数据管理操作。rest 接口使用HTTP调用的方式,无需登录Web管理界面就可以对GeoServer进行简单的调用和配置。
Geoserver官网的REST API使用教程(CURL对rest接口的调用):https://docs.geoserver.org/stable/en/user/rest/index.html
先要下载安装curl,地址:https://curl.haxx.se/download.html或者百度网盘链接: https://pan.baidu.com/s/1D3G-nCFfZZzdHAulqN3WpQ 提取码: x8zn,解压文件,将curl-7.61.1-win64-mingw\bin目录下 curl.exe 复制到C:\Windows\System32目录下即可。
先列出curl调用geoserver的rest接口命令:
新建工作区:
curl -v -u admin:geoserver -X POST -H "Content-type: text/xml" -d "
" http://localhost:8080/geoserver/rest/workspaces ' + namespace + '
上传tif影像:
curl -u admin:geoserver -XPUT -H "Content-type:image/tiff" --data-binary @' + tifpname + ' http://localhost:8080/geoserver/rest/workspaces/' + namespace + '/coveragestores/' + layername+ '/file.geotiff
上传shp:
curl -u admin:geoserver -X PUT -H "Content-type: application/zip" --data-binary @' + shppname + ' http://localhost:8081/geoserver/rest/workspaces/' + namespace + '/datastores/' + datastoresName+ '/file.shp
其中,namespace为工作区名称,tifpname为tif影像本地路径,layername为上传tif影像后的图层名,shppname为shp本地路径,datastoresName为shp上传后图层名。
二、基于nodejs实现geoserver发布影像服务
1、导入工具包
nodejs调用curl这里使用的是child_process包,通过开启子进程,实现在终端调用curl。
npm i child_process
引用安装好的child_process包:
let exec = require('child_process').exec;定义工作区名称和上传的shapefile文件图层名:
let namespace = "china";
let datastoresName = "chinaLatest";
Tif文件和shp文件路径:
let tifpname = "D:/apache-tomcat-8.5.37/webapps/geoserver/data/data/TJ3.tif"  //tif文件路径
let shppname = "C:/Users/xxxx/Downloads/china-latest-free.shp.zip" //shp文件路径此处需要注意的是,shapefile必须要先打包成zip,不是将所有shapefile放入文件夹后大包,而是直接选中一系列文件后右键添加到压缩文件…”而不是把shapefile放到文件夹中再压缩。
本次从文件路径分别截取部分字段作为文件名或图层名,其实这里可以随意定义:
let tiflen = tifpname.split("/").length
let layername = tifpname.split("/")[tiflen - 1].split(".")[0]  //获取tif文件名
let tifname = tifpname.split("/")[tiflen - 1]  //获取tif文件名
let shplen = shppname.split("/").length
let shpname = shppname.split("/")[shplen - 1].split(".")[0]  //获取shp文件名
接下来将需要执行的curl命令结合以上定义好的字段,拼成相应的命令句子:
let mkspacestr = 'curl -v -u admin:geoserver -XPOST -H "Content-type: text/xml" -d "' + namespace + ' let publishTifStr = 'curl -u admin:geoserver -XPUT -H "Content-type:image/tiff" --data-binary @' + tifpname + ' http://localhost:8080/geoserver/rest/workspaces/' + namespace + '/coveragestores/' + layername + '/file.geotiff' //上传tif文件的命令句子let publishShpStr = 'curl -u admin:geoserver -XPUT -H "Content-type: application/zip" --data-binary @' + shppname + ' http://localhost:8080/geoserver/rest/workspaces/' + namespace + '/datastores/' + datastoresName + '/file.shp' //上传shp文件的命令句子此处需要注意的是,datastoresName不能与tif影像的layername相同,因为一旦上传tif影像成功,生成相应的图层,则该数据存储类型已经被定义为GeoTIFF,此时如果将shp上传的图层名也命名为一样的名字,则会上传失败。
开始调用子进程,执行以上创建工作区、发布tif影像、发布shp:
exec(mkspacestr, function (err, stdout, stderr) {

  if (err) {

    console.log('make space error:' + stderr);

  } else {

    console.log("make new space " + namespace + " success!")    //提示工作区新增成功

    // 将影像文件路径名放入curl的put方法中发布影像

    exec(publishTifStr, function (err, stdout, stderr) {

      if (err) {

        console.log('publish error:' + stderr);      //提示错误信息

      } else {

        console.log("publish new tiff " + tifname + " success!")     //提示tif影像上传成功

        exec(publishShpStr, function (err, stdout, stderr) {

          if (err) {

            console.log('publish error:' + stderr);

          } else {

            console.log("publish new shapefile " + shpname + " success!")    //提示shapefile上传成功

          }

        })

      }

    })

  }

});
控制台打印结果:
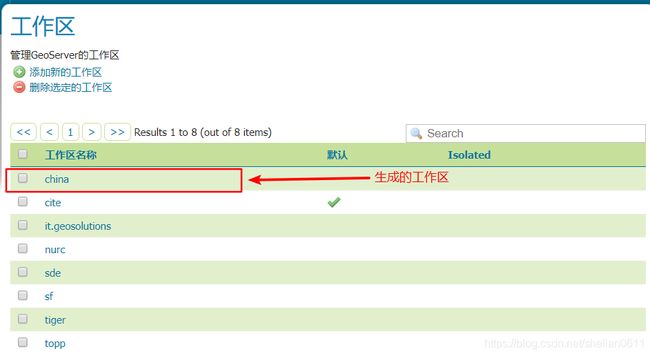
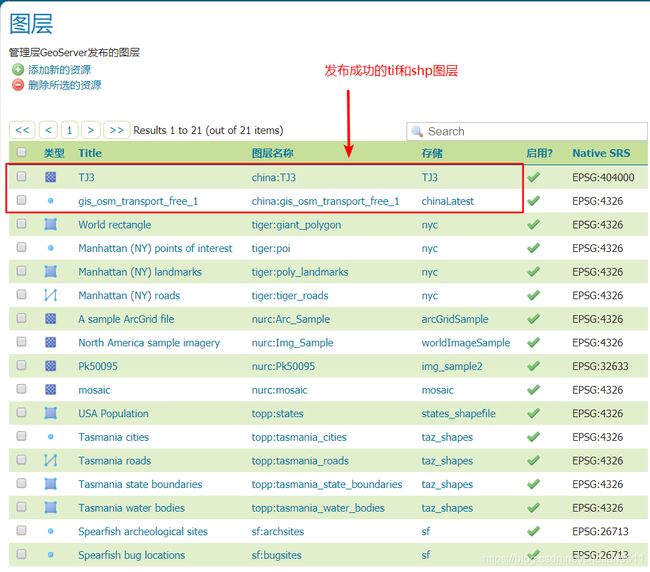
在geoserver中查看操作结果:
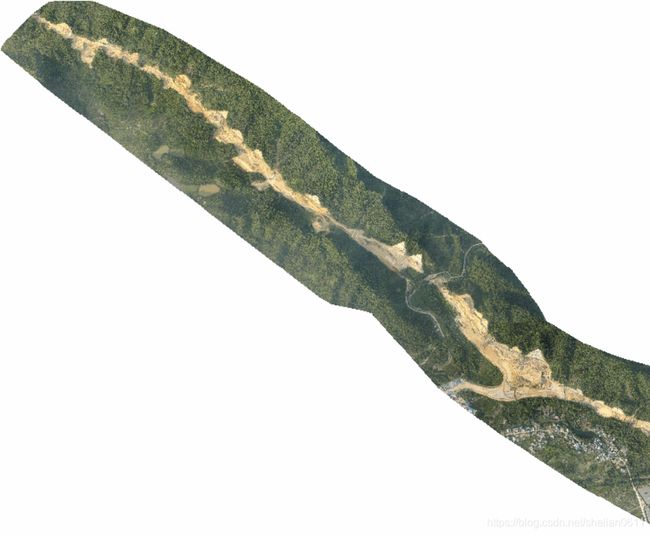
发布成功的tif影像:
发布出来的shp:


