原文是Spring官网的一个guide: https://spring.io/guides/gs/rest-service/
要利用Spring构建一个RESTful Web Service,意味着你要想好基础的三样东西:
1. 要访问的URL 要长什么样?包括是什么样的http action(GET, POST, UPDATE,DELETE)
2. 访问URL后要返回什么样的数据结构,什么内容。这是一个object,Spring会调用jackson JSON把Object 转成JSON返回.
3. Controller,也就是访问这个URL后,你要做什么事情然后才能返回2的结果。为什么是Controller呢? 因为 In Spring’s approach to building RESTful web services, HTTP requests are handled by a controller.
这里省去包配置的内容,可以点击文章开头的官网查看,这里我遇到一个包的问题是,当我用gradle编译的时候会抛出java.lang.ClassNotFoundException: org.springframework.boot.SpringApplication的错误,查了这个问题,有人说是版本的问题,但是没交代是什么的版本,于是我把项目改成maven编译,就没问题了
在这个例子里,
- URL 将会是 localhost:8080/greeting?name=NAME, 参数部分选填,name有默认值。
- 返回的Object 里要包含访问的次数,和一个文本内容。
- 控制器希望当用户访问URL的时候,返回" Hello, %s !",就是拿到1中的name,然后拼上Hello, 业务逻辑很简单。
想完这三个问题后,接下来就是要把这三者连接起来工作: 当用户从浏览器访问localhost:8080/greeting?name=NAME,浏览器可以返回显示Hello, NAME !.
我们知道,提出前面这三个问题后,我们可以用很多种方式实现,比如各种计算机语言,各种框架,而我这里在学习Spring呢,当然是用Spring框架。
框架帮我们实现通用的底层代码,我们只要调用这些工具,填上业务代码,其余的事情交给框架实现,这也是spring boot所秉持的创造信念。
那么在写代码之前,我们的脑海里要有基础的框架:需要写几个类,每个类是要做什么工作?
要实现这个小功能,我们需要3个类:
1. 作为返回值的Object(Greeting.java), 一个简单的resource representation class:
{
    "id": 1,
    "content": "Hello, World!"
}
这个类 通常包括
fields, constructors, and accessors for the id and content data
package hello;
/*
Spring uses the [Jackson JSON](http://wiki.fasterxml.com/JacksonHome) library to automatically marshal instances of type `Greeting` into JSON.
虽然返回的是一个Object,但是Spring会利用Jackson JSON 把它转成JSON,这样就能很好的展示在Web页面上。*/
public class Greeting {

    private final long id;
    private final String content;

    public Greeting(long id, String content) {
        this.id = id;
        this.content = content;
    }

    public long getId() {
        return id;
    }

    public String getContent() {
        return content;
    }
}
2. Controller类, 这个是核心,主要的事情都在这里实现。它要做的事情是
2.1告诉Spring,这是个Controller类,用到的注解@RestController
2.2将URL map到对应的处理方法,用到的注解@RequestMapping("/greeting")
2.3取到URL中的参数name,否则取默认值
2.4利用name,实例化一个Greeting object,并返回,用到的注解@RequestParam(value="name", defaultValue="World")
Controller:
Spring 的RESTful Web Service 是通过controller来处理HTTP 请求的。
In Spring’s approach to building RESTful web services, HTTP requests are handled by a controller. These components are easily identified by the [@RestController] annotation
package hello;

import java.util.concurrent.atomic.AtomicLong;
import org.springframework.web.bind.annotation.RequestMapping;
import org.springframework.web.bind.annotation.RequestParam;
import org.springframework.web.bind.annotation.RestController;

/* 把这个类标志成一个RestController类
This code uses Spring 4’s new [`@RestController`] annotation, which marks the class as a controller where every method returns a domain object instead of a view. It’s shorthand for `@Controller` and `@ResponseBody` rolled together.
*/
@RestController
public class GreetingController {
    private static final String template = "Hello, %s!";
    private final AtomicLong counter = new AtomicLong();

/*这个注解用于把对/greeting的请求全部map到greeting()方法。
The example does not specify GET vs. PUT, POST, and so forth, because @RequestMapping maps all HTTP operations by default. Use @RequestMapping(method=GET) to narrow this mapping.
*/
    @RequestMapping("/greeting")
    public Greeting greeting(@RequestParam(value="name", defaultValue="World") String name) {
        return new Greeting(counter.incrementAndGet(),
                            String.format(template, name));
    }
}
/*
The `Greeting` object must be converted to JSON. Thanks to Spring’s HTTP message converter support, you don’t need to do this conversion manually. Because [Jackson 2]is on the classpath, Spring’s [`MappingJackson2HttpMessageConverter`] is automatically chosen to convert the `Greeting` instance to JSON.
*/
3. 启动类,一个带有main()入口函数的类, 主要用于启动。
添加@SpringBootApplication注解, Spring需要为这样的类自动做很多配置的事情,主要是用于启动这个application
下面这种启动方式是创建了一个独立的应用程序,在此过程中,使用Spring的支持将Tomcat servlet容器嵌入为HTTP运行时,而不是部署到外部实例。
package hello;

import org.springframework.boot.SpringApplication;
import org.springframework.boot.autoconfigure.SpringBootApplication;

@SpringBootApplication
public class Application {

    public static void main(String[] args) {
        //通过SpringApplication.run()来启动程序
        SpringApplication.run(Application.class, args);
    }
}
@SpringBootApplication 注解的作用如下,英文版好理解:
@SpringBootApplication is a convenience annotation that adds all of the following:
@Configuration tags the class as a source of bean definitions for the application context.
@EnableAutoConfiguration tells Spring Boot to start adding beans based on classpath settings, other beans, and various property settings.
Normally you would add @EnableWebMvc for a Spring MVC app, but Spring Boot adds it automatically when it sees spring-webmvc on the classpath. This flags the application as a web application and activates key behaviors such as setting up a DispatcherServlet.
@ComponentScan tells Spring to look for other components, configurations, and services in the hello package, allowing it to find the controllers.
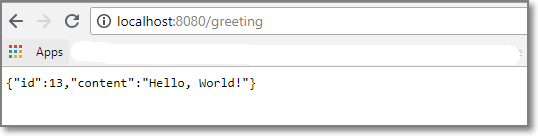
完成编码后,可以将应用程序打包,如果你用的编译工具可以直接编译,对于只是学习这样的场景,直接用编译工具编译就可以了。比如我用IDEA , 那么直接启动main(),然后到网页端做测试:

测试:
不带name:
带name:
