Vue Router
官方的路由管理器。它和 Vue.js 的核心深度集成,让构建单页面应用变得易如反掌。
Vue Router
目标:
手动实现简单的vue-roter功能
1. 实现VueRouter类和install方法
2. 实现router-view、router-link
3. 监听url变化:hashchange or popstate
4. 响应url
开发环境:
package.json
    "vue": "^2.6.11",
    "vue-router": "^3.3.2"
在vue中,vue-router的用法
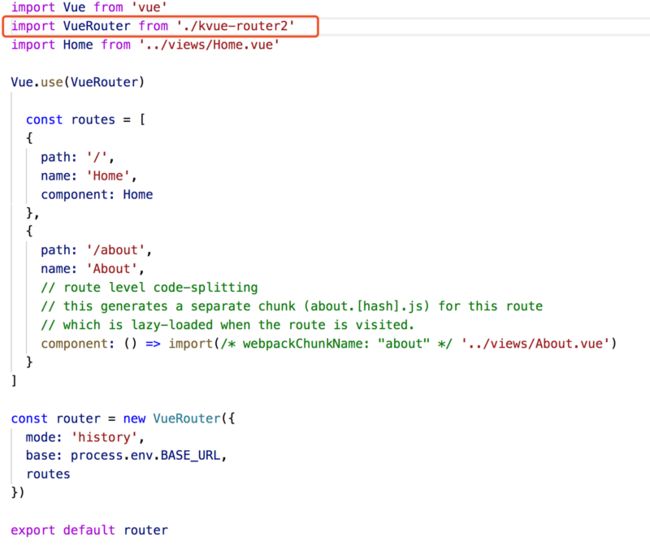
src/router/index.js
import Vue from 'vue'
import VueRouter from 'vue-router'
import Home from '../views/Home.vue'

Vue.use(VueRouter) // 首先在这里使用vue的use方法使用VueRouter,调用的是VueRouter这个插件的install方法。

  const routes = [
  {
    path: '/',
    name: 'Home',
    component: Home
  },
  {
    path: '/about',
    name: 'About',
    component: () => import(/* webpackChunkName: "about" */ '../views/About.vue')
  }
]

const router = new VueRouter({ //  需要有个VueRouter的类
  mode: 'history',
  base: process.env.BASE_URL,
  routes
})

export default router
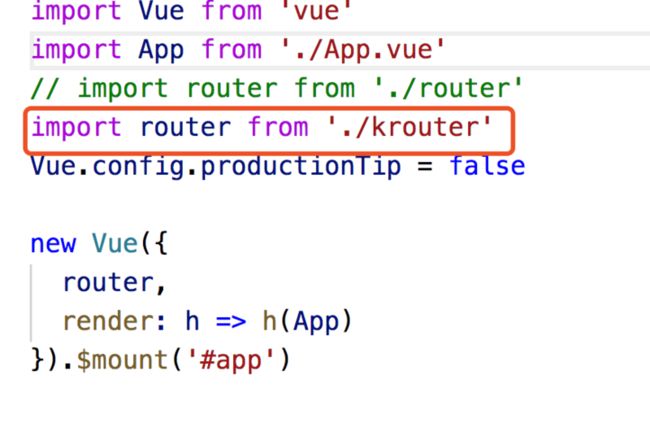
router/src/main.js
在根组件上添加该实例
new Vue({
  router,
  render: h => h(App)
}).$mount('#app')
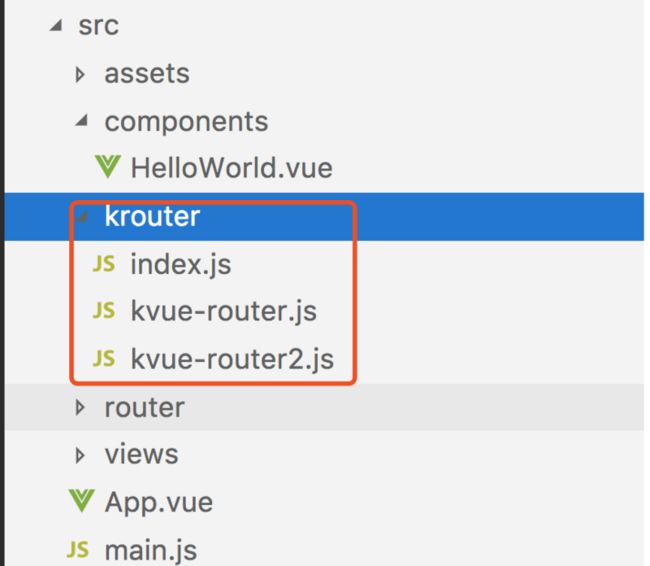
创建自己的kvue-router
src/krouter 自己创建的kvue-routersrc/krouter/index.js 路由的入口,其实和默认导入的src/router/index.js 是一样的。只是修改了,import VueRouter from './kvue-router2';将导入位置改成自己编写好的kvue-router
kvue-router.js 与 kvue-router2.js 的区别是,kvue-router2.js进行了优化,接下来也会讲解。
进行实现简单vue-router功能
src/krouter/kvue-router.js
// 引用传入的_vue 构造函数,在class VueRouter中需要用的_vue 所以定一个全局的
let Vue;
Vue
// vuerouter 这个类
// 实现install方法,一个类要用install方法
// vuerouter 是一个类 外部用法是:new VueRouter(routers: [...]) krouter/kvue-router.js
class VueRouter {
// 在这个里面需要处理传入的路由
// “拿到传入的props 就需要用的constructor; ” 需要知道,在使用new VueRouter(routers: [...]), routers里面传入的参数
constructor(options){
// 方便在其他地方使用
this.$options=options // 保存选项备用
//创建current保存当前url
// 为了让current 组建重新渲染 应该是响应式数据
// this.current='/' 这个写法就不行
// 使用vue中defineReactive方法,给一个对象 指定一个属性是响应式的。
Vue.util.defineReactive(this, 'current', '/') // 给当前的VueRouter 设置一个响应式的数据
// 监听hashchange事件 监控url的改变
window.addEventListener('hashchange', this.onHashChange.bind(this)) //改this
}
// 当路由发生变化的时候,去改变下当前的router-view
onHashChange(){
// 修改当前的url值,获取的的hash 需要修改; hash的格式为:#/.....
this.current= window.location.hash.slice(1)
console.log(this.current)
}
}
// 实现静态的install方法
// 参数1 是vue的构造函数 Vue.use(VueRouter); use 使用的就是install方法;所以_vue 接收到的就是vue构造函数
VueRouter.install =function(_vue){
Vue=_vue
//挂载 VueRouter的实例 创建的实例,放在了main.js 的new Vue({router,...}) 中 在vue中也需要使用 this.$router,所以需要挂载组建
// 通过options来获取,但是options是组建实例的选项,而不是构造函数的
//因为是 new Vue({router,...}) 才会有组建实例,所以需要放在生命周期里面去实现
//为了能够拿到Vue根实例中的router实例
// 可以利用mixin 全局混入实现
Vue.mixin({
// mixins 定义了之后,里面写的这个生命周期,所有的组建都会走一遍。因为定义在 beforeCreate ,所以 new Vue({router,...})执行完。已经可以获取到router这个组建实例
// 为什么需要在生命周期里面去使用,是因为只有在生命周期里面 才可以找到全局this 根实力;Vue.mixins 是全局的
beforeCreate() {
// 只有在Vue的根实例中 才会有 .router
// 区分什么是根组建,根实例; new Vue 是根实例 App 是跟根组建
// 所以需要判断
if(this.$options.router){
// 这是一种单例模式,拿到之后赋值
Vue.prototype.$router =this.$options.router
}
}
})
// 需要注册两个组建 XXXX这里面的内容就是插槽内容
Vue.component('router-link', { // router-link 的使用是: 接下来进行优化src/krouter/kvue-router2.js
// 引用传入的_vue 构造函数,在class VueRouter中需要用的_vue 所以定一个全局的
let Vue;
Vue
// vuerouter 这个类
// 实现install方法,一个类要用install方法
// vuerouter 是一个类 外部用法是:new VueRouter(routers: [...]) krouter/kvue-router.js
class VueRouter {
// 在这个里面需要处理传入的路由
// “拿到传入的props 就需要用的constructor; ” 需要知道,在使用new VueRouter(routers: [...]), routers里面传入的参数
constructor(options){
// 方便在其他地方使用
this.$options=options // 保存选项备用
//创建current保存当前url
// 为了让current 组建重新渲染 应该是响应式数据
// this.current='/' 这个写法就不行
// 处理routes
this.routeMap={}
this.$options.routes.forEach(route=>{
this.routeMap[route.path] = route
})
// 使用vue中defineReactive方法,给一个对象 指定一个属性是响应式的。
Vue.util.defineReactive(this, 'current', '/') // 给当前的VueRouter 设置一个响应式的数据
// 监听hashchange事件 监控url的改变
window.addEventListener('hashchange', this.onHashChange.bind(this)) //改this
}
// 当路由发生变化的时候,去改变下当前的router-view
onHashChange(){
// 修改当前的url值,获取的的hash 需要修改; hash的格式为:#/.....
this.current= window.location.hash.slice(1)
console.log(this.current)
}
}
// 实现静态的install方法
// 参数1 是vue的构造函数 Vue.use(VueRouter); use 使用的就是install方法;所以_vue 接收到的就是vue构造函数
VueRouter.install =function(_vue){
Vue=_vue
//挂载 VueRouter的实例 创建的实例,放在了main.js 的new Vue({router,...}) 中 在vue中也需要使用 this.$router,所以需要挂载组建
// 通过options来获取,但是options是组建实例的选项,而不是构造函数的
//因为是 new Vue({router,...}) 才会有组建实例,所以需要放在生命周期里面去实现
//为了能够拿到Vue根实例中的router实例
// 可以利用mixin 全局混入实现
Vue.mixin({
// mixins 定义了之后,里面写的这个生命周期,所有的组建都会走一遍。因为定义在 beforeCreate ,所以 new Vue({router,...})执行完。已经可以获取到router这个组建实例
// 为什么需要在生命周期里面去使用,是因为只有在生命周期里面 才可以找到全局this 根实力;Vue.mixins 是全局的
beforeCreate() {
// 只有在Vue的根实例中 才会有 .router
// 区分什么是根组建,根实例; new Vue 是根实例 App 是跟根组建
// 所以需要判断
if(this.$options.router){
// 这是一种单例模式,拿到之后赋值
Vue.prototype.$router =this.$options.router
}
}
})
// 需要注册两个组建 XXXX这里面的内容就是插槽内容
Vue.component('router-link', { // router-link 的使用是: 

