Kite的学习历程之SpringBoot之数据访问整合MyBatis
Kite学习框架的第十九天
1 使用注解整合MyBatis
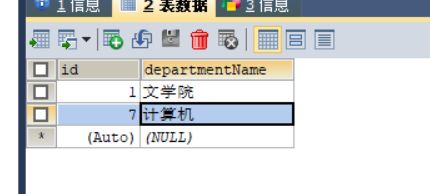
1.1 首先创建一个要进行操作的数据库
SET FOREIGN_KEY_CHECKS=0;

-- ----------------------------
-- Table structure for department
-- ----------------------------
DROP TABLE IF EXISTS `department`;
CREATE TABLE `department` (
  `id` INT(11) NOT NULL AUTO_INCREMENT,
  `departmentName` VARCHAR(255) DEFAULT NULL,
  PRIMARY KEY (`id`)
) ENGINE=INNODB AUTO_INCREMENT=1 DEFAULT CHARSET=utf8;

SET FOREIGN_KEY_CHECKS=0;
1.2 创建一个数据库对应的实体类
package cn.kitey.mybatis.bean;

public class Department {

    private Integer id;
    private String  departmentName;

    public Department() {
    }

    public Department(Integer id, String departmentName) {
        this.id = id;
        this.departmentName = departmentName;
    }

    public Integer getId() {
        return id;
    }

    public void setId(Integer id) {
        this.id = id;
    }

    public String getDepartmentName() {
        return departmentName;
    }

    public void setDepartmentName(String departmentName) {
        this.departmentName = departmentName;
    }

    @Override
    public String toString() {
        return "Department{" +
                "id=" + id +
                ", departmentName='" + departmentName + '\'' +
                '}';
    }
}
1.3 创建一个Mapper包,并创建一个DepartmentMapper接口,并指定为mapper
在类上添加一个
@Mapper
指定扫面这一个类
package cn.kitey.mybatis.mapper;

import cn.kitey.mybatis.bean.Department;
import org.apache.ibatis.annotations.*;

/**
 * 指定这是一个操作的据库的mapper
 */
//@Mapper
public interface DepartmentMapper {

    @Select("select * from department where id=#{id}")
    public Department getDeptById(Integer id);

    @Select("delete from department where id#{id}")
    public int deleteDeptById(Integer id);

    @Options(useGeneratedKeys = true, keyProperty = "id")
    @Insert("insert into department(departmentName) values(#{departmentName})")
    public int insertDept(Department department);

    @Update("update department set departmentName=#{departmentName} where id={id }")
    public int updateDept(Department department);
}
在主程序上加一个
@MapperScan(value = “cn.kitey.mybatis.mapper”)
表示扫描整个mapper包下
package cn.kitey.mybatis;

import org.mybatis.spring.annotation.MapperScan;
import org.springframework.boot.SpringApplication;
import org.springframework.boot.autoconfigure.SpringBootApplication;
@MapperScan(value = "cn.kitey.mybatis.mapper")
@SpringBootApplication
public class Demo06BootDataMybatisApplication {

    public static void main(String[] args) {
        SpringApplication.run(Demo06BootDataMybatisApplication.class, args);
    }

}
1.4 创建一个控制类
通过自动注入的方法注入
@Autowired
DepartmentMapper departmentMapper;
package cn.kitey.mybatis.controller;

import cn.kitey.mybatis.bean.Department;
import cn.kitey.mybatis.bean.Employee;
import cn.kitey.mybatis.mapper.DepartmentMapper;
import cn.kitey.mybatis.mapper.EmployeeMapper;
import org.springframework.beans.factory.annotation.Autowired;
import org.springframework.web.bind.annotation.GetMapping;
import org.springframework.web.bind.annotation.PathVariable;
import org.springframework.web.bind.annotation.RestController;

@RestController
public class DeptController {

    @Autowired
    DepartmentMapper departmentMapper;

    @GetMapping("/dept/{id}")
    public Department getDepartment(@PathVariable("id") Integer id){
        return  departmentMapper.getDeptById(id);
    }

    @GetMapping("/dept")
    public Department insertDept(Department department){
        departmentMapper.insertDept(department);
        return  department;
    }
1.5 在网页地址栏进行访问
以上就是基于注解的SpringBoot整合Mybatis


