Android动态添加View
文章目录
- addView的使用
- 在LinearLayout中的使用
- addView(View child)
- addView(View child, int index)
- 小结
- 在RelativeLayout中的使用
- index在RelativeLayout中有用吗?
动态添加View我们就要通过addView的方式动态向布局中添加View。(ps:addView是ViewGroup中特有的方法,而单一的View是不存在该方法的)
addView的使用
addView(View child)   // child-被添加的View
addView(View child, int index)   // index-被添加的View的索引
addView(View child, int width, int height)   // width,height被添加的View指定的宽高
addView(View view, ViewGroup.LayoutParams params)   // params被添加的View指定的布局参数
addView(View child, int index, LayoutParams params)
在LinearLayout中的使用
addView(View child)
LinearLayout中View的排列是按照指定的方向上线性排列的,子View的索引也是从零开始按照排列的顺序依次递增的
1.首先新建一个Activity并在布局中指定一个LinearLayout作为容器。布局文件如下:
<?xml version="1.0" encoding="utf-8"?>
<LinearLayout xmlns:android="http://schemas.android.com/apk/res/android"
    android:layout_width="match_parent"
    android:layout_height="match_parent"
    android:orientation="vertical">

    <!--添加view的容器-->
    <LinearLayout
        android:id="@+id/container"
        android:layout_width="match_parent"
        android:layout_height="400dp"
        android:background="#ffa200"
        android:orientation="vertical">

        <!--事先存在的view-->
        <TextView
            android:layout_width="wrap_content"
            android:layout_height="wrap_content"
            android:layout_gravity="center_horizontal"
            android:text="最初index为0"
            android:textColor="#ffffff"
            android:textSize="25sp" />
        <!--事先存在的view-->
        <TextView
            android:layout_width="wrap_content"
            android:layout_height="wrap_content"
            android:layout_gravity="center_horizontal"
            android:text="最初index为1"
            android:textColor="#ffffff"
            android:textSize="25sp" />

    </LinearLayout>

    <!--点击按钮添加view-->
    <Button
        android:id="@+id/btn_add"
        android:layout_width="match_parent"
        android:layout_height="50dp"
        android:background="#ffff00"
        android:text="Add View"
        android:textAllCaps="false" />

</LinearLayout>
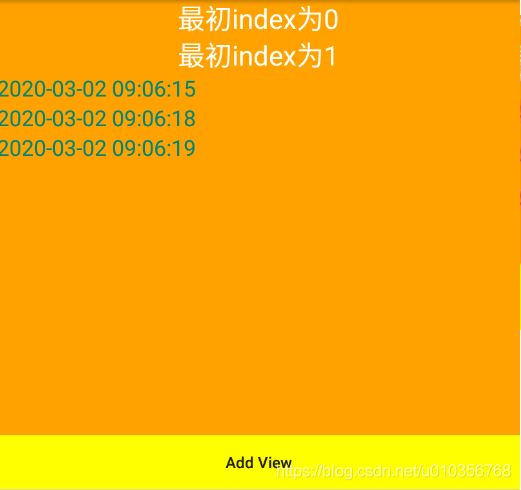
原始布局如下:

2.现在我们编写Activity的代码,对控件进行初始化以及点击事件的设置,如下所示:
public class MainActivity extends AppCompatActivity {
    private LinearLayout mContainer;
    private Button btn_add;

    @Override
    protected void onCreate(Bundle savedInstanceState) {
        super.onCreate(savedInstanceState);
        setContentView(R.layout.activity_main);

        mContainer = findViewById(R.id.container);
        btn_add = findViewById(R.id.btn_add);
        btn_add.setOnClickListener(new View.OnClickListener() {
            @Override
            public void onClick(View view) {
                addView(view);
            }
        });
    }

    private void addView(View view){
        TextView textView = new TextView(this);
        textView.setTextColor(getResources().getColor(R.color.colorPrimary));
        textView.setTextSize(20);
        textView.setText(date(System.currentTimeMillis()));
        mContainer.addView(textView);
    }

    private String date(long time){
        SimpleDateFormat sdf = new SimpleDateFormat("yyyy-MM-dd HH:mm:ss");
        Date date = new Date(time);
        return sdf.format(date);
    }
}
点击按钮后效果

由上述效果图我们可以初步分析得出结论,在线性布局中,我们调用addView(View child)方法时,会在指定的方向的最后一个View的下面添加上child这个View,也就是说被添加的View的索引总是等于容器中当前子View的个数
addView(View child, int index)
此方法相对于上面的方法多了一个index参数,也就是调用此方法时我们会给被添加的View指定一个索引。下面,我们来修改addView方法的代码,addView时,指定索引为1
mContainer.addView(textView,1);
点击按钮效果图

当我们为添加的View指定了index后,我们被添加的View就会被添加到容器中指定的索引位置处,并把之前的View(包括此View后面的View)全部向后“挤”了一位
当然,在我们指定索引时,我们应当先做一个判断,确保我们指定的index不能大于当前容器内View的总数量。代码可以如下
int index = new Random().nextInt();
if (index > mContainer.getChildCount()) {  // 当index大于当前容器子View数量时,让他等于容器内子View的数量。
     index = mContainer.getChildCount();
}
mContainer.addView(child, index);
小结
LinearLayout中addView的使用就只介绍这两种方法,这里指定线性布局的排列方向为垂直方向,当然指定为水平方向也是一样的效果,只是在添加View的方向上变为了水平方向的改变。在这里讲解调用这两个参数的方法主要是因为在LinearLayout中能更好的理解一些
在RelativeLayout中的使用
1.布局文件:
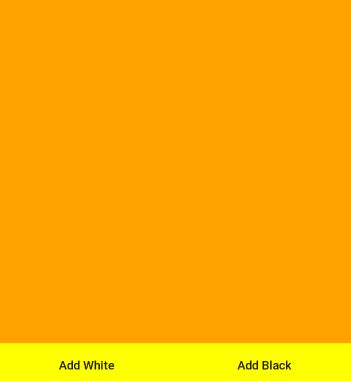
首先修改布局文件,这里将最初顶部的容器改为一个空的RelativeLayout。底下的按钮变成了两个,分别用于添加颜色不同的View。布局代码就不粘贴了,看一下改完的初始效果图:

private void addViewWhite(View view){
        TextView textView = new TextView(this);
        textView.setTextColor(Color.WHITE);
        textView.setTextSize(20);
        textView.setText("LayoutParams");
        mContainer.addView(textView);
    }

    private void addViewBlack(View view){
        TextView textView = new TextView(this);
        textView.setTextColor(Color.BLACK);
        textView.setTextSize(20);
        textView.setText("LayoutParams");
        //定义LayoutParam
        RelativeLayout.LayoutParams layoutParams = new RelativeLayout.LayoutParams(ViewGroup.LayoutParams.WRAP_CONTENT,ViewGroup.LayoutParams.WRAP_CONTENT);
        layoutParams.leftMargin = 100;
        mContainer.addView(textView,layoutParams);
    }
LayoutParams理解和使用
index在RelativeLayout中有用吗?
添加黑色View代码改为
mContainer.addView(textView,0,layoutParams);
看下运行效果

可以认为index指定了View在里面的层级。一个View的index越大,说明它越在上面。这一点在FrameLayout中是一样的(注意,如果在使用addView时候想设置index,也要遵循上面说到的规则)
原文
