Apache的基本及高级配置
Apache的基本及高级配置
一、Apache的配置文件
/etc/httpd/conf/httpd.conf
ServerRoot 服务器的配置文件及日志文件
Timeout 网站响应时间
KeepAliveOn允许保持连接(每个链接有多少个请求)
MaxKeepAliveRequests 每次连接提出的请求数量默认100.0表示不限
KeepAliveTimeout同一连接同一客户端两个请求之间的等待时间
MaxSpareServersHttpd 进程会随连入的多少而变动,最好闲置5个进程
MaxClients150 客户端并发连接的数量
ServerName 如果服务器的名字解析有问题,或者没有正式的DNS名字,也可以在这里指定IP地址。当ServerName设置不正确的时候,服务器不能正常启动。
DocumentRoot/usr/web 对于http://www.my.host.com/index.html 的访问就会指向/usr/web/index.html
里面参数的意思:OptionsFollowSymLinks #默认下在/var/www/hml下面的链接文件生效。
AllowOverrideNone #不可覆盖,让.htaccess文件失效。
二、Http端口号管理
yum -y install policycoreutils-python*
semanageport -l | grep http#查看SELinux下http相关端口
semanageport -a -t http_port_t -p tcp 8000#在selinux中添加8000端口号以允许httpd服务使用
三、UserDir
设定了用户宿主目录下的一个实际目录,存放了该用户提供访问的文档。
Apache允许系统的每个用户建立自己的网站,用户只需要在自己的主目
录下建立一个目录,并以UserDir指令设置目录名(默认为public_html)
,把提供访问的文件存放在该目录下,则在客户端可以使用类似的地址访
问:http://webserver/~用户名/guess.html,服务器向客户端返回/home/用户名/public_html/guess.html页面
vim /etc/httpd/conf/httpd.conf
修改此位置
把UserDirpublic_html去掉注释
创建新用户useradd aaa -p 521521
在aaa用户目录下新建一个目录和一个网页:
cd /home/aaa mkdir public_html echo "aaa
"> index.html
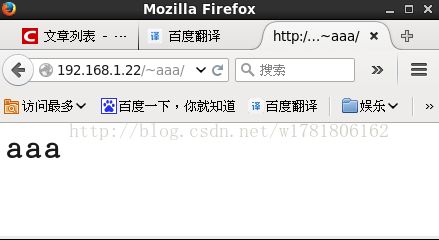
在网页输入:http://192.168.1.22/~aaa/ #后面 ~aaa是新建的用户网页
四、带用户认证的目录
vim /etc/httpd/conf/httpd.conf
修改DocumentRoot /web
新加
Orderdeny,allow

Denyfrom all

Allowfrom 192.168.1.22/24

 #只允许192.168.1.22的访问
如果再加上
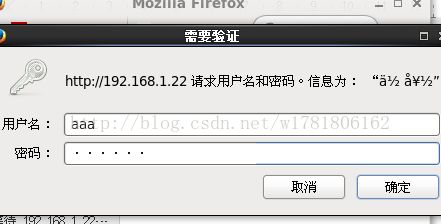
AuthName "你好"   #随便写,只是一个提示

AuthType  basic     #Apache 认证方式

AuthUserFile  /etc/httpd/.htpasswd

Requirevalid-user #允许所有用户
touch /etc/httpd/.htpasswd #apache添加用户
htpasswd-cm /etc/httpd/.htpasswd aaa #输入密码
htpasswd-m /etc/httpd/.htpasswd bbb
htpasswd-m /etc/httpd/.htpasswd ccc
servicehttpd restart #重启服务
五、虚拟网页
端口:
NameVirtualHost*:81

NameVirtualHost*:80


DocumentRoot /web

ServerName 192.168.1.22:80


DocumentRoot /web2

ServerName 192.168.1.22:81
域名:
修改:/etc/hosts文件,加上
192.168.1.22 www.baidu.com
192.168.1.22 www.google.com
NameVirtualHost*:80


ServerName  www.baidu.com

DocumentRoot  /web/


ServerName  ww.google.com

DocumentRoot  /web2/

alias  /wang /web3 #虚拟目录,很好用

# Ip地址:
ifconfig eth0:0 192.168.1.21 up #新加ip地址
修改:
NameVirtualHost*:80


DocumentRoot  /web

ServerName  192.168.1.22:80


DocumentRoot  /web2

ServerName 192.168.1.21:80
六、加密网页:https
做一个证书:在/etc/pki/tls/certs目录下
make baidu.pem
修改:
NameVirtualHost*:443


ServerName 192.168.1.22

DocumentRoot /web/

SSLEngineon

SSLCertificateFile" /etc/pki/tls/certs/baidu.pem"

SSLCertificateKeyFile" /etc/pki/tls/certs/baidu.pem"

