实验·动态页面跟静态页面的分离
实验·动态页面跟静态页面的分离
文章目录
- 实验·动态页面跟静态页面的分离
- 实验环境
- 实验步骤
- 一 安装apache+php
- 二 安装nginx
- 实验结果
实验环境
两台CentOS 7.6 一台做动态页面一台做静态页面
实验步骤
一 安装apache+php
1 安装httpd
[root@localhost ~]# yum -y install httpd httpd-devel
2 开启httpd服务
[root@localhost ~]# systemctl start httpd.service
3 配置防火墙允许http个https
[root@localhost ~]# firewall-cmd --permanent --zone=public --add-service=http
success
[root@localhost ~]# firewall-cmd --permanent --zone=public --add-service=https
success
4 重新加载防火墙的配置使其生效
[root@localhost ~]# firewall-cmd --reload
5 安装mariadb
[root@localhost ~]# yum -y install mariadb mariadb-server mariadb-libs mariadb-devel
[root@localhost ~]# systemctl start mariadb.service
[root@localhost ~]# netstat -antp | grep mysqld
root@localhost ~]# mysql_secure_installation
Enter current password for root (enter for none): 			===>按回车
Set root password? [Y/n] 												===>Y
New password:
Re-enter new password:
Remove anonymous users? [Y/n] 									===>n
Disallow root login remotely? [Y/n] 									===>n
Remove test database and access to it? [Y/n] 				===>n
Reload privilege tables now? [Y/n] 									===>y
6 安装php
[root@localhost ~]# yum -y install php
7 关联php与mysql数据库
[root@localhost ~]# yum -y install php-mysql
8 安装php的扩展环境
[root@localhost ~]# yum -y install php-gd php-ldap php-odbc php-pear php-xml php-xmlrpc php-mbstring php-snmp php-soap curl curl-devel php-bcmath
9 修改站点网页
[root@localhost ~]# cd /var/www/html
[root@localhost html]# vim index.php

[root@localhost html]# systemctl restart httpd
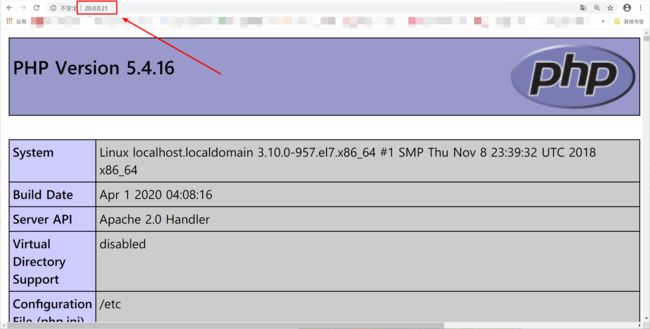
10 在Win10浏览器上面输入"20.0.0.21/index.php"

二 安装nginx
1 安装环境
[root@localhost ~]# yum -y install gcc gcc-c++ pcre pcre-devel zlib-devel make
2 解压源码包
[root@localhost opt]# tar zxvf nginx-1.12.2.tar.gz
3 编译安装
[root@localhost opt]# cd nginx-1.12.2/
[root@localhost nginx-1.12.2]# useradd -M -s /sbin/nologin nginx
[root@localhost nginx-1.12.2]# ./configure \
--prefix=/usr/local/nginx \
--user=nginx \
--group=nginx \
--with-http_stub_status_module
[root@localhost nginx-1.12.2]# make && make install
4 创建软链接便于管理
[root@localhost nginx-1.12.2]# ln -s /usr/local/nginx/sbin/nginx /usr/local/sbin/
[root@localhost nginx-1.12.2]# yum -y install elinks
[root@localhost nginx-1.12.2]# nginx
[root@localhost nginx-1.12.2]# netstat -antp | grep nginx
tcp        0      0 0.0.0.0:80              0.0.0.0:*               LISTEN      14834/nginx: master
5 修改配置文件实现动态页面指向apache-php
[root@localhost nginx-1.12.2]# vim /usr/local/nginx/conf/nginx.conf
    location ~ \.php$ {
      proxy_pass   http://20.0.0.21;		===>填写apache-php的IP
    }
[root@localhost nginx-1.12.2]# pkill nginx
[root@localhost nginx-1.12.2]# nginx
实验结果
浏览器上输入"20.0.0.22/index.php或者20.0.0.22/index.html"
php网页使用的是apache-php
