Spring Boot学习笔记(十四)mybatis(一)使用IDEA 整合SpringBoot + mybatis详细流程(有工程源码)
参考SpringBoot整合mybatis快速入门、spring boot +mybatis(通过properties配置) 集成
后来发现一个教程:乐天笔记Mybatis,个人感觉很不错
工程源码:
链接:https
文章目录
- 一、准备数据库
- 二、新建SpringBoot工程
- 三、创建文件
- 1、准备工作
- 2、开始实践
- ① 修改application.properties
- ② 新建并编写UserEntity.class文件
- ③ 新建并编写的UserMapper.class文件
- ④ 新建并编写我们的mybatis/mapper下的UserMapper.xml(也可以通过模板快速创建框架)
- ⑤ 创建并编写我们的Service.class
- ⑥ 创建并编写我们的ServiceImpl.class
- ⑦ 创建并编写我们的UserController.class
- 四、测试
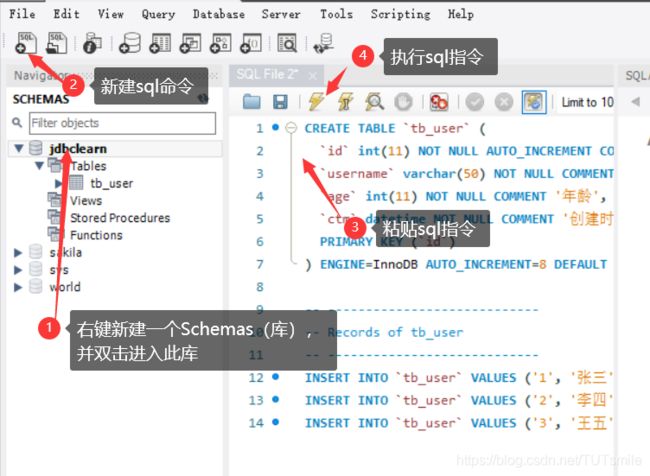
一、准备数据库
CREATE TABLE `tb_user` (
  `id` int(11) NOT NULL AUTO_INCREMENT COMMENT 'ID',
  `username` varchar(50) NOT NULL COMMENT '用户名',
  `age` int(11) NOT NULL COMMENT '年龄',
  `ctm` datetime NOT NULL COMMENT '创建时间',
  PRIMARY KEY (`id`)
) ENGINE=InnoDB AUTO_INCREMENT=8 DEFAULT CHARSET=utf8;

-- ----------------------------
-- Records of tb_user
-- ----------------------------
INSERT INTO `tb_user` VALUES ('1', '张三', '18', '2019-01-24 09:07:41');
INSERT INTO `tb_user` VALUES ('2', '李四', '20', '2019-01-24 09:07:41');
INSERT INTO `tb_user` VALUES ('3', '王五', '19', '2019-01-24 09:07:41');
二、新建SpringBoot工程

等待Spring boot 工程的新建以及依赖的自动下载,打开pom,确认一下是否有一下依赖(版本可不同)
            org.springframework.boot
            spring-boot-starter-web


            mysql
            mysql-connector-java
            runtime


            org.mybatis.spring.boot
            mybatis-spring-boot-starter
            2.1.0
三、创建文件
1、准备工作
我们最终的文件目录如下所示

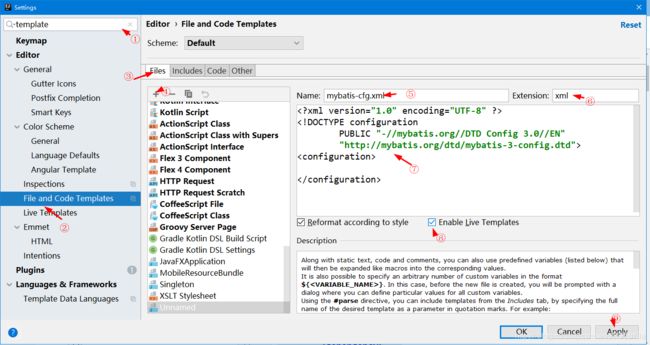
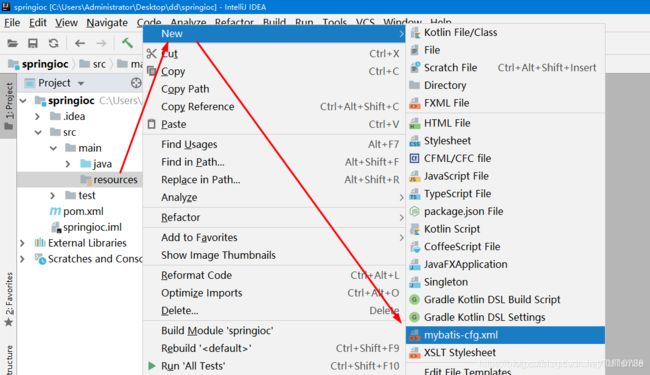
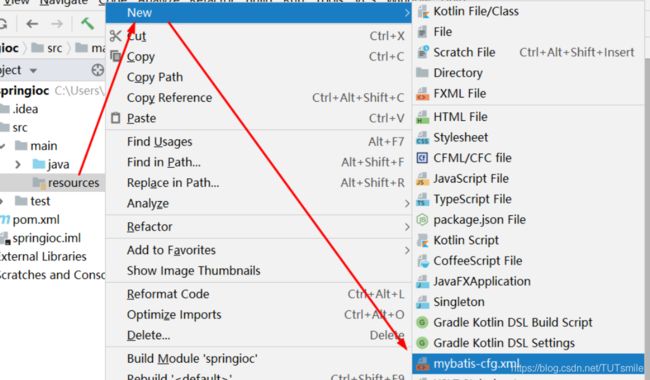
首先,让我们来添加模板文件,方便以后快速生成mybatis配置文件(图片来源)


- 我们依照以上步骤,创建mybatis-config模板,以下为填入的代码
- 创建mabatis-mapper模板,以下为填入的代码
2、开始实践
① 修改application.properties
# 服务器端口,如果不配置默认是8080端口
server.port=8096

# 数据库设置
spring.datasource.driver-class-name=com.mysql.cj.jdbc.Driver
spring.datasource.url=jdbc:mysql://127.0.0.1:3306/jdbclearn?serverTimezone=UTC&useUnicode=true&characterEncoding=utf8
spring.datasource.username=root
spring.datasource.password=123456

#配置.xml文件路径
# 若没有在最前面加上/,则路径均默认为resource下,若想要指定工程文件中的文件,也可以写为:/com/example/demo/你的文件层级/*.xml
mybatis.config-locations=classpath:mybatis/mybatis-config.xml
mybatis.mapper-locations=classpath:mybatis/mapper/*.xml
② 新建并编写UserEntity.class文件
import org.apache.ibatis.annotations.Mapper;
import java.io.Serializable;
import java.util.Date;
@Mapper
public class UserEntity implements Serializable {
    private static final long serialVersionUID = 1L;

    private int id;
    private String username;
    private int age;
    private Date ctm;

    public int getId() {
        return id;
    }

    public String getUsername() {
        return username;
    }

    public int getAge() {
        return age;
    }

    public Date getCtm() {
        return ctm;
    }

    public void setId(int id) {
        this.id = id;
    }

    public void setUsername(String username) {
        this.username = username;
    }

    public void setAge(int age) {
        this.age = age;
    }

    public void setCtm(Date ctm) {
        this.ctm = ctm;
    }
}
③ 新建并编写的UserMapper.class文件
import com.example.demo.entity.UserEntity;
import org.apache.ibatis.annotations.Mapper;
import java.util.List;

@Mapper
public interface UserMapper {
    List<UserEntity> findAll();
}
④ 新建并编写我们的mybatis/mapper下的UserMapper.xml(也可以通过模板快速创建框架)
⑤ 创建并编写我们的Service.class
import java.util.List;

public interface UserService {
    List<UserEntity> findAll();
}
⑥ 创建并编写我们的ServiceImpl.class
import org.springframework.stereotype.Service;
import javax.annotation.Resource;
import java.util.List;

@Service
public class UserServiceImpl implements UserService {
//    此处若@Autowire可能会出现红色错误Could not autowire. No beans of 'xxxMapper' type found.但仍可执行
//    将byType进行自动填充的AutoWire换成 byName注入的@Resource,则不会有此问题
//    如果一定要使用Autowire,则需要在SpringBoot启动类(此工程中为DemoApplication)添加@MapperScaner
    @Resource
    private UserMapper userMapper;

    @Override
    public List<UserEntity> findAll() {
        return userMapper.findAll();
    }
}
⑦ 创建并编写我们的UserController.class
import org.springframework.beans.factory.annotation.Autowired;
import org.springframework.web.bind.annotation.RequestMapping;
import org.springframework.web.bind.annotation.RestController;

import java.util.List;

@RestController
@RequestMapping("/user")
public class UserController {

    @Autowired
    private UserServiceImpl userServiceImpl;

    @RequestMapping("/findAll")
    public List<UserEntity> findAll(){
        return userServiceImpl.findAll();
    }

}
四、测试
我们启动项目后
在浏览器输入地址localhost:8096/user/findAll(或者用postman进行测试)查询成功
![]()


