Swift UITableView相关功能(七)数据编辑功能
UITableView的数据编辑功能
我们上一节主要讲了tableView分区头视图等的一些问题
上一节地址:http://blog.csdn.net/lwjok2007/article/details/49250887
继续使用上节代码(代码下载方式见第六节末尾)
这节我们主要实现一下table 的编辑状态
类似如下界面:
其实实现以上界面很简单是需要设置一下tableView 的一个属性即可
_tableView.setEditing(true, animated: true)我们先添加button分别对应添加和删除
        //添加编辑按钮
        let btnEdit=UIButton(frame: CGRectMake(10, 20, 120, 36))
        btnEdit.addTarget(self, action: "btnEditAct:", forControlEvents: UIControlEvents.TouchDown)
        btnEdit.setTitle("删除", forState: UIControlState.Normal)
        btnEdit.setTitleColor(UIColor.redColor(), forState: UIControlState.Normal)
        self.view.addSubview(btnEdit)


        let btnEdit1=UIButton(frame: CGRectMake(150, 20, 120, 36))
        btnEdit1.addTarget(self, action: "btnEditAct1:", forControlEvents: UIControlEvents.TouchDown)
        btnEdit1.setTitle("添加", forState: UIControlState.Normal)
        btnEdit1.setTitleColor(UIColor.redColor(), forState: UIControlState.Normal)
        self.view.addSubview(btnEdit1)
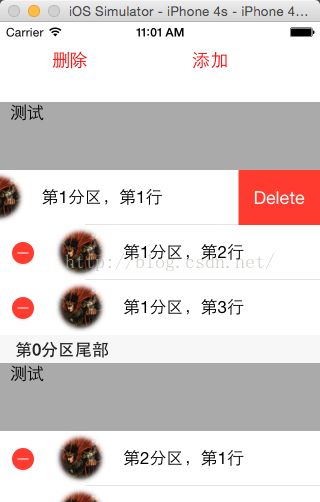
我们首先实现一下删除按钮(应为默认就是删除按钮,无需做更多操作)
    //删除按钮
    func btnEditAct(sender:UIButton)
    {

        if _tableView.editing
        {
            _tableView.setEditing(false, animated: true)
        }else{
            _tableView.setEditing(true, animated: true)
        }

    }
这里首先判断当前table 是否为编辑状态 如果是的话 取消编辑状态 否则打开编辑状态
我们运行程序 点击删除按钮看看效果
接下来我们实现 增加按钮的功能。
实现之前我们得了解一个tableView的代理方法
func tableView(tableView: UITableView, editingStyleForRowAtIndexPath indexPath: NSIndexPath) ->UITableViewCellEditingStyle此代理方法会返回一个 UITableViewCellEditingStyle 一般有两种情况 Delete Insert 分别对应删除 添加两种情况
首先我们建一个bool参数 用来记录我们点击的是删除还是添加
var isDelIns:Bool! //删除按钮
func btnEditAct(sender:UIButton)
{
isDelIns=true
if _tableView.editing
{
_tableView.setEditing(false, animated: true)
}else{
_tableView.setEditing(true, animated: true)
}
}
//添加按钮
func btnEditAct1(sender:UIButton)
{
isDelIns=false
if _tableView.editing
{
_tableView.setEditing(false, animated: true)
}else{
_tableView.setEditing(true, animated: true)
}
}根据bool值返回结果
    //新增或者删除按钮的事件
    func tableView(tableView: UITableView, commitEditingStyle editingStyle: UITableViewCellEditingStyle, forRowAtIndexPath indexPath: NSIndexPath) {
        if  editingStyle==UITableViewCellEditingStyle.Insert
        {
            //此处判断为添加数据方法 在这里做相应的操作
            println("添加数据")
        }else if editingStyle==UITableViewCellEditingStyle.Delete {
            //此处为删除数据方法,在这里做相应的操作即可
            println("删除数据")
        }
    }
此时运行程序 两个按钮都试一下

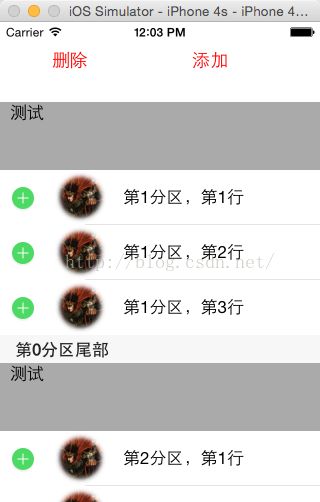
添加和删除基本样子实现了。但是,我们发现点击每一行数据上的删除,和添加小图标之后是没有反应的。
这是因为还缺少一个tableView的代理方法
    //新增或者删除按钮的事件
    func tableView(tableView: UITableView, commitEditingStyle editingStyle: UITableViewCellEditingStyle, forRowAtIndexPath indexPath: NSIndexPath) {
        if  editingStyle==UITableViewCellEditingStyle.Insert
        {
            //此处判断为添加数据方法 在这里做相应的操作 此处如果修改了table的数据一定记得同步修改数据源
            println("添加数据")
        }else if editingStyle==UITableViewCellEditingStyle.Delete {
            //此处为删除数据方法,在这里做相应的操作即可 此处如果修改了table的数据一定记得同步修改数据源
            println("删除数据")
        }
    }
这时候我们再试试 是不是点击删除 或者添加之后有log出现了
具体操作大家自己试着写一写,我们这里就不细写了
说到这里。我们加一点特别说明。大家如果经常完qq的话会发现qq聊天列表页在左滑的时候也会出现类似的删除按钮,但是他还有一个置顶按钮

怎么让tableview出现两个按钮了
其实也是一个简单的代理方法
    //table编辑状态下点击删除cell右侧设置多个按钮
    func tableView(tableView: UITableView, editActionsForRowAtIndexPath indexPath: NSIndexPath) -> [AnyObject]? {
        let action1=UITableViewRowAction(style: UITableViewRowActionStyle.Default, title: "删除"){(action,indexPath)->Void in
            //点击删除调用
            println("点击了删除")
        }


        let action2=UITableViewRowAction(style: UITableViewRowActionStyle.Normal, title: "标记为未读"){(action,indexPath)->Void in
            //点击标记为未读调用
            println("标记为未读")

        }
        let action3=UITableViewRowAction(style: UITableViewRowActionStyle.Default, title: "置顶"){(action,indexPath)->Void in
            //点击置顶调用
            println("点击了置顶")

        }

        return[action1,action2,action3]
    }
此处代理方法返回一个数组。数组里面有个几个UITableViewRowAction 就会出现几个按钮

本节我们先讲到这里
下节我们尝试建立索引
下节地址:http://blog.csdn.net/lwjok2007/article/details/49307019
本节源代码我们会上传到qq群空间,欢迎下载
源码名称:TestTableViewSwift7.zip
苹果开发群2 :492222303 欢迎加入 欢迎讨论问题