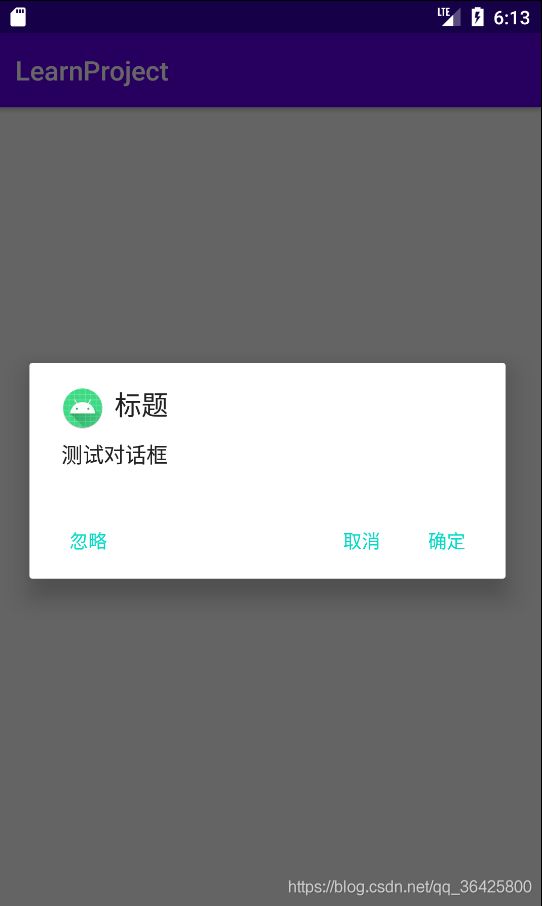
Android开发学习笔记——对话框Dialog
Android开发学习笔记——对话框Dialog
- 基本使用
- 常用属性和方法
- AlertDialog
- 基本方法和使用
- 列表对话框
- 单选列表对话框
- 多选列表对话框
- 其它Dialog
- 自定义对话框
- setView
- 继承Dialog
- DialogFragment
- onCreateDialog
- onCreateView
- 显示DialogFragment
- 与Dialog的比较
- 总结
弹出对话框在我们进行开发的过程中是一个很常见的需求,比如在退出APP之前、或者执行某种操作之前都会弹出对话框与用户进行交互,请求确认。
基本使用
常用属性和方法
AlertDialog
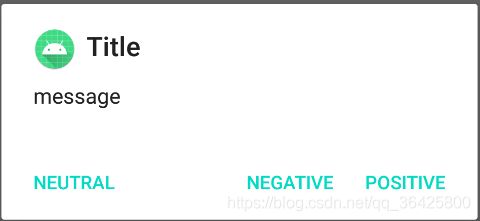
AlertDialog是在系统提供的Dialog中我们使用最多和功能最强大的一个Dialog,其基本用法很简单,只需要通过AlertDialog.Builder创建Builder对象,通过Builder为对话框设置标题、图标、按钮等内容,然后调用builder.create()方法创建dialog,使用dialog.show()即可显示对话框。其基本样式如下图:
基本方法和使用
AlertDialog的使用方式很简单,其标签、图标、按钮都是只需要设置相关文字、点击事件等即可,而中间内容部分,可以设置为文字内容、列表、单选列表和多选列表等,这都可以通过Builder类直接实现。Buider类常用方法如下:
| 方法名 | 说明 |
|---|---|
| setTitle | 设置标题 |
| setIcon | 设置图标 |
| setMessage | 设置对话框提示内容 |
| setItems | 设置显示列表对话框 |
| setAdapter | 设置对话框列表adapter |
| setView | 设置对话框自定义view |
| setMultiChoiceItems | 设置多选列表对话框 |
| setSingleChoiceItems | 设置单选列表 |
| setPositiveButton | 设置positive按钮内容和点击事件 |
| setPositiveButton | 设置positive按钮内容和点击事件 |
| setNegativeButton | 设置negative按钮内容和点击事件 |
| setNeutralButton | 设置Neutral按钮内容和点击事件 |
| setCancelable | 设置对话框是否能够退出 |
| setCustomTitle | 设置对话框自定义view |
| setCursor | 设置cursor中一个列用对话框列表显示 |
| create | 创建一个对话框 |
AlertDialog的一些常用方法:
| 方法名 | 说明 |
|---|---|
| show | 显示对话框 |
| dismiss | 隐藏对话框 |
| cancel | 隐藏对话框同时回调onCancelListener中的退出事件 |
| setOnCancleListener | 设置退出对话框监听 |
| setCanceledOnTouchOutside | 设置点击对话框外部是否退出对话框 |
值得注意的是:在没有设置退出监听前,dismiss和cancel是完全相同的。
AlertDialog的基本使用方法如下代码所示:
private fun showAlertDialog(){
    val builder = AlertDialog.Builder(this)
        .setTitle("标题")
        .setMessage("测试对话框")
        .setIcon(R.mipmap.ic_launcher_round)
        .setPositiveButton("确定") { dialogInterface: DialogInterface, i: Int ->
            dialogInterface.dismiss()
            Log.e("dialog","点击确定按钮")
        }
        .setNegativeButton("取消") { dialogInterface: DialogInterface, i: Int ->
            dialogInterface.dismiss()
            Log.e("dialog", "点击取消按钮")
        }
        .setNeutralButton("忽略"){ dialogInterface: DialogInterface, i: Int ->
            dialogInterface.dismiss()
            Log.e("dialog", "点击忽略按钮")
        }
    val dialog = builder.create()
    dialog.setCanceledOnTouchOutside(true)
    dialog.show()
}
列表对话框
其实根据上述对Builder的描述我们很容易就能猜测到,只有使用setItems方法就可以很轻松地创建一个带列表地对话框。
private fun showAlertListDialog(){
    val list = arrayOf<String>("张三","李四","王五","赵六","钱七","小明","小华")
    val builder = AlertDialog.Builder(this)
        .setTitle("列表")
        .setItems(list) { dialogInterface: DialogInterface, i: Int ->
            Log.e("dialog", "点击item$i")
        }
        .setIcon(R.mipmap.ic_launcher_round)
        .setPositiveButton("确定") { dialogInterface: DialogInterface, i: Int ->
            dialogInterface.dismiss()
            Log.e("dialog","点击确定按钮")
        }

    val dialog = builder.create()
    dialog.setCanceledOnTouchOutside(true)
    dialog.show()
}
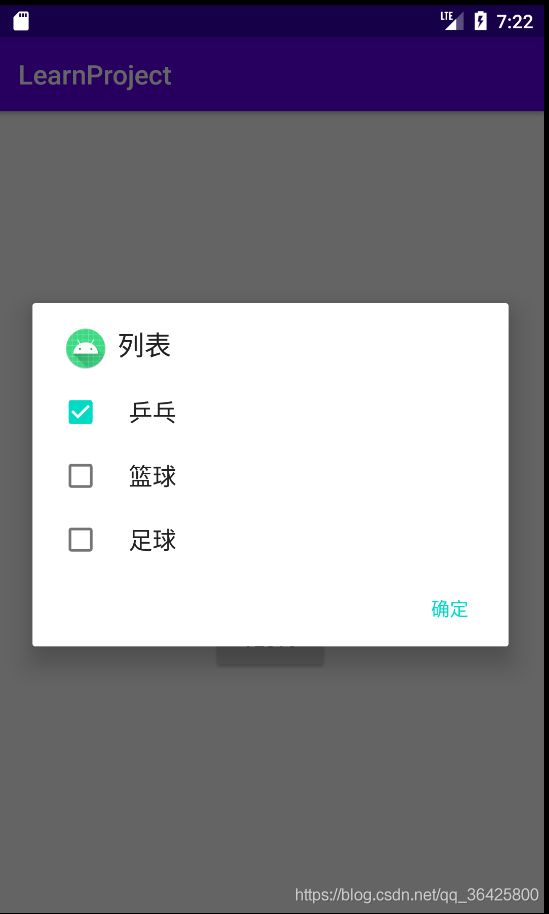
显示效果如下,点击列表项对话框会自动消失:

需要注意地是,在使用setItems方法时不能再使用setMessage,否则只会显示文本内容,不会显示列表。
但是这种方法只能显示最简单地字符串列表,我们也可以使用setAdapter方法来在对话框中实现列表对话框,通过设置Adapter,我们能够实现更加复杂地列表出来。
具体实现方法,和List View地实现方法相同,只需要自定义Adapter或者使用系统提供地ArrayAdapter、SimpleAdapter,然后使用setAdapter方法进行设置即可。
class MineAdapter(var mContext: Context, var data: MutableList<ItemData>) : BaseAdapter() {

    companion object{
        const val TYPE_NORMAL = 0
        const val TYPE_IMAGE = 1
    }

    @SuppressLint("ViewHolder")
    override fun getView(position: Int, convertView: View?, parent: ViewGroup?): View {
        //获取item布局
        val view = LayoutInflater.from(mContext).inflate(R.layout.item_mine,parent, false)
        //展示item数据
        val tvName = view.findViewById<TextView>(R.id.tvName)
        val tvAge= view.findViewById<TextView>(R.id.tvAge)
        val ivAvatar = view.findViewById<ImageView>(R.id.ivAvatar)
        val btTest = view.findViewById<Button>(R.id.btTest)
        tvName.text = data[position].name//设置名字
        tvAge.text = data[position].age.toString()//设置年龄
        ivAvatar.setImageResource(R.mipmap.ic_launcher)//设置头像
//        btTest.setOnClickListener { Log.e("test", "show button${position}") }
//        view.setOnClickListener { Log.e("test", "show item${position}") }
        return view
    }

    override fun getItemViewType(position: Int): Int {
        return data[position].type
    }

    override fun getViewTypeCount(): Int {
        return 2
    }

    override fun getItem(p0: Int): Any {
        return data[p0]
    }

    override fun getItemId(p0: Int): Long {
        return p0.toLong()
    }

    override fun getCount(): Int {
        return data.size
    }

}
对话框实现如下:
private fun showAlertListAdapterDialog(){
   val list = mutableListOf<ItemData>()
   for (i in 1..20) list.add(ItemData(MineAdapter.TYPE_NORMAL,"item-name$i", 10+i, R.mipmap.ic_launcher))
   val builder = AlertDialog.Builder(this)
       .setTitle("列表")
       .setAdapter(MineAdapter(this, list)) { dialogInterface: DialogInterface, i: Int ->
           Log.e("dialog", "adapter item$i")
       }
       .setIcon(R.mipmap.ic_launcher_round)
       .setPositiveButton("确定") { dialogInterface: DialogInterface, i: Int ->
           dialogInterface.dismiss()
           Log.e("dialog","点击确定按钮")
       }

   val dialog = builder.create()
   dialog.setCanceledOnTouchOutside(true)
   dialog.show()
}
单选列表对话框
通过setSingleChoiceItems方法,我们可以设置单选列表对话框,代码如下:
private fun showAlertSingleListDialog(){
   val list = arrayOf<String>("乒乓","篮球","足球")
   val builder = AlertDialog.Builder(this)
       .setTitle("列表")
       .setSingleChoiceItems(list, 0) { dialogInterface: DialogInterface, i: Int ->
           Log.e("dialog", "点击item$i")
       }
       .setIcon(R.mipmap.ic_launcher_round)
       .setPositiveButton("确定") { dialogInterface: DialogInterface, i: Int ->
           dialogInterface.dismiss()
           Log.e("dialog","点击确定按钮")
       }

   val dialog = builder.create()
   dialog.setCanceledOnTouchOutside(true)
   dialog.show()
}
多选列表对话框
同样的,使用setMultiChoiceItems方法,我们能够创建一个多选列表对话框。代码如下:
private fun showAlertMultiListDialog(){
   val list = arrayOf<String>("乒乓","篮球","足球")
   val flags = BooleanArray(3)//根据对话框中表项选择,值会发生变化
   val builder = AlertDialog.Builder(this)
       .setTitle("列表")
       .setMultiChoiceItems(list, flags) { dialogInterface: DialogInterface, i: Int, f : Boolean ->
           Log.e("dialog", "点击item$i,切换为$f")
       }
       .setIcon(R.mipmap.ic_launcher_round)
       .setPositiveButton("确定") { dialogInterface: DialogInterface, i: Int ->
           dialogInterface.dismiss()
           Log.e("dialog","点击确定按钮")
       }

   val dialog = builder.create()
   dialog.setCanceledOnTouchOutside(true)
   dialog.show()
}
其它Dialog
除了AlertDialog以外,谷歌还提供了一些其它的Dialog的实现,比如:ProgressDialog是一个用于显示进度的对话框,不过目前已经被废弃,还有DatePickerDialog和TimePickerDialog等。
自定义对话框
尽管系统提供了众多Dialog供开发者使用,但是在实际的生产开发过程中,我们一般是很少直接使用系统提供的Dialog的,因为系统提供的Dialog样式过于简单,而且一般会与产品的设计风格不一致,使用起来也不够灵活,这时就需要我们去自定义Dialog了。
setView
自定义Dialog的最简单的方法就是使用Buidler的setView方法,通过XML布局自定义View,然后使用setView为dialog添加布局。代码如下:
自定义布局:
<androidx.constraintlayout.widget.ConstraintLayout xmlns:android="http://schemas.android.com/apk/res/android"
    android:layout_width="match_parent"
    android:layout_height="match_parent"
    xmlns:app="http://schemas.android.com/apk/res-auto">

    <ImageView
        android:id="@+id/ivImage"
        android:src="@mipmap/ic_launcher_round"
        android:layout_width="wrap_content"
        android:layout_height="wrap_content"
        app:layout_constraintStart_toStartOf="parent"
        app:layout_constraintEnd_toEndOf="parent"
        app:layout_constraintTop_toTopOf="parent" />

    <TextView
        android:id="@+id/tvContent"
        android:layout_width="wrap_content"
        android:layout_height="wrap_content"
        android:text="测试自定义View"
        app:layout_constraintTop_toBottomOf="@id/ivImage"
        app:layout_constraintStart_toStartOf="parent"
        app:layout_constraintEnd_toEndOf="parent"/>

    <Button
        android:id="@+id/btEnsure"
        android:layout_width="wrap_content"
        android:layout_height="wrap_content"
        android:text="yes"
        app:layout_constraintTop_toBottomOf="@id/tvContent"
        app:layout_constraintStart_toStartOf="parent"
        app:layout_constraintEnd_toStartOf="@id/btCancel"/>
    <Button
        android:id="@+id/btCancel"
        android:layout_width="wrap_content"
        android:layout_height="wrap_content"
        android:text="no"
        app:layout_constraintTop_toTopOf="@id/btEnsure"
        app:layout_constraintStart_toEndOf="@id/btEnsure"
        app:layout_constraintEnd_toEndOf="parent"/>

androidx.constraintlayout.widget.ConstraintLayout>
private fun showAlertViewDialog(){
   val view = ViewGroup.inflate(this,R.layout.dialog_view,null)
   val builder = AlertDialog.Builder(this)
       .setTitle("测试自定义view")
       .setView(view)
   val dialog = builder.create()
   view.findViewById<Button>(R.id.btCancel).setOnClickListener {
       dialog.dismiss()
       Log.e("dialog", "cancel")
   }
   view.findViewById<Button>(R.id.btEnsure).setOnClickListener {
       dialog.dismiss()
       Log.e("dialog", "Ensure")
   }
   dialog.setCanceledOnTouchOutside(true)
   dialog.show()
}
具体效果如下:
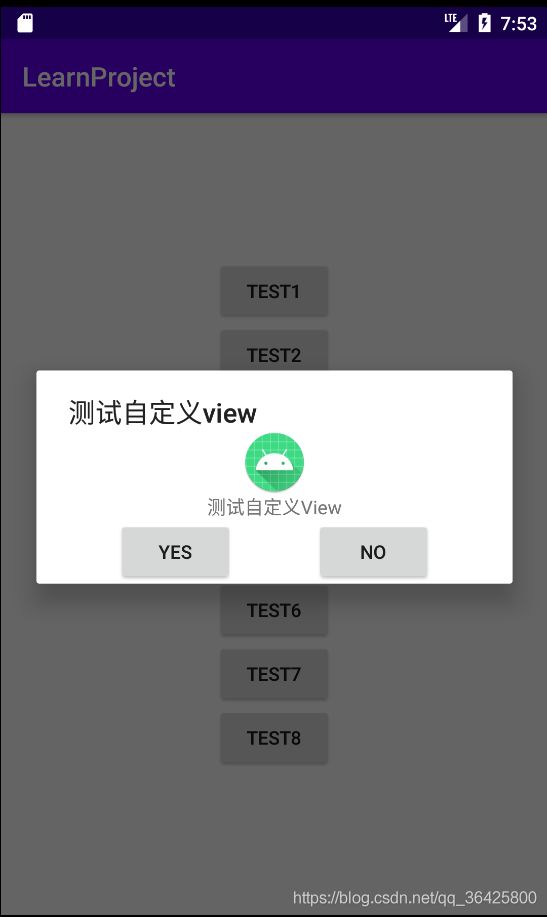
其实仔细观察,我们会发现,setView其实和setMessage差不多,我们实际上并没有对整个dialog进行自定义,只是在dialog中显示了一个自定义view,仍然可以使用dialog的按钮,title等。而且是无法设置dialog的宽高的,布局中根布局的宽高设置是无效的。
继承Dialog
虽然通过setView能够实现一部分需求,但是,真正需要自定义Dialog还是需要继承Dialog类,重新实现一个Dialog类。通过XML布局来完全自定义Dialog布局,对于Dialog中的点击事件可以使用回调的方式实现。通过这种方法,我们可以任意的构建dialog的布局和实现。
首先,我们可以根据需求,去构建XML布局,如下:
<androidx.constraintlayout.widget.ConstraintLayout xmlns:android="http://schemas.android.com/apk/res/android"
    android:layout_width="250dp"
    android:layout_height="200dp"
    xmlns:app="http://schemas.android.com/apk/res-auto"
    android:background="@drawable/drawable_dialog_bg">

    <TextView
        android:id="@+id/tvTitle"
        android:layout_width="wrap_content"
        android:layout_height="wrap_content"
        android:text="Title"
        android:textSize="25sp"
        android:layout_marginTop="10dp"
        app:layout_constraintTop_toTopOf="parent"
        app:layout_constraintStart_toStartOf="parent"
        app:layout_constraintEnd_toEndOf="parent"/>

    <TextView
        android:id="@+id/tvMessage"
        android:layout_width="0dp"
        android:layout_height="wrap_content"
        android:text="message"
        android:textSize="20sp"
        android:padding="5dp"
        android:gravity="center"
        app:layout_constraintStart_toStartOf="parent"
        app:layout_constraintEnd_toEndOf="parent"
        app:layout_constraintTop_toBottomOf="@id/tvTitle"
        app:layout_constraintBottom_toTopOf="@id/viewLineH"/>

    <View
        android:id="@+id/viewLineH"
        android:layout_width="0dp"
        android:layout_height="1dp"
        android:background="#e4e4e4"
        app:layout_constraintStart_toStartOf="parent"
        app:layout_constraintEnd_toEndOf="parent"
        app:layout_constraintBottom_toTopOf="@id/btCancel"/>

    <Button
        android:id="@+id/btCancel"
        android:layout_width="0dp"
        android:layout_height="wrap_content"
        android:text="取消"
        android:textColor="#999999"
        app:layout_constraintBottom_toBottomOf="parent"
        app:layout_constraintStart_toStartOf="parent"
        app:layout_constraintEnd_toStartOf="@id/viewLine"
        android:background="@null"/>

    <View
        android:id="@+id/viewLine"
        android:layout_width="1dp"
        android:layout_height="0dp"
        android:background="#e4e4e4"
        app:layout_constraintTop_toTopOf="@id/btEnsure"
        app:layout_constraintBottom_toBottomOf="@id/btEnsure"
        app:layout_constraintStart_toEndOf="@id/btCancel"
        app:layout_constraintEnd_toStartOf="@id/btEnsure"/>

    <Button
        android:id="@+id/btEnsure"
        android:layout_width="0dp"
        android:layout_height="wrap_content"
        android:text="确定"
        android:textColor="#38adff"
        app:layout_constraintBottom_toBottomOf="parent"
        app:layout_constraintEnd_toEndOf="parent"
        app:layout_constraintStart_toEndOf="@id/viewLine"
        android:background="@null"/>

androidx.constraintlayout.widget.ConstraintLayout>
然后,继承Dialog,重写onCreat方法,使用setContentView方法设置dialog的布局,然后可以根据需求设置一些回调等内容。注意,只有调用dialog.show()之后onCreate方法才会执行。同时,Dialog中默认存在一个白色背景,如果设置圆角效果的会影响显示效果,可以使用window?.setBackgroundDrawable(ColorDrawable(Color.TRANSPARENT))将背景设置为透明,进而隐藏。代码如下:
class MyDialog(context: Context) : Dialog(context) {

    private var onMyDialogListener : OnMyDialogListener ?= null

    private var tvTitle : TextView ?= null
    private var tvMessage : TextView ?= null
    private var btCancel : Button ?= null
    private var btEnsure : Button ?= null

    private var title : String ?= null
    private var message : String ?= null

    override fun onCreate(savedInstanceState: Bundle?) {
        super.onCreate(savedInstanceState)
        //设置dialog布局
        setContentView(R.layout.dialog_my_view)
        //设置点击dialog外部不退出
//        setCanceledOnTouchOutside(false)
        initView()
        //设置背景透明,默认会有个白色背景
        window?.setBackgroundDrawable(ColorDrawable(Color.TRANSPARENT))
//        window?.setLayout(WindowManager.LayoutParams.MATCH_PARENT, WindowManager.LayoutParams.MATCH_PARENT)
    }

    private fun initView(){
        tvTitle = findViewById(R.id.tvTitle)
        tvMessage = findViewById(R.id.tvMessage)
        btCancel = findViewById(R.id.btCancel)
        btEnsure = findViewById(R.id.btEnsure)
        tvTitle?.text = title
        tvMessage?.text = message
        btCancel?.setOnClickListener { onMyDialogListener?.onCancel() }
        btEnsure?.setOnClickListener { onMyDialogListener?.onEnsure() }
    }

    fun setTitle(title : String){
        this.title = title
    }

    fun setMessage(message : String){
        this.message = message
    }

    fun setOnMyDialogListener(onMyDialogListener : OnMyDialogListener){
        this.onMyDialogListener = onMyDialogListener
    }


    abstract class OnMyDialogListener{
        abstract fun onCancel()
        abstract fun onEnsure()
    }
}
根据上述内容,我们可以发现,通过继承Dialog实现自定义对话框,存在很大的灵活性,我们可以添加任意内容和效果,我们可以在Dialog中使用RecycleView、Edit View等组件。
DialogFragment
Android3.0后官方推出了DialogFragment,并且推荐使用DialogFragment来代替Dialog。那么DialogFragment和Dialog有什么区别呢?实际上DialogFragment其本质就是一个Fragment,与Dialog相比,其主要优势在于解耦和拥有着和Fragment一样的生命周期,生命周期更加完善,容易管理。有个很常见的场景就是,在手机旋转时,使用DialogFragment对话框会自动重建,而使用Dialog会直接消失,需要监听onDestroy、onSaveInstanceState和onCreate等一系列方法去重建Dialog。
那么我们应该如何去使用DialogFragment呢?实际上,DialogFragment的使用方法很简单,就相当于在Dialog上面封装了一层Fragment,DialogFragment的创建有两种方式,不过都需要先继承DialogFragment,然后去重写onCreatView或者onCreateDialog方法。
onCreateDialog
使用onCreateDialog方法实现DialogFragment一般用于替代传统的Dialog对话框场景,我们只需要继承DialogFragment,在onCreateDialog中正常创建Dialog,然后返回dialog对象即可。具体代码如下:
class MyDialogFragment : DialogFragment() {
    override fun onCreateDialog(savedInstanceState: Bundle?): Dialog {
        val dialog = MyDialog(requireContext())
        dialog.setTitle("自定义对话框")
        dialog.setMessage("自定义对话框内容提示")
        dialog.setOnMyDialogListener(object : MyDialog.OnMyDialogListener() {
            override fun onCancel() {
                dialog.dismiss()
                Log.e("dialog", "my dialog cancel")
            }
            override fun onEnsure() {
                dialog.dismiss()
                Log.e("dialog", "my dialog ensure")
            }
        })
        return dialog
    }
}
从上述代码中,我们可以看到整个类我们就重写了onCreateDialog方法,而且方法内就是正常创建了一个dialog然后返回了这个dialog对象。
onCreateView
通过重写onCreateView方法来实现DialogFragment的方法就和实现一个Fragment差不多,只是返回的时Dialog的布局,该方法相对而言更加灵活,一般用于创建效果和功能更加复杂的dialog,或是存在网络请求等异步操作的场景。
class MyDialogFragment : DialogFragment() {
    private var tvTitle : TextView?= null
    private var tvMessage : TextView?= null
    private var btCancel : Button?= null
    private var btEnsure : Button?= null
    override fun onCreateView(
        inflater: LayoutInflater,
        container: ViewGroup?,
        savedInstanceState: Bundle?
    ): View? {
        //背景透明
       dialog?.window?.setBackgroundDrawable(ColorDrawable(Color.TRANSPARENT))
//        dialog?.setCanceledOnTouchOutside(false)
        val view = inflater.inflate(R.layout.dialog_my_fragment, container, false)
        initView(view)
        return view
    }

    private fun initView(view: View){
        tvTitle = view.findViewById(R.id.tvTitle)
        tvMessage = view.findViewById(R.id.tvMessage)
        btCancel = view.findViewById(R.id.btCancel)
        btEnsure = view.findViewById(R.id.btEnsure)
        tvTitle?.text = "DialogFragment"
        tvMessage?.text = "这是一个DialogFrabment"
        btCancel?.setOnClickListener {
            dialog?.dismiss()
            Log.e("dialog", "my dialog cancel")
        }
        btEnsure?.setOnClickListener {
            dialog?.dismiss()
            Log.e("dialog", "my dialog ensure")
        }
    }
}
其XML布局如下:
<androidx.constraintlayout.widget.ConstraintLayout xmlns:android="http://schemas.android.com/apk/res/android"
    android:layout_width="match_parent"
    android:layout_height="match_parent"
    xmlns:app="http://schemas.android.com/apk/res-auto">

    <View
        android:id="@+id/viewBg"
        android:layout_width="250dp"
        android:layout_height="200dp"
        app:layout_constraintStart_toStartOf="parent"
        app:layout_constraintEnd_toEndOf="parent"
        app:layout_constraintTop_toTopOf="parent"
        app:layout_constraintBottom_toBottomOf="parent"
        android:background="@drawable/drawable_dialog_bg"/>

    <TextView
        android:id="@+id/tvTitle"
        android:layout_width="wrap_content"
        android:layout_height="wrap_content"
        android:text="Title"
        android:textSize="25sp"
        android:layout_marginTop="10dp"
        app:layout_constraintTop_toTopOf="@+id/viewBg"
        app:layout_constraintStart_toStartOf="@+id/viewBg"
        app:layout_constraintEnd_toEndOf="@+id/viewBg"/>

    <TextView
        android:id="@+id/tvMessage"
        android:layout_width="0dp"
        android:layout_height="wrap_content"
        android:text="message"
        android:textSize="20sp"
        android:padding="5dp"
        android:gravity="center"
        app:layout_constraintStart_toStartOf="@+id/viewBg"
        app:layout_constraintEnd_toEndOf="@+id/viewBg"
        app:layout_constraintTop_toBottomOf="@id/tvTitle"
        app:layout_constraintBottom_toTopOf="@id/viewLineH"/>

    <View
        android:id="@+id/viewLineH"
        android:layout_width="0dp"
        android:layout_height="1dp"
        android:background="#e4e4e4"
        app:layout_constraintStart_toStartOf="@+id/viewBg"
        app:layout_constraintEnd_toEndOf="@+id/viewBg"
        app:layout_constraintBottom_toTopOf="@id/btCancel"/>

    <Button
        android:id="@+id/btCancel"
        android:layout_width="0dp"
        android:layout_height="wrap_content"
        android:text="取消"
        android:textColor="#999999"
        app:layout_constraintBottom_toBottomOf="@+id/viewBg"
        app:layout_constraintStart_toStartOf="@+id/viewBg"
        app:layout_constraintEnd_toStartOf="@id/viewLine"
        android:background="@null"/>

    <View
        android:id="@+id/viewLine"
        android:layout_width="1dp"
        android:layout_height="0dp"
        android:background="#e4e4e4"
        app:layout_constraintTop_toTopOf="@id/btEnsure"
        app:layout_constraintBottom_toBottomOf="@id/btEnsure"
        app:layout_constraintStart_toEndOf="@id/btCancel"
        app:layout_constraintEnd_toStartOf="@id/btEnsure"/>

    <Button
        android:id="@+id/btEnsure"
        android:layout_width="0dp"
        android:layout_height="wrap_content"
        android:text="确定"
        android:textColor="#38adff"
        app:layout_constraintBottom_toBottomOf="@+id/viewBg"
        app:layout_constraintEnd_toEndOf="@+id/viewBg"
        app:layout_constraintStart_toEndOf="@id/viewLine"
        android:background="@null"/>

androidx.constraintlayout.widget.ConstraintLayout>
实现效果如下:

根据上述代码,我们可以看出,通过onCreateView方法实现DialogFragment的方法和实现一个Fragment的方法基本相同,值得注意的是,我们需要注意设置背景是否透明。
显示DialogFragment
显示DialogFragment也是使用show方法,只是参数有点不同,代码如下:
private fun showDialogFragment(){
    val dialogFragment = MyDialogFragment()
    dialogFragment.show(supportFragmentManager, "dialogFragment")
}
需要注意的是,如果DialogFragment中同时实现了onCreateDialog和onCreateView方法,那么onCreateDialog会将其覆盖,显示出来的将是onCreateDialog中返回的dialog.
与Dialog的比较
与使用Dialog实现对话框相比,DialogFragment能够在Activity被销毁时自动重建Dialog。
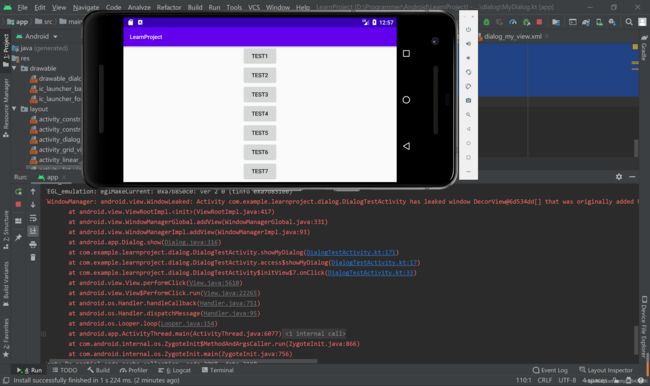
使用Dialog显示对话框后,旋转屏幕,由于旋转屏幕后Activity会被自动销毁然后重写创建,此时Dialog会消失,并且由于Activity已经关闭,而Dialog还在显示,此时就会报错,如下图:
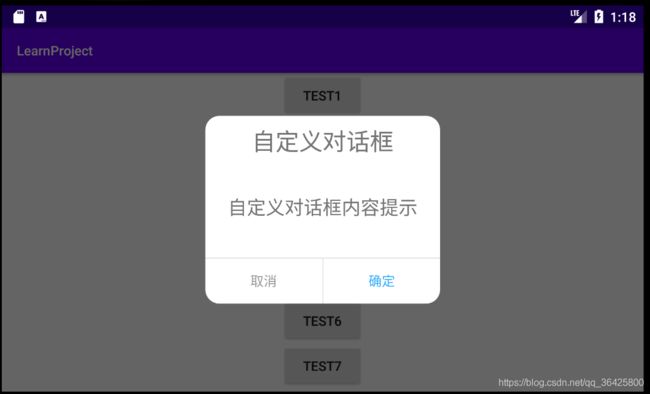
而要想解决该问题,我们需要首先在onDestroy中关闭正在显示的Dialog,然后在onSaveInstanceState中保存Dialog状态,最后再在onCreate或者onRestoreInstanceState方法中重新恢复dialog。代码如下:
companion object{
        //记录是否需要恢复dialog
        const val  DIALOG_SHOW = "dialog_show"
    }
override fun onDestroy() {
    super.onDestroy()
    dialog?.cancel()
}

override fun onSaveInstanceState(outState: Bundle) {
    super.onSaveInstanceState(outState)
    if (dialog?.isShowing == true) outState.putBoolean(DIALOG_SHOW, true)
}

override fun onRestoreInstanceState(savedInstanceState: Bundle) {
    super.onRestoreInstanceState(savedInstanceState)
    if (savedInstanceState.getBoolean(DIALOG_SHOW)){
        showMyDialog()
    }
}
通过这些处理,即可实现在旋转屏幕后对dialog进行恢复,如下图:
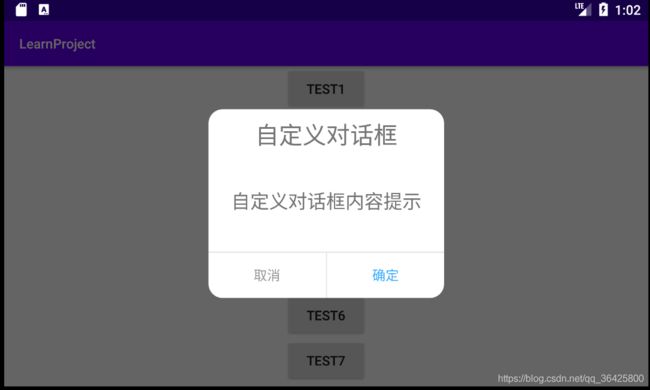
但如果使用DialogFragment显示,我们不需要格外做任何出来,dialog就会自动重建,而且都能保持原样,如下图:
总结
今天重新对Dialog的使用进行了回顾,主要是对AlertDialog的使用进行了说明,同时也进一步学习了自定义Dialog的相关实现方法,也了解学习了下DialogFragment的相关用法和优点,不过还需要多熟悉。
