flutter SliverAppBar
SliverAppBar
A material design app bar that integrates with a [CustomScrollView].
AppBar 和 SliverAppBar 是Material Design中的 App Bar,也就是 Android 中的 Toolbar
SliverAppBar是一个与 CustomScrollView 结合使用的material design风格的标题栏 .
不同于AppBar, 它可以展开或收缩.
构造方法:
const SliverAppBar({
  Key key,
  this.leading, //左侧标题
  this.automaticallyImplyLeading = true, //如果leading为null,是否自动填充一个leading
  this.title, //标题
  this.actions, //菜单
  this.flexibleSpace, //可以展开区域,通常是一个FlexibleSpaceBar
  this.bottom, //底部内容区域
  this.elevation,
  this.forceElevated = false, //结合 elevation 使用,当elevation 不为 0 的时候,是否显示阴影
  this.backgroundColor,
  this.brightness,
  this.iconTheme,
  this.actionsIconTheme,
  this.textTheme,
  this.primary = true,
  this.centerTitle,
  this.excludeHeaderSemantics = false,
  this.titleSpacing = NavigationToolbar.kMiddleSpacing,
  this.expandedHeight, //展开后的高度
  this.floating = false, //是否向下滑动时立即显示appBar
  this.pinned = false, //appBar是否置顶
  this.snap = false, //当手指放开时,SliverAppBar是否会根据当前的位置展开/收起
  this.stretch = false,
  this.stretchTriggerOffset = 100.0,
  this.onStretchTrigger,
  this.shape,
})
如果你看过AppBar的构造方法,那么你会发现AppBar的构造方法都是在这里面的。其属性也是一致的,下面我们针对公共的属性做一下详细的解释:
-
snap : 需要注意的是
snap是和floading结合使用的 , 并且要求floating=true, 否则使用会报错. -
automaticallyImplyLeading : 如果为true(默认) , 那么页面可以回退的话,会添加一个返回按钮.
-
leading:在标题前面显示的一个控件,在首页通常显示应用的 logo;在其他界面通常显示为返回按钮
-
title: Toolbar 中主要内容,通常显示为当前界面的标题文字
-
actions:一个 Widget 列表,代表 Toolbar 中所显示的菜单,对于常用的菜单,通常使用 IconButton 来表示;对于不常用的菜单通常使用 PopupMenuButton 来显示为三个点,点击后弹出二级菜单
-
bottom:一个 AppBarBottomWidget 对象,通常是 TabBar。用来在 Toolbar 标题下面显示一个 Tab 导航栏
-
elevation:纸墨设计中控件的 z 坐标顺序,默认值为 4,对于可滚动的 SliverAppBar,当 SliverAppBar 和内容同级的时候,该值为 0, 当内容滚动 SliverAppBar 变为 Toolbar 的时候,修改 elevation 的值
flexibleSpace:一个显示在 AppBar 下方的控件,高度和 AppBar 高度一样,可以实现一些特殊的效果,该属性通常在 SliverAppBar 中使用 -
backgroundColor:APP bar 的颜色,默认值为 ThemeData.primaryColor。改值通常和下面的三个属性一起使用
-
brightness:App bar 的亮度,有白色和黑色两种主题,默认值为 ThemeData.primaryColorBrightness
-
iconTheme:App bar 上图标的颜色、透明度、和尺寸信息。默认值为 ThemeData.primaryIconTheme
-
textTheme: App bar 上的文字样式。默认值为 ThemeData.primaryTextTheme
-
centerTitle: 标题是否居中显示,默认值根据不同的操作系统,显示方式不一样
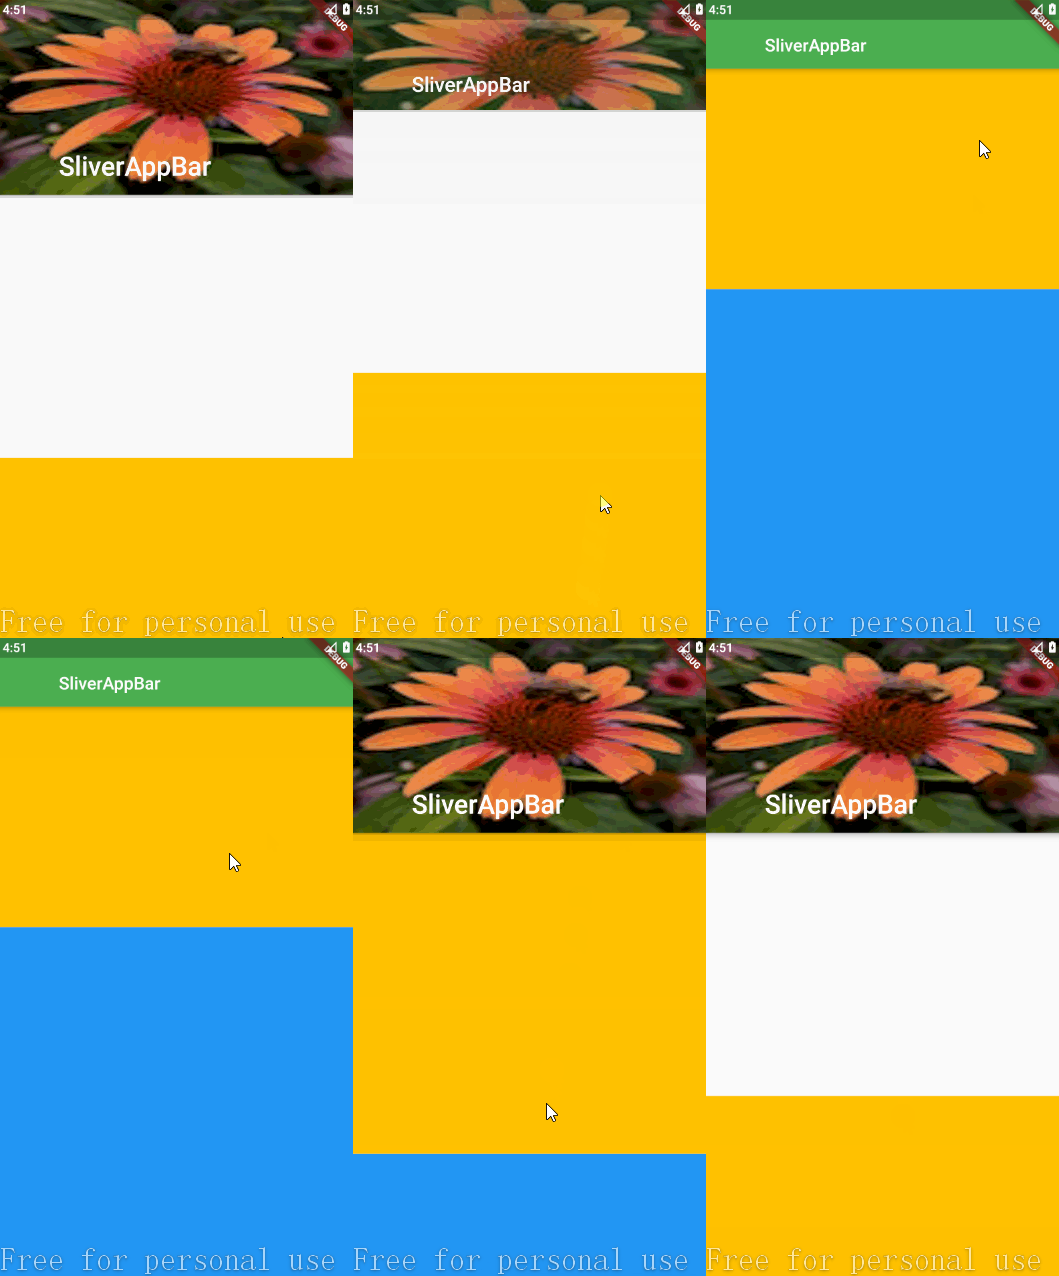
一个简单的SliverAppBar
SliverAppBar(
              automaticallyImplyLeading: false,
              elevation: 5,
              forceElevated: true,
              expandedHeight: 200,
              floating: true,
              snap: false,
              pinned: true,
              stretch: true,
              flexibleSpace: FlexibleSpaceBar(
                title: Text('SliverAppBar'),
                background: Image.asset(
                  'images/pic1.jpg',
                  fit: BoxFit.fill,
                ),
                //标题是否居中
                centerTitle: false,
                //标题间距
                //titlePadding: EdgeInsetsDirectional.only(start: 0, bottom: 16),
                collapseMode: CollapseMode.parallax,
              ))
虽然基本相同,构造方法也是非常的简单,但是我们却不能直接使用它,由官方文档可以看到我们通常结合ScrollView来使用它。
我们结合CustomScrollView来看下例子吧:
/*
 * Created by 李卓原 on 2018/9/13.
 * email: [email protected]
 *
 */

import 'package:flutter/material.dart';

class DiscoverListPage extends StatelessWidget {
  @override
  Widget build(BuildContext context) {
    return Scaffold(
      body: NestedScrollView(
          headerSliverBuilder: _sliverBuilder,
          body: Center(
            child: ListView.builder(
              itemBuilder: _itemBuilder,
              itemCount: 15,
            ),
          )),
    );
  }

  List _sliverBuilder(BuildContext context, bool innerBoxIsScrolled) {
    return [
      SliverAppBar(
        centerTitle: true,    //标题居中
        expandedHeight: 200.0,  //展开高度200
        floating: false,  //不随着滑动隐藏标题
        pinned: true,    //固定在顶部
        flexibleSpace: FlexibleSpaceBar(
          centerTitle: true,
          title: Text('我是一个FlexibleSpaceBar'),
          background: Image.network(
            "https://timgsa.baidu.com/timg?image&quality=80&size=b9999_10000&sec=1531798262708&di=53d278a8427f482c5b836fa0e057f4ea&imgtype=0&src=http%3A%2F%2Fh.hiphotos.baidu.com%2Fimage%2Fpic%2Fitem%2F342ac65c103853434cc02dda9f13b07eca80883a.jpg",
            fit: BoxFit.cover,
          ),
        ),
      )
    ];
  }

Widget _itemBuilder(BuildContext context, int index) {
    return ListTile(
      leading: Icon(Icons.android),
      title: Text('无与伦比的标题+$index'),
    );
  }
}
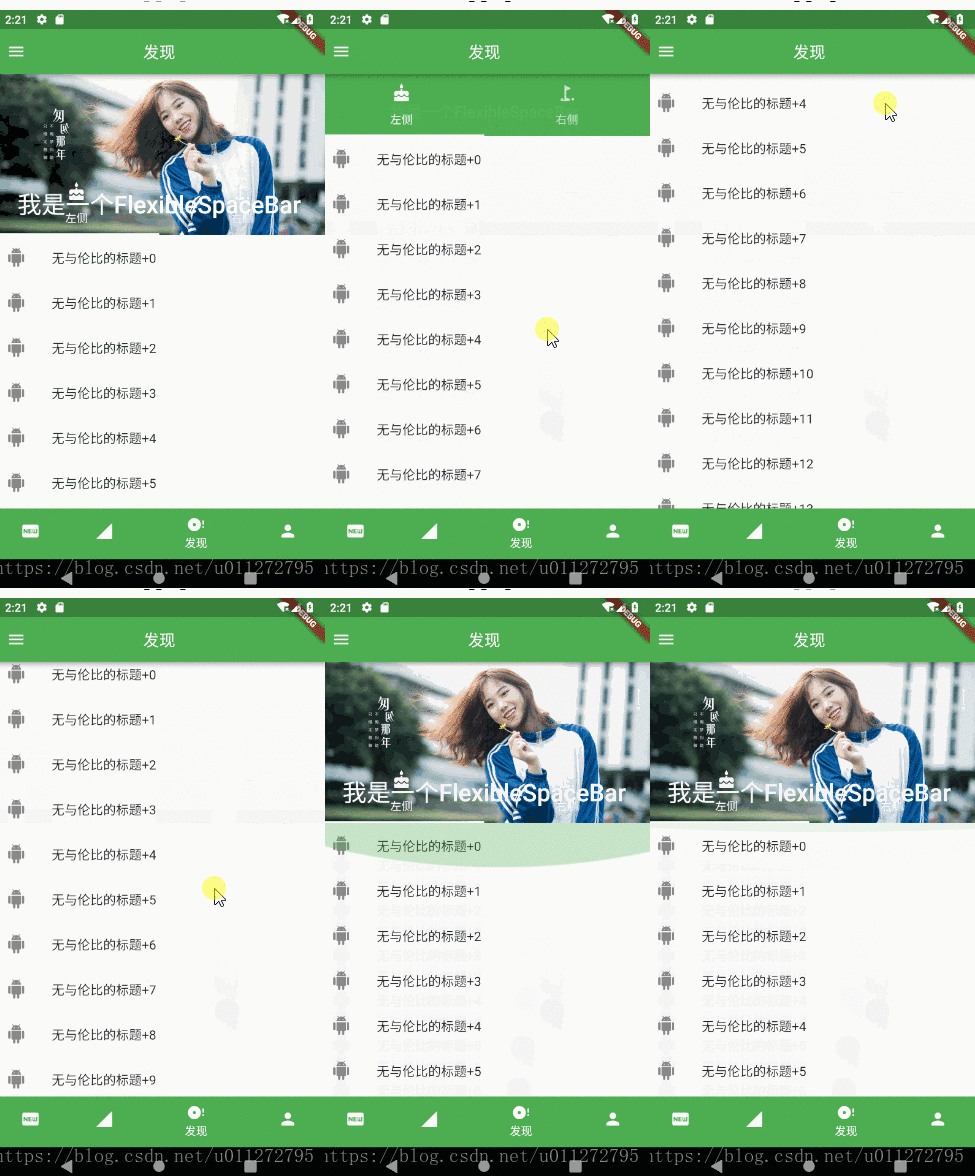
首先我们使用了NestedScrollView中的headerSliverBuilder属性添加了SliverAppBar
然后我们设置展开的高度为200,不让标题栏随着滑动滚动出可视区域,
最后我们给NestedScrollView的body加了一个长度为15的ListView
我们把 pinned的属性设置为false(不固定在顶部)再看下效果
接下来我们来看下bottom属性,允许我们在在下面放置你想放置其他Widget,好吧我们来放个TabBar看下
其实代码很简单,只不过我们需要让DiscoverListPage继承于 StatefulWidget,然后让State with TickerProviderStateMixin , 并为SliverAppBar添加个bottom ,改造后的代码 :
/*
 * Created by 李卓原 on 2018/9/13.
 * email: [email protected]
 *
 */

import 'package:flutter/material.dart';

class DiscoverListPage extends StatefulWidget {
  @override
  State createState() => DiscoverListState();
}

class DiscoverListState extends State
    with TickerProviderStateMixin {
  @override
  Widget build(BuildContext context) {
    return Scaffold(
      body: NestedScrollView(
          headerSliverBuilder: _sliverBuilder,
          body: Center(
            child: ListView.builder(
              itemBuilder: _itemBuilder,
              itemCount: 15,
            ),
          )),
    );
  }

  List _sliverBuilder(BuildContext context, bool innerBoxIsScrolled) {
    return [
      SliverAppBar(
        //标题居中
        centerTitle: true,
        //展开高度200
        expandedHeight: 200.0,
        //不随着滑动隐藏标题
        floating: false,
        //固定在顶部
        pinned: false,
        flexibleSpace: FlexibleSpaceBar(
          centerTitle: true,
          title: Text('我是一个FlexibleSpaceBar'),
          background: Image.network(
            "https://timgsa.baidu.com/timg?image&quality=80&size=b9999_10000&sec=1531798262708&di=53d278a8427f482c5b836fa0e057f4ea&imgtype=0&src=http%3A%2F%2Fh.hiphotos.baidu.com%2Fimage%2Fpic%2Fitem%2F342ac65c103853434cc02dda9f13b07eca80883a.jpg",
            fit: BoxFit.cover,
          ),
        ),
        //    bottom   这是新增的    这是新增的    这是新增的      这是新增的
        bottom: TabBar(
          tabs: [
            Tab(icon: Icon(Icons.cake), text: '左侧'),
            Tab(icon: Icon(Icons.golf_course), text: '右侧'),
          ],
          controller: TabController(length: 2, vsync: this),
        ),
      )
    ];
  }

  Widget _itemBuilder(BuildContext context, int index) {
    return ListTile(
      leading: Icon(Icons.android),
      title: Text('无与伦比的标题+$index'),
    );
  }
}
看一下效果:

简直, 丑的不忍直视。
当然我们是希望这个TabBar在SliverAppBar下方,并且随着SliverAppBar滚动的。
由于TabBar的高度所以我们并不能让SliverAppBar滑动到顶部,所以要想实现随着SliverAppBar的移动,把TabBar放在bottom也不是很合适的。
在这里,我们可以借助于SliverPersistentHeader中的SliverPersistentHeader属性来解决
SliverPersistentHeader的构造很简单,只有简单的几个属性,不再具体讲了
 const SliverPersistentHeader({
    Key key,
    @required this.delegate,
    this.pinned = false,
    this.floating = false,
  })
全部代码如下:
/*
 * Created by 李卓原 on 2018/9/13.
 * email: [email protected]
 *
 */

import 'package:flutter/material.dart';

class DiscoverListPage extends StatefulWidget {
  @override
  State createState() => DiscoverListState();
}

class DiscoverListState extends State
    with TickerProviderStateMixin {
  @override
  Widget build(BuildContext context) {
    return Scaffold(
      body: NestedScrollView(
          headerSliverBuilder: _sliverBuilder,
          body: Center(
            child: ListView.builder(
              itemBuilder: _itemBuilder,
              itemCount: 15,
            ),
          )),
    );
  }

  List _sliverBuilder(BuildContext context, bool innerBoxIsScrolled) {
    return [
      SliverAppBar(
        //标题居中
        centerTitle: true,
        //展开高度200
        expandedHeight: 200.0,
        //不随着滑动隐藏标题
        floating: false,
        //固定在顶部
        pinned: false,
        flexibleSpace: FlexibleSpaceBar(
          centerTitle: true,
          title: Text('我是一个FlexibleSpaceBar'),
          background: Image.network(
            "https://timgsa.baidu.com/timg?image&quality=80&size=b9999_10000&sec=1531798262708&di=53d278a8427f482c5b836fa0e057f4ea&imgtype=0&src=http%3A%2F%2Fh.hiphotos.baidu.com%2Fimage%2Fpic%2Fitem%2F342ac65c103853434cc02dda9f13b07eca80883a.jpg",
            fit: BoxFit.cover,
          ),
        ),
      ),
      SliverPersistentHeader(
          delegate: _SliverAppBarDelegate(TabBar(
        labelColor: Colors.red,
        unselectedLabelColor: Colors.grey,
        tabs: [
          Tab(icon: Icon(Icons.cake), text: '左侧'),
          Tab(icon: Icon(Icons.golf_course), text: '右侧'),
        ],
        controller: TabController(length: 2, vsync: this),
      )))
    ];
  }

  Widget _itemBuilder(BuildContext context, int index) {
    return ListTile(
      leading: Icon(Icons.android),
      title: Text('无与伦比的标题+$index'),
    );
  }
}

class _SliverAppBarDelegate extends SliverPersistentHeaderDelegate {
  _SliverAppBarDelegate(this._tabBar);

  final TabBar _tabBar;

  @override
  double get minExtent => _tabBar.preferredSize.height;

  @override
  double get maxExtent => _tabBar.preferredSize.height;

  @override
  Widget build(
      BuildContext context, double shrinkOffset, bool overlapsContent) {
    return Container(
      child: _tabBar,
    );
  }

  @override
  bool shouldRebuild(_SliverAppBarDelegate oldDelegate) {
    return false;
  }
}
比刚才有了明显的进步,但是有童鞋就问了,我们怎么让这个SliverPersistentHeader中的内容(TabBar)不随着ListView的滚动而滑动呢?
其实很简单,上面我贴出了SliverPersistentHeader的构造方法,因为SliverPersistentHeader跟SliverAppBar一样都有一个 pinned属性,将它设置为true这里面的内容就会在到达顶部后停止跟随ListView移动了。
github:https://github.com/lizhuoyuan/flutter_oschina


